Installing Rocky 9 Linux on VirtualBox
Rocky 9 comes with 10-year free support program and provides the opportunity to Linux users to migrate from other Linux distributions free of charge, here are some steps that one needs to follow to install this Linux on VirtualBox:
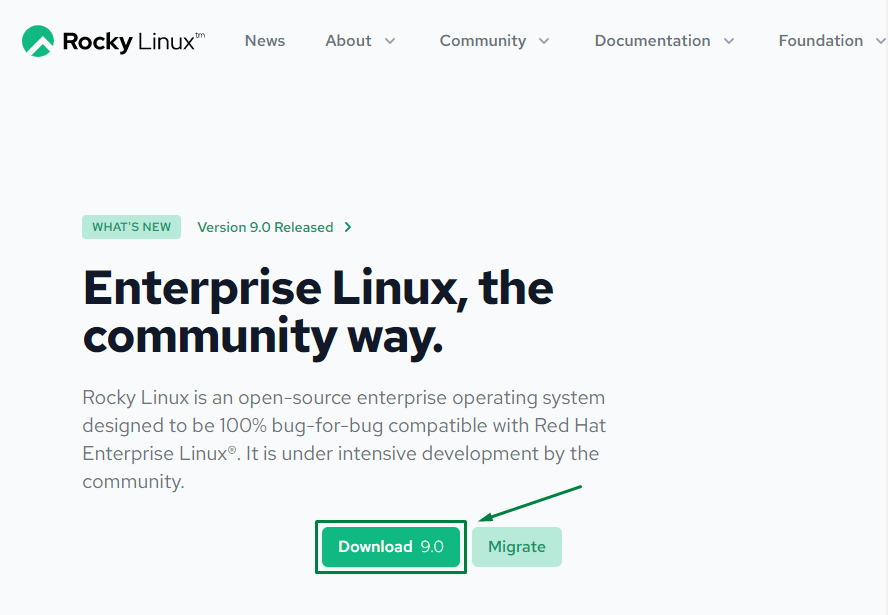
Step 1: Visit the official website of Rocky Linux and click on Download 9.0 to move download section:
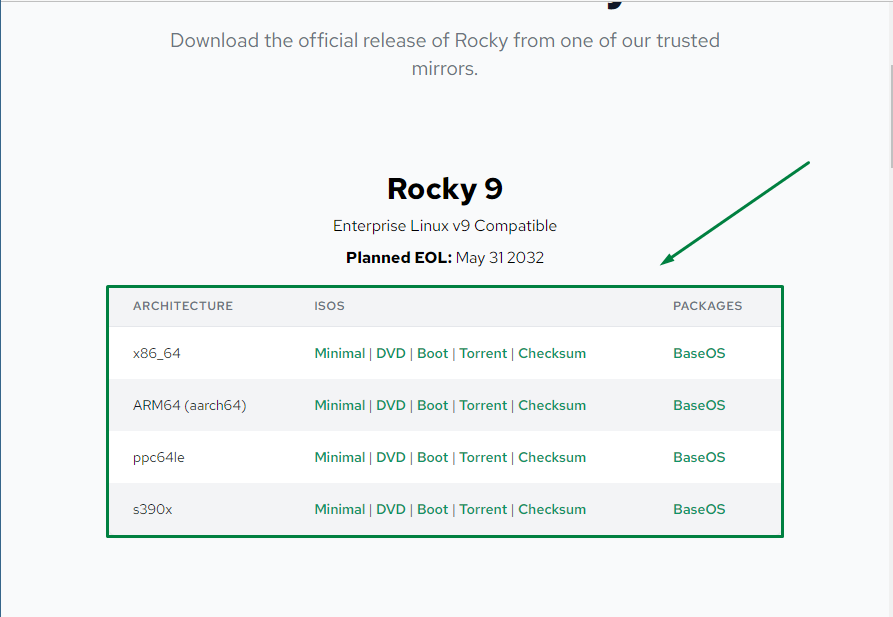
Step 2: Next, select the suitable architecture and download the torrent file do not go for the minimal option as it only comes with the terminal version of Rocky:
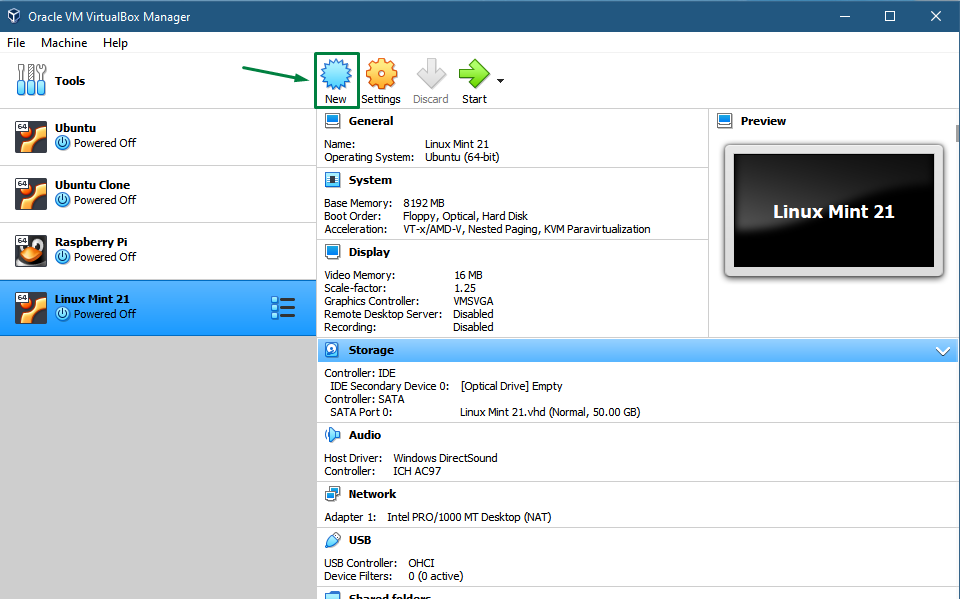
Step 3: Once the file is downloaded run the VirtualBox and click on New option from the top:
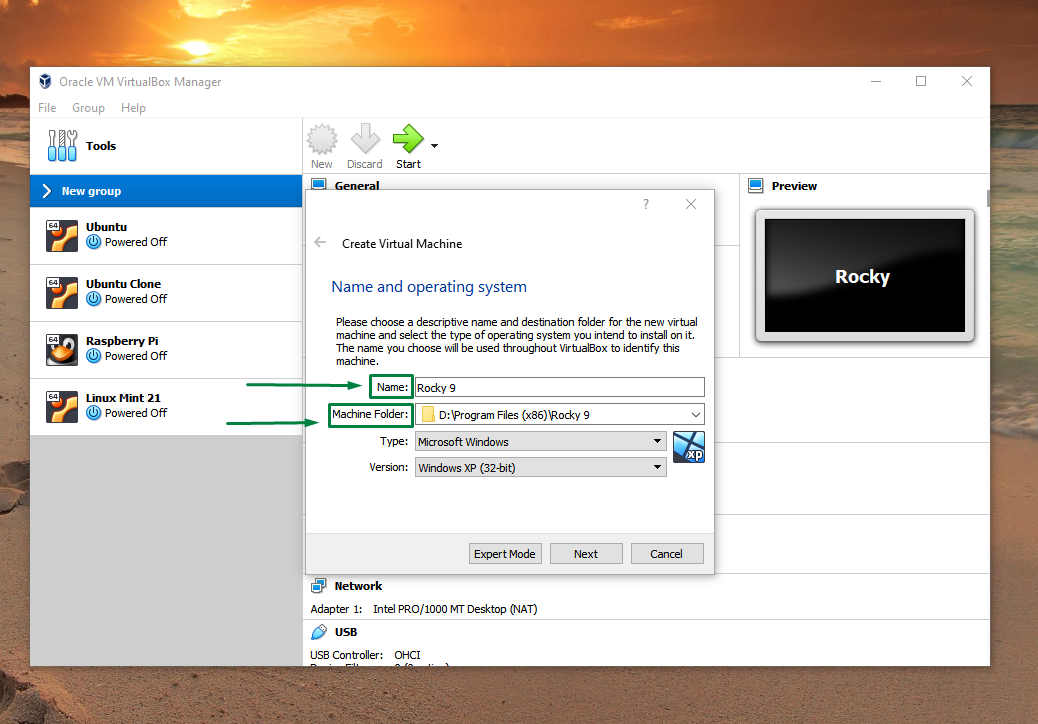
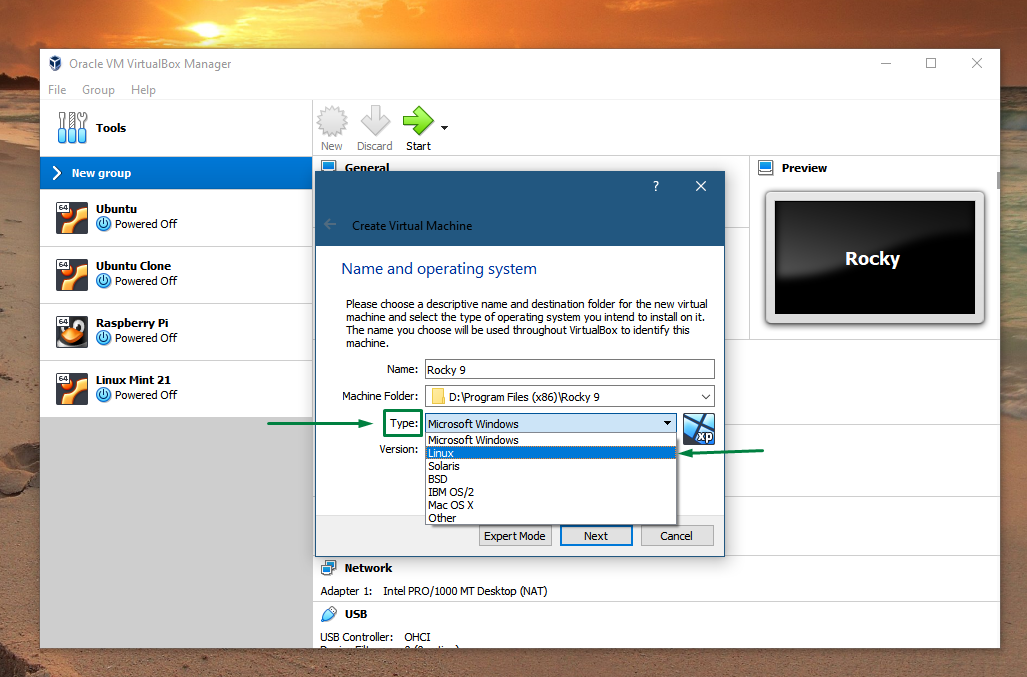
Step 4: Next Name your virtual machine and select the suitable directory under the Machine Folder:
Now select the Type of operating system that is Linux:
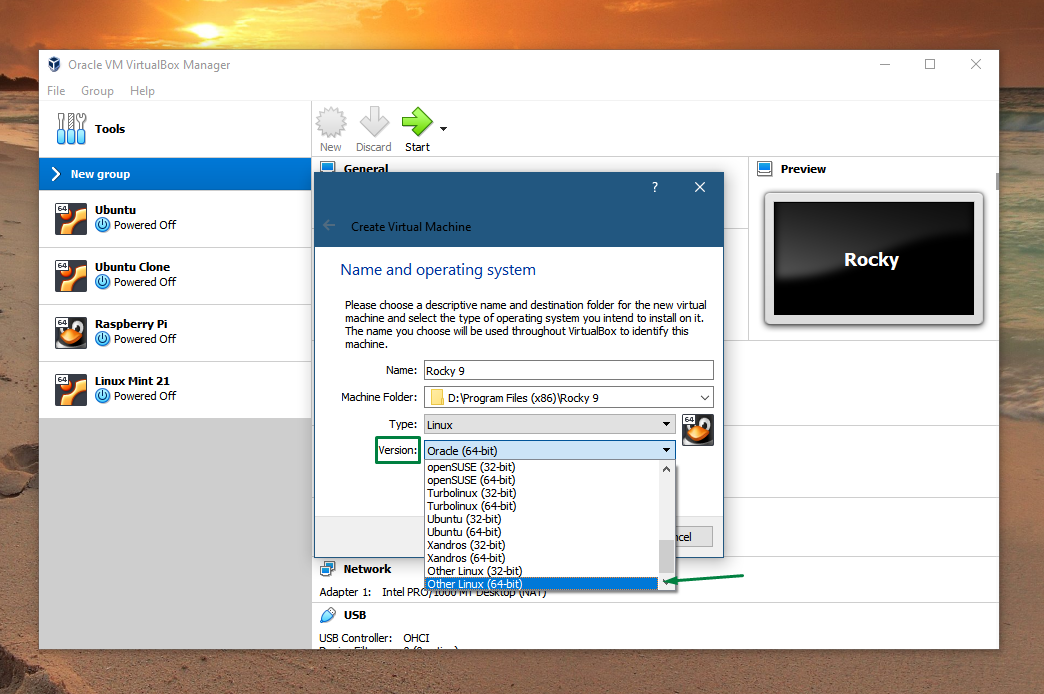
Step 5: Next select the version of operating system that is other Linux (64-bit):
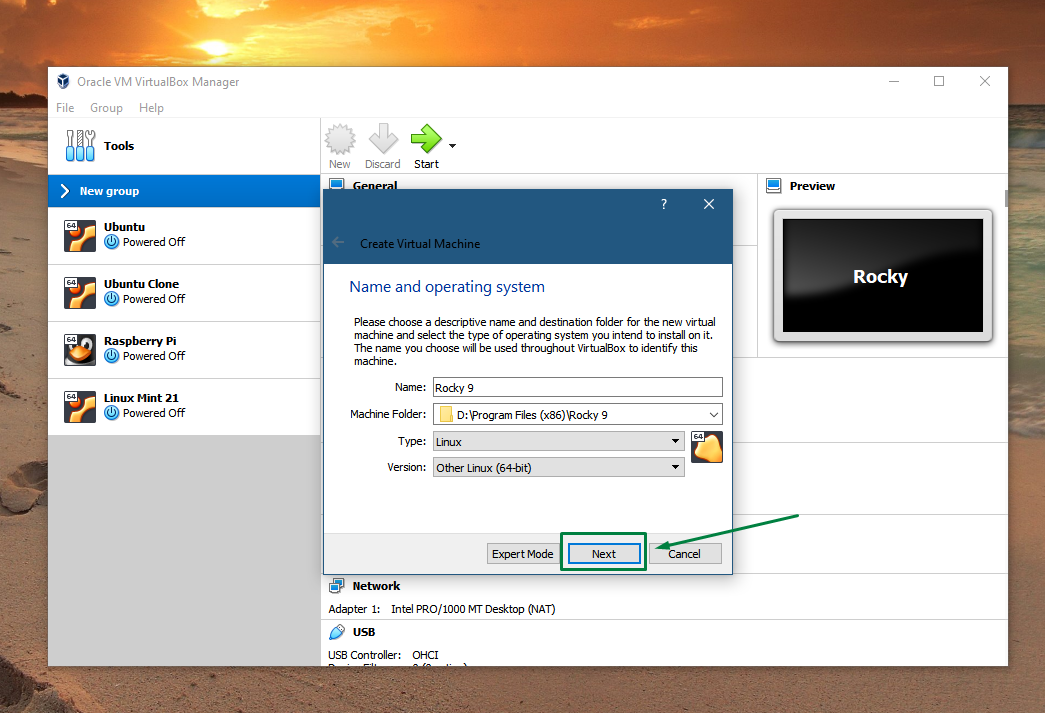
Once you have selected all the relevant information then click on Next:
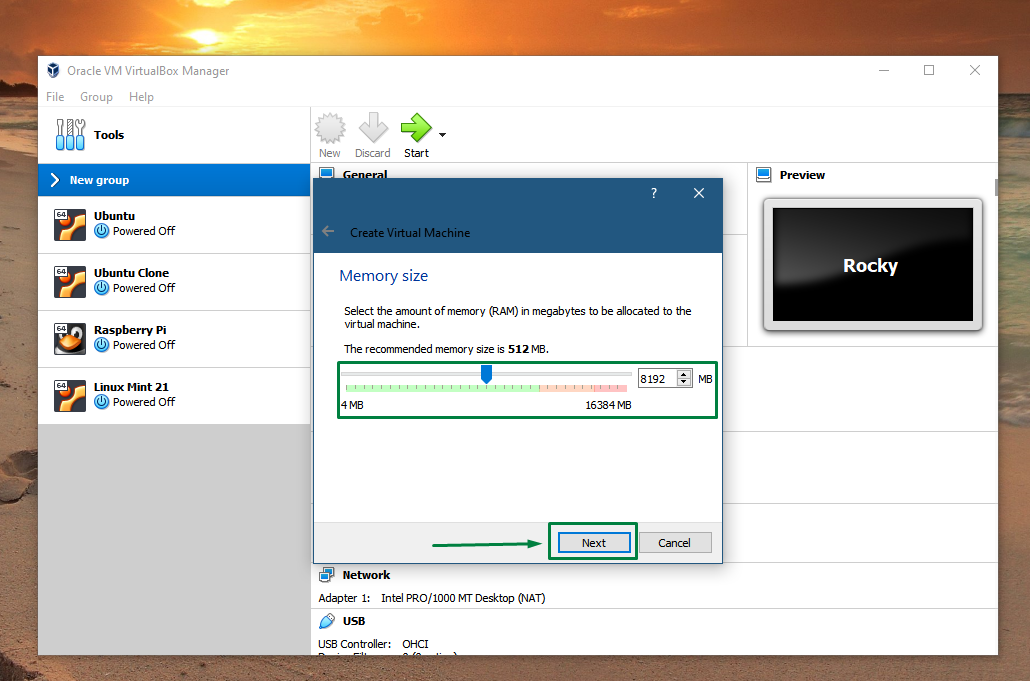
Step 6: Now assign the RAM for your virtual machine for instance I have given the RAM of 8GB:
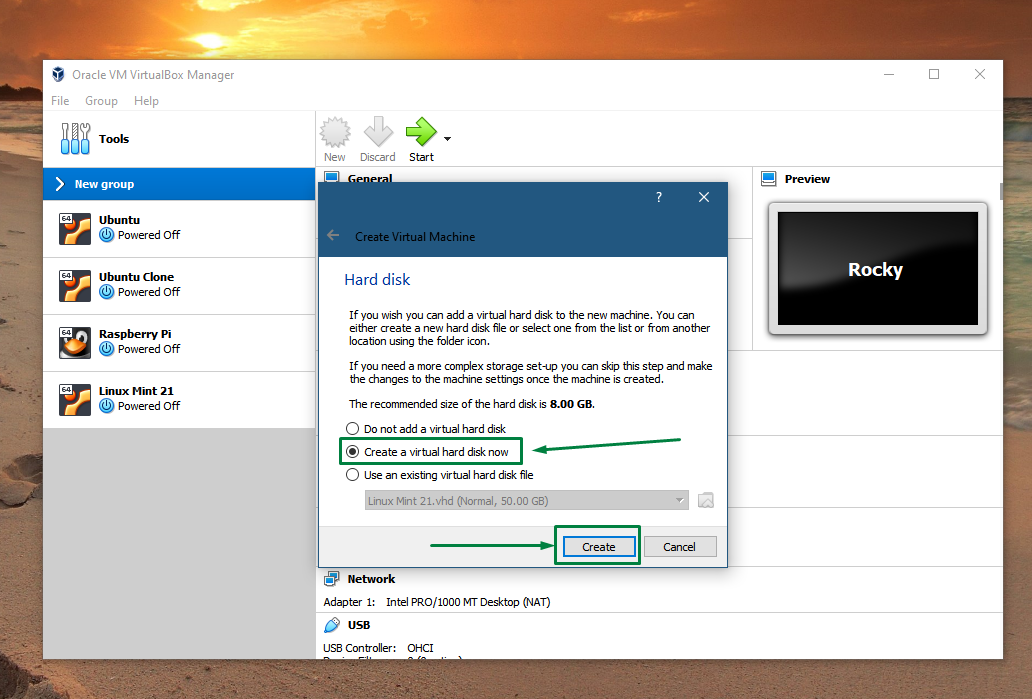
Step 7: Next, choose the type of hard disk for virtual machine by selecting Create a virtual hard disk now and after that click on the Create option:
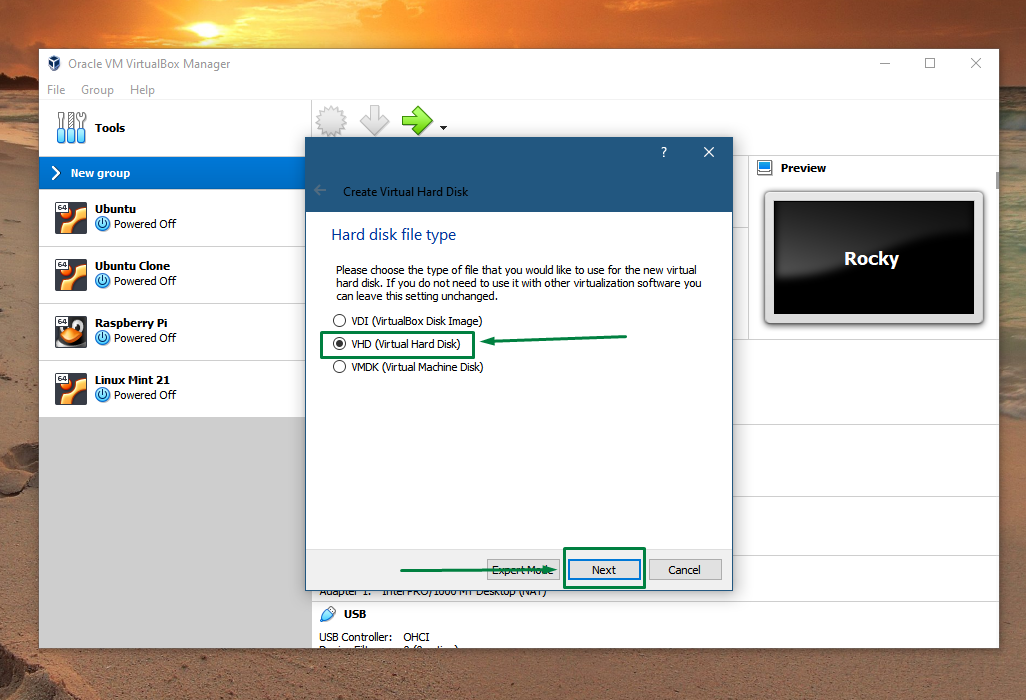
Step 8: Now select the VHD (virtual hard disk) as the file type and click on Next:
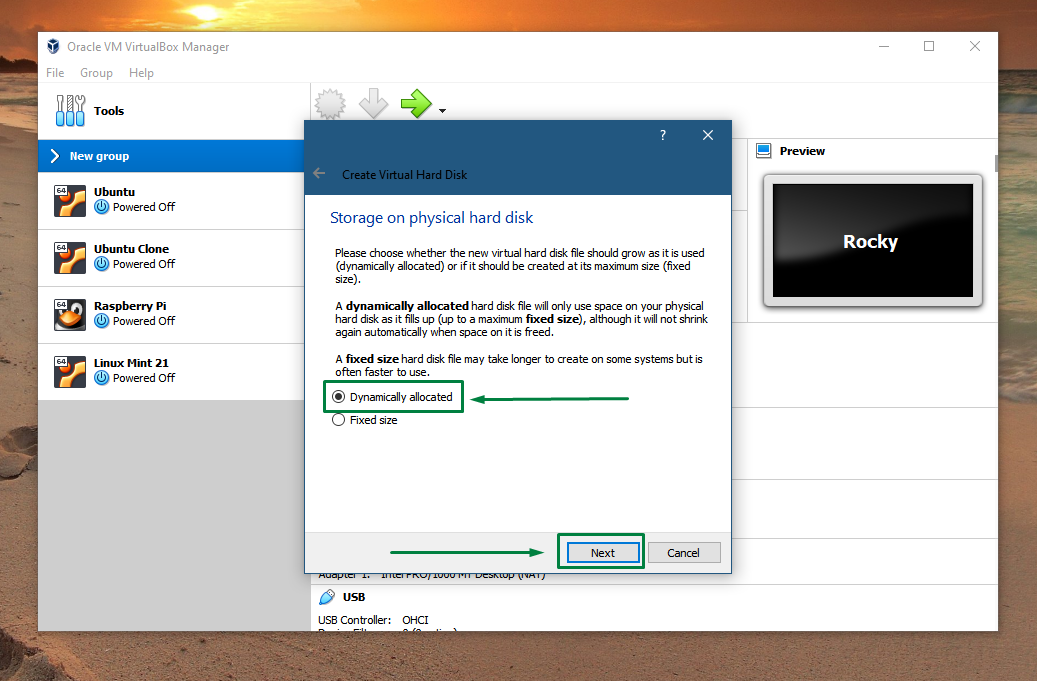
Step 9: Next, select the type of size of physical hard and for that select the Dynamically allocated option and then click on Next:
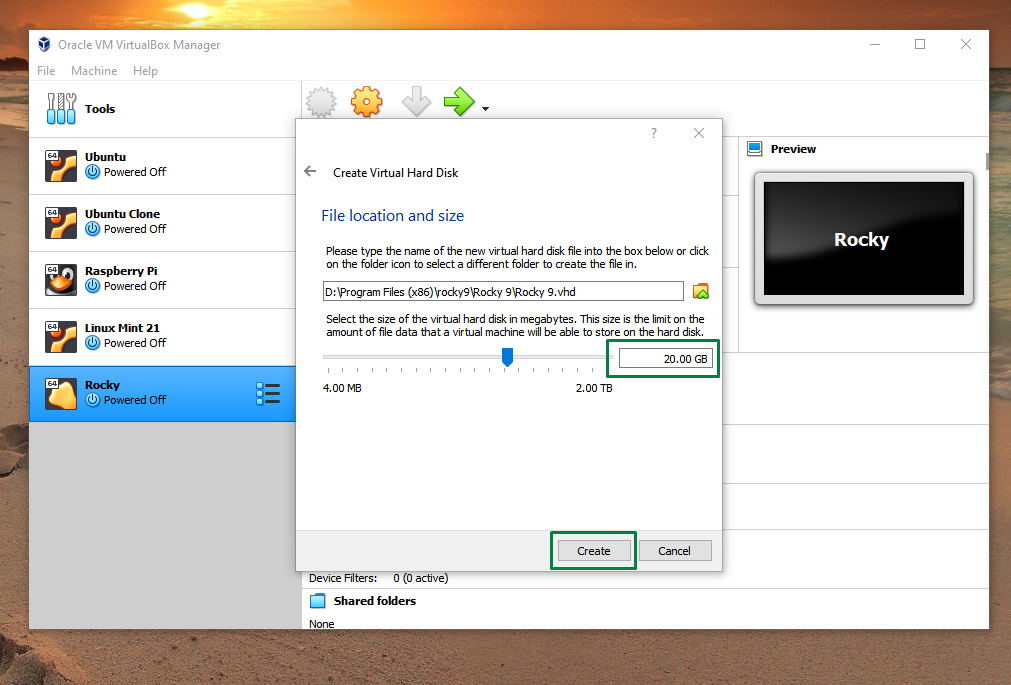
Step 10: Now allocate the storage size for the virtual machine and try to set it about almost 20GB in order to make the installation process run smoothly:
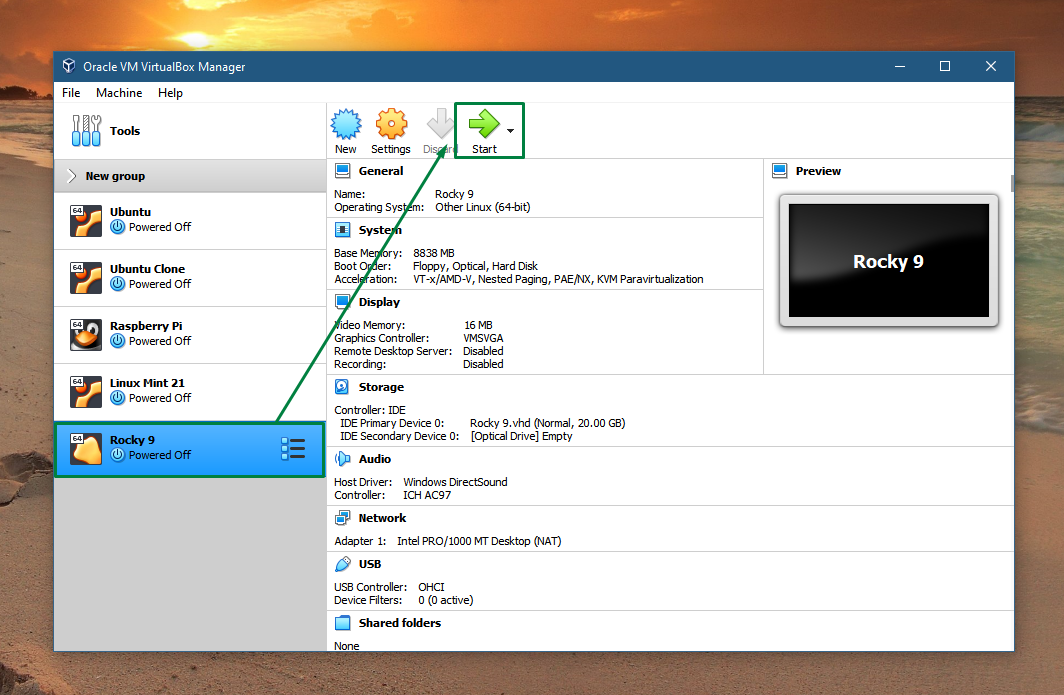
Step 11: Now the virtual machine is created so next click on Start button from the top:
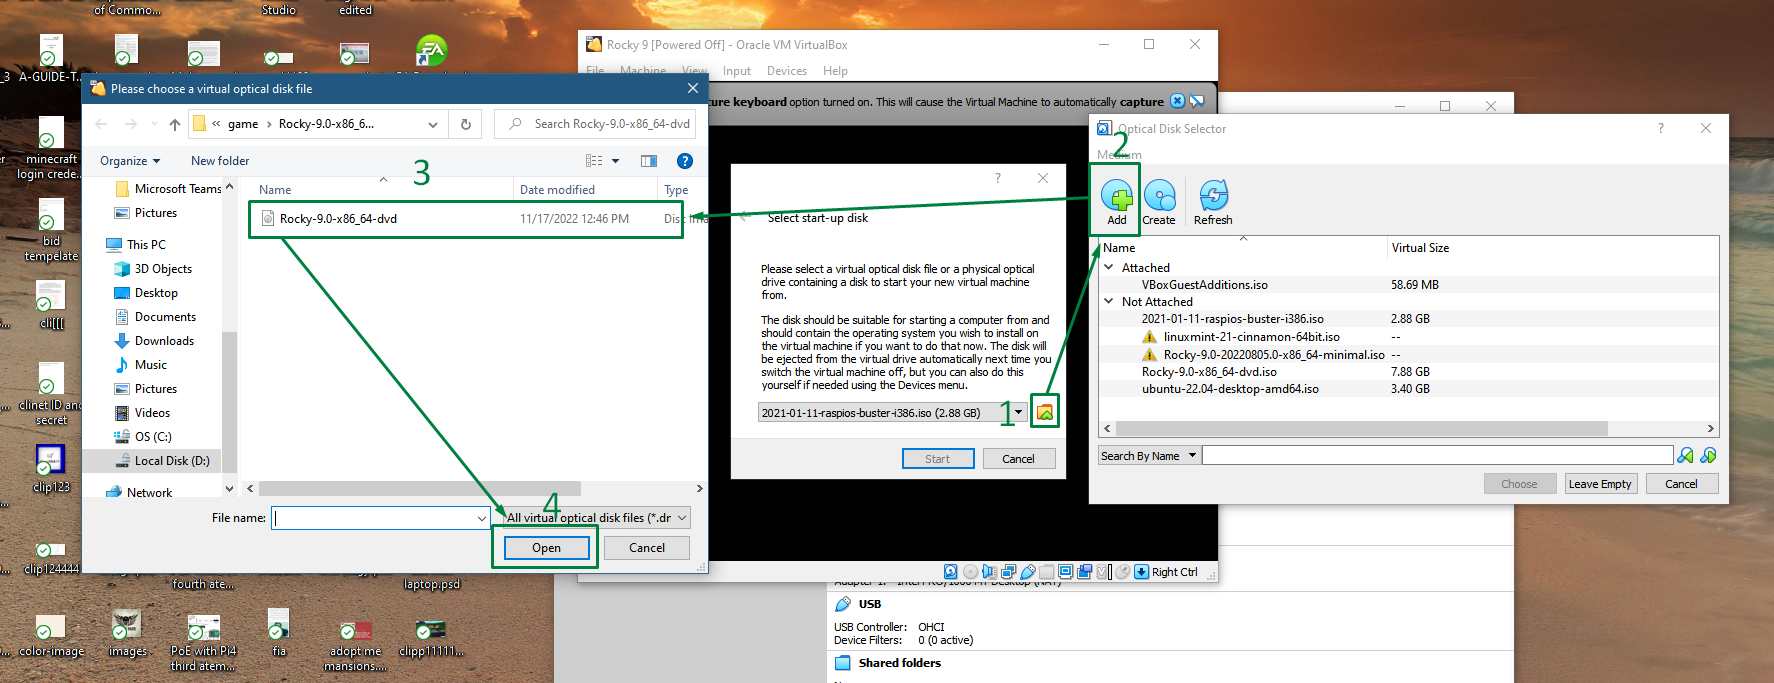
Step 12: First under the start-up disk click on the folder icon to select the disk image, from there in the Optical Disk Selector click on ADD and then select the downloaded file. After that click on Open and the respective file will be selected:
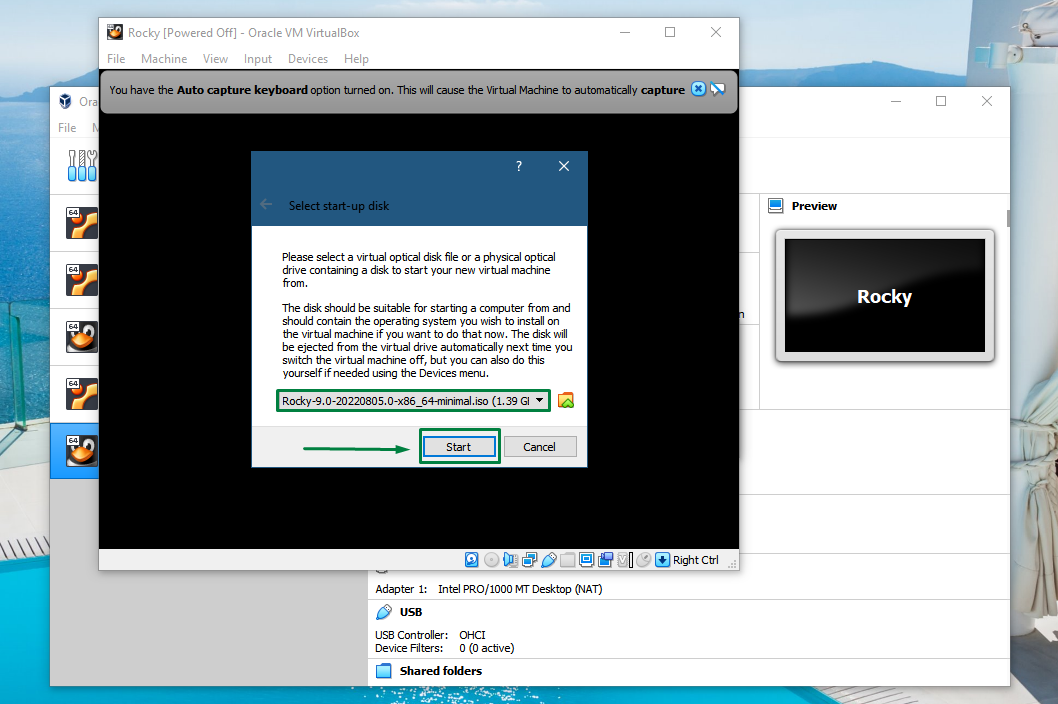
Step 13: Now click on Start to further move to the installation process:
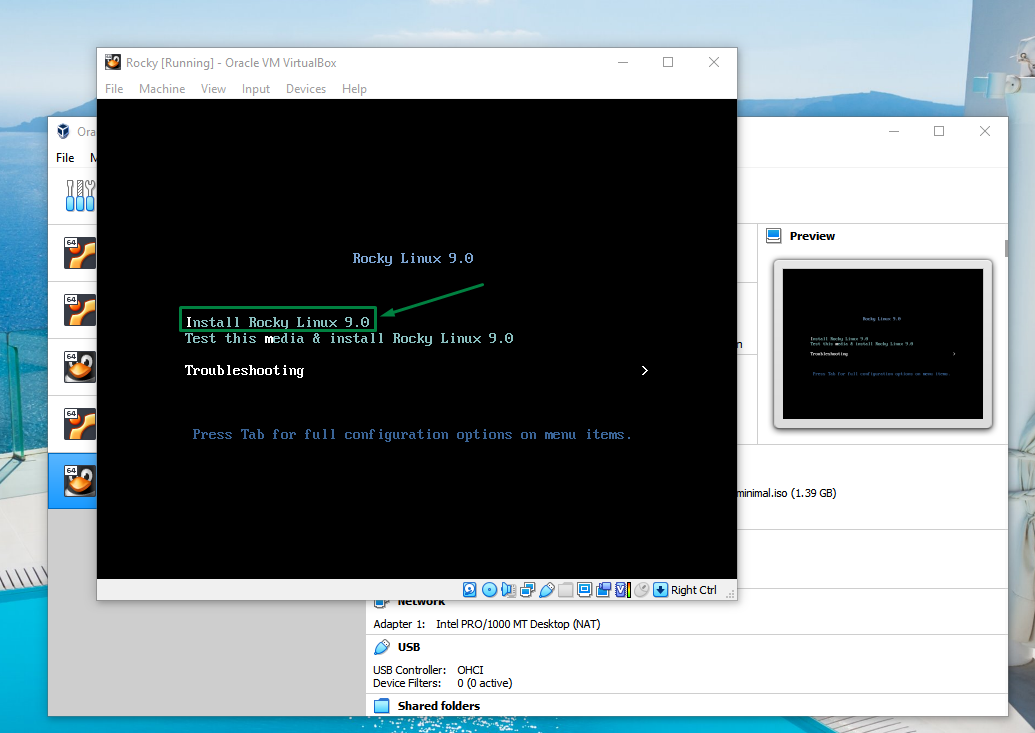
Step 14: Next, select the Install Rocky Linux 9.0 to begin the installation process:
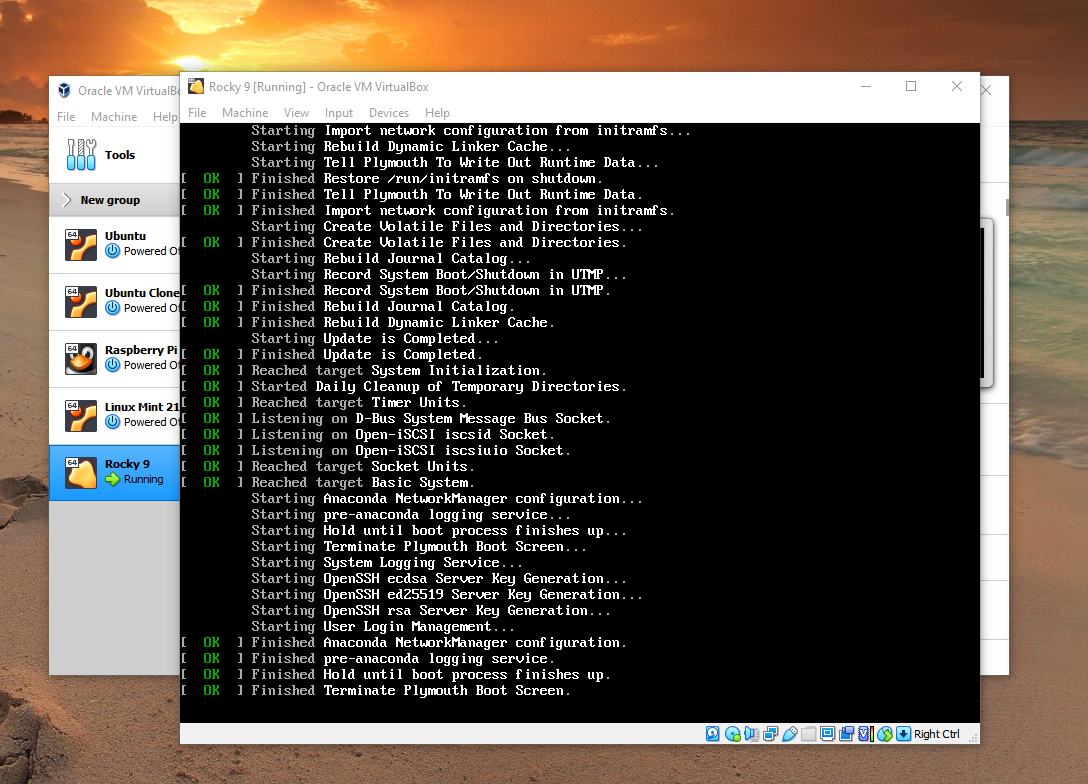
The installation process will start and take time:
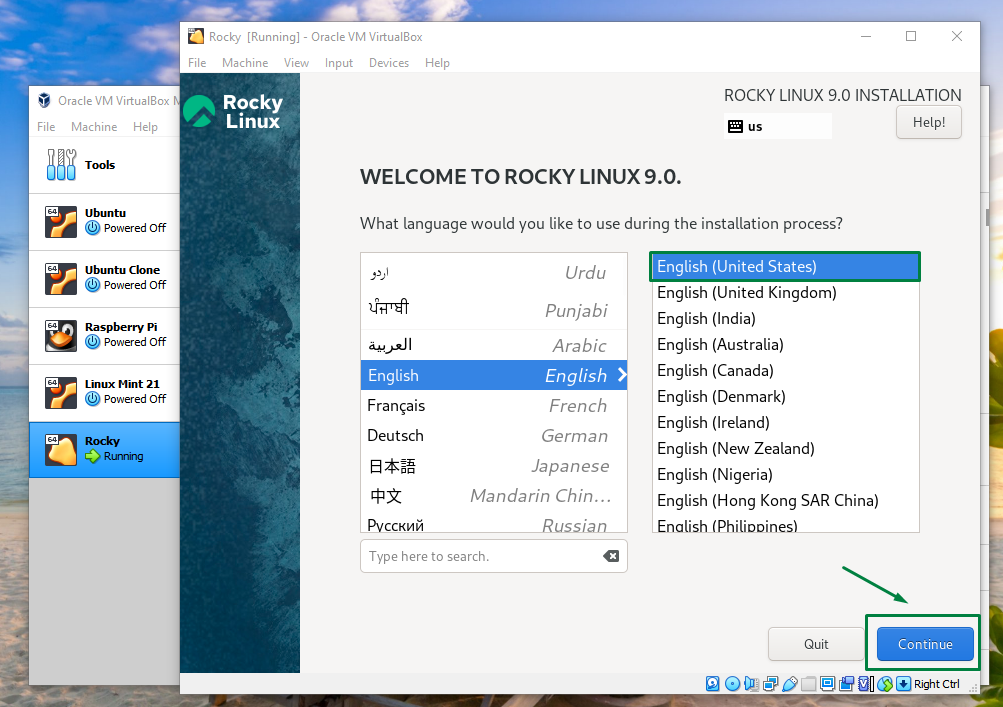
Step 15: Next, select the suitable language:
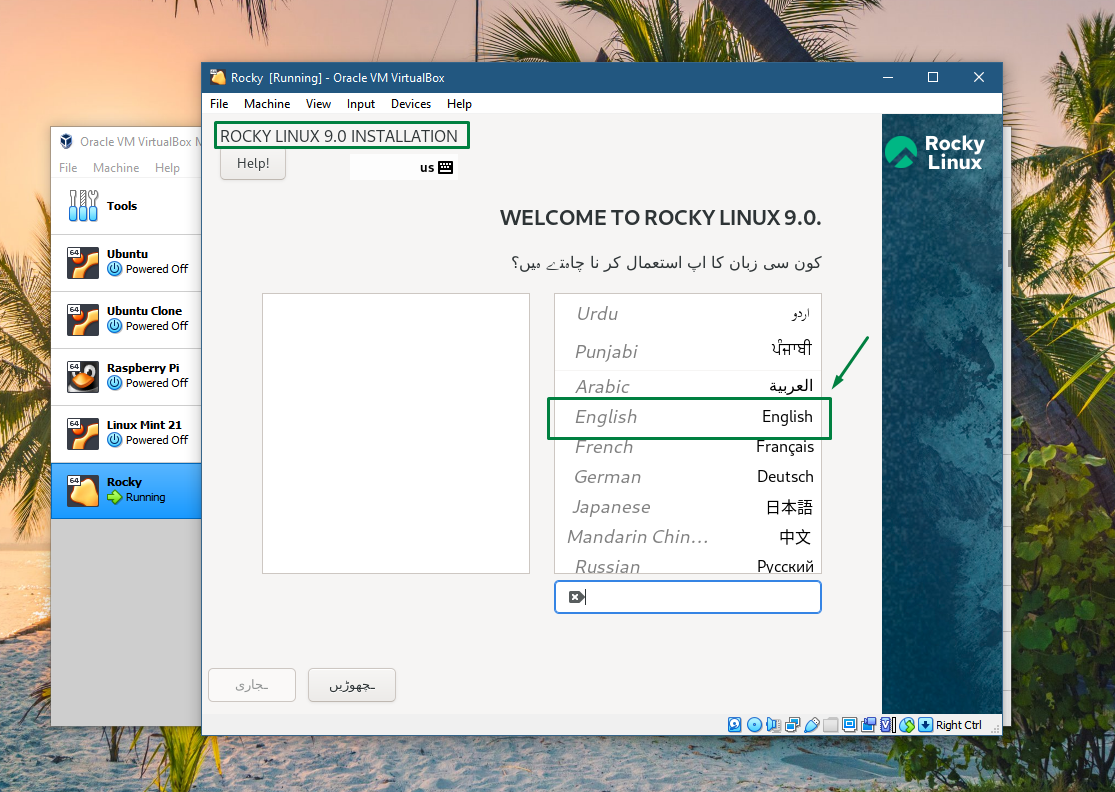
Once you have selected the language click on Continue:
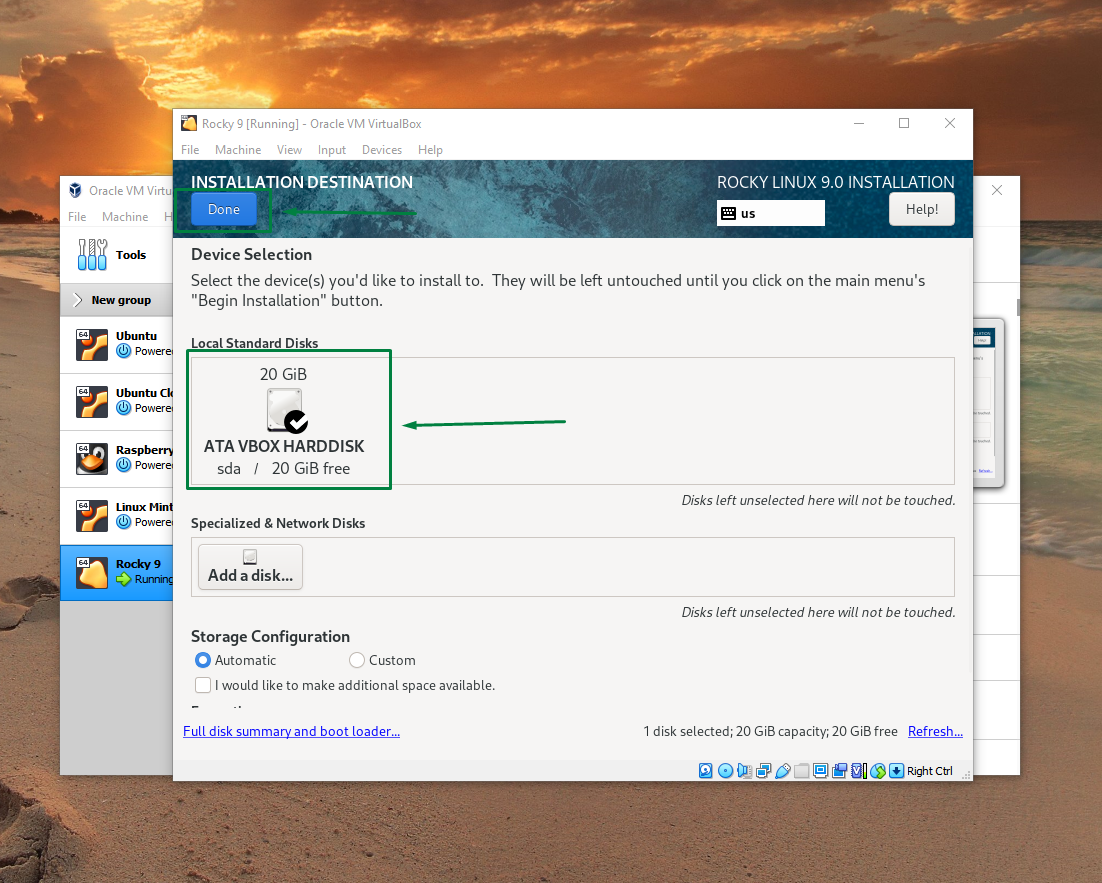
Step 16: Now complete the settings of the option that are highlighted one of which is the Installation Destination click on it:
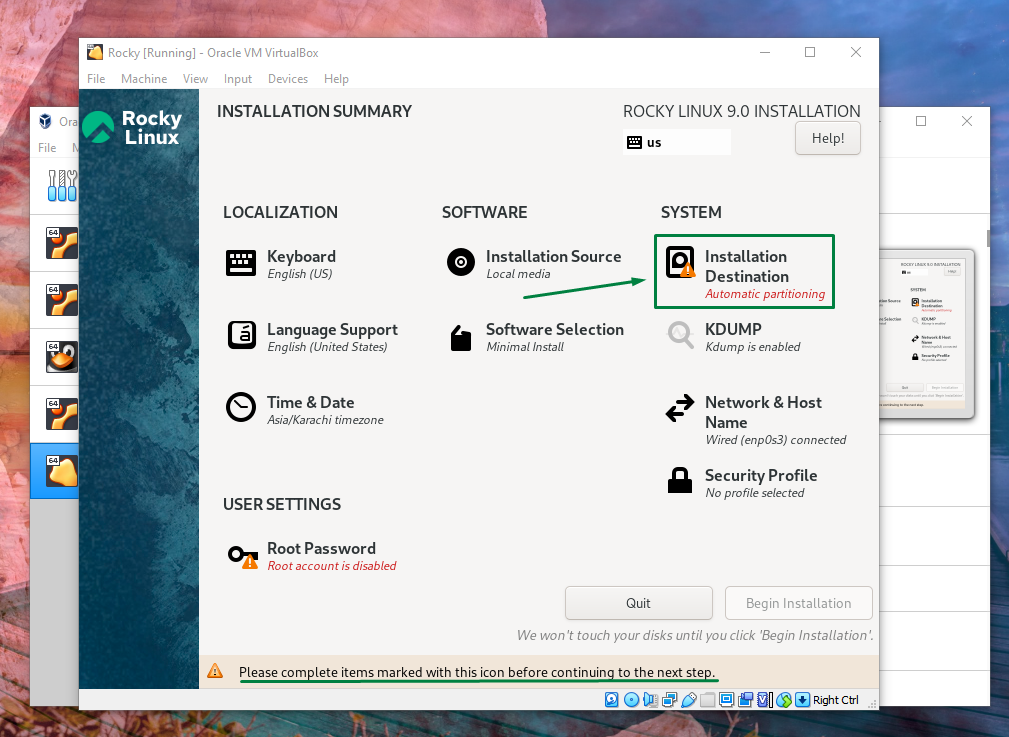
Next select the hard drive and keep the Storage Configuration to Automatic after that click on Done:
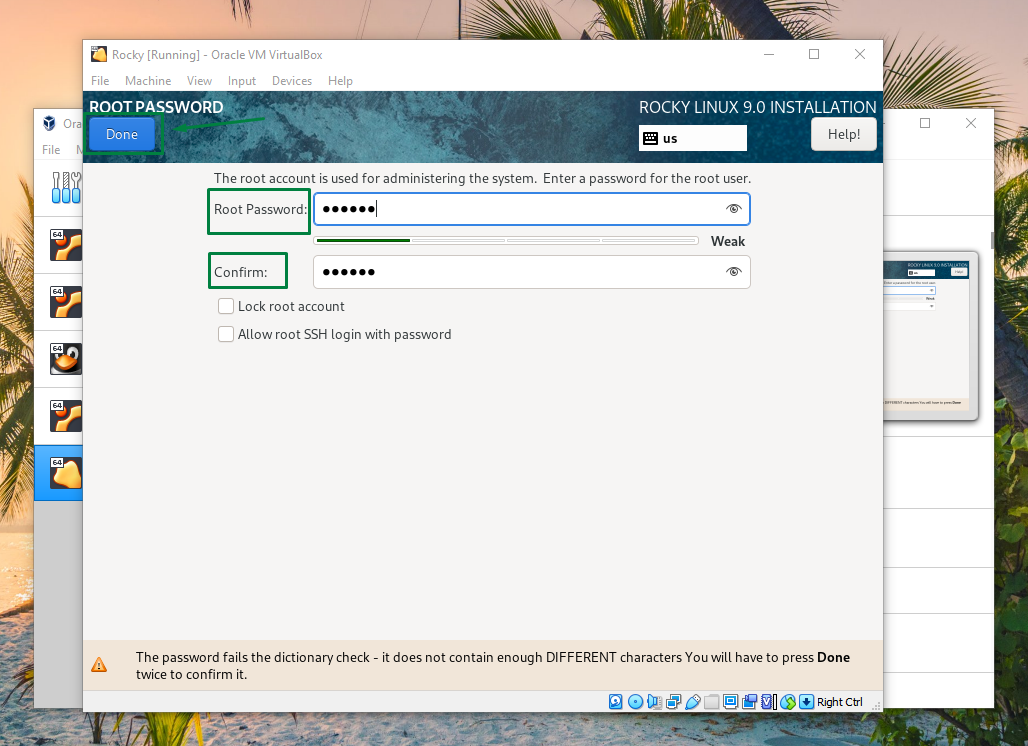
Step 17: The next option that is highlighted is the Root Password, click on it:

Set the Root Password and click on Done:
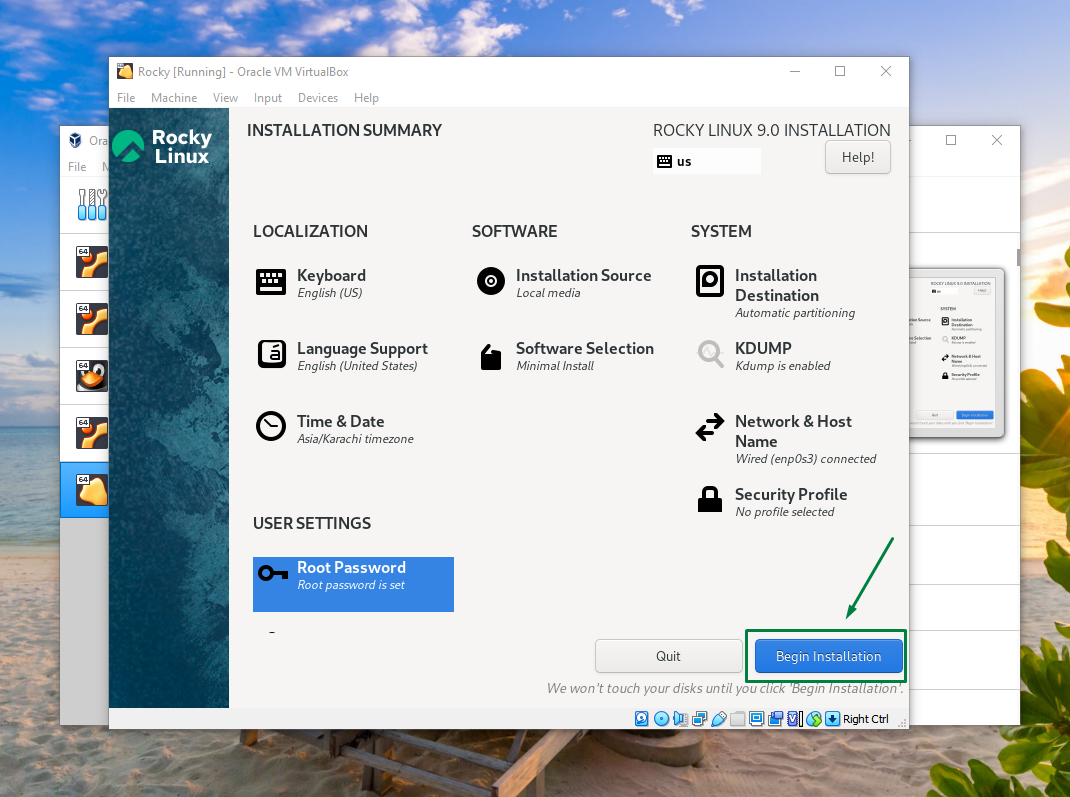
Step 18: Now click on Begin Installation:
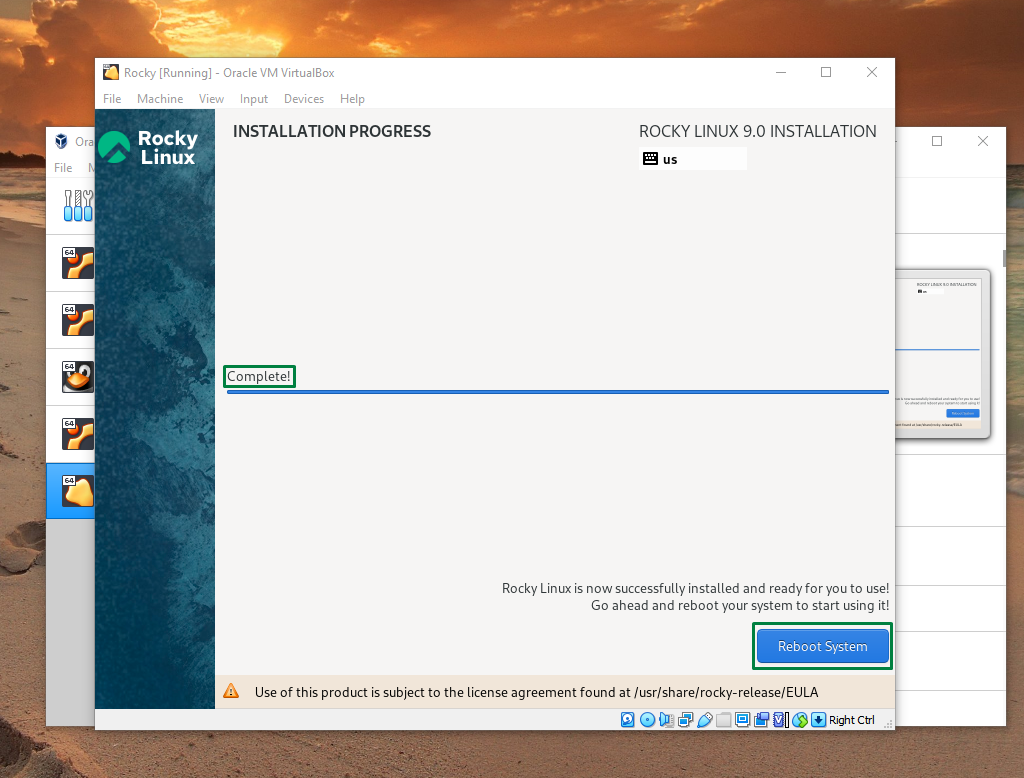
The installation process will start, it might take some time, so wait:

When the installation is complete click on Reboot System:
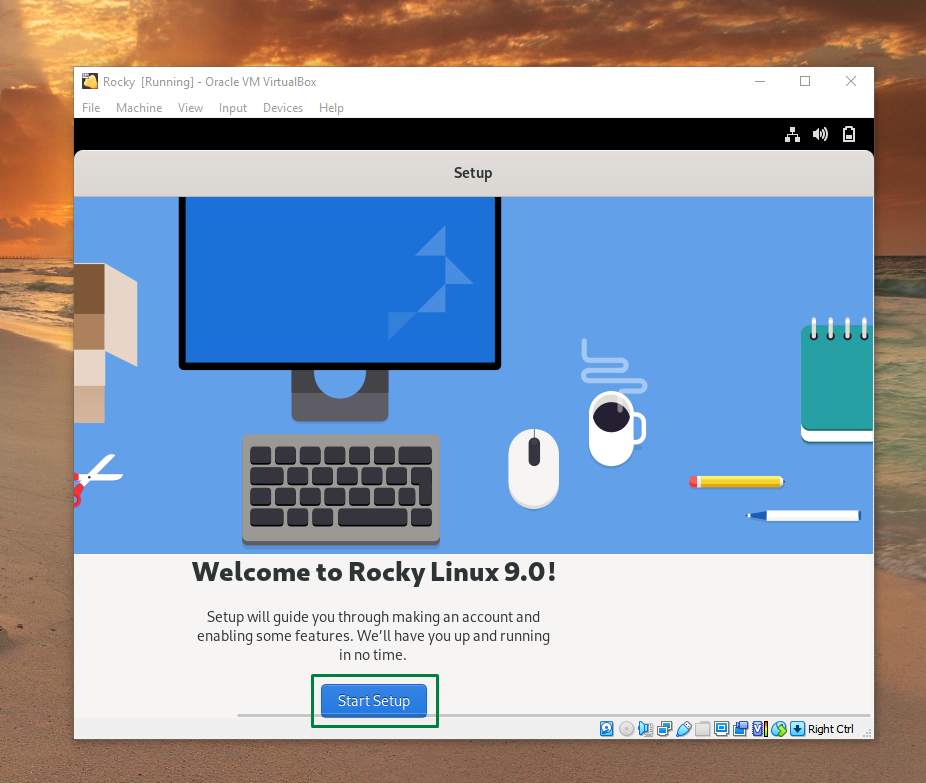
Step 19: Once the system is rebooted click on the Start setup:
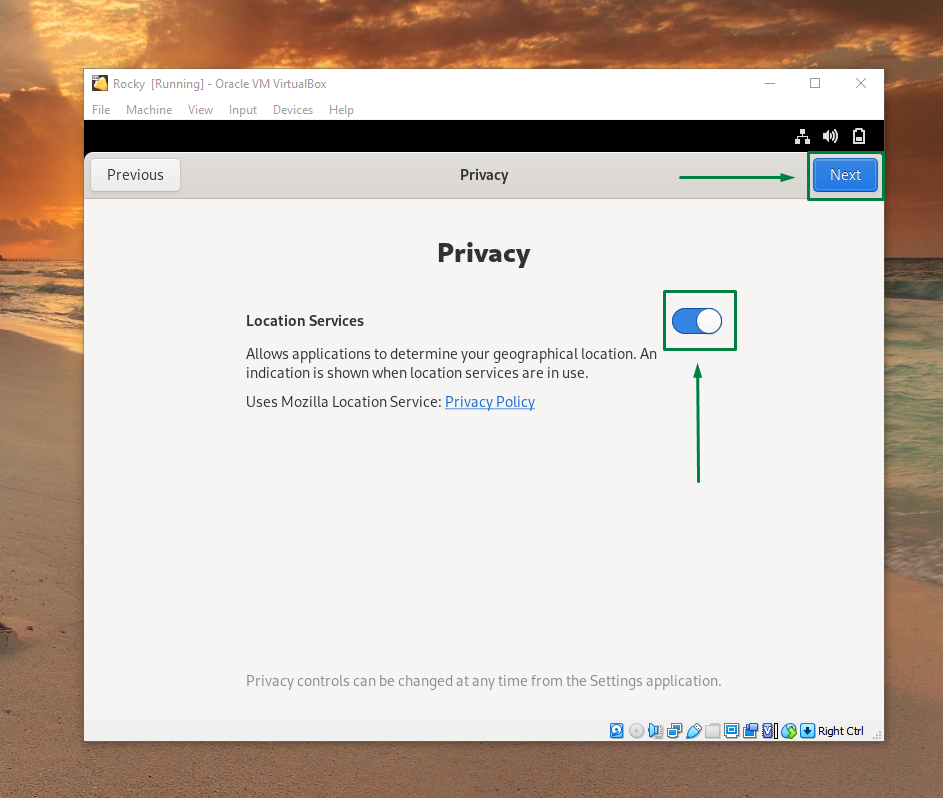
Step 20: Turn on the Location Services and click on Next to proceed further:
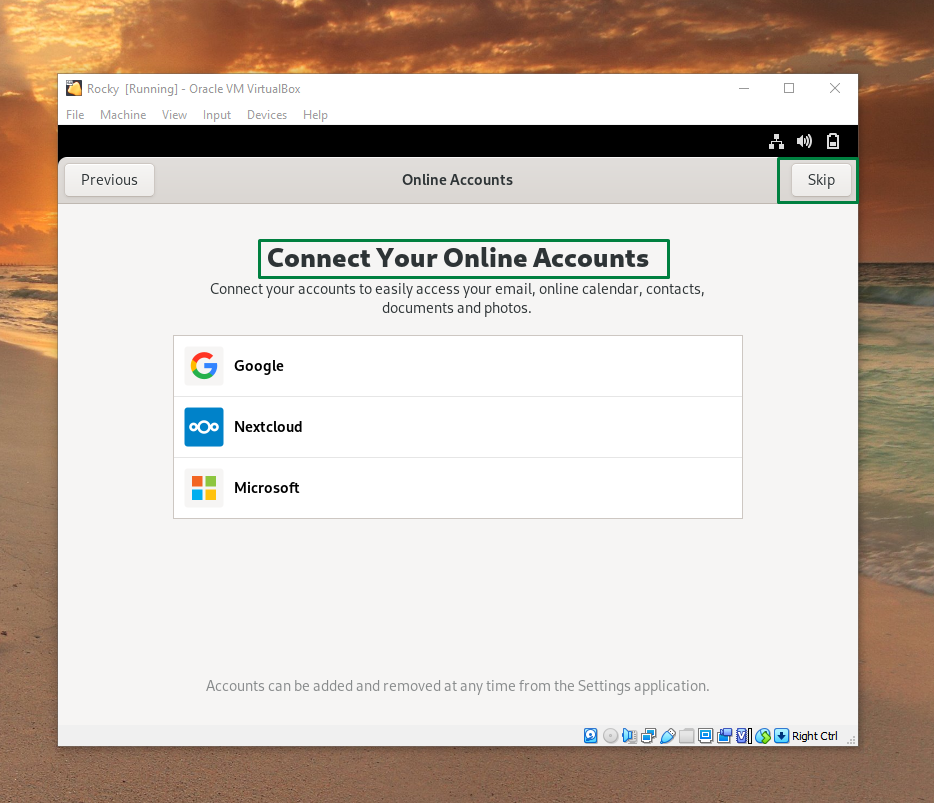
Step 21: Now add the any of your Online account or click on Skip:
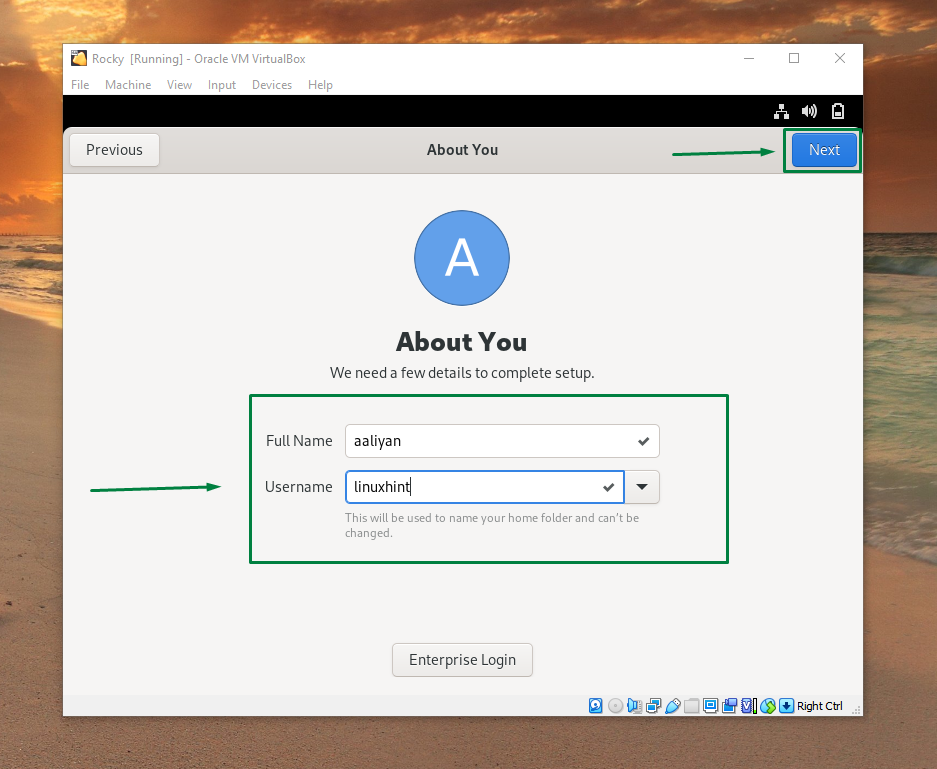
Step 22: Now set the Full Name and the Username and click on Next:
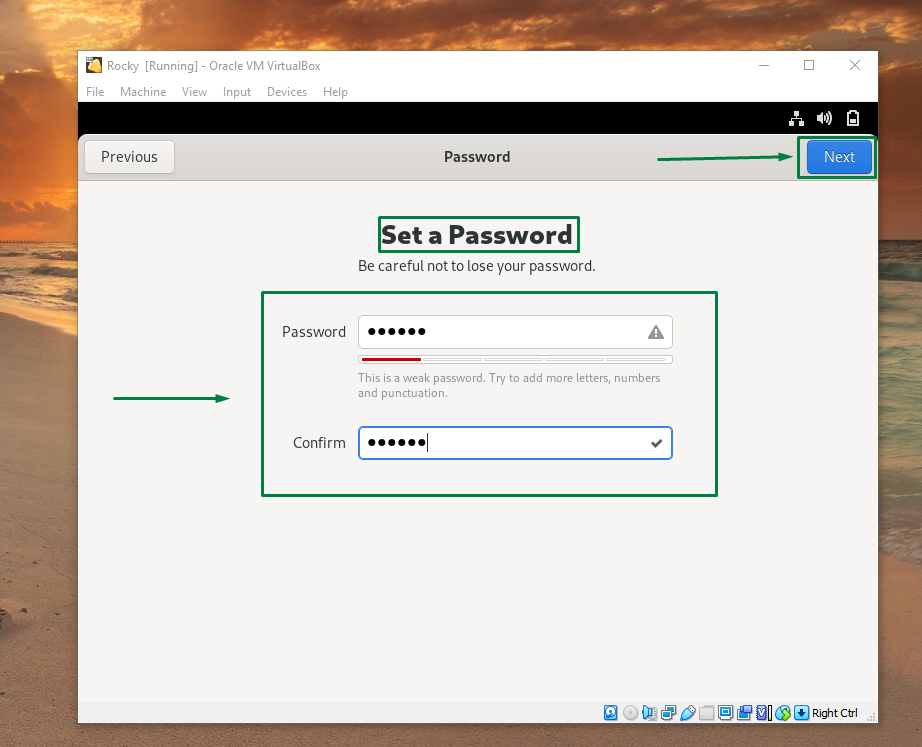
Step 23: Now Set a Password for your virtual machine and select Next:
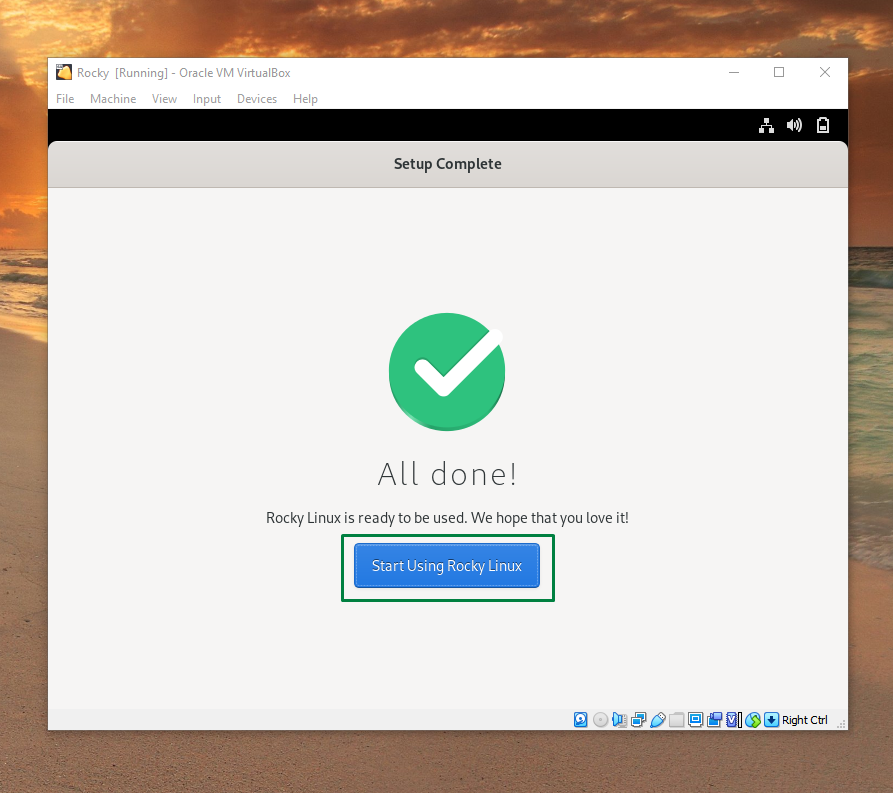
Now the setup is complete and then click on Start Using Rocky Linux:
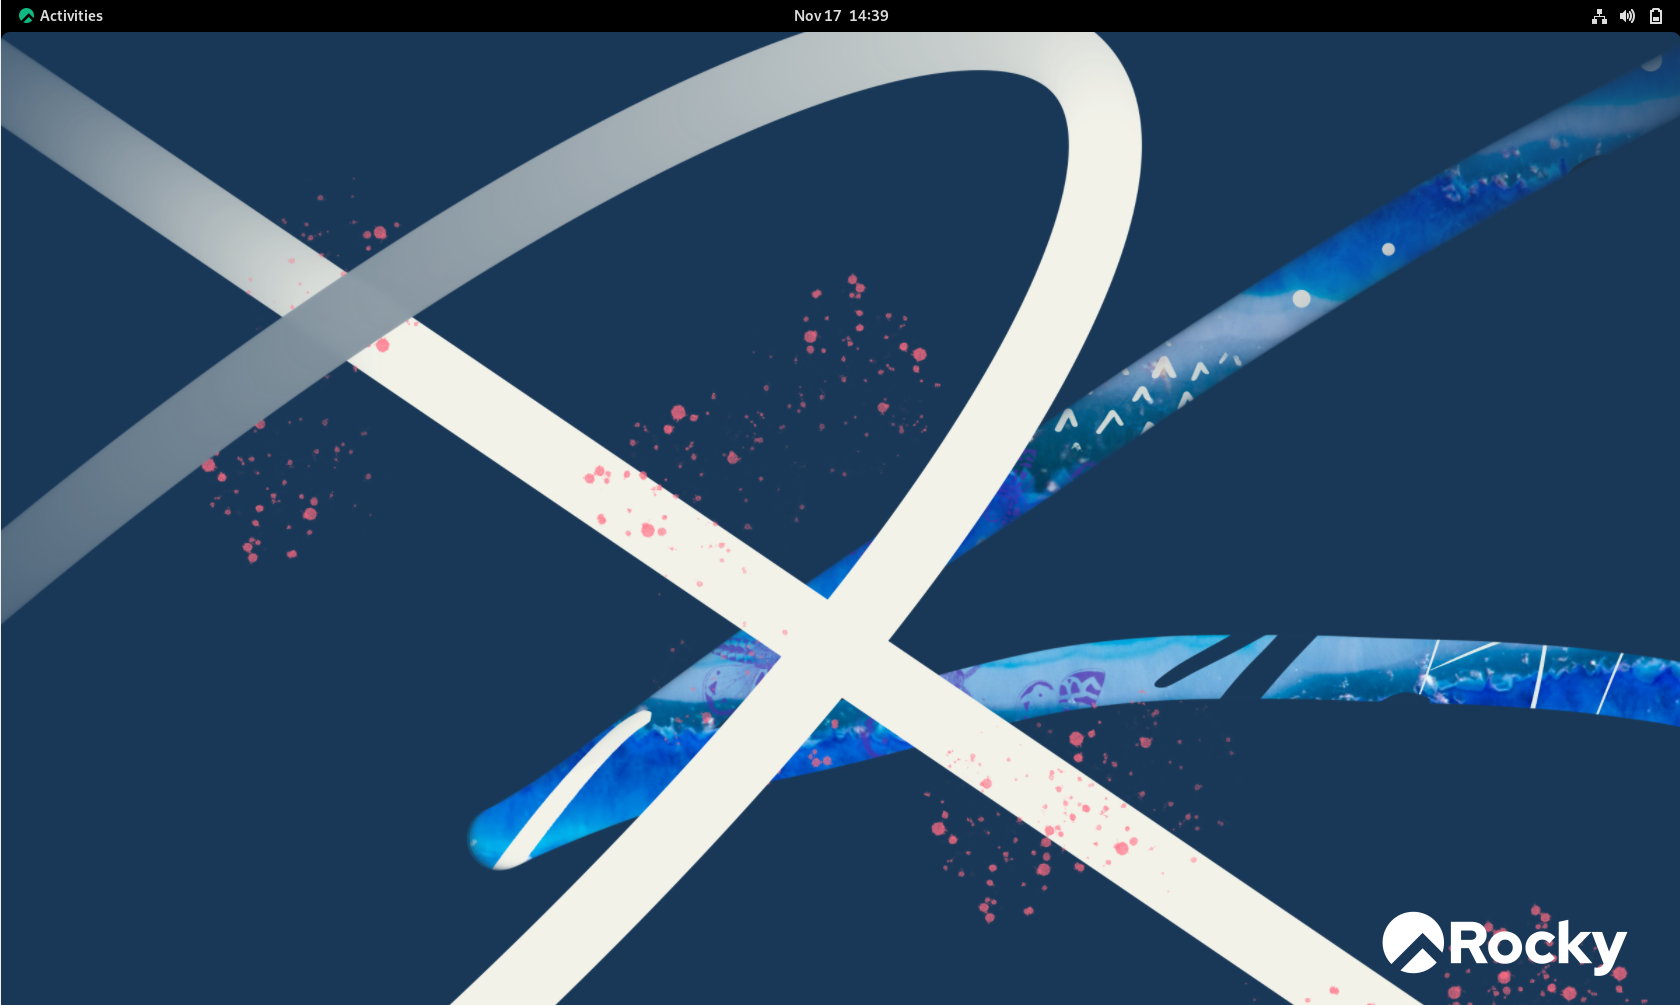
So, this is how Rocky Linux 9 can be installed on VirtualBox and this way one can enjoy using multiple operating systems on a single device.
Conclusion
Linux is one of the most used operating systems as it is useful for many applications like software development and programming. Rocky Linux is one of the Linux distributions that is based on Cent-OS and recently its newer version that is Rocky 9 is launched which has a lot of improvements in it. To install on VirtualBox just download its disk image and create a new virtual machine on Virtual Box.