In this article I will show you how to install and setup PostgreSQL the easy way on Ubuntu Linux. In order to use “The Easy Way”, it implies that will use the version of PostgreSQL that comes with the Ubuntu distribution and not get picky about specifying a different version. So lets get started.
Run apt-get to install postgresql package for Ubuntu as such:
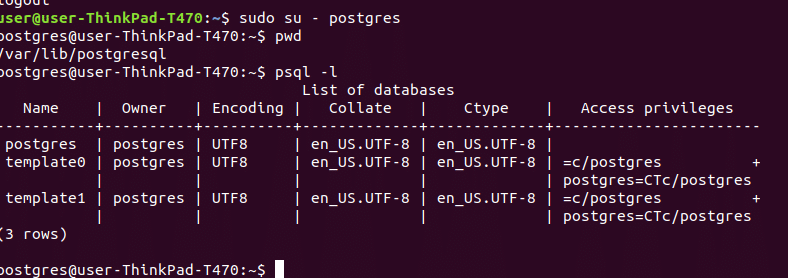
After the command completes PostgreSQL software will be installed and configured to an initial running and usable state. To verify what has been done try the following commands:

pwd
# psql -l
Now check the output form the ps command that was done earlier and notice where is the location of the config_file. In my example the following arg was added on the command line:
Let’s open the postgresql.conf configuration file to see what we can learn. The following interesting entries were specified which will help us understand how PostgreSQL was installed on this system:
# (change requires restart)
hba_file = '/etc/postgresql/9.6/main/pg_hba.conf' # host-based authentication file
# (change requires restart)
port = 5432 # (change requires restart)
From the above we can see some critical directories. The data_directory is where the data we insert into the database is actually stored, we should not need to play around with that at all. The hba_file is where we will update our access permissions for new connections to the database. hba file is certainly something we will want to modify when we setup more robust security. By default password’s are used, but LDAP or Kerberoros are probably desired in a more secure setting. And the port is set to 5432, which is the standard port. If we wanted to be more secure we could modify to use a different port, but I don’t think it really helps too much anyway against sophisticated attackers.
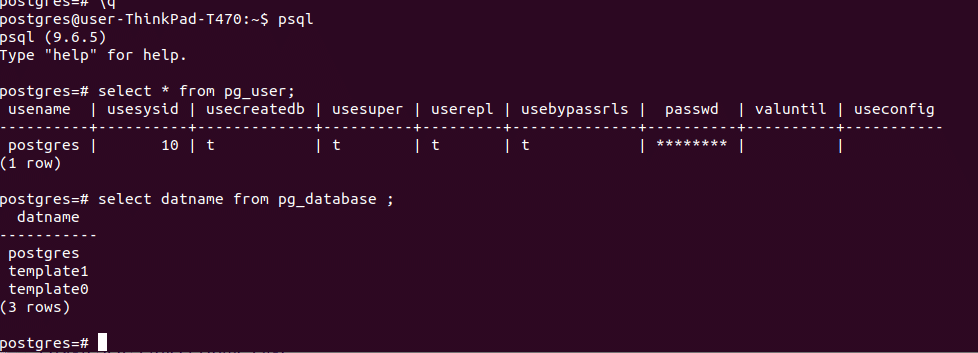
Before making any other configurations lets do some simple queries and see the output to get a feeling for what is setup.
postgres=# SELECT * FROM pg_user;
postgres=# SELECT * FROM pg_database;
Next let us create a new user that can login to the database that is not the postgres superuser. Use the following command:
‘E’ means store password for this user encrypted, ‘P’ means prompt now for a new password for this new user, and ‘d’ means allow the new user to create databases in the system. Now you can exit out from the linux user ‘postgres’ and from the command prompt of a regular user let us connect to the database:
To make this easier to use we can set a few environment variables as shown below:
export PGHOST=127.0.0.1

And finally before getting started, let us create a new database that we can use for our data with the createdb command:
The command above will create a new database in the system called ‘mywebstore’ which can be used for storing your user data. And with that we have installed and setup PostgreSQL on Ubuntu “The Easy Way”.
References
PostgreSQL Wikipedia Page
PostgreSQL Project Home Page
PostgreSQL Official Documentation
PostgreSQL License