To set up NextCloud a little bit easier, NextCloud offers the NextCloud AIO (All-in-One) docker image. You can use it to easily install, update, backup/restore NextCloud without losing your data.
In this article, we will show you how to easily install the latest version of NextCloud AIO (All-in-One) on Ubuntu, Debian, Fedora, RHEL, AlmaLinux, Rocky Linux, CentOS Stream, and other popular Linux distributions. Since the latest version of NextCloud requires a valid SSL certificate to work, we will use a Let’s Encrypt SSL certificate that we generated on our computer/server and link it to the NextCloud Docker containers so that NextCloud can access and use them.
Topic of Contents:
- Installing CURL
- Installing Docker CE and Docker Compose
- Setting a Static IP Address on Your Computer/Server
- Setting a DNS Record for Your NextCloud AIO Server
- Generating a Let’s Encrypt SSL Certificate for NextCloud AIO
- Preparing a Project Directory for NextCloud AIO
- Configuring the Storage for NextCloud AIO
- Installing the NextCloud AIO Master Container
- Configuring the NextCloud Installation Using the NextCloud AIO Web Interface
- Installing NextCloud from the NextCloud AIO Web Interface
- Accessing NextCloud
- Conclusion
- References
Installing CURL
To install the Docker CE on your computer/server easily, you need CURL. You can install CURL on your favorite Linux distribution very easily as it is available in the official package repository of every Linux distribution.
On Ubuntu, Debian, Linux Mint, Kali Linux, and other Ubuntu/Debian-based Linux distributions, you can install CURL with the following commands:
$ sudo apt install curl -y
On Fedora, RHEL, AlmaLinux, Rocky Linux, CentOS Stream, and other RHEL-based Linux distributions, you can install CURL with the following commands:
$ sudo dnf install curl -y
Once CURL is installed, you can check if CURL is accessible with the following command. If CURL is accessible, the command will print the version of CURL that you installed on your computer/server.
Installing Docker CE and Docker Compose
To install the latest version of Docker CE and Docker Compose on Ubuntu, Debian, Fedora, RHEL, AlmaLinux, Rocky Linux, CentOS Stream, and other popular Linux distributions, run the following command:
The latest version of Docker CE and Docker Compose are being installed. It takes a while to complete.
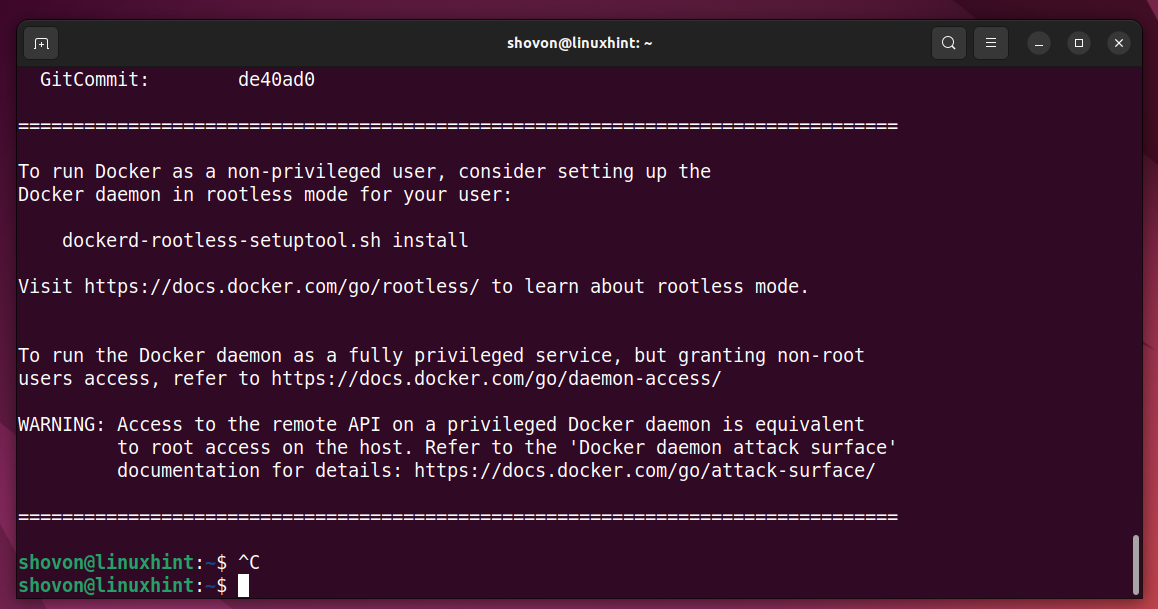
At this point, the latest version of Docker CE and Docker Compose should be installed on your computer/server.
Add your login user to the docker group so that you can run the Docker commands without root/superuser privileges if needed.
For the changes to take effect, reboot your computer/server as follows:
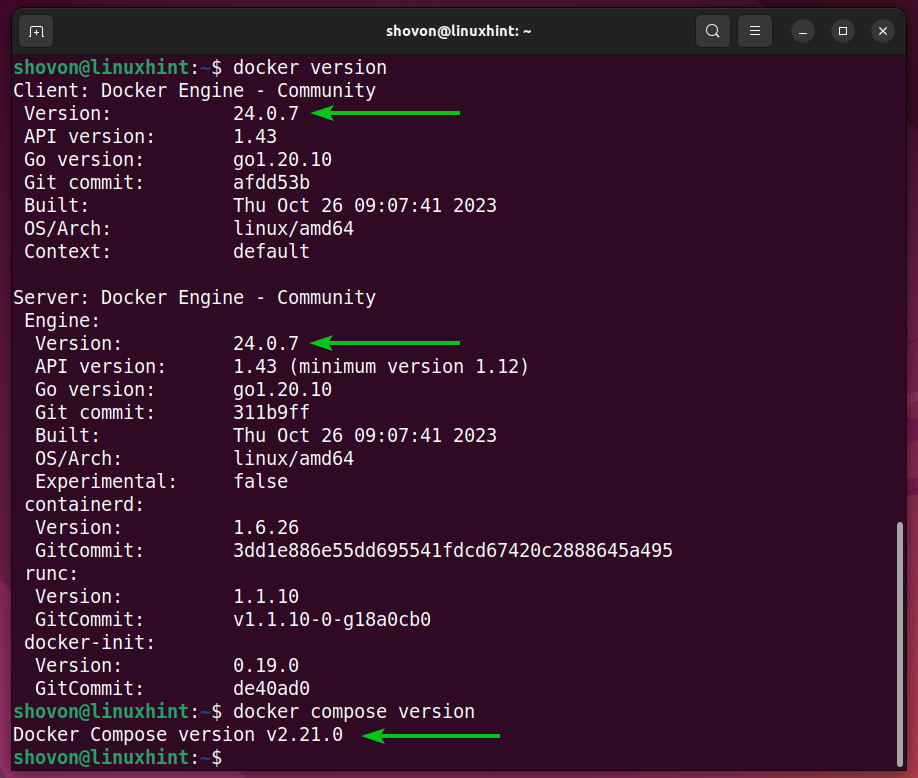
Once your computer/server boots, you can check if the Docker commands are accessible with the following commands. If the Docker commands are accessible, the version of Docker and Docker Compose that you installed on your computer/server should be printed.
$ docker compose version
Setting a Static IP Address on Your Computer/Server
For NextCloud to work correctly, you must set up a static IP address on your computer/server. LinuxHint has many articles on that topic. Please search on linuxhint.com for a detailed information on setting up a static IP address for your Linux distribution.
Setting a DNS Record for Your NextCloud AIO Server
For NextCloud to work properly, you must also have a domain name that points to the IP address of your computer/server. To do that, you must add an A record (for IPv4) on the DNS server of your domain that points to the IP address of your computer/server where you want to install NextCloud.
Generating a Let’s Encrypt SSL Certificate for NextCloud AIO
Once you set a static/fixed IP address and add a DNS record for NextCloud on your DNS server, you will generate a valid SSL certificate using Let’s Encrypt or buy a valid SSL certificate from an authorized certificate authority (CA).
If you want to get a free Let’s Encrypt SSL certificate for your domain name using CloudFlare DNS-01 validation, we have an article on that. Feel free to read it for more information.
Preparing a Project Directory for NextCloud AIO
Since NextCloud AIO runs NextCloud in Docker containers, you need to create a few files to configure your NextCloud installation. Better to keep them all organized in a single folder.
You can create a project directory for NextCloud AIO which is “/opt/nextcloud-aio” (let’s say) as follows:
Now, navigate to the “/opt/nextcloud-aio” directory as follows:
Create a Docker Compose file which is “compose.yaml” in the “/opt/nextcloud-aio” directory and open it with the nano text editor as follows:
Copy and paste the following lines in the “compose.yaml” file:
volumes:
nextcloud_aio_mastercontainer:
name: nextcloud_aio_mastercontainer
services:
nextcloud:
image: nextcloud/all-in-one:latest
restart: always
container_name: nextcloud-aio-mastercontainer
volumes:
- nextcloud_aio_mastercontainer:/mnt/docker-aio-config
- /etc/letsencrypt/live/nodekite.com/fullchain.pem:/etc/apache2/certs/ssl.crt
- /etc/letsencrypt/live/nodekite.com/privkey.pem:/etc/apache2/certs/ssl.key
- /var/run/docker.sock:/var/run/docker.sock:ro
ports:
- 8080:8080
environment:
- SKIP_DOMAIN_VALIDATION=true
- APACHE_PORT=11000
- APACHE_IP_BINDING=127.0.0.1
- NEXTCLOUD_DATADIR=/mnt/nextcloud-data
# - NEXTCLOUD_ENABLE_DRI_DEVICE=true
caddy:
image: caddy:alpine
restart: always
ports:
- 443:443
volumes:
- ./Caddyfile:/etc/caddy/Caddyfile
- /etc/letsencrypt/live/nodekite.com/fullchain.pem:/certs/fullchain.pem
- /etc/letsencrypt/live/nodekite.com/privkey.pem:/certs/privkey.pem
network_mode: "host"
Create a Caddyfile file in the “/opt/nextcloud-aio” directory and open it with the nano text editor as follows:
Copy and paste the following lines in the Caddyfile file:
tls /certs/fullchain.pem /certs/privkey.pem
reverse_proxy localhost:11000
}
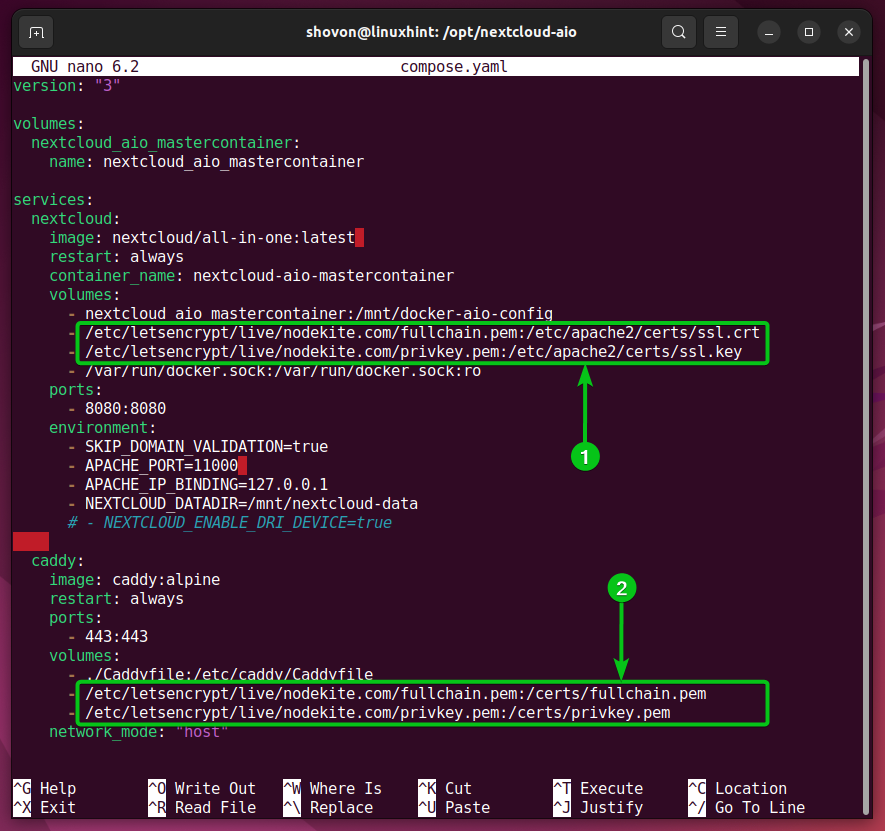
Here, in the “compose.yaml” file, “/etc/letsencrypt/live/nodekite.com/fullchain.pem” and “/etc/letsencrypt/live/nodekite.com/privkey.pem” are the full path of our Let’s Encrypt SSL certificates. These are linked to the nextcloud-aio-mastercontainer and caddy (reverse-proxy) containers.
The “fullchain.pem” and “privkey.pem” certificate files are bind mounted in the “/etc/apache2/certs/ssl.crt” and “/etc/apache2/certs/ssl.key” paths, respectively, in the “nextcloud_aio_mastercontainer” Docker container[1]. If you don’t pass the SSL certificates in the “nextcloud_aio_mastercontainer” Docker container, sooner or later, you will get the MOZILLA_PKIX_ERROR_SELF_SIGNED_CERT error (on Mozilla Firefox) and/or other SSL errors (on other web browsers) while attempting to access the NextCloud AIO management interface.
The “fullchain.pem” and “privkey.pem” certificate files are bind mounted in the “/certs/fullchain.pem” and “/certs/privkey.pem” paths, respectively, in the caddy Docker container[2]. The caddy container will be used as the reverse proxy server for NextCloud.
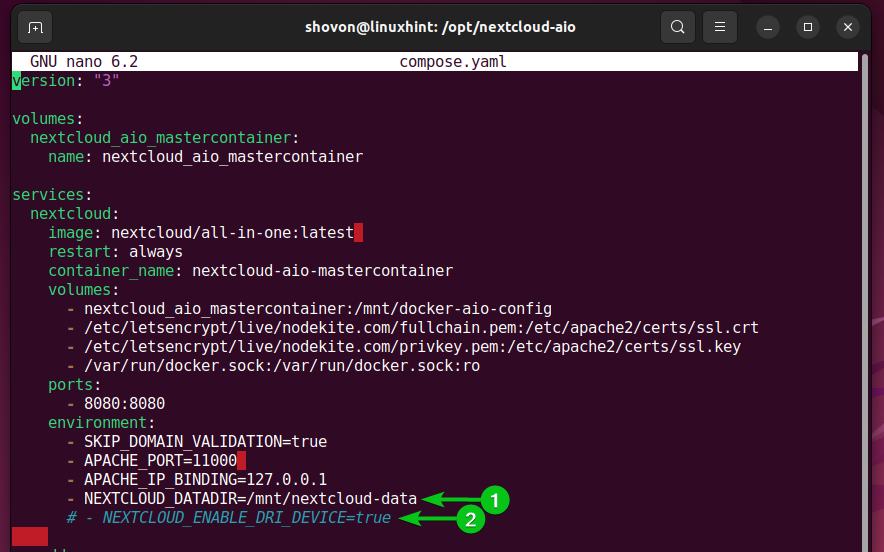
Another important configuration option for NextCloud is the NEXTCLOUD_DATADIR and NEXTCLOUD_ENABLE_DRI_DEVICE environment variables.
NEXTCLOUD_DATADIR is the directory on your computer/server (where Docker/NextCloud is installed) where NextCloud stores all the user files. Here, we will mount a dedicated storage device to the “/mnt/nextcloud-data” path and use it for storing the NextCloud user files[1].
If NEXTCLOUD_ENABLE_DRI_DEVICE option is enabled, NextCloud will use your GPU to transcode the media files (i.e. videos). So, if you want to use your GPU to transcode the media files, remove the “#” from the line to enable the NEXTCLOUD_ENABLE_DRI_DEVICE environment variable[2].
Configuring the Storage for NextCloud AIO
In this section, we will show you the basics of mounting a storage device on your Linux system so that you can use it for storing the NextCloud user files.
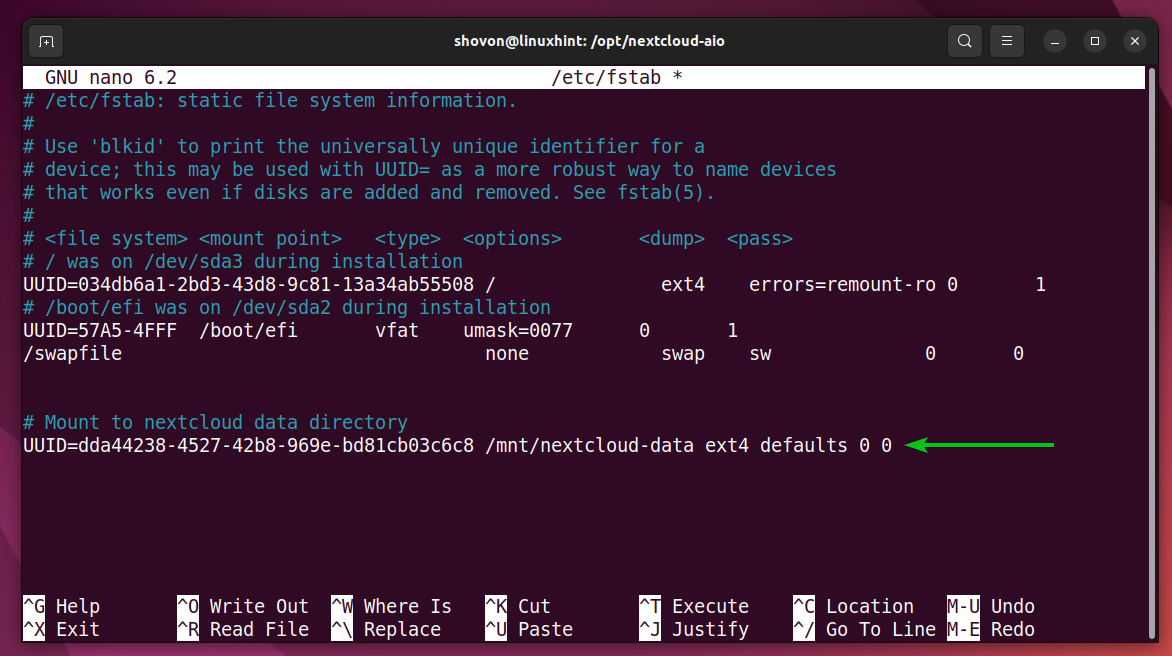
We have a EXT4 formatted storage device “/dev/sdb1” with the UUID dda44238-4527-42b8-969e-bd81cb03c6c8 (note this as you need it to mount the filesystem). We mount it on the “/mnt/nextcloud-data” directory (where we configured NextCloud to store the user files) for the demonstration.
First, open the “/etc/fstab” file with the nano text editor as follows:
Type in the following line at the end of the “/etc/fstab” file to mount the “/dev/sdb1” storage device using it’s UUID on the “/mnt/nextcloud-data” directory. Once you’re done, press <Ctrl> + X followed by “Y” and <Enter> to save the “/etc/fstab” file.
Create the “/mnt/nextcloud-data” mount path as follows:
Mount the configured storage device to the “/mnt/nextcloud-data” directory as follows:
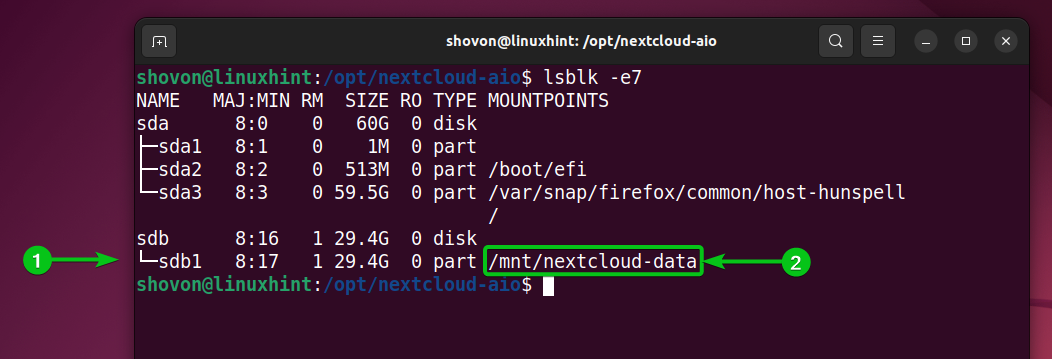
As you can see, the “/dev/sdb1”[1] storage device is mounted in the “/mnt/nextcloud-data”[2] path.
Installing the NextCloud AIO Master Container
In the “/opt/nextcloud-aio” NextCloud project directory, you should have a “compose.yaml” file and a Caddyfile.
To start the NextCloud AIO container, run the following command:
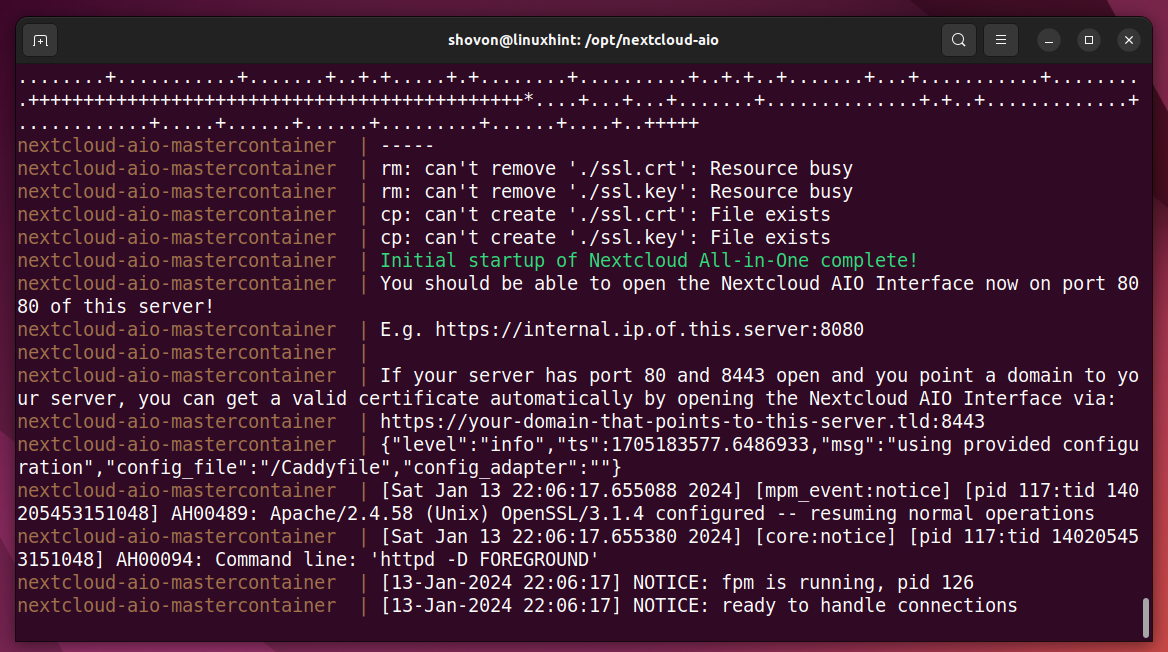
The NextCloud AIO container should be started.
Now, visit https://your-nextcloud-domain.com:8080 from your favorite web browser to access NextCloud AIO.
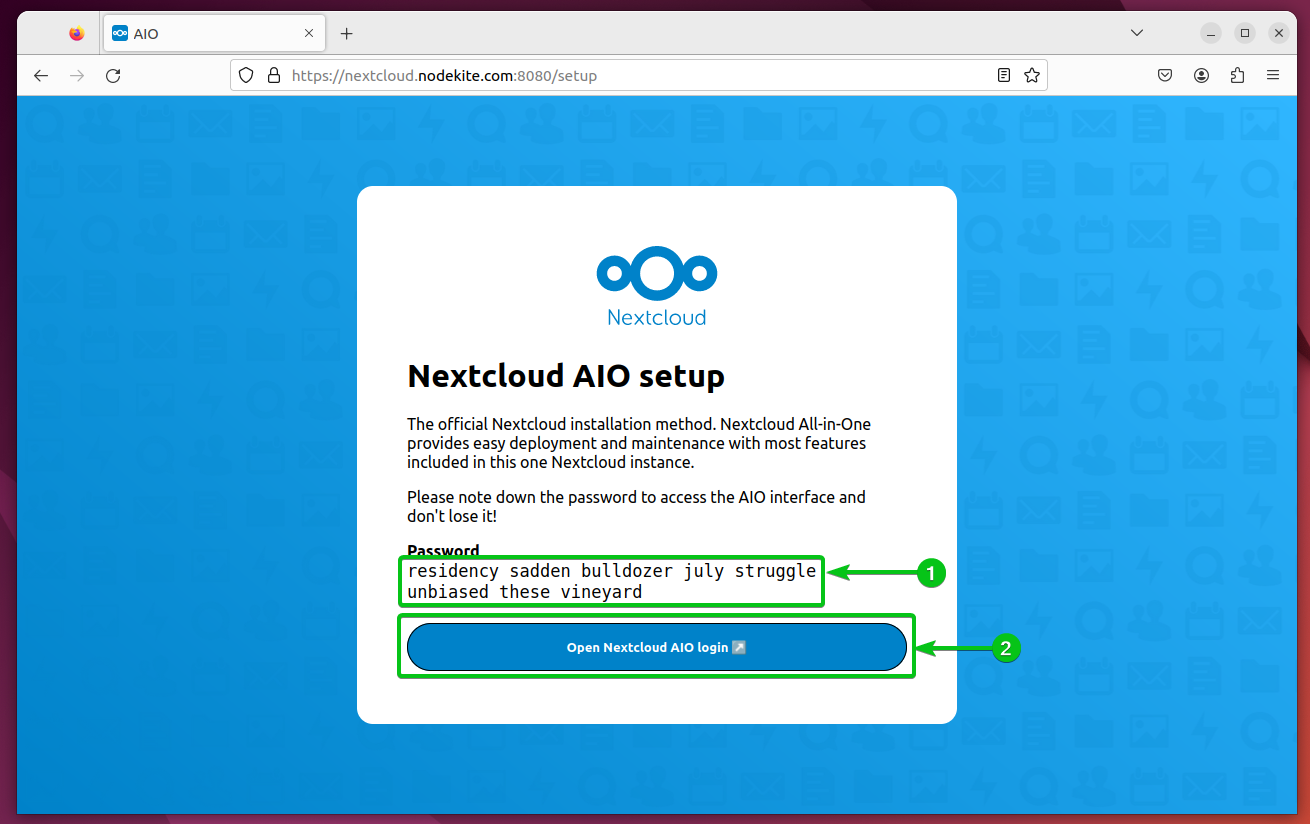
You will see the log in password for NextCloud AIO the first time you access NextCloud AIO from a web browser[1]. You need to note it down. It’s very important. If you lose this password, you have to reset the NextCloud AIO master container and start over.
Once you noted down the NextCloud AIO log in password, click on “Open NextCloud AIO login”[2].
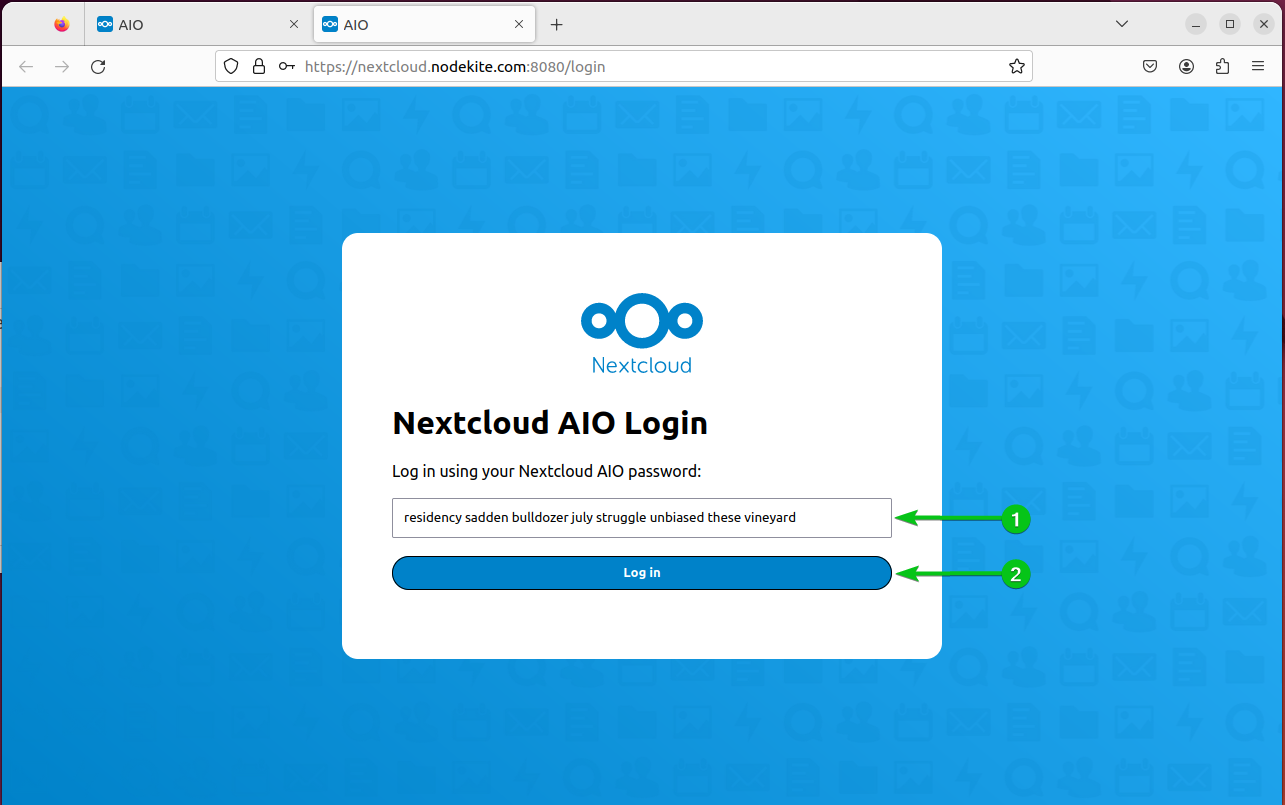
Once the NextCloud AIO login page is displayed, type in the NextCloud AIO password[1] and click on “Log in”[2].
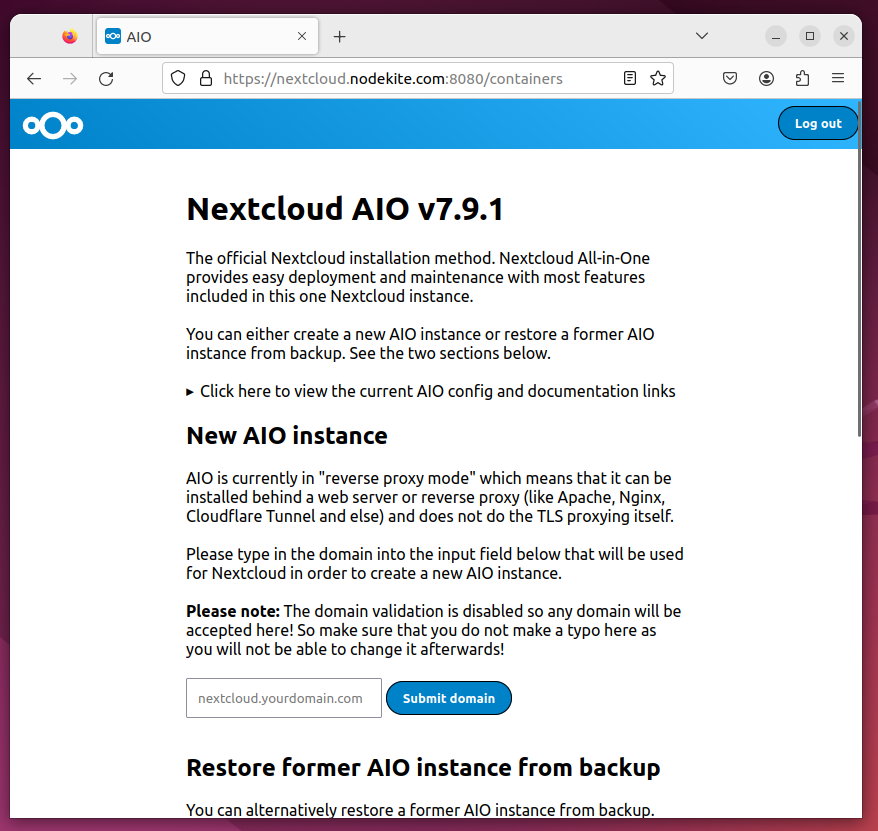
You should be logged in to the NextCloud AIO management interface.
Configuring the NextCloud Installation Using the NextCloud AIO Web Interface
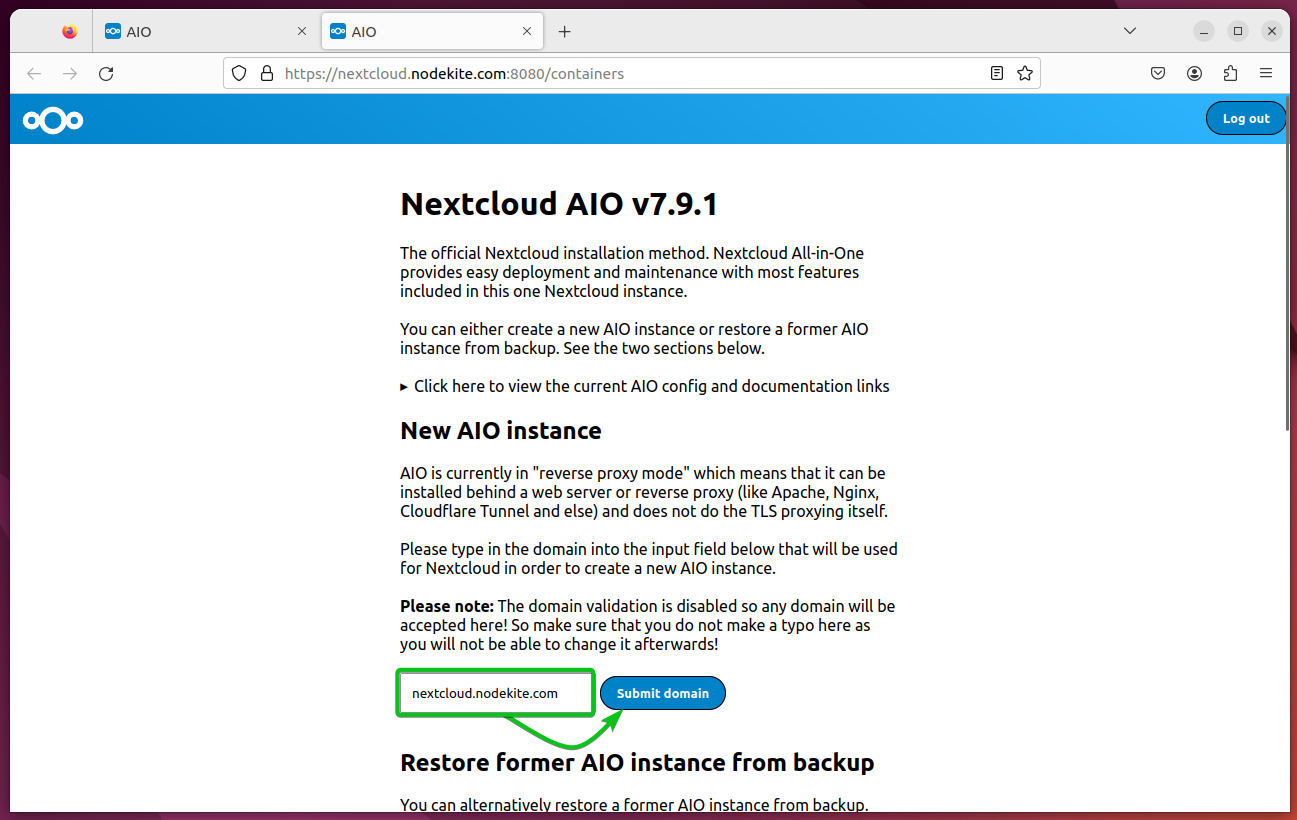
First, type in the domain name that you want to use for NextCloud and click on “Submit domain”.
NOTE: You must use the same domain name that you generated the SSL certificates for.
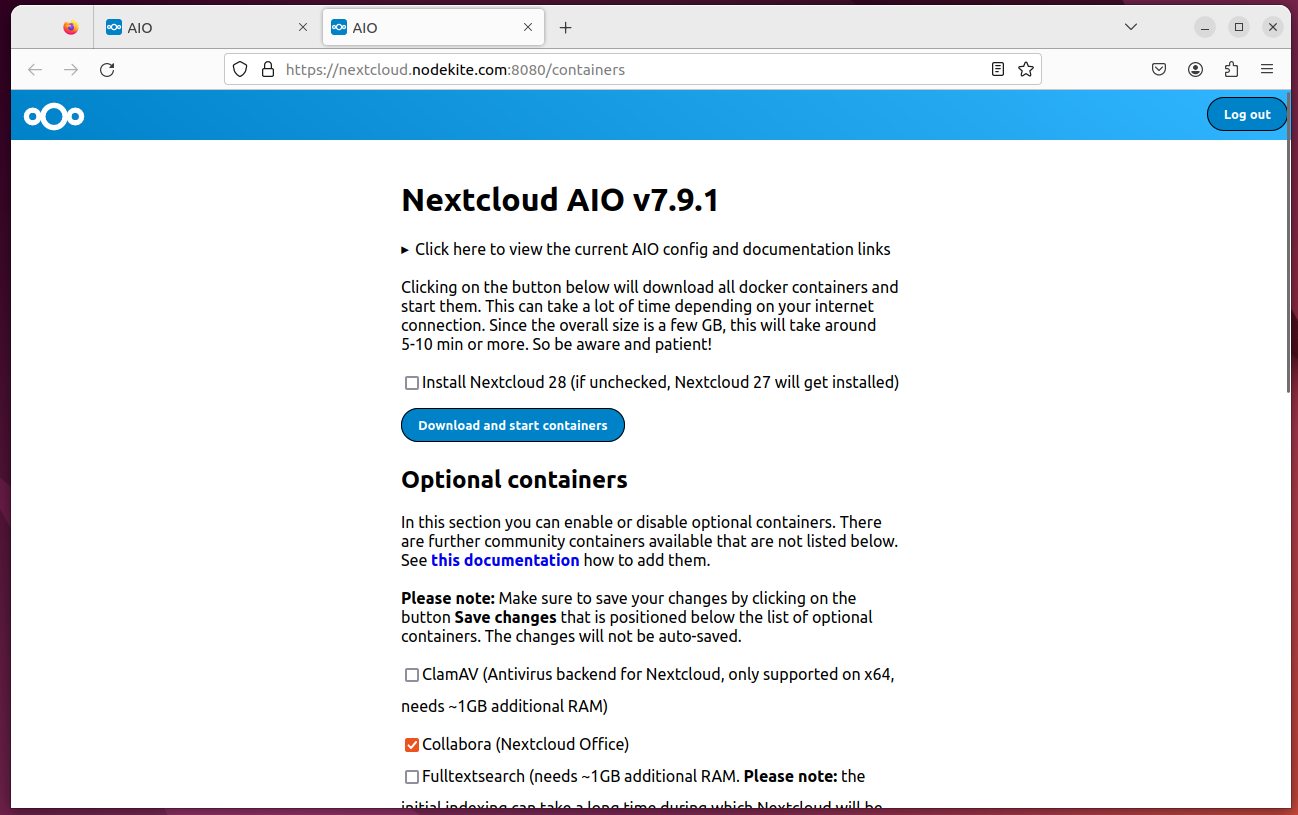
Once you configure a domain name for NextCloud, NextCloud AIO will ask you to configure your NextCloud installation.
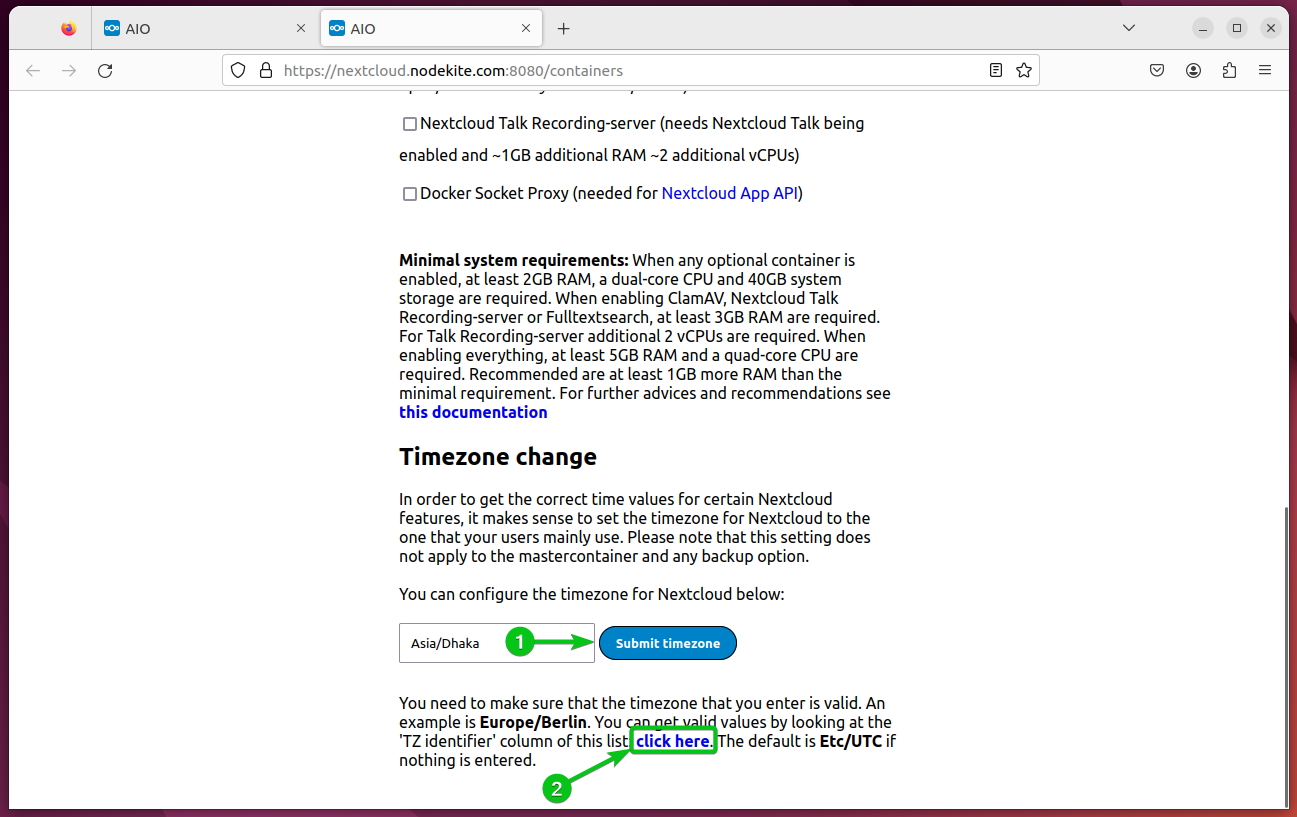
Scroll down to the “Timezone change” section, type in your timezone in TZ identifier format and click on “Submit timezone”[1]. If you don’t know the TZ identifier format of your timezone, click on the link as marked in the following screenshot[2] and you will find a list of TZ identifiers for all the timezones worldwide:
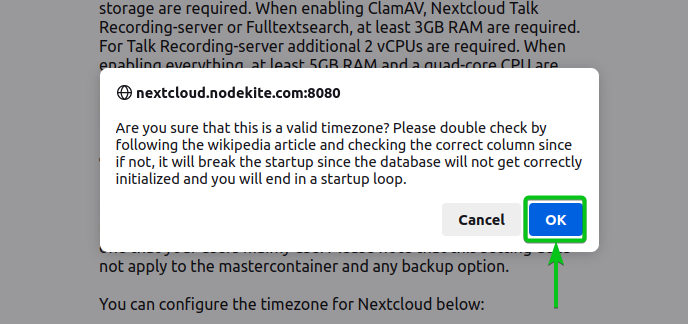
Click on “OK” to confirm the timezone.
Your desired timezone should be set.
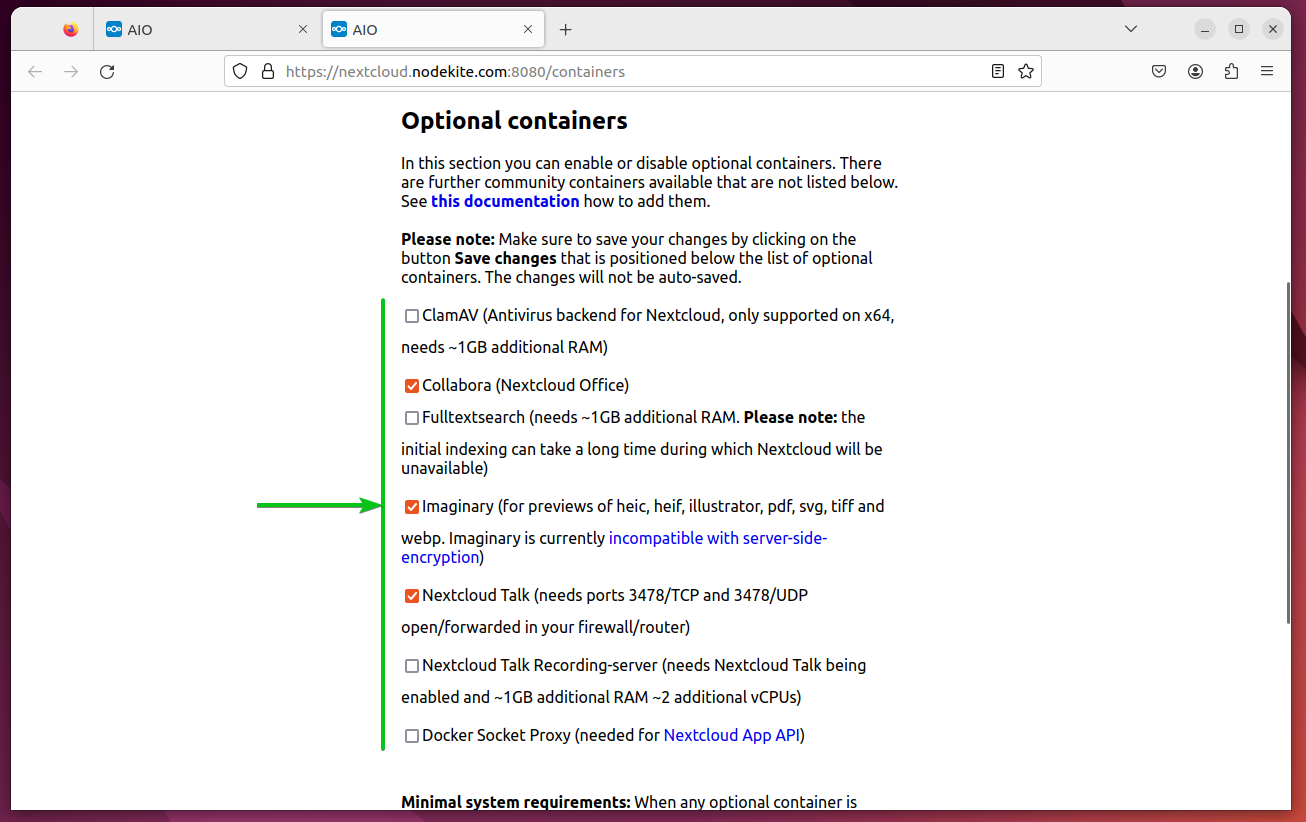
Scroll to the “Optional containers” section. By default, only the containers that are required for a fully functional NextCloud server are selected. You can select the other containers from the list to add more functionality to NextCloud.
ClamAV: If you want to scan the NextCloud user files for viruses, you can enable this container.
Fulltextsearch: If you want to use the full text search functionality of NextCloud to find the files, select this container.
Nextcloud Talk Recording-server: If you want to record your NextCloud Talk calls, select this container.
Docker Socket Proxy: If you want to use the NextCloud API, select this container.
Installing NextCloud from the NextCloud AIO Web Interface
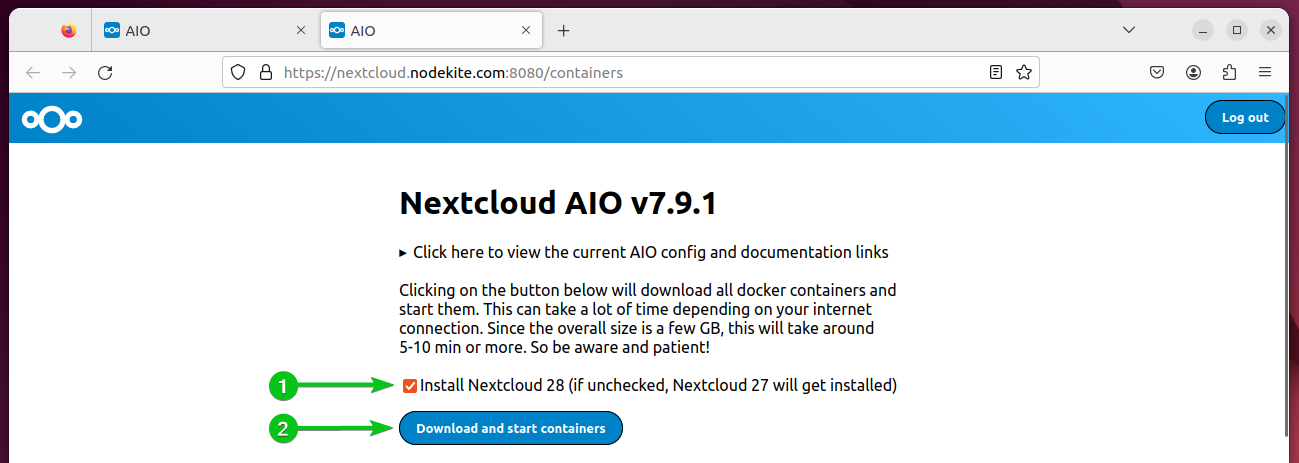
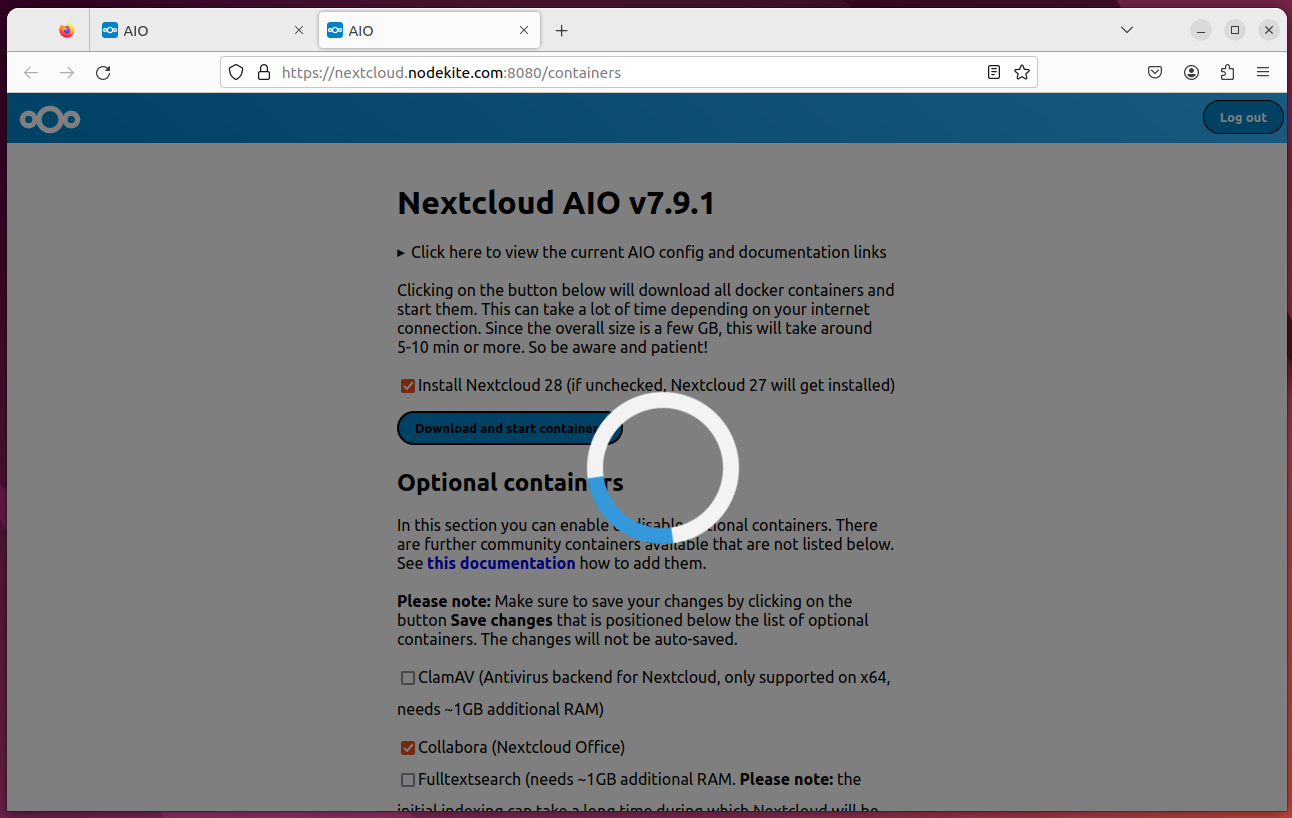
To install the latest version of NextCloud (NextCloud Hub 7), tick “Install Nextcloud 28”[1] and click on “Download and start containers”[2].
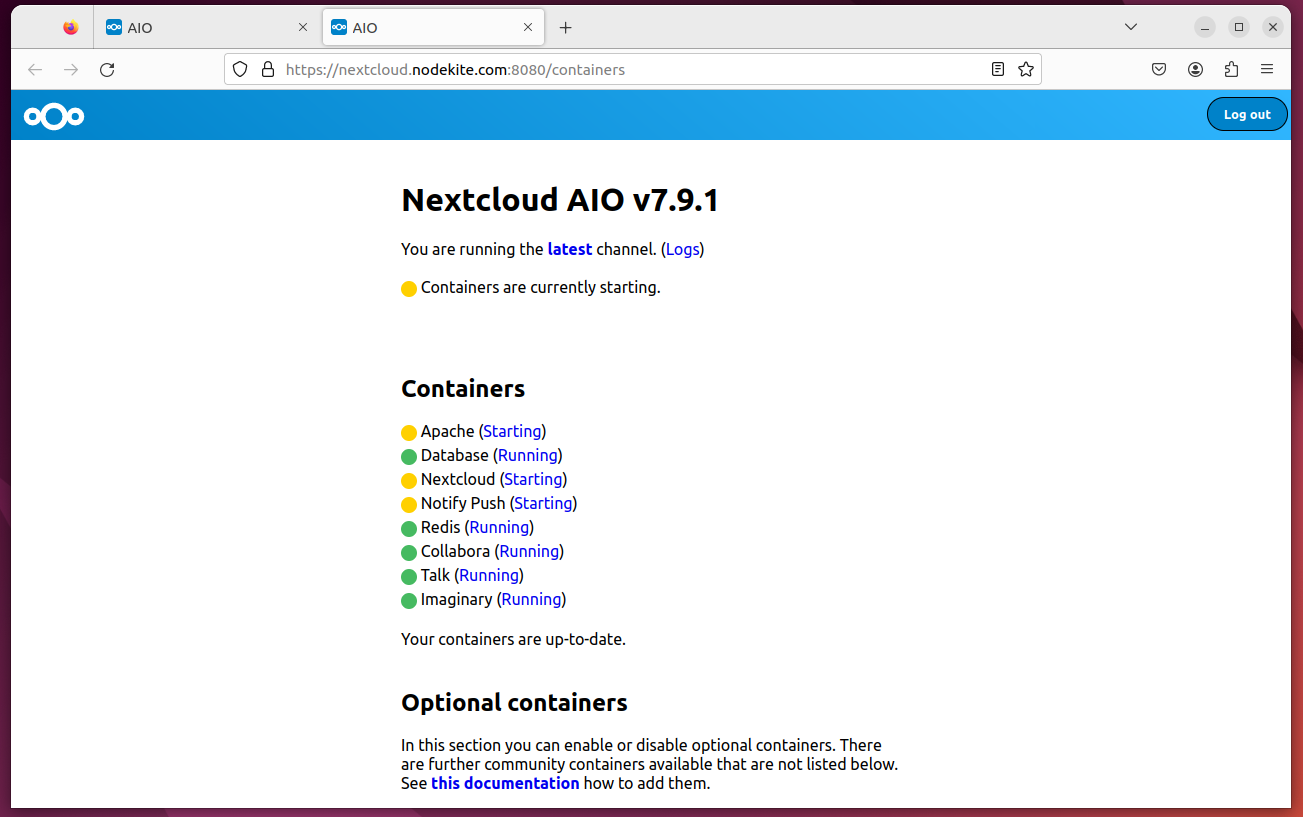
NextCloud AIO should start downloading all the required Docker containers and start them. It takes a while to complete.
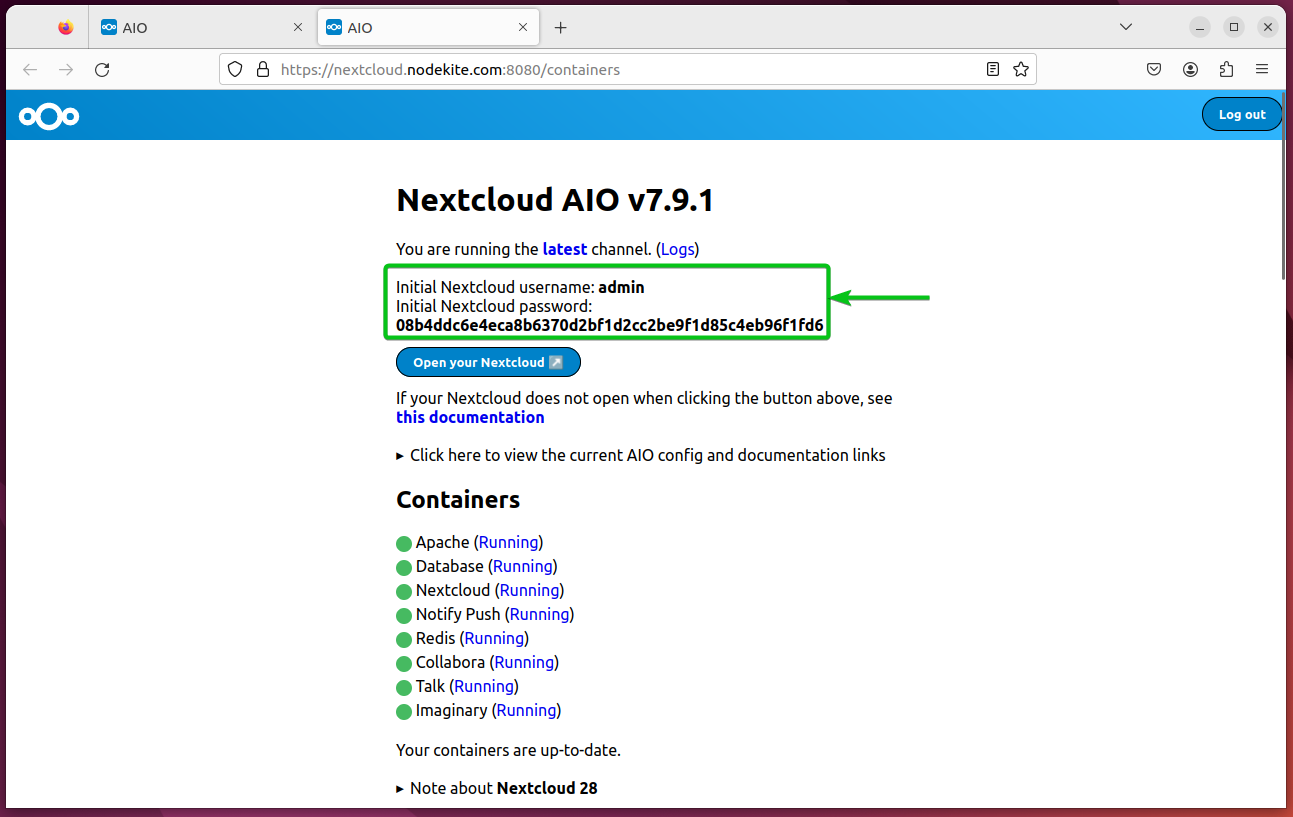
You can refresh the NextCloud AIO page to see the progress of the NextCloud installation. The containers that are downloaded and started correctly should be marked in green. The containers that are being downloaded or configured are marked in yellow.
Once NextCloud is installed, NextCloud AIO will show you the admin password of your NextCloud installation.
Accessing NextCloud
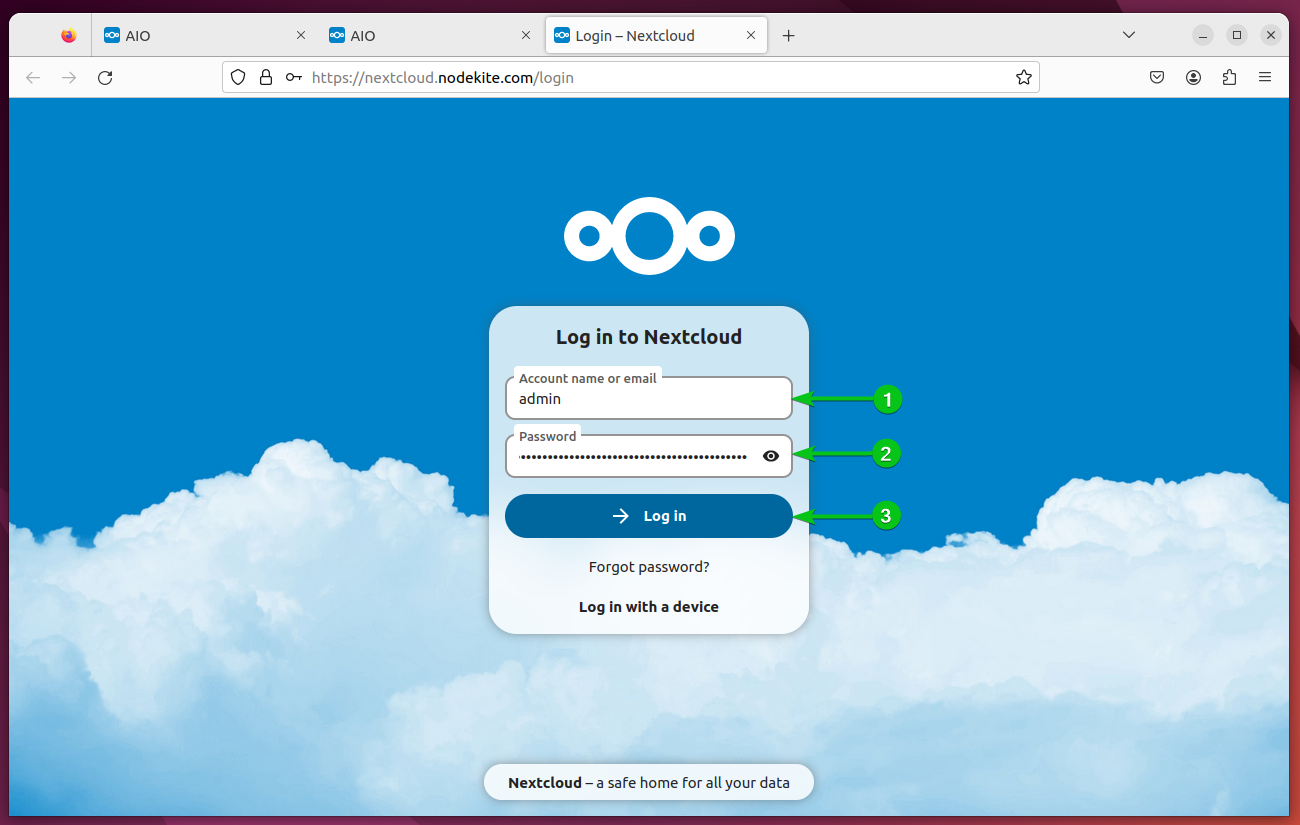
To access NextCloud, visit https://your-nextcloud-domain.com from a web browser and you should see the NextCloud log in page.
Type in “admin” as the username[1] and the admin password (that you’ve seen in the NextCloud AIO page)[2] and click on “Log in”[3].
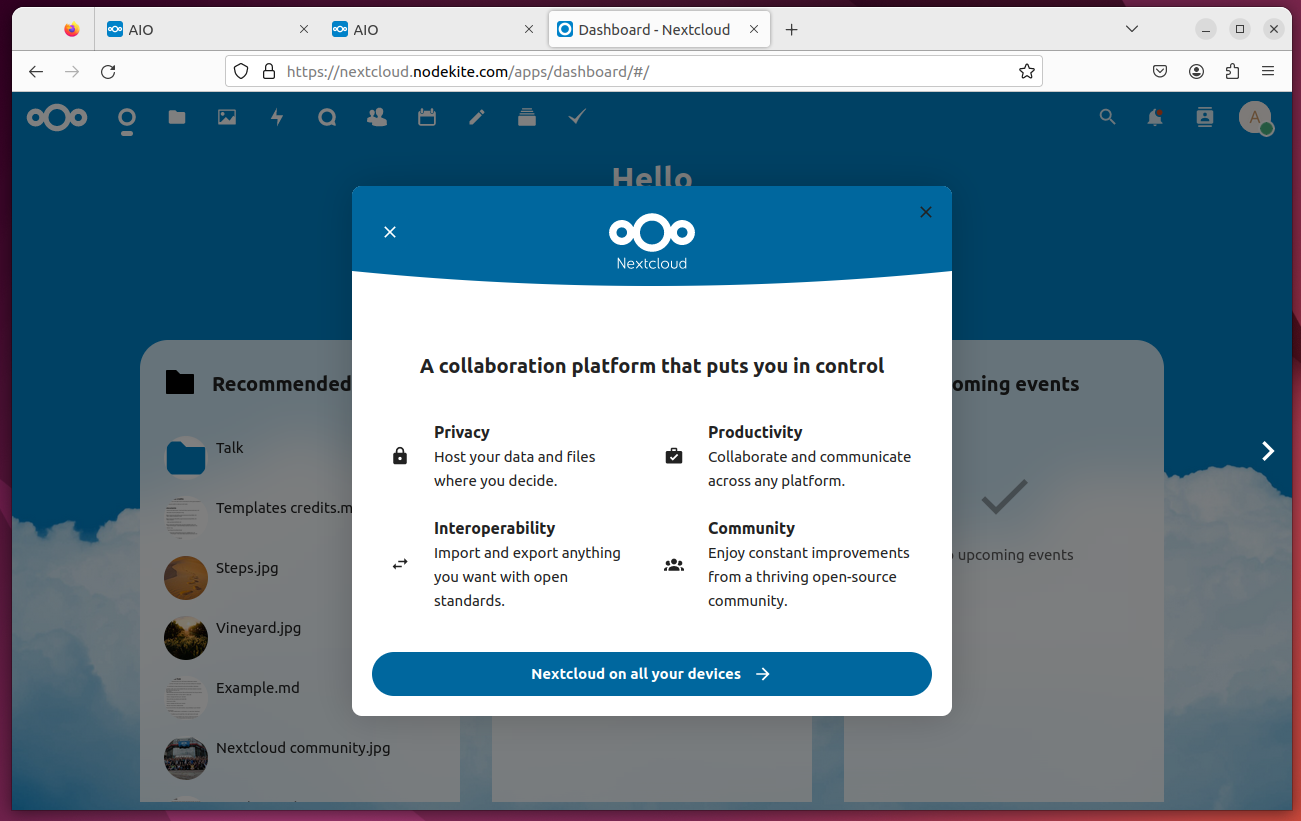
You should be logged in to NextCloud as the admin user. As an admin user, you can create new NextCloud users, configure the quotas for the NextCloud users, and do other administrative tasks.
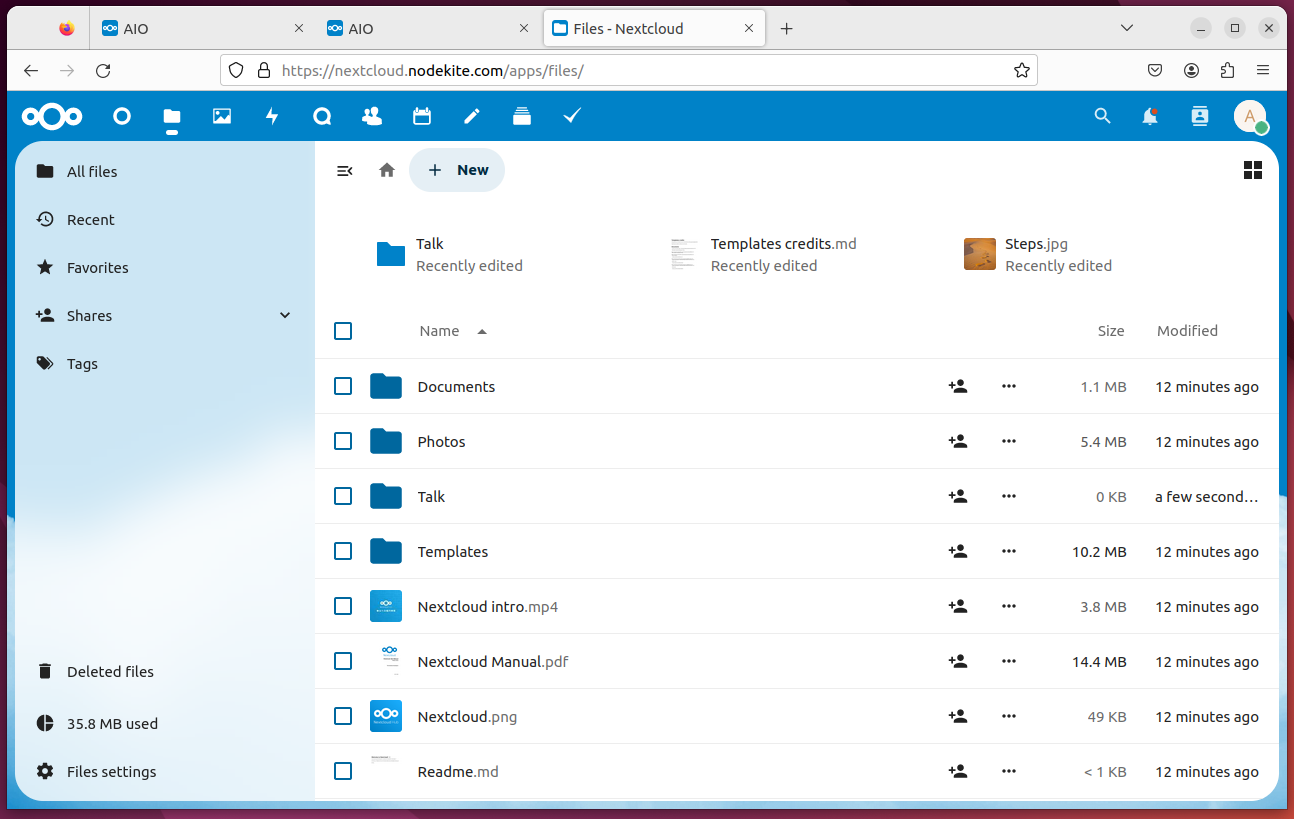
The following is the NextCloud Hub 7 file management interface:
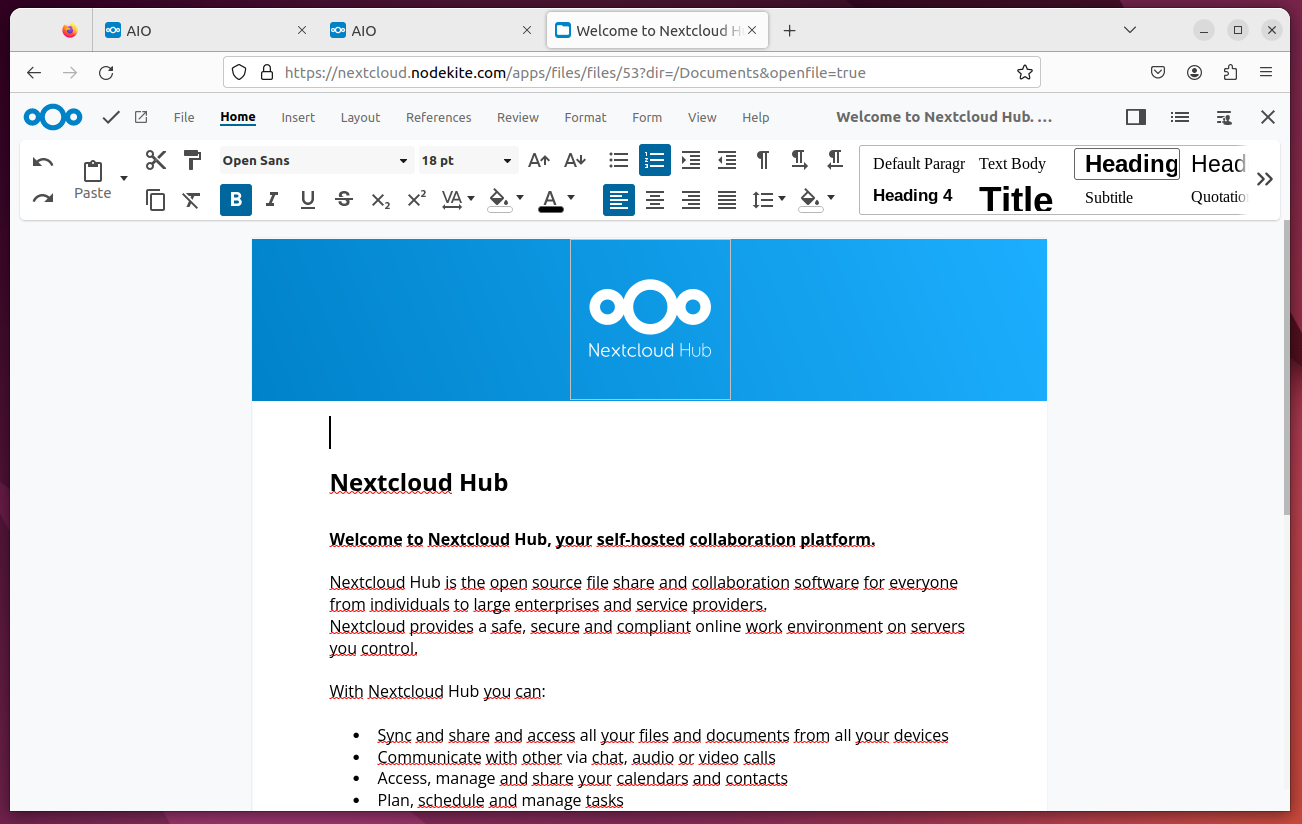
Viewing a Word document in NextCloud Hub 7:
Conclusion
In this article, we showed you how to install the latest version of NextCloud AIO (All-in-One) on Ubuntu, Debian, Fedora, RHEL, AlmaLinux, Rocky Linux, CentOS Stream, and other popular Linux distributions based on Ubuntu/Debian or RHEL. Since the latest version of NextCloud requires a valid domain name and a valid SSL certificate, it makes the installation a bit difficult for most people. We simplified the process of installing the latest version of NextCloud on your favorite Linux distribution using a valid Let’s Encrypt SSL certificate and a domain name.
References:
- nextcloud/all-in-one: The official Nextcloud installation method. Provides easy deployment and maintenance with most features included in this one Nextcloud instance.
- all-in-one/compose.yaml at main · nextcloud/all-in-one
- all-in-one/reverse-proxy.md at main · nextcloud/all-in-one
- abelncm/nextcloud-aio-local-docker-compose: Run Nextcloud AIO in your localhost


