This tutorial will teach how to install Jenkins Agent on Windows. However, before proceeding with this tutorial, we must ensure that we have Java JDK installed on the Windows machine.
It is recommended to ensure that the JDK version running on the controller is similar to that installed on the Windows machine.
Configuring Jenkins Agent
Navigate to the Jenkins controller Dashboard and select the “Build Executor Status” from the left-hand pane to set up a new Jenkins Agent.
In the available nodes page, select the “New Node” option. This will allow you to create and configure a new Jenkins Agent.
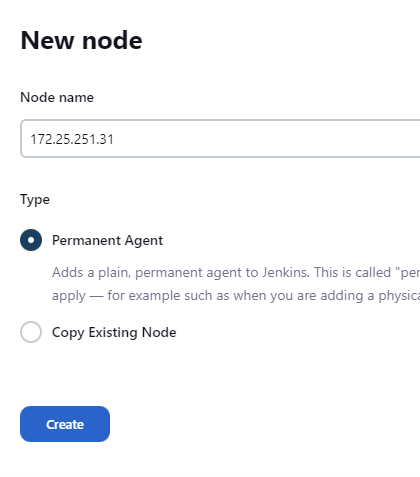
Select “New Node” on the top right to create a new Jenkins Agent. First, give the node a name. For simplicity, we will use the IP address of the target agent as the Node Name.
Next, choose the Node type as permanent Agent and click create.
In the next Window, provide all the details for your Agent, including the remote directory you wish to use as the Jenkins workspace.
Ensure to select the launch method as “Launch agent by connecting it to the controller” and select the “Use WebSocket” method.

Once completed, Click save to configure the Jenkins agent.
Head to the “Build Executor Status page” to view the available controllers. You should see the windows agent listed in the options.
Click on the Agent to view the available options. This should give you the command you need to execute to connect the Windows agent to the controller.
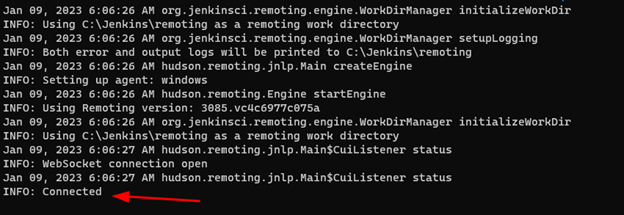
Copy and paste the commands into the Windows agent’s command line. This should download the agent.jar file and connect the Agent to the controller.
For example:
Connecting the Agent:
1f97f602e489a231bd1d5c7369bb59fc9969e2d414a890001ef5a68144c8c7dd -workDir "C:\Jenkins"
You should see the output logs as shown:
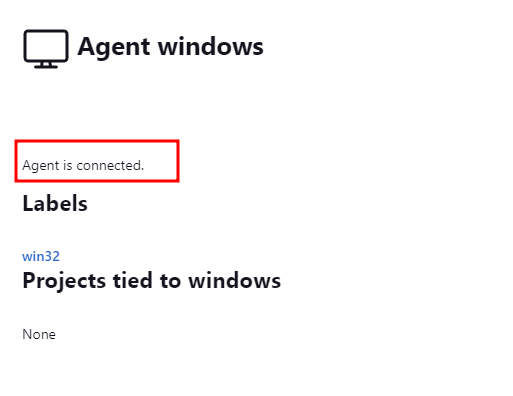
You can head back to the Jenkins controller dashboard to check on the status of the agent.
Conclusion
This post covered the fundamentals of connecting a Windows Jenkins agent to a controller using websocket.