Fedora Workstation 35 is the latest version of Fedora Linux distribution. Fedora Workstation 35 features the latest version of the GNOME Desktop Environment – GNOME 41. It also has lots of updated software packages.
In this article, I am going to show you how to create a Fedora Workstation 35 bootable USB thumb drive and install Fedora Workstation 35 on your computer from the USB thumb drive. So, let’s get started.
Table of Contents:
- Downloading Fedora Workstation 35 ISO Image
- Creating a Fedora Workstation 35 Bootable USB on Windows
- Creating a Fedora Workstation 35 Bootable USB on Linux
- Booting Fedora Workstation 35 Installer from USB
- Installing Fedora Workstation 35
- Booting Fedora Workstation 35
- Conclusion
- References
Downloading Fedora Workstation 35 ISO Image:
In this section, I am going to show you how to download the Fedora Workstation 35 ISO image from the official website of Fedora.
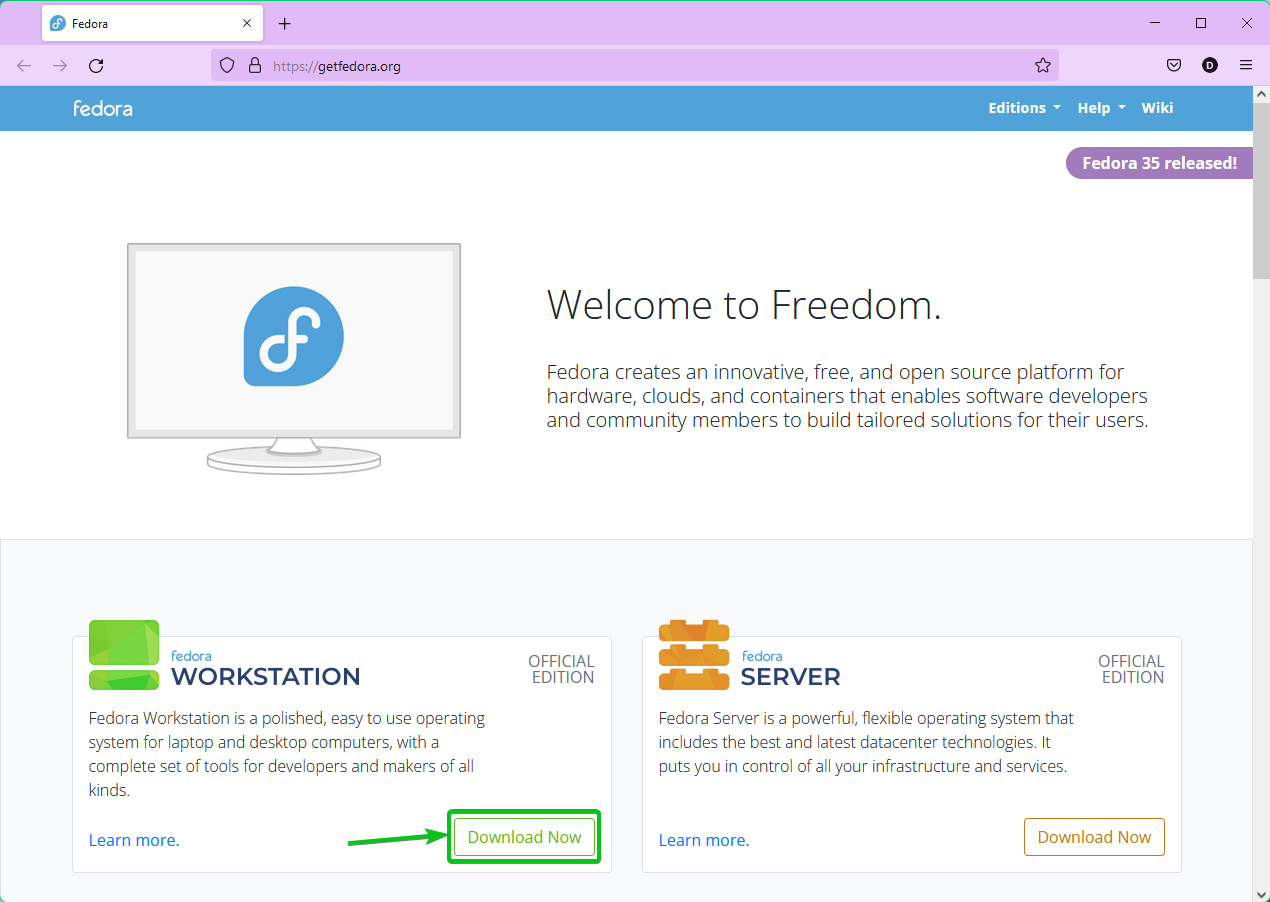
First, visit the official website of Fedora from your favorite web browser.
Once the page loads, click on the Download Now button as marked in the screenshot below.
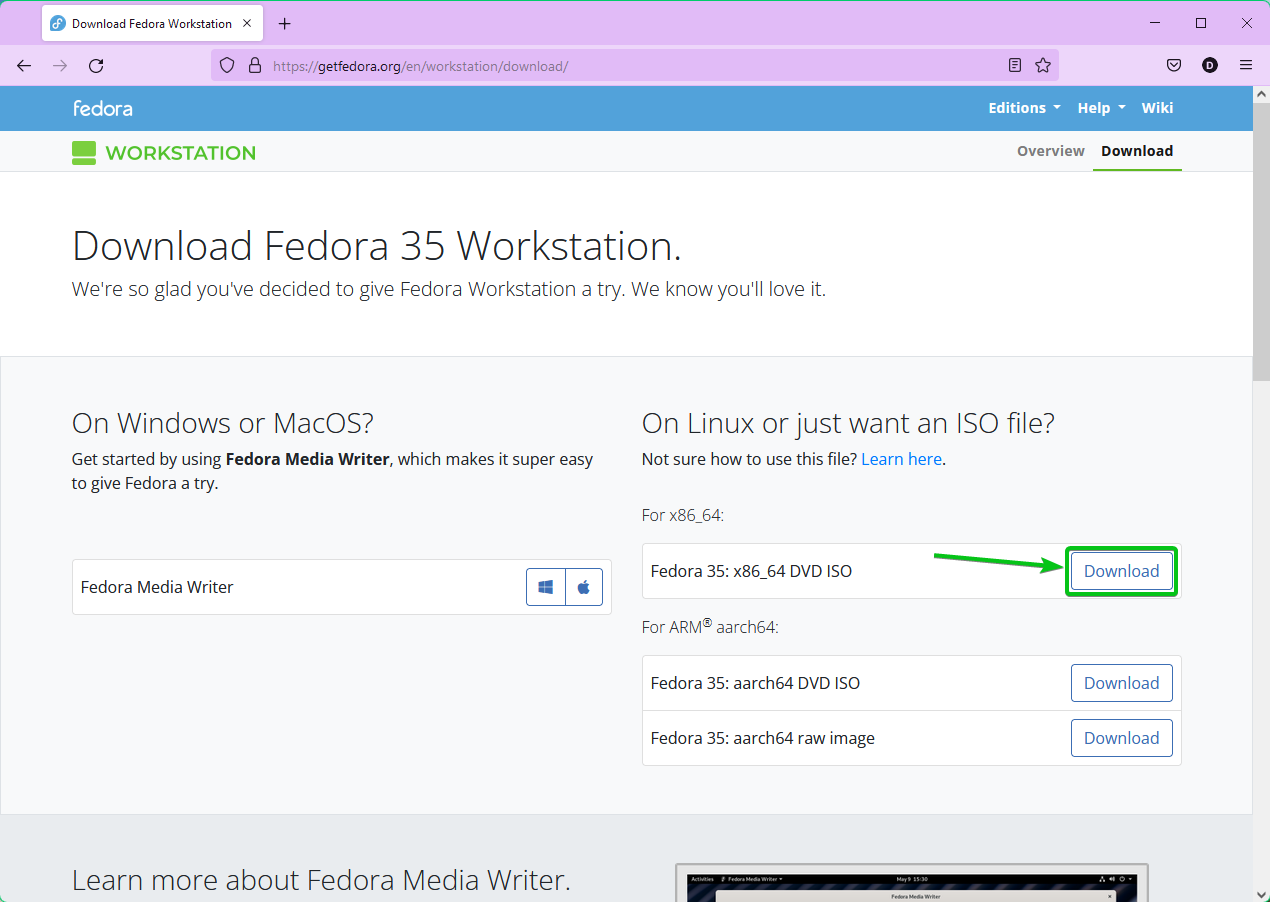
Click on the Download link of Fedora 35: x86_64 DVD ISO as marked in the screenshot below.
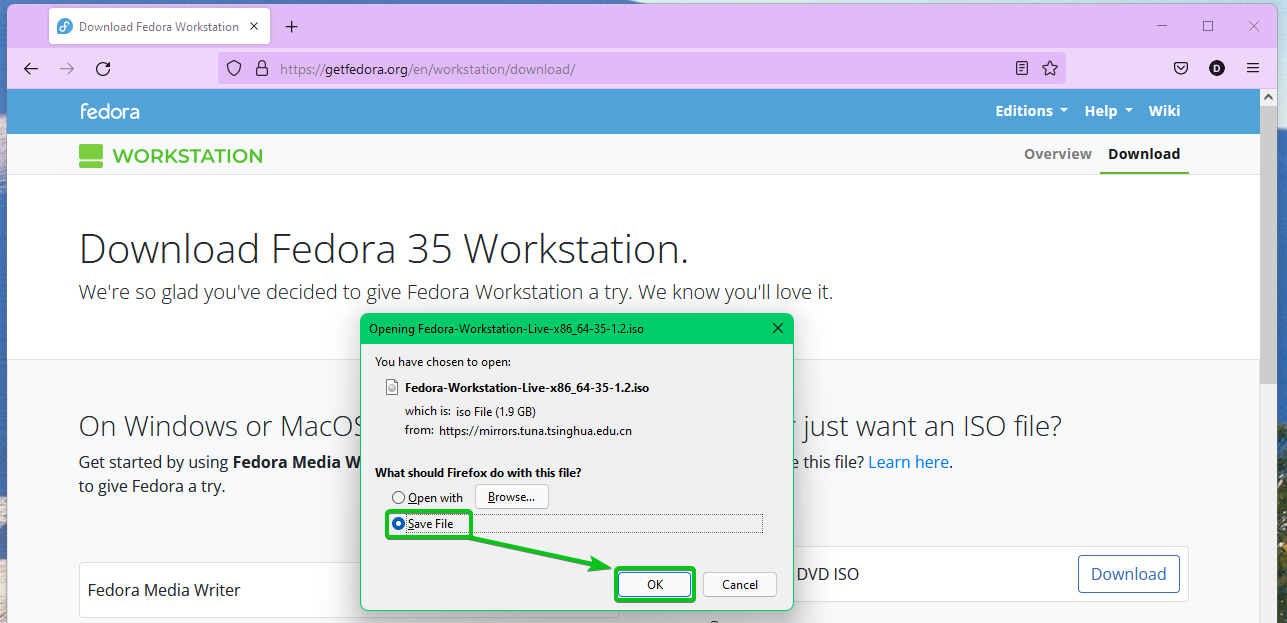
Your browser should prompt you to save the Fedora Workstation 35 ISO image. Select Save File and click on OK.
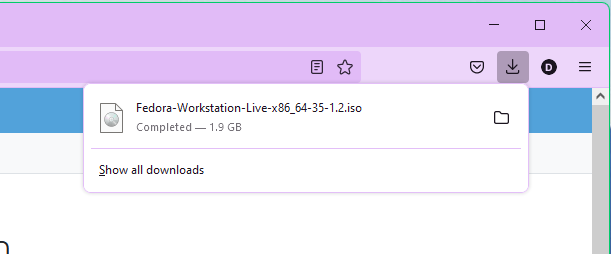
Your browser should start downloading Fedora Workstation 35 ISO image. It may take a while to complete.
At this point, the Fedora Workstation 35 ISO image should be downloaded.
Creating a Fedora Workstation 35 Bootable USB on Windows:
In this section, I am going to show you how to create a bootable USB thumb drive of Fedora Workstation 35 on Windows using Rufus so that you can use it to install Fedora 35 on your computer.
You can download Rufus from the official website of Rufus.
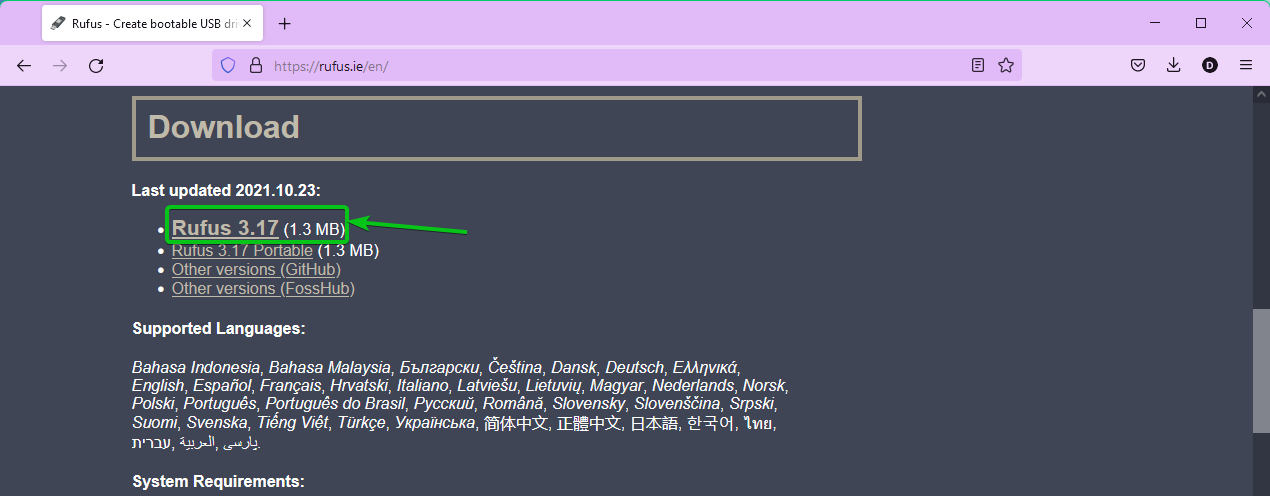
Visit https://rufus.ie/en/ from your favorite web browser and click on the Rufus download link as marked in the screenshot below.
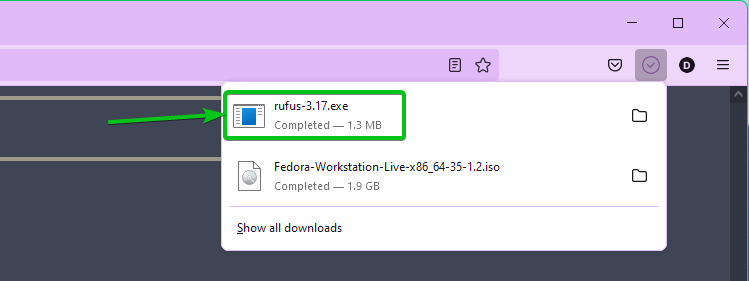
Your browser will prompt you to save Rufus. Click on Save File.
Rufus should be downloaded.
Insert a USB thumb drive on your computer and run Rufus.
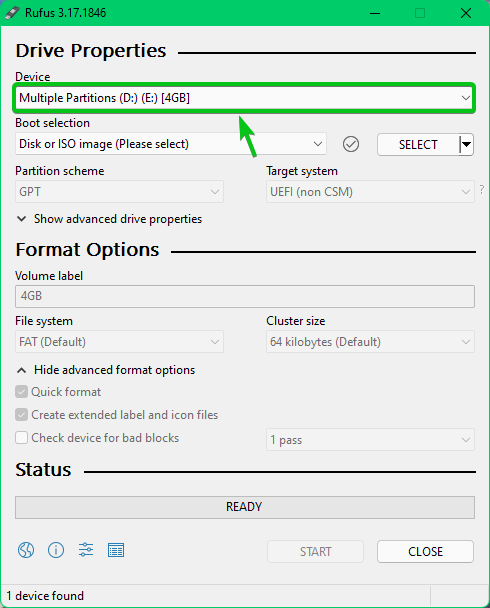
Rufus should be opened.
Select your USB thumb drive from the Device dropdown menu as marked in the screenshot below.
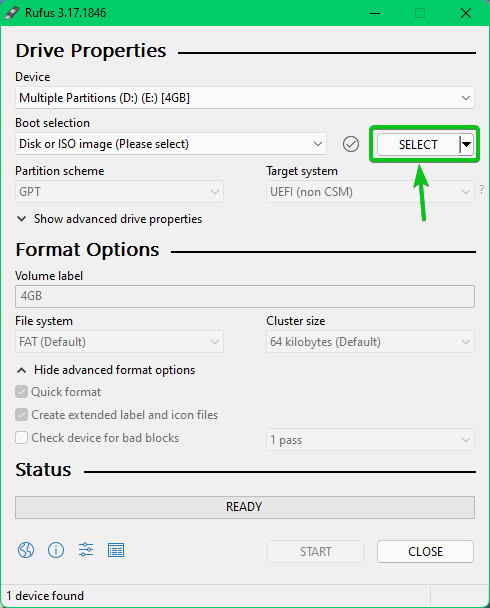
Click on SELECT.
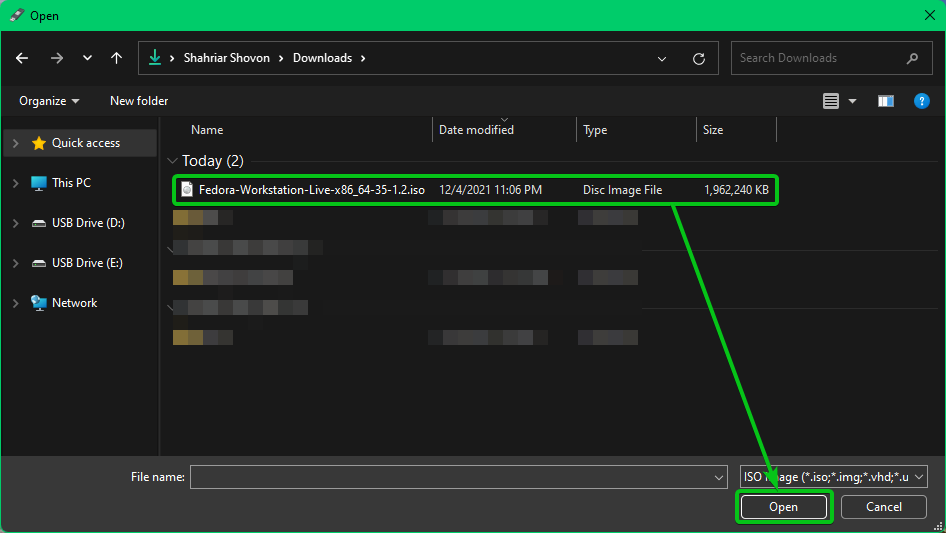
Select the Fedora Workstation 35 ISO image that you’ve just downloaded and click on Open.
Click on START.
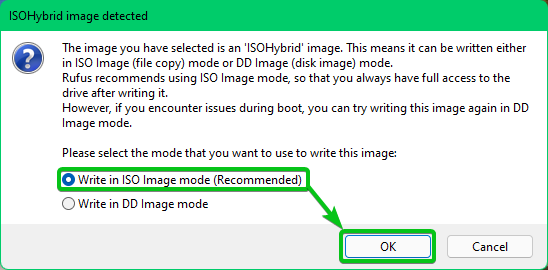
Select Write in ISO Image mode (Recommended) and click on OK.
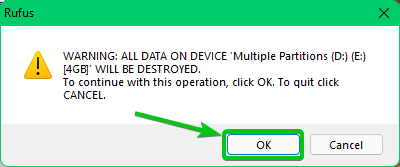
Click on OK.
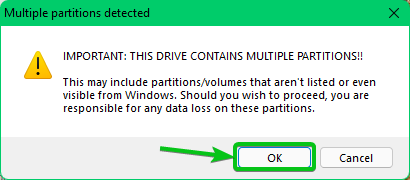
Click on OK.
Rufus will start copying all the required files to the USB thumb drive. It may take a while to complete.
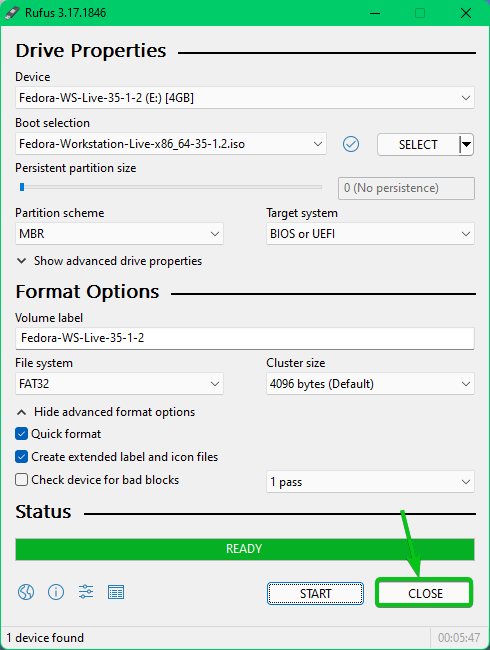
Once the USB thumb drive is READY, click on CLOSE.
You will be able to use this USB thumb drive to install Fedora Workstation 35 on your computer.
Creating a Fedora Workstation 35 Bootable USB on Linux:
In this section, I am going to show you how to create a Fedora Workstation 35 bootable USB thumb drive on Linux so that you can use it to install Fedora Workstation 35 on your computer.
Insert a USB thumb drive on your computer and run the following command to find the device name of your USB thumb drive. In my case, the device name is sda as you can see in the screenshot below.
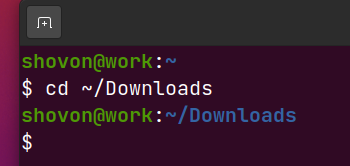
Navigate to the ~/Downloads directory as follows:
The Fedora Workstation 35 ISO image should be in the ~/Downloads directory as you can see in the screenshot below.
To write the Fedora Workstation 35 ISO image to the USB thumb drive, run the following command:
The Fedora Workstation 35 ISO image is being written to the USB thumb drive. It may take a while to complete.
At this point, the Fedora Workstation 35 ISO image should be written to the USB thumb drive.
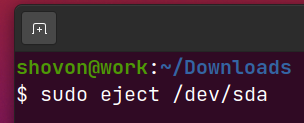
Eject the USB thumb drive with the following command:
Now, you will be able to use this USB thumb drive to install Fedora Workstation 35 on your computer.
Booting Fedora Workstation 35 Installer from USB:
The method to boot from the USB thumb drive depends on the motherboard you have on your computer. You will have to go to the BIOS of your computer and select the USB thumb drive to boot from it. Usually, you will be pressing keys like <F2>, <Del>, etc. just after pressing the power button of your computer. Please check the manual of your motherboard for more information.
Once you boot from the USB thumb drive, you should see the following window.
Select Start Fedora-Workstation-Live 35 and press <Enter>.
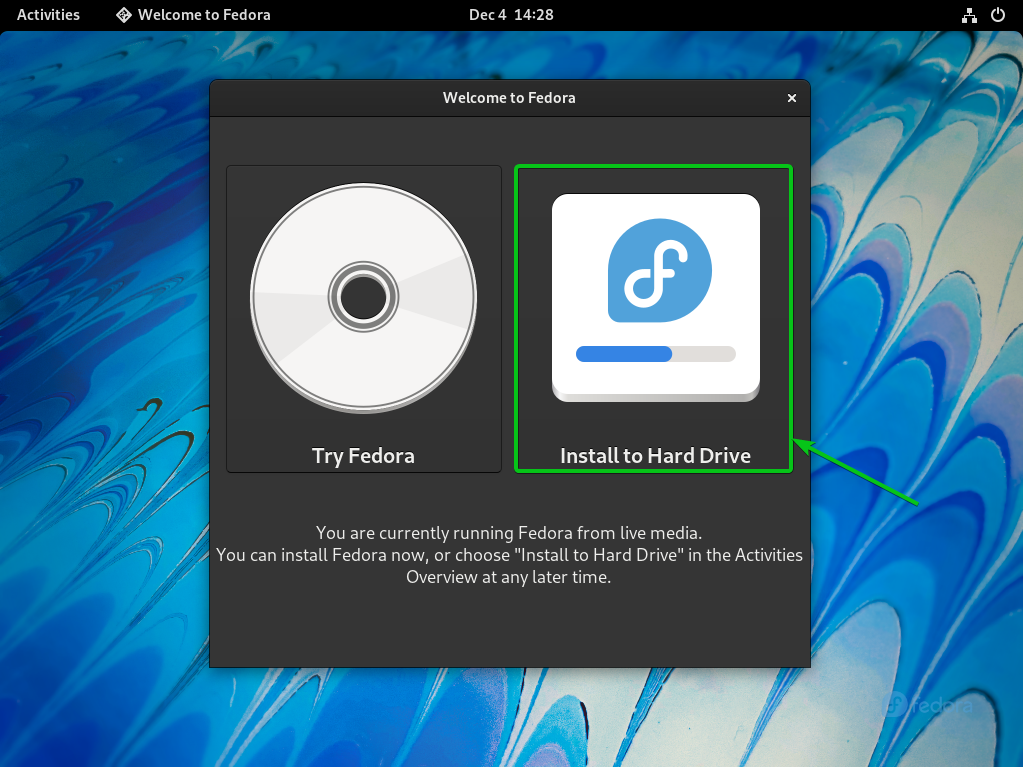
You can try Fedora Workstation 35 in Live mode from here and see how Fedora Workstation 35 performs on your computer. To do that, click on Try Fedora.
If you want to install Fedora Workstation 35 on your computer, click on Install to Hard Drive.
Once you click on the Install to Hard Drive icon, Fedora Workstation 35 installer should be opened. You can install Fedora Workstation 35 on your computer from here.
Installing Fedora Workstation 35:
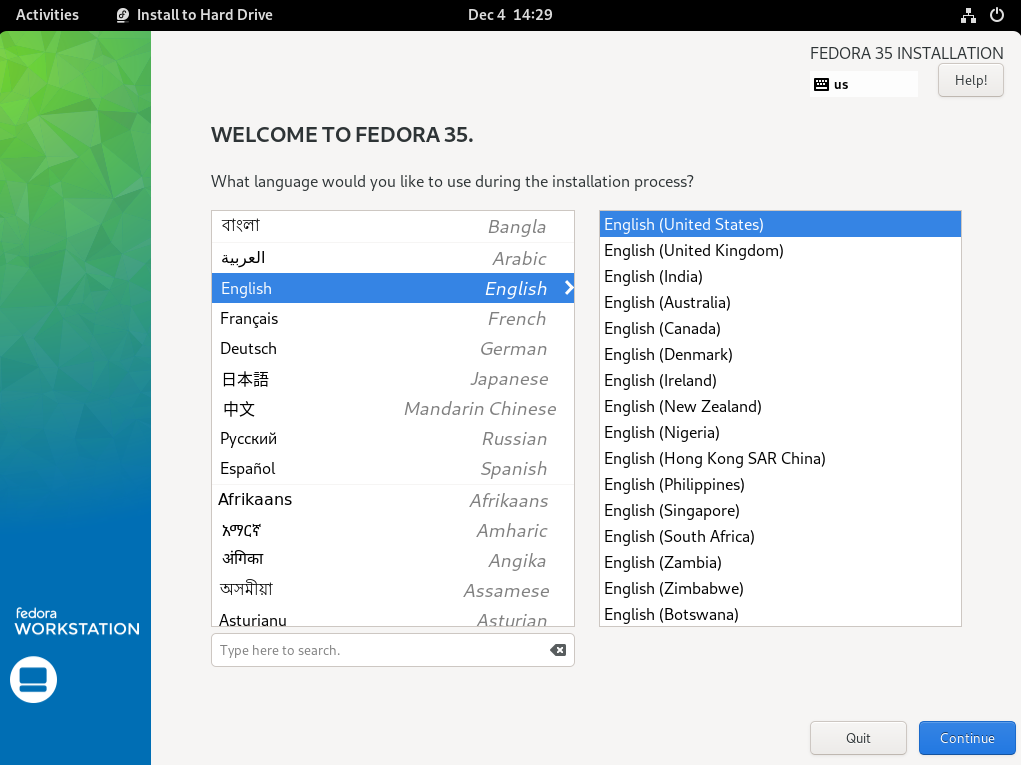
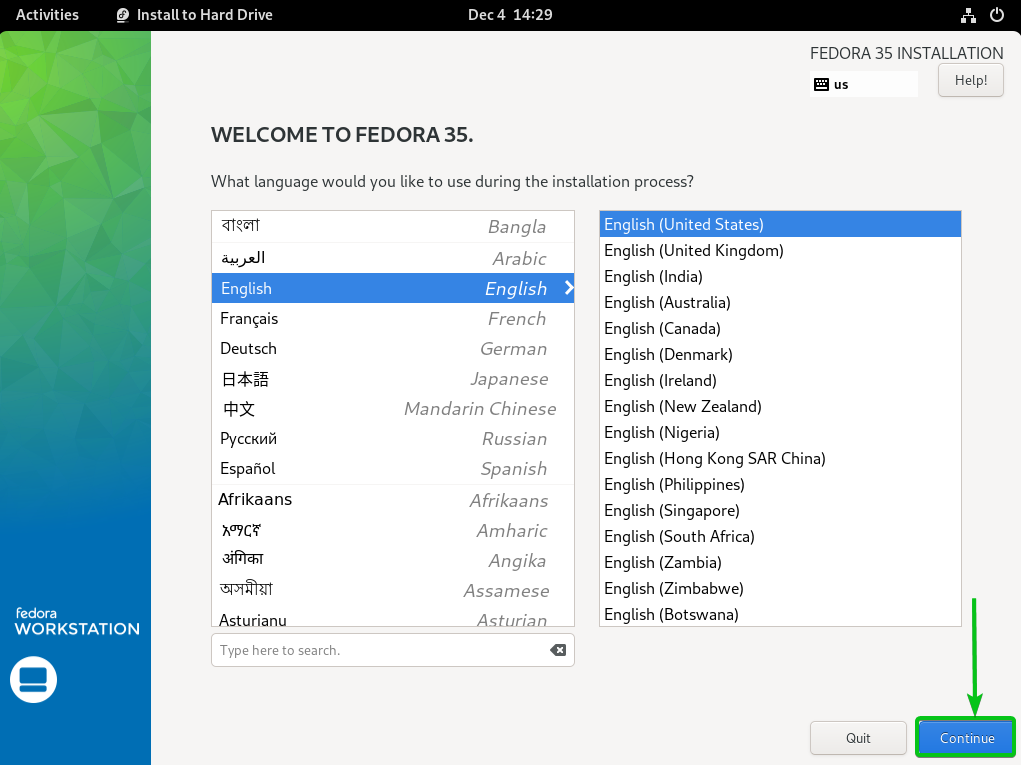
Select your language and click on Continue.
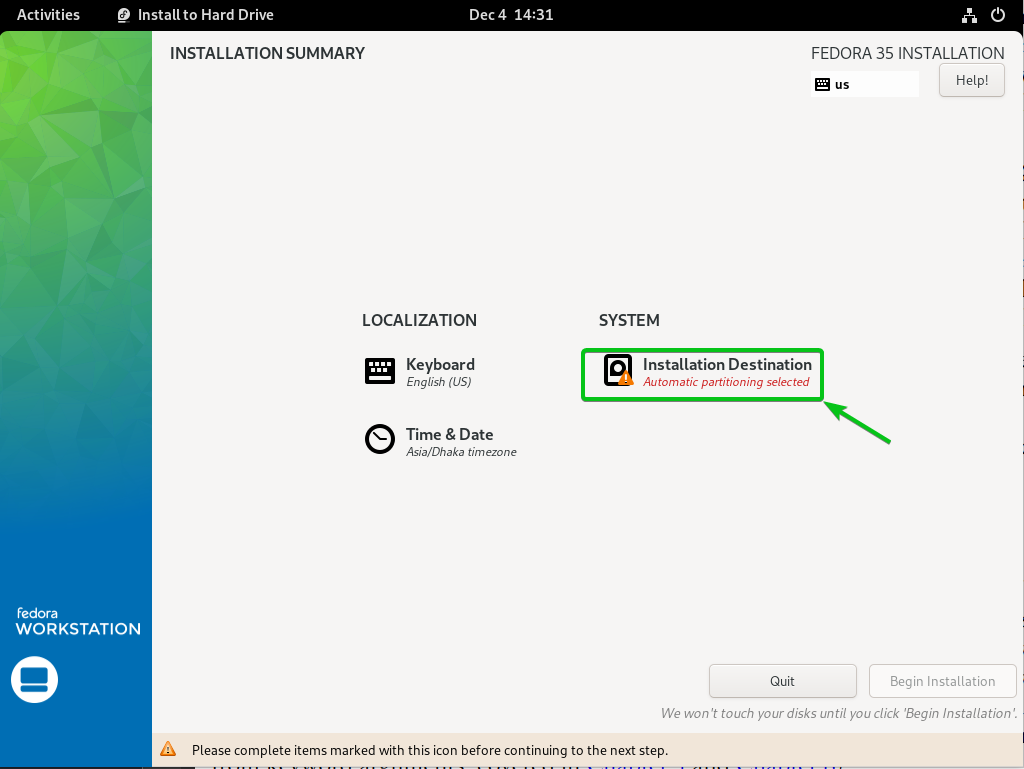
Click on Installation Destination.
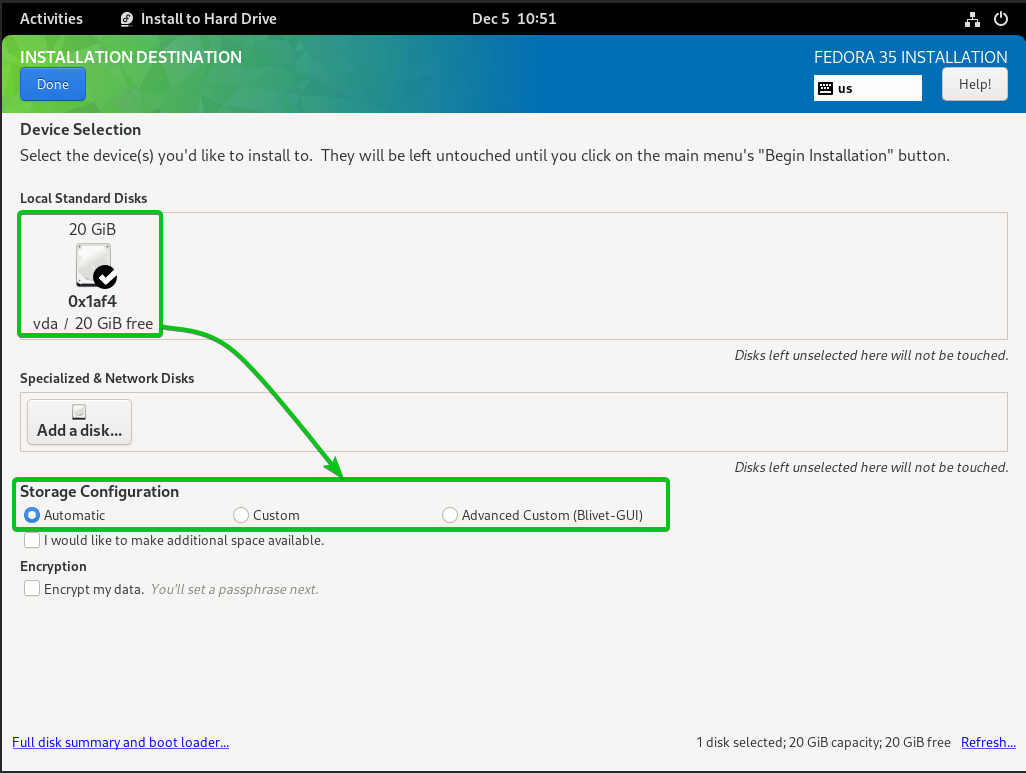
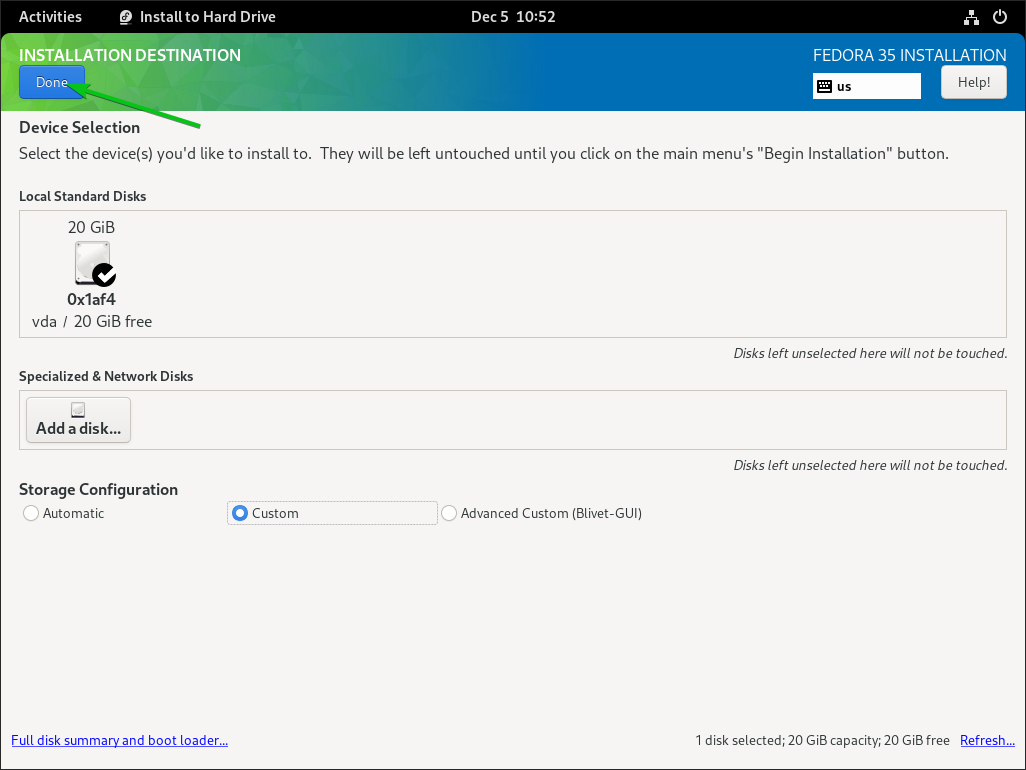
Select your storage device (HDD/SSD) from here and select a Storage Configuration.
Automatic: This storage configuration will automatically create all the required partitions on your selected storage device. In the process, your existing partitions might get deleted. This option is not recommended if you have important data or another operating system on the storage device. It is only helpful for new storage devices or if you don’t care about the data of the storage device.
Custom: This storage configuration will allow you to partition your selected storage device manually. It is useful if you have an operating system installed on the storage device or have any important data.
Advanced Custom (Blivet-GUI): This storage configuration also allows you to manually partition your selected storage device. It uses the Blivet-GUI for partitioning the storage device.
Once you’ve selected a storage device and a storage configuration, click on Done.
NOTE: In this article, I will show you how to manually partition your storage device using the Custom storage configuration.
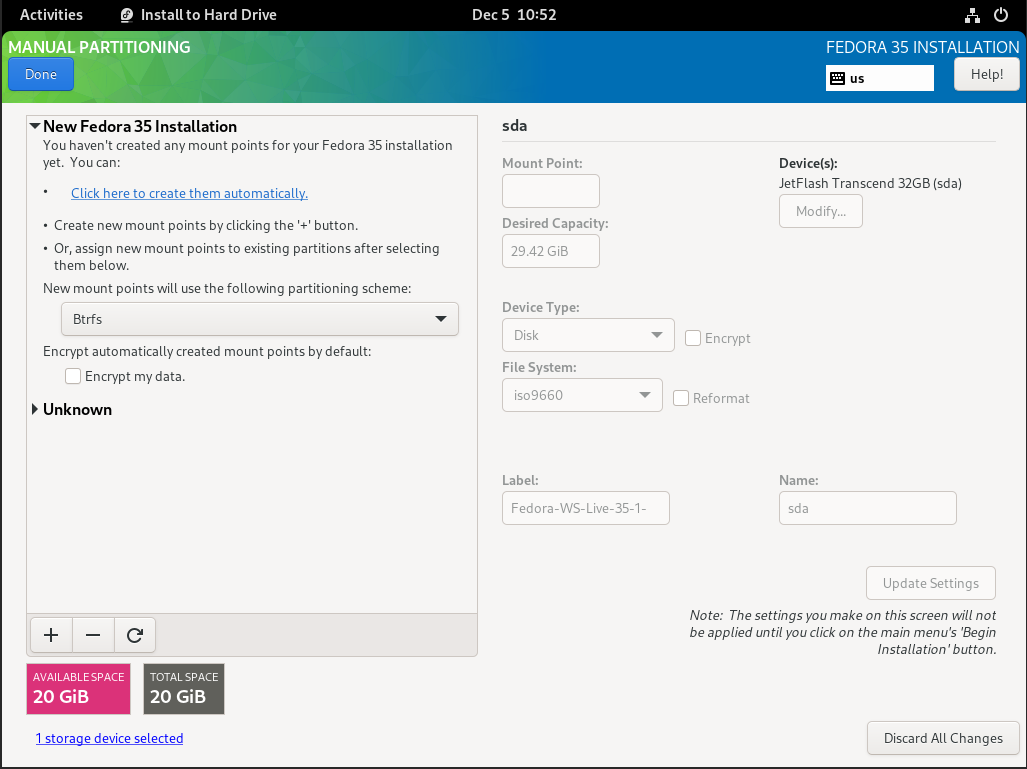
A new window will be displayed. You can partition your storage device from here.
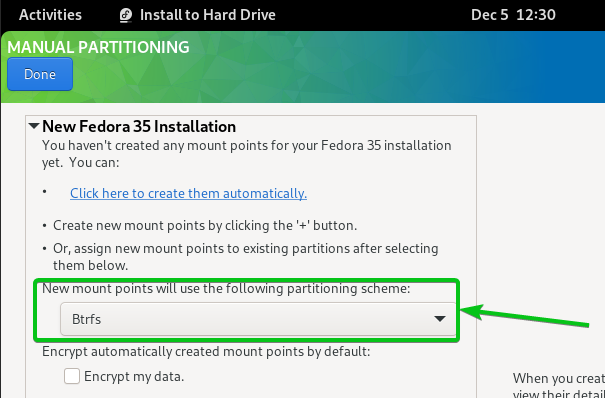
By default, Fedora Workstation 35 uses the Btrfs partitioning scheme. So, every partition you create will use the Btrfs filesystem.
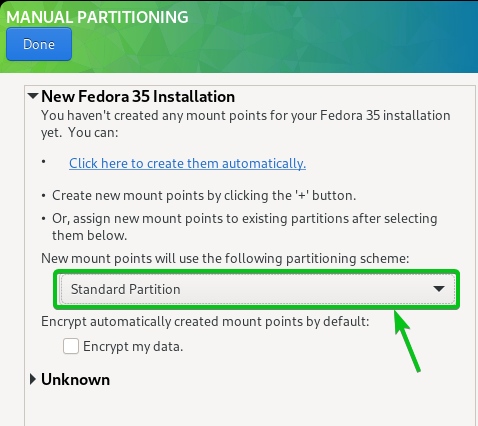
If you want, you can change the partitioning scheme using the marked dropdown menu.
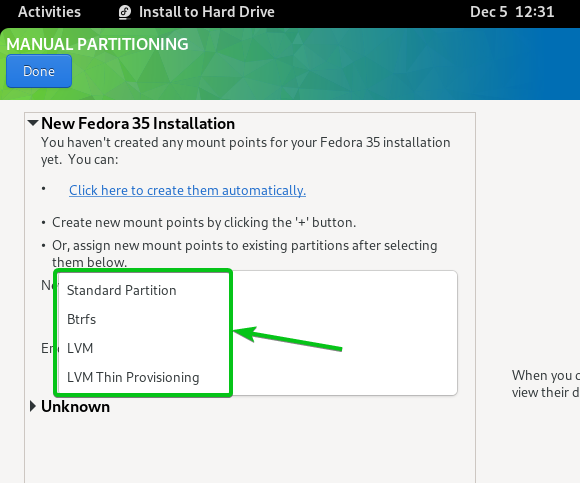
Fedora Workstation 35 allows you to use the following partitioning schemes:
Standard Partition: This scheme allows you to create partitions on the partition table (MBR or GPT) of your storage device and select your own filesystem for each of the partitions. This is the most widely supported partitioning scheme.
Btrfs: This scheme uses Btrfs to manage the partitions of the storage device.
LVM and LVM Thin Provisioning: These schemes use LVM (Logical Volume Manager) to manage partitions of the storage device.
I am going to use the Standard Partition scheme in this article.
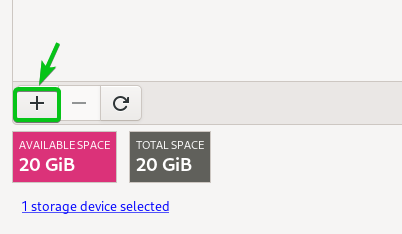
To create a new partition on the storage device, click on + as marked in the screenshot below.
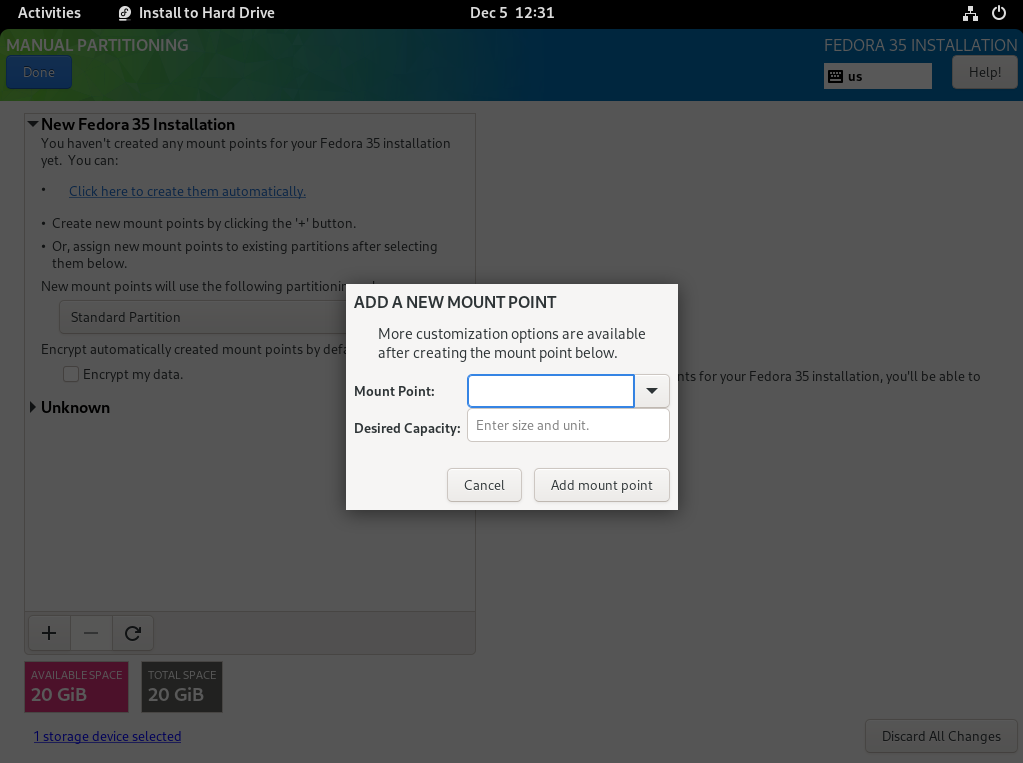
Now, select a Mount point from the dropdown menu, type in your Desired Capacity, and click on Add mount point.
To install Fedora Workstation 35, you will need to create at least 2 partitions.
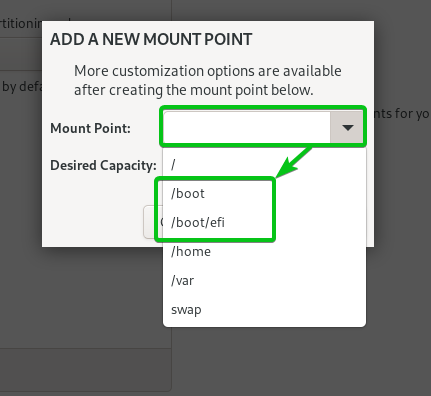
A boot (/boot) partition if you’re using a BIOS-based motherboard. Or, an EFI System Partition (/boot/efi)if you’re using a UEFI-based motherboard.
A root (/) partition.
Let’s create the boot partition or EFI System Partition first.
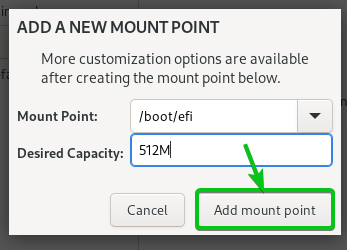
From the Mount point dropdown menu, select /boot if you’re using a BIOS-based motherboard. Select /boot/efi if you’re using a UEFI-based motherboard.
512 MB of disk space is enough for the boot partition or EFI System Partition. So, type in 512M in the Desired Capacity section and click on Add mount point.
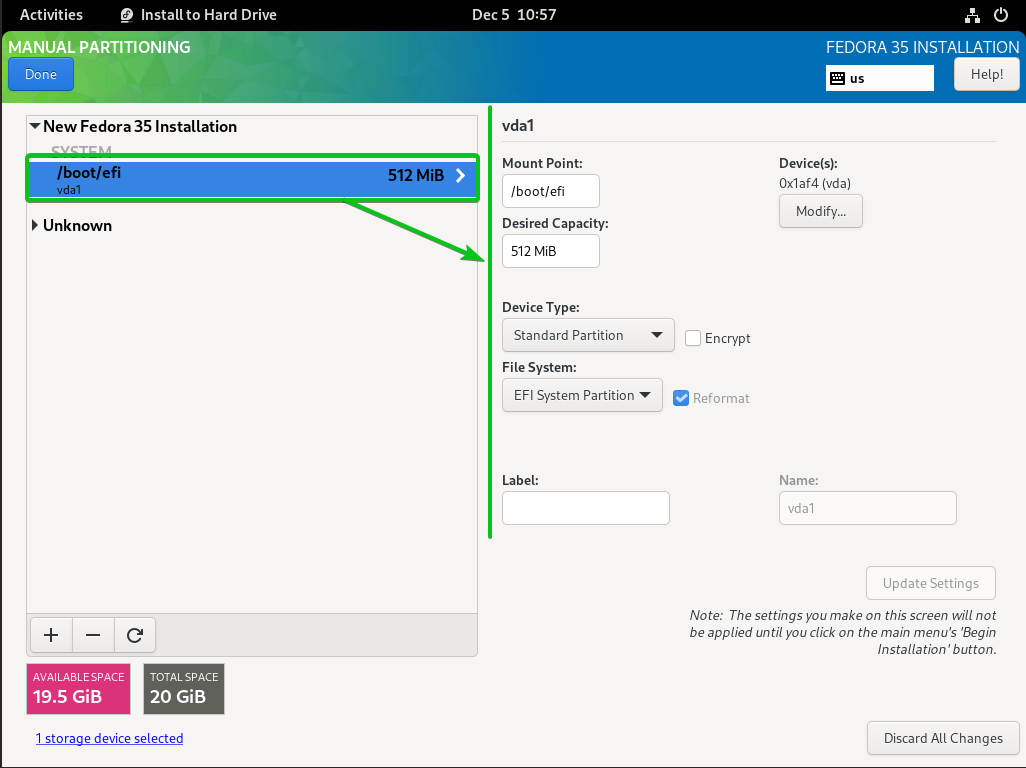
A new boot partition or EFI System Partition should be created.
NOTE: I have created an EFI System Partition as I am running a UEFI-based motherboard.
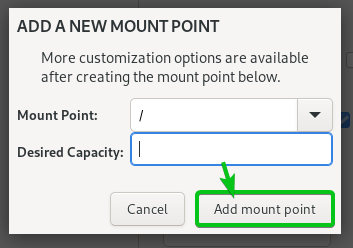
To create a root partition, select / from the Mount point dropdown menu.
Type in the size of the root partition in the Desired Capacity section. If you want to use all the available free disk space for the root partition, leave it blank.
Once you’re done, click on Add mount point.
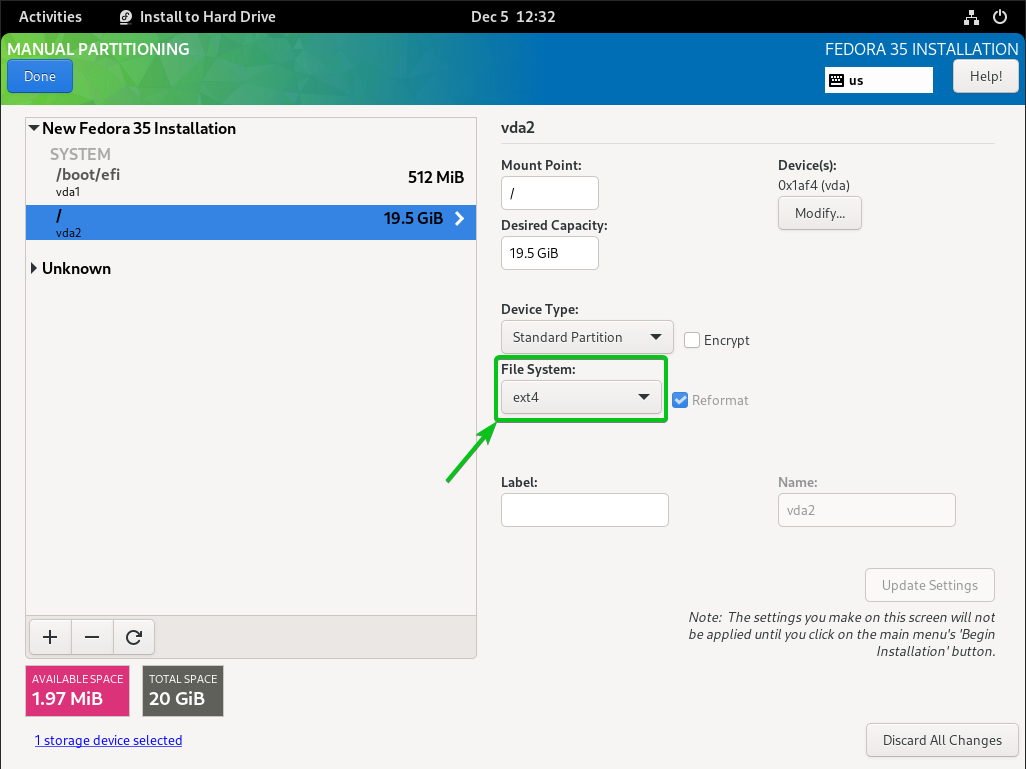
A root partition should be created.
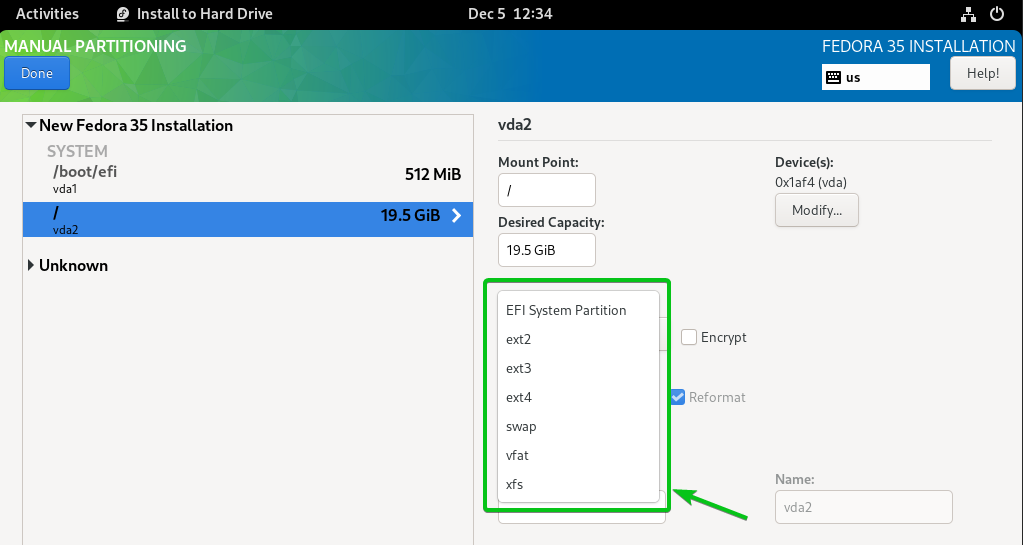
If you’ve selected the Standard Partition scheme, then the root partition will use the ext4 file system by default. You can click on the File System dropdown menu if you want to change it to something else.
Fedora Workstation 35 supports the following filesystems for the Standard Partition scheme.
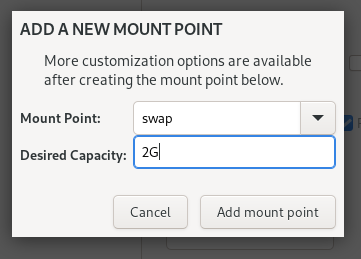
Optionally, you can create a 2 GB swap partition with the following settings if you want.
NOTE: Adjust the swap partition size depending on your requirement.
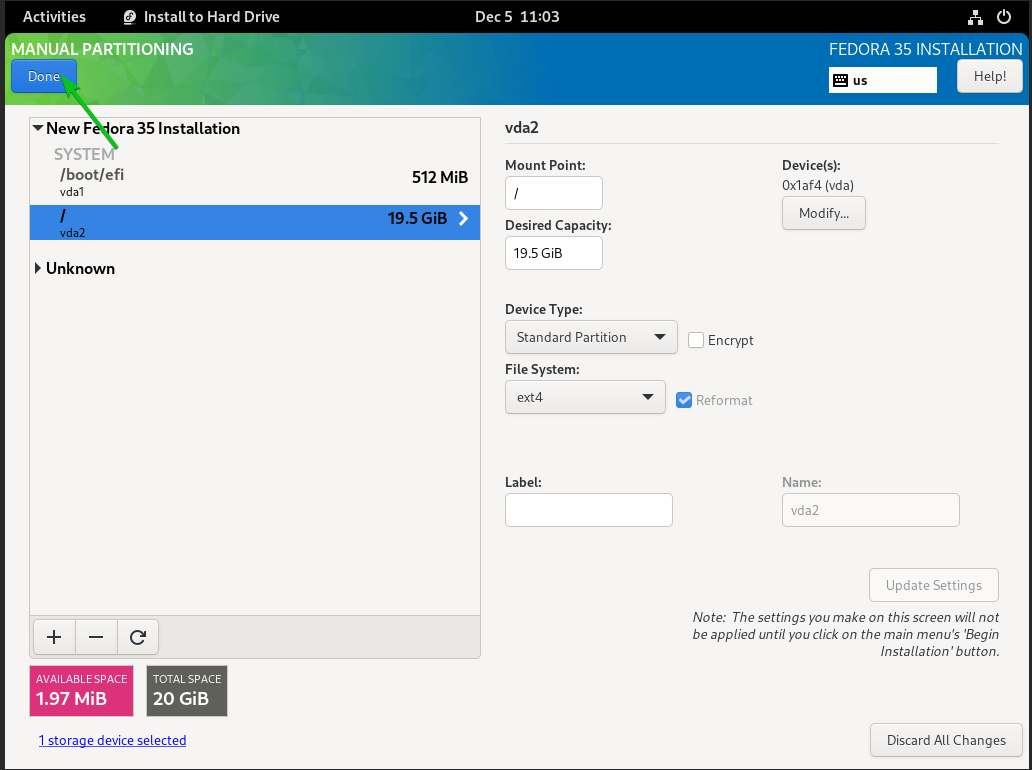
Once you’re done partitioning the storage device, click on Done.
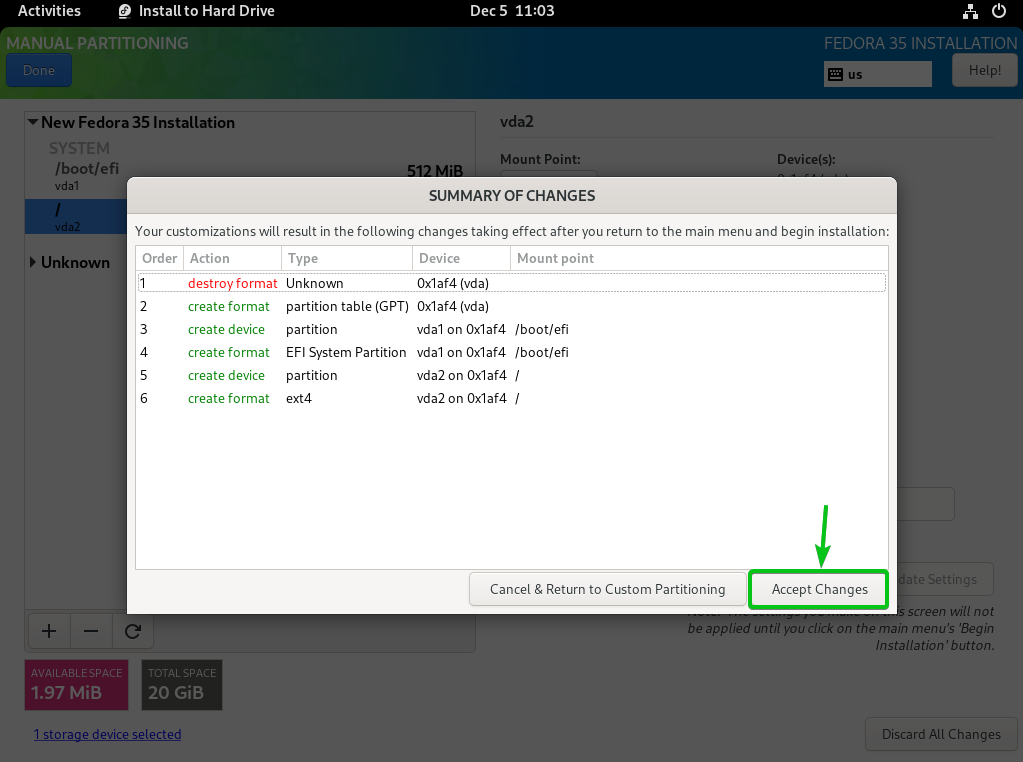
A summary of all the changes to be made to the storage device should be displayed.
To accept the changes, click on Accept Changes.
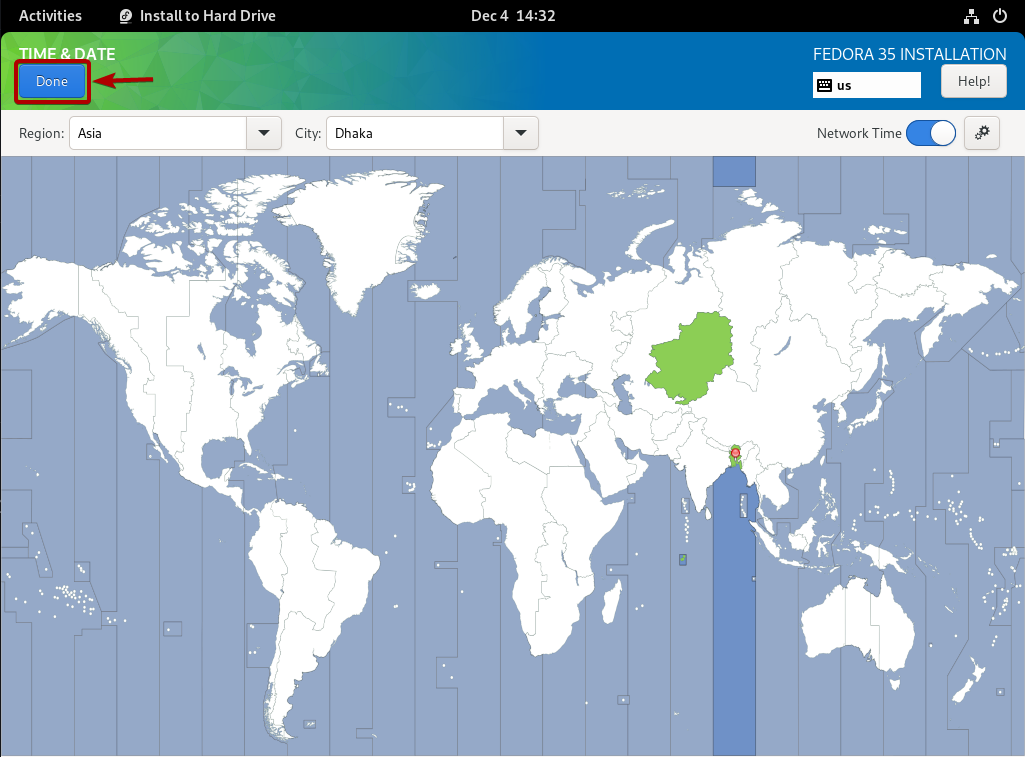
To select a timezone, click on Time & Date.
Select your region and city from the Region and City dropdown menus respectively.
Once you’ve configured the timezone, click on Done.
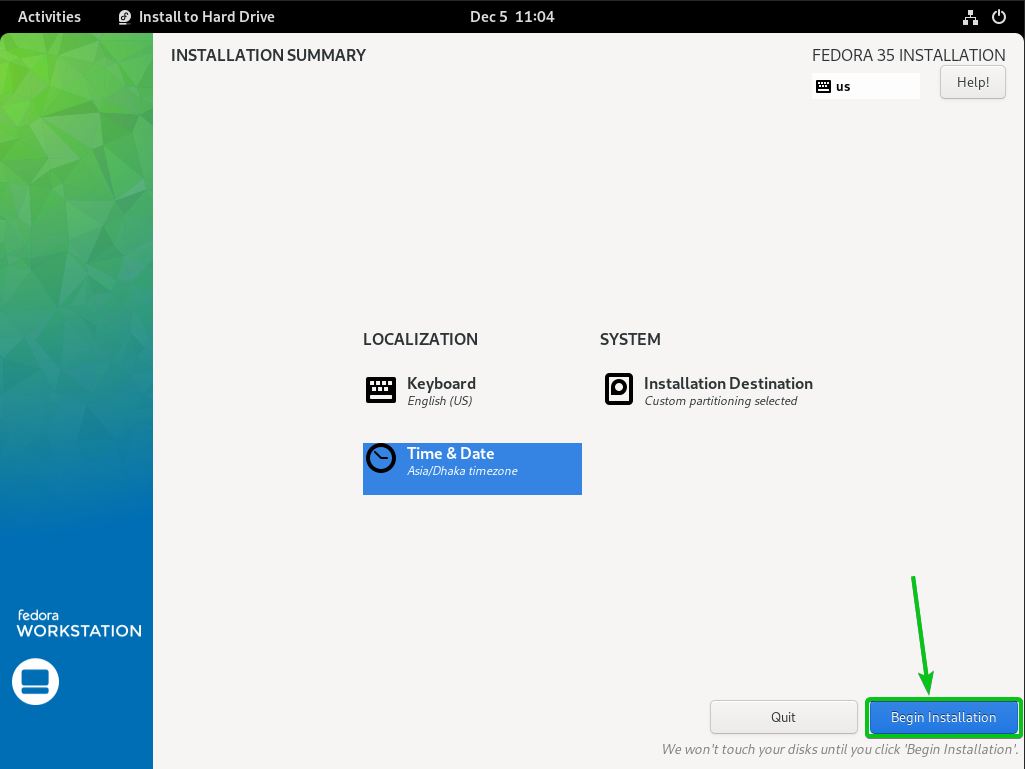
Click on Begin Installation.
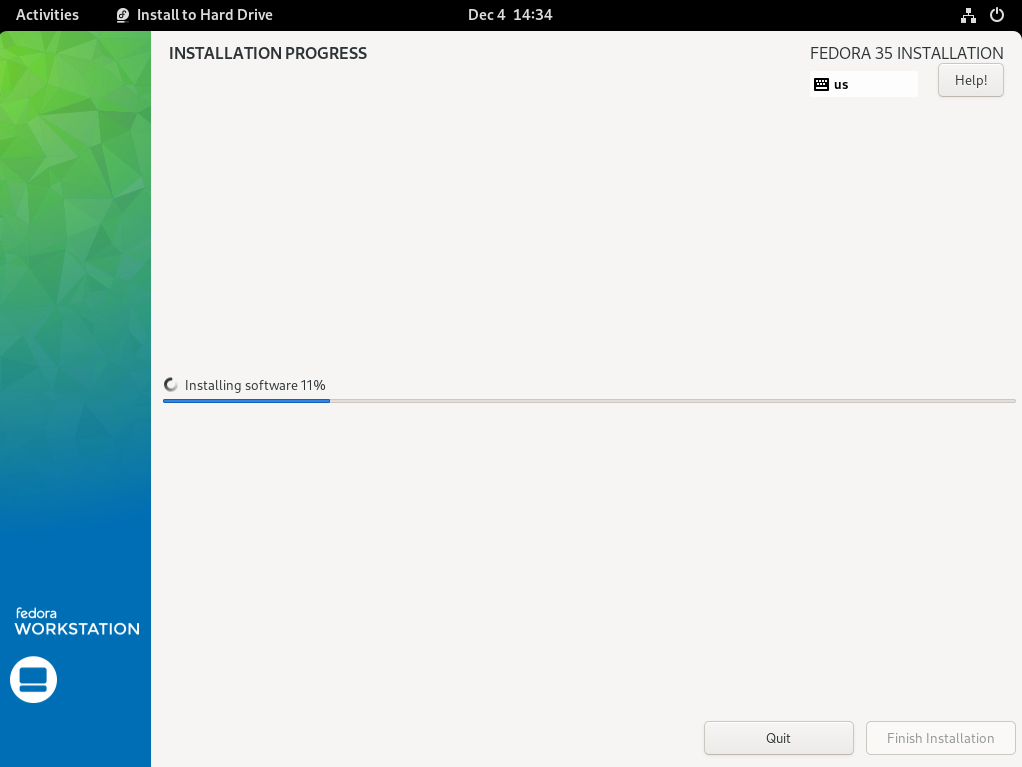
Fedora Workstation 35 is being installed. It may take a while to complete.
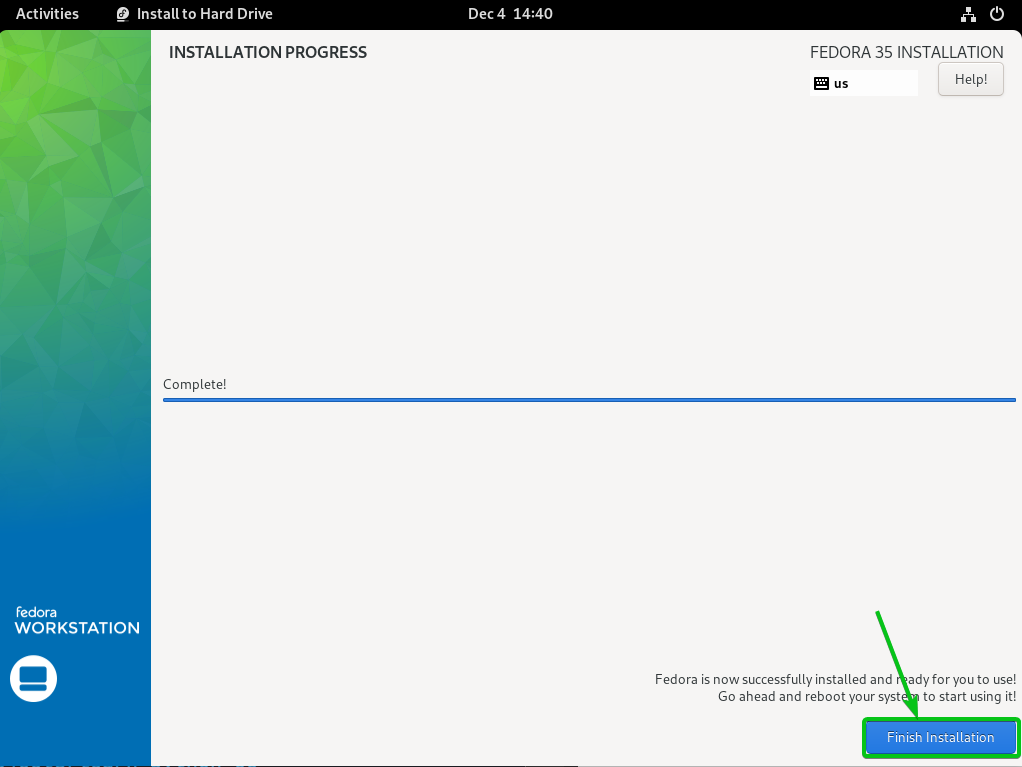
Once Fedora Workstation 35 is installed on your computer, click on Finish installation.
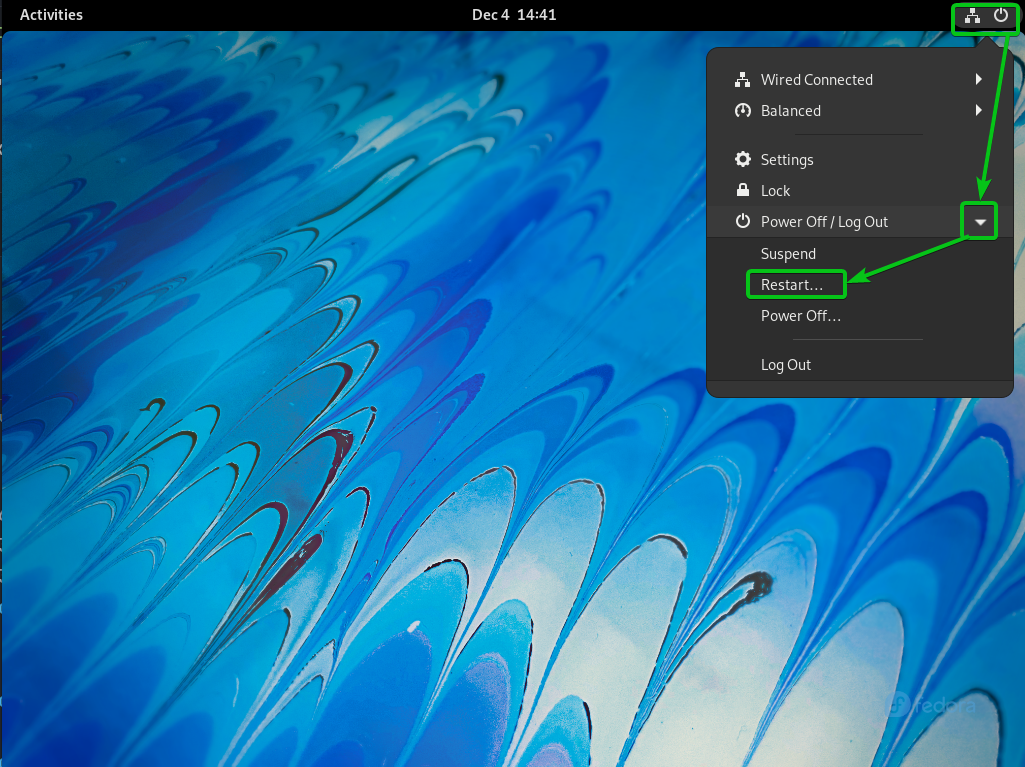
Now, click on System Tray > Power Off/Log Out > Restart… to restart your computer.
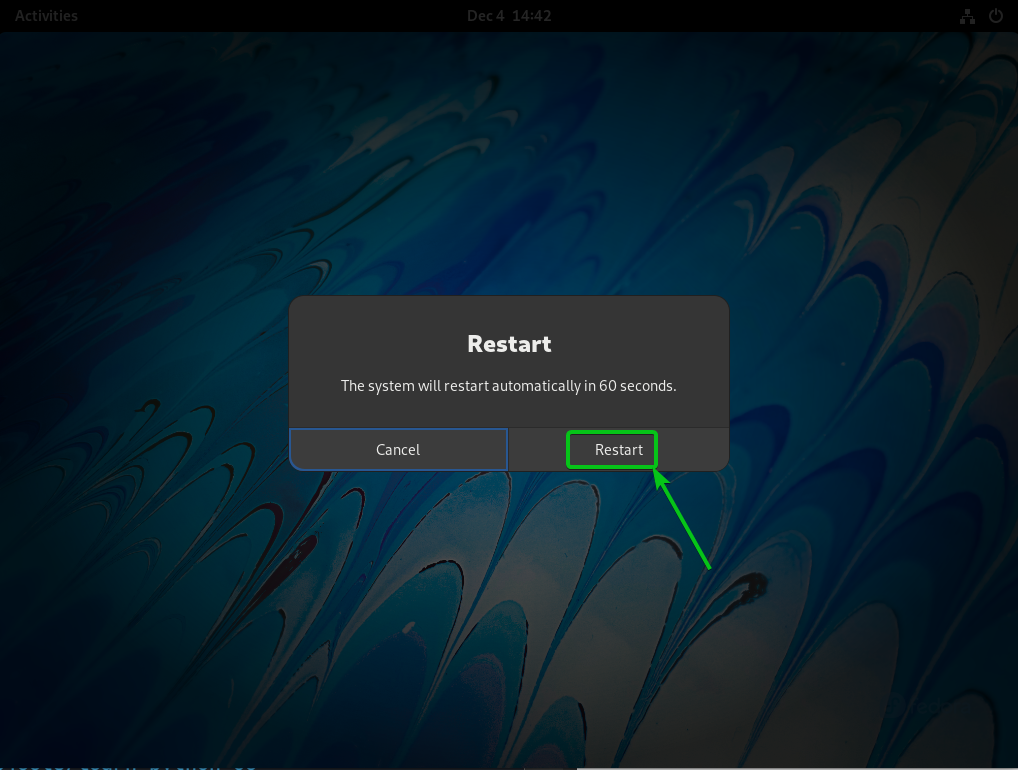
Click on Restart. Your computer will restart. Now, you can remove the USB thumb drive from your computer.
Booting Fedora Workstation 35:
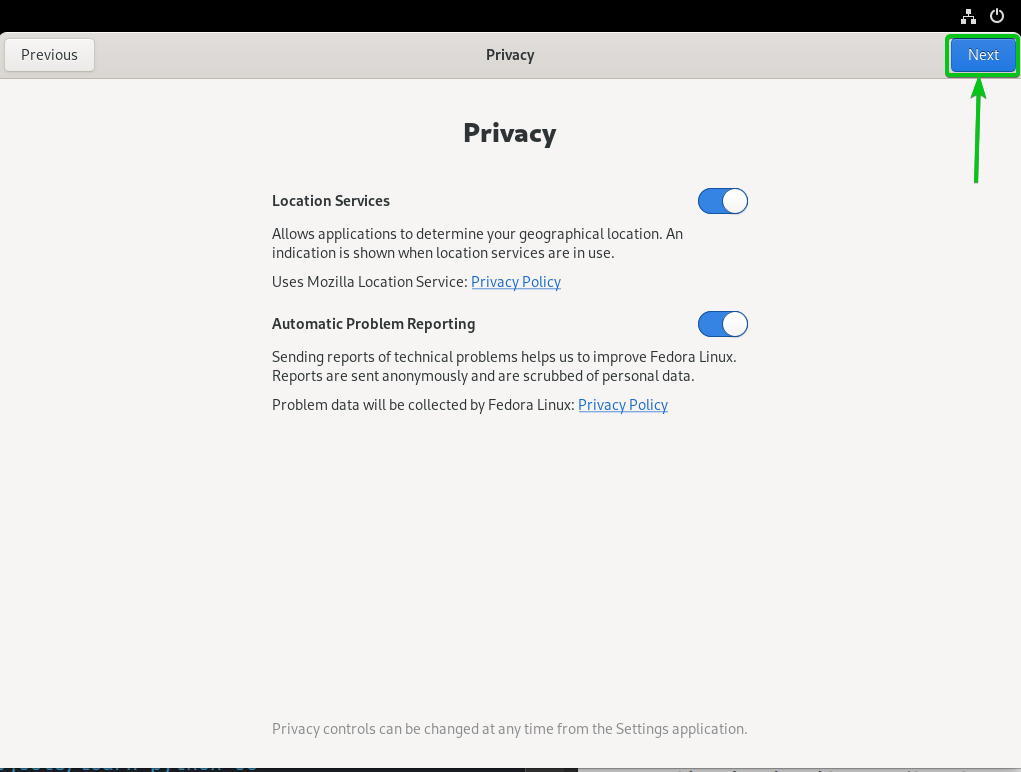
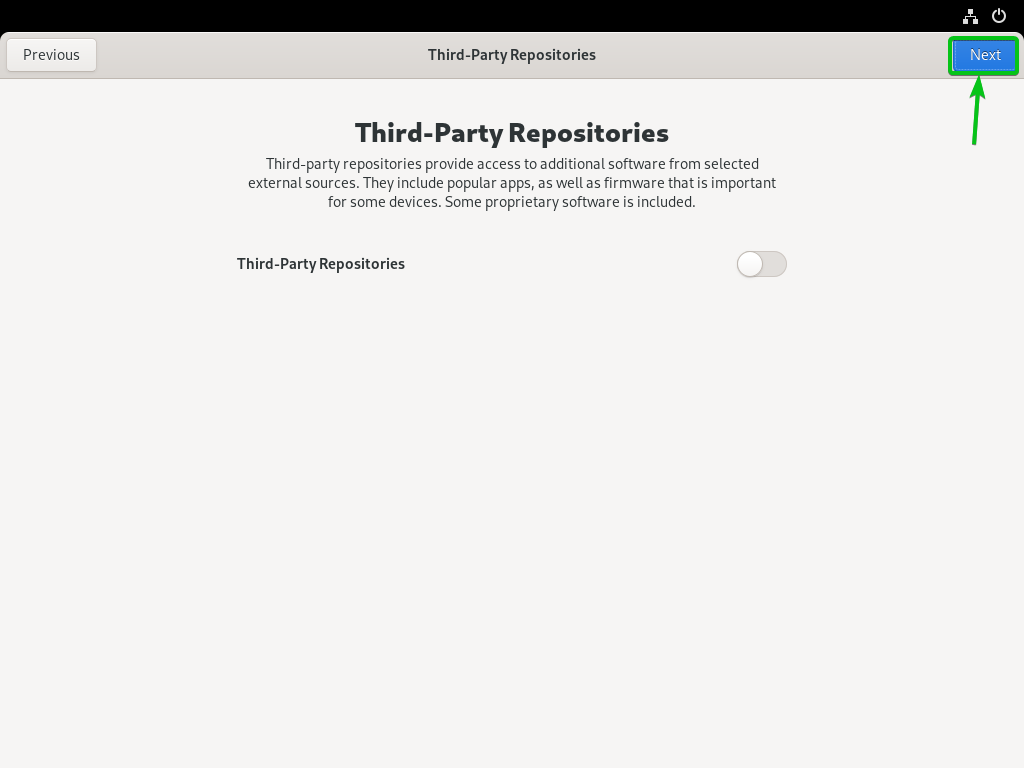
The first time you boot Fedora Workstation 35 on your computer, you will have to do some initial configuration.
Click on Start Setup.
Click on Next.
Click on Next.
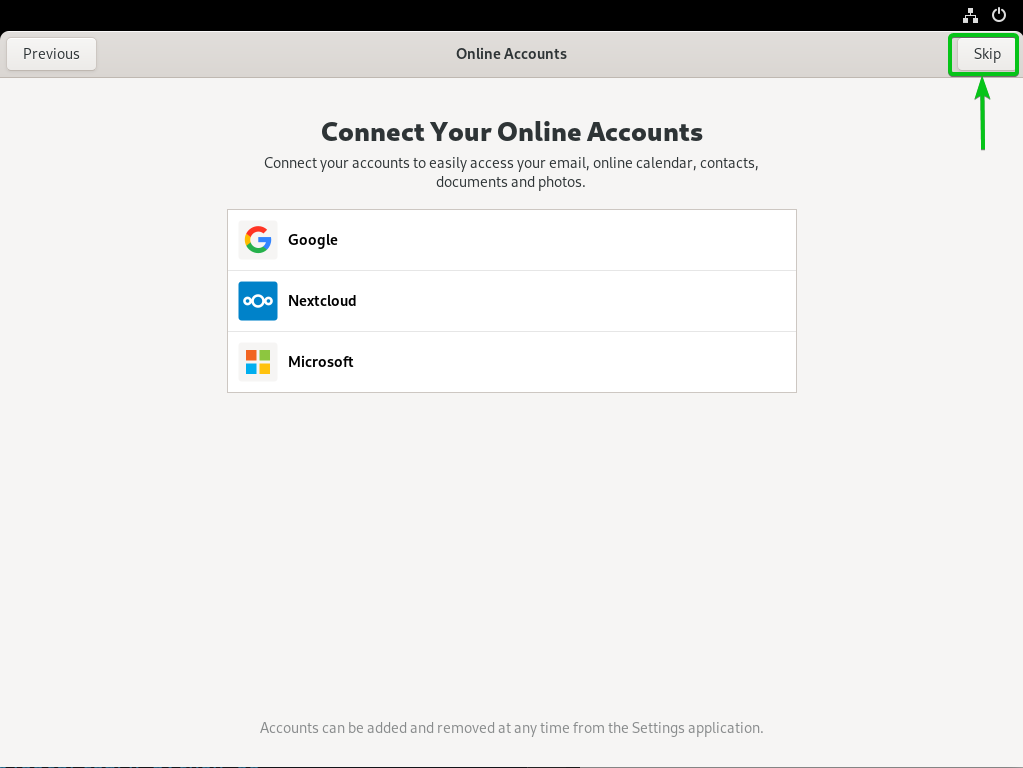
Click on Skip.
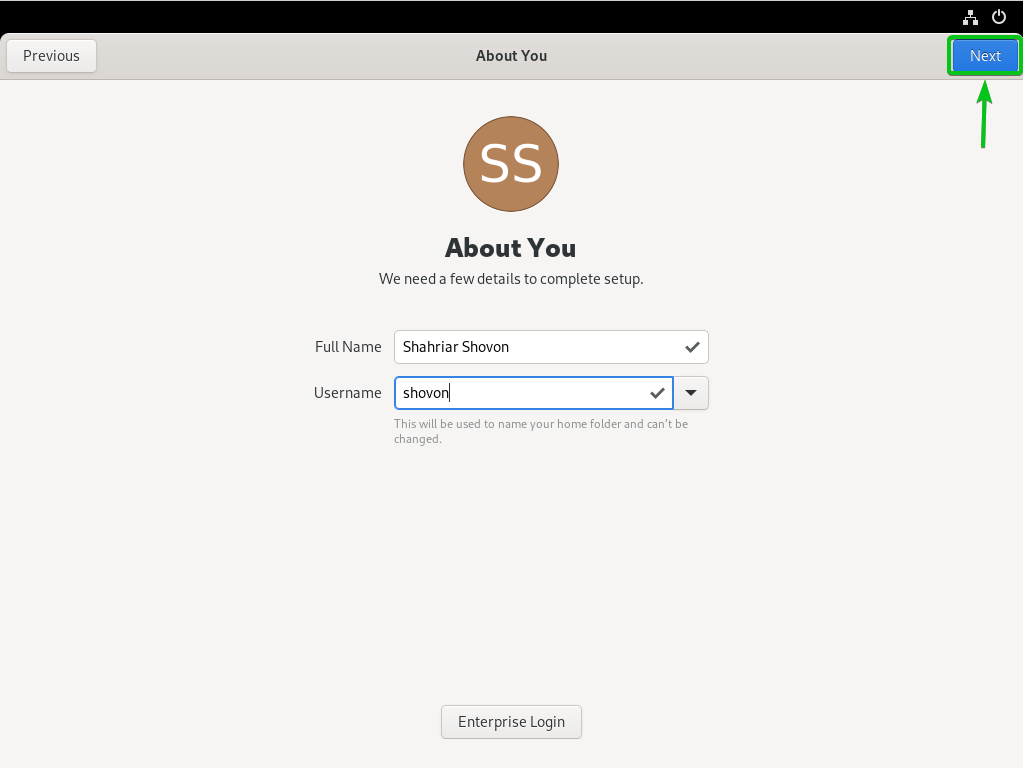
Type in your name and username and click on Next.
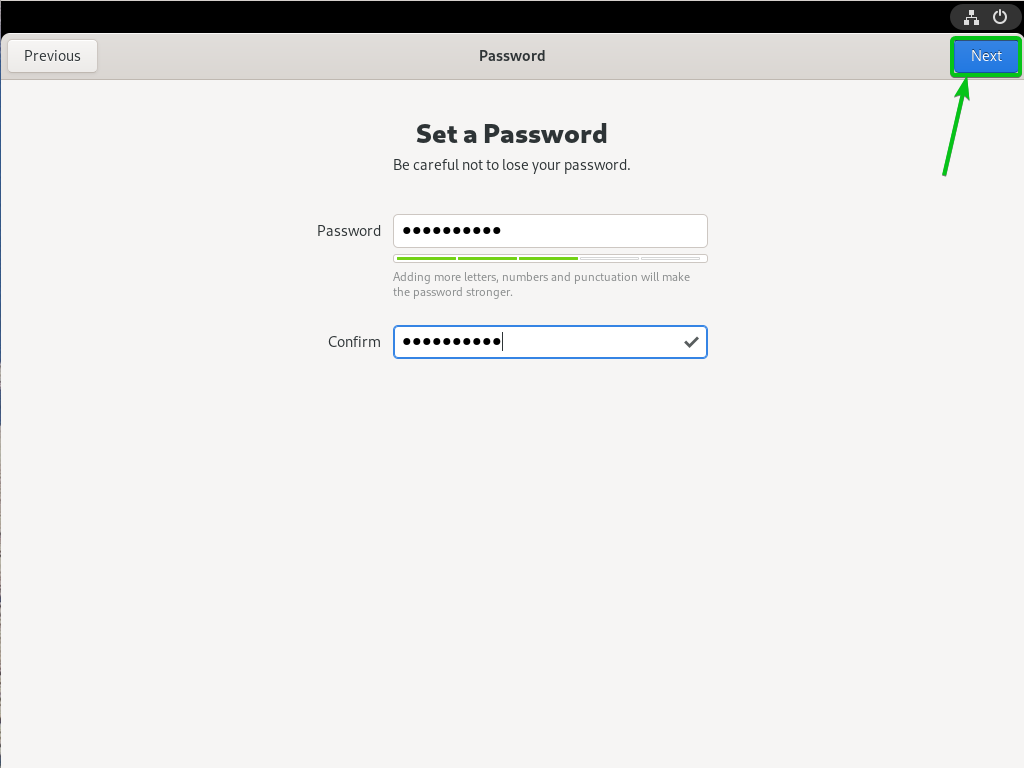
Type in your login password and click on Next.
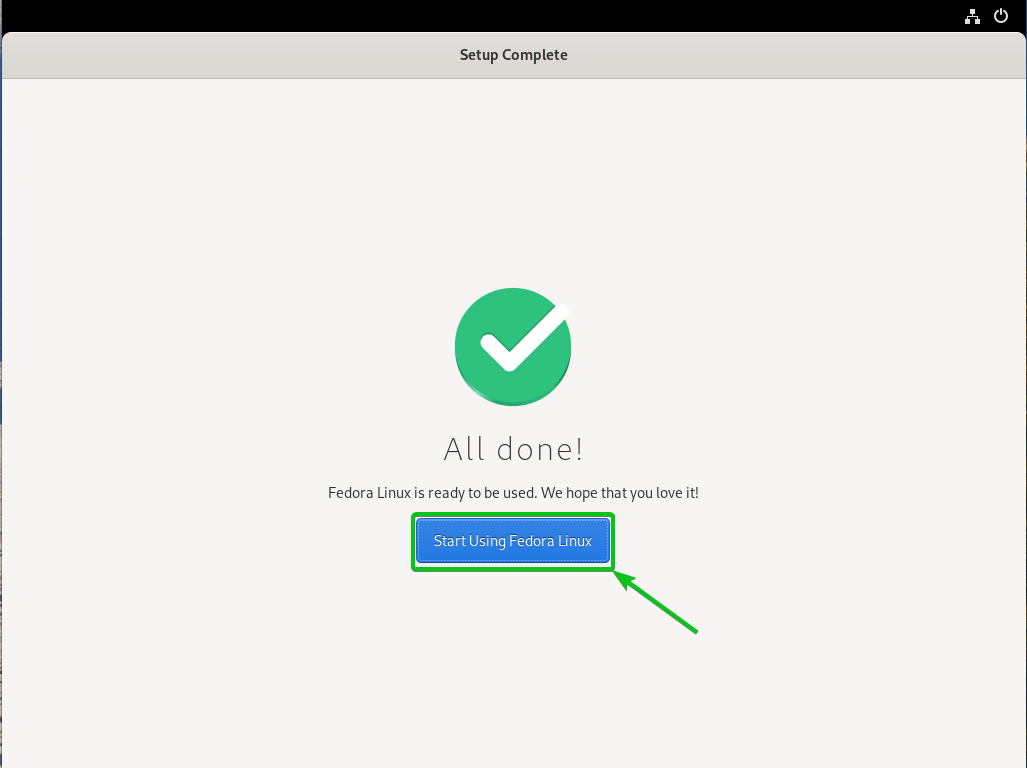
Click on Start Using Fedora Linux.
Click on No Thanks.
Fedora Workstation 35 should be ready to use.
Conclusion:
In this article, I have shown you how to download the Fedora Workstation 35 ISO image. I have also shown you how to create a USB thumb drive of Fedora Workstation 35 on Windows and Linux. I have shown you how to install Fedora Workstation 35 on your computer and do the initial setup as well.

