FreeBSD

Install and Configure KVM on FreeBSD

KVM stands for Kernel-based Virtual Machine, and it is open-source virtualization software that lets you create virtual machines. It comes built into Linux and allows the user to create a hypervisor by which several virtual environments are completely isolated from one another can be hosted.

This post will illustrate in a step by step detail the procedure for setting up and configuring the latest FreeBSD 12.0 on KVM. The tutorial assumes that you’re using one of the Linux distributions on your local machine.

Prerequisites

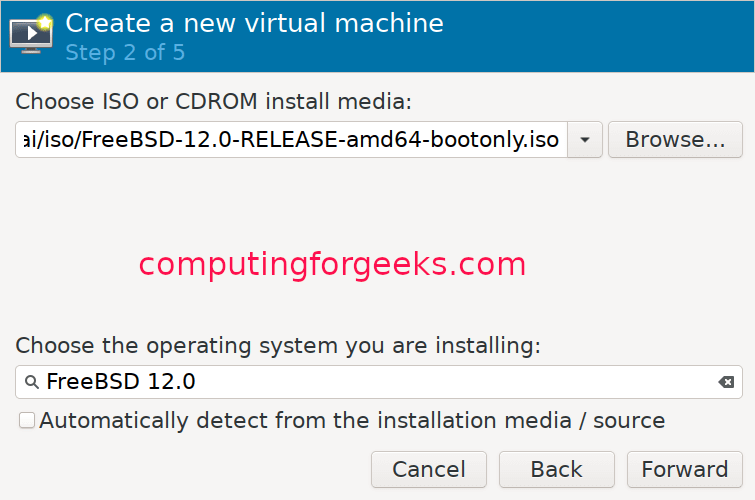
Create a new virtual machine as follows:

https://computingforgeeks.com/wp-content/uploads/2019/10/how-to-install-freebsd-kvm-01-1.png

Select the operating system type:

https://computingforgeeks.com/wp-content/uploads/2019/10/how-to-install-freebsd-kvm-02-1.png

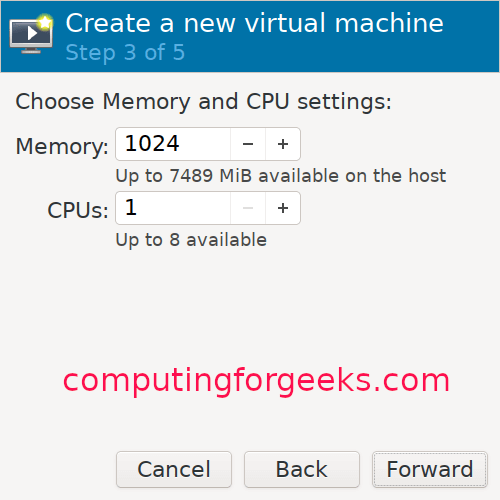
Allocate some memory to your virtual machine and configure CPU settings:

https://computingforgeeks.com/wp-content/uploads/2019/10/how-to-install-freebsd-kvm-03-1.png

https://computingforgeeks.com/wp-content/uploads/2019/10/how-to-install-freebsd-kvm-03-1.png

Allocate a disk size for your VM:

https://computingforgeeks.com/wp-content/uploads/2019/10/how-to-install-freebsd-kvm-04-1.png

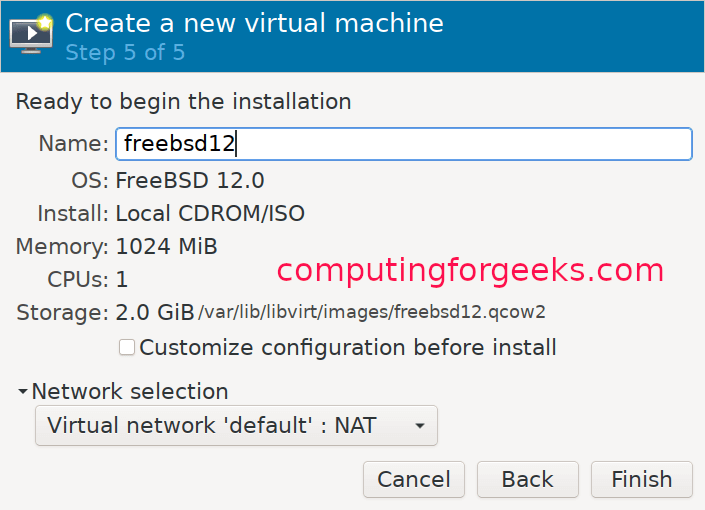
Give your VM a name:

https://computingforgeeks.com/wp-content/uploads/2019/10/how-to-install-freebsd-kvm-05-1.png

FreeBSD KVM Installation Guide

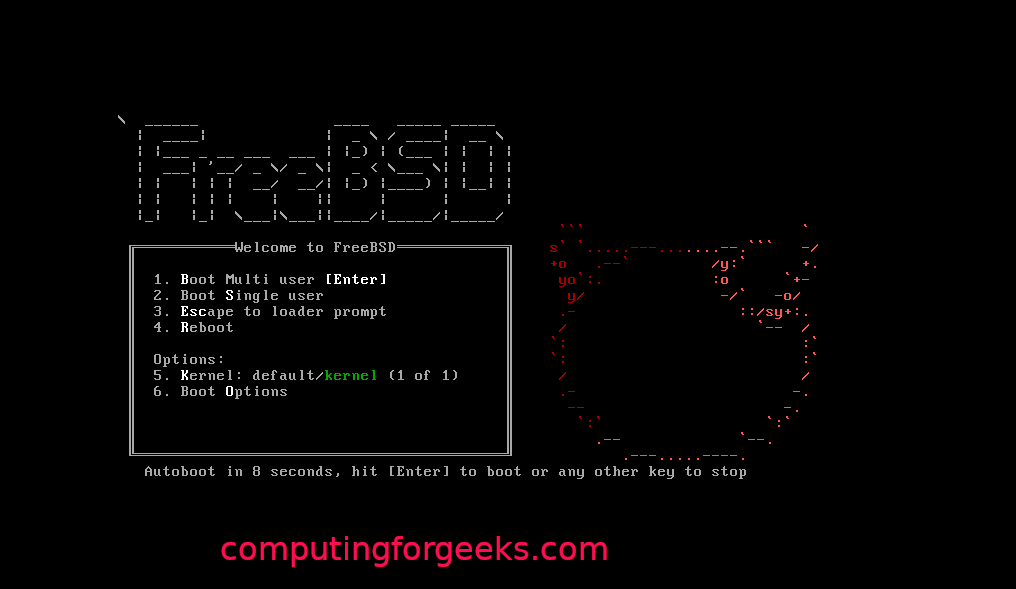
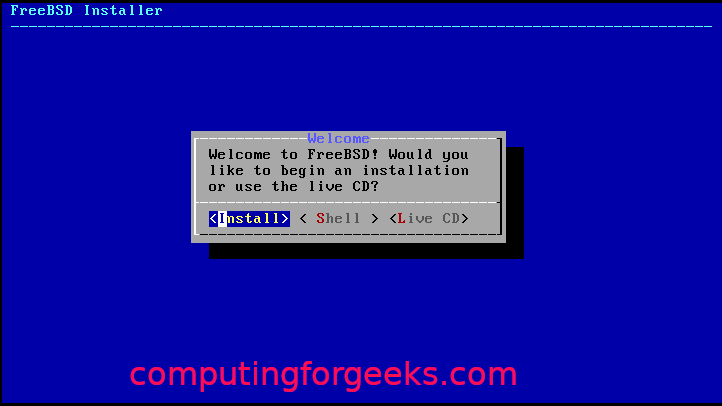
Once the VM creation is finished, the installer will start automatically. Press enter to continue, as shown below:

https://computingforgeeks.com/wp-content/uploads/2019/10/how-to-install-freebsd-kvm-06-1.png
Click the install button to continue:

https://computingforgeeks.com/wp-content/uploads/2019/10/how-to-install-freebsd-kvm-07-1.png

Choose one of the keymaps, then give your VM a hostname:

https://computingforgeeks.com/wp-content/uploads/2019/10/how-to-install-freebsd-kvm-09-1.png

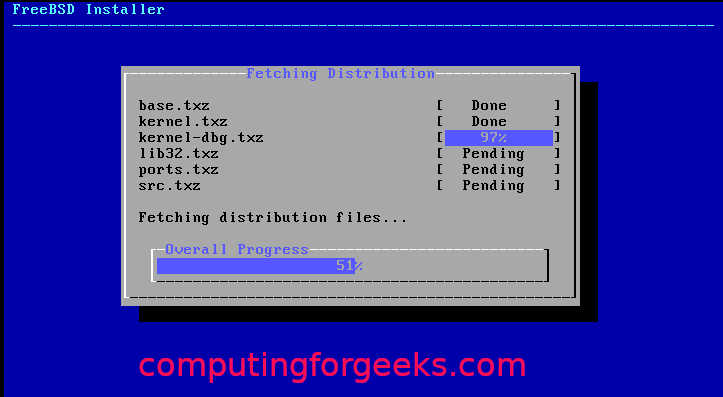
Select the FreeBSD components you want to install:

https://computingforgeeks.com/wp-content/uploads/2019/10/how-to-install-freebsd-kvm-10-1.png
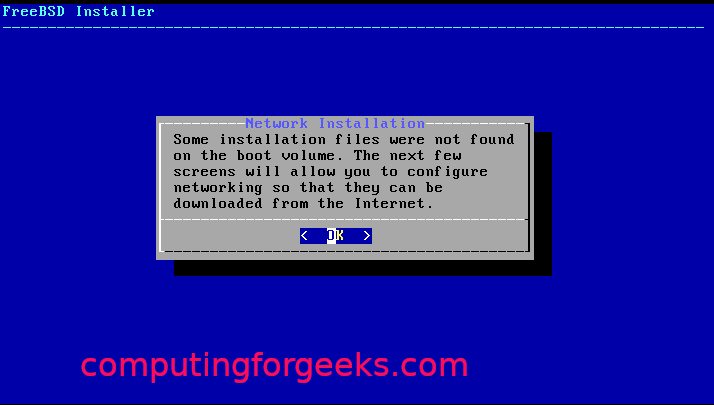
If the software packages aren’t retrievable from the disk, it’ll download it off of the web.

https://computingforgeeks.com/wp-content/uploads/2019/10/how-to-install-freebsd-kvm-11-1.png

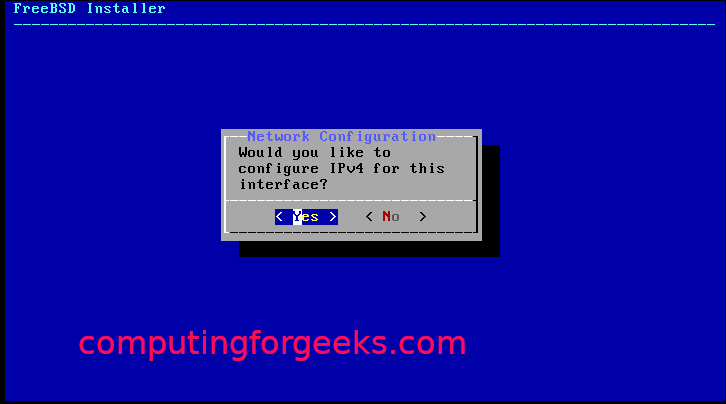
Choose the network interface to configure:

https://computingforgeeks.com/wp-content/uploads/2019/10/how-to-install-freebsd-kvm-12-1.png
Just agree and click ‘ok’ if you’re using IPv4:

https://computingforgeeks.com/wp-content/uploads/2019/10/how-to-install-freebsd-kvm-13-1.png

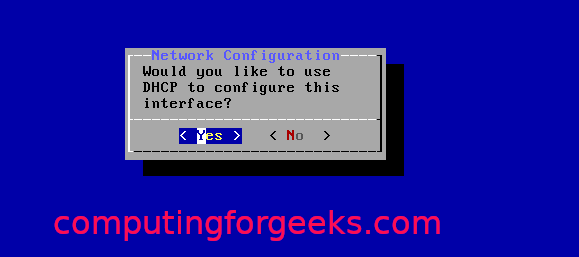
Choose DHCP if you’re using static IP addressing:

https://computingforgeeks.com/wp-content/uploads/2019/10/how-to-install-freebsd-kvm-14-1.png

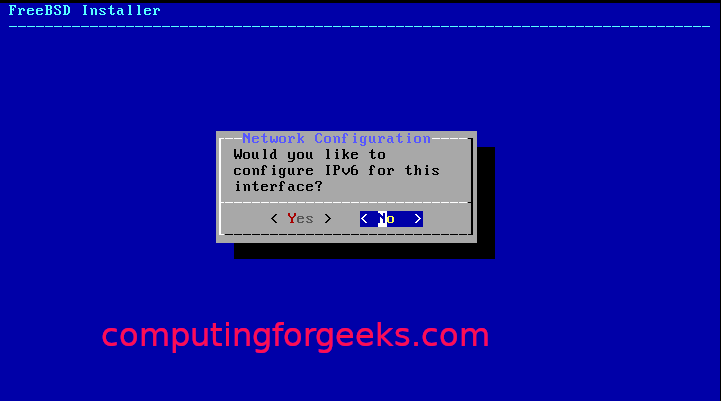
Click on ‘Yes’ if you’re using IPv6:

https://computingforgeeks.com/wp-content/uploads/2019/10/how-to-install-freebsd-kvm-15-1.png

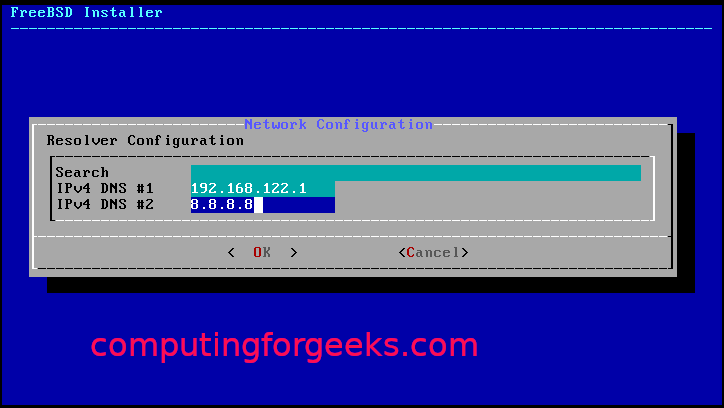
Then for revolver configuration:

https://computingforgeeks.com/wp-content/uploads/2019/10/how-to-install-freebsd-kvm-16-1.png

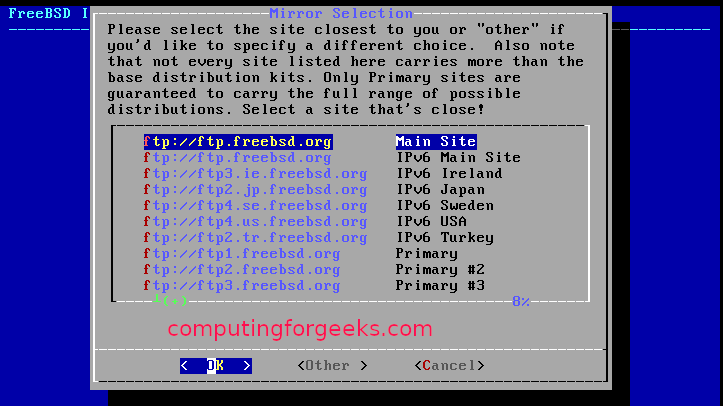
Out of the installation mirrors, select those that are nearest to you:

https://computingforgeeks.com/wp-content/uploads/2019/10/how-to-install-freebsd-kvm-17-1.png
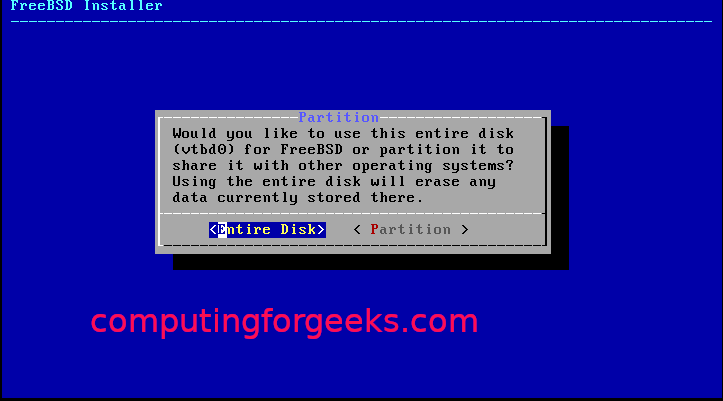
Select one of the partitioning methods (auto/manual/shell):

https://computingforgeeks.com/wp-content/uploads/2019/10/how-to-install-freebsd-kvm-18-1.png

https://computingforgeeks.com/wp-content/uploads/2019/10/how-to-install-freebsd-kvm-19-1.png

https://computingforgeeks.com/wp-content/uploads/2019/10/how-to-install-freebsd-kvm-20-1.png

https://computingforgeeks.com/wp-content/uploads/2019/10/how-to-install-freebsd-kvm-21-1.png

https://computingforgeeks.com/wp-content/uploads/2019/10/how-to-install-freebsd-kvm-22-1.png
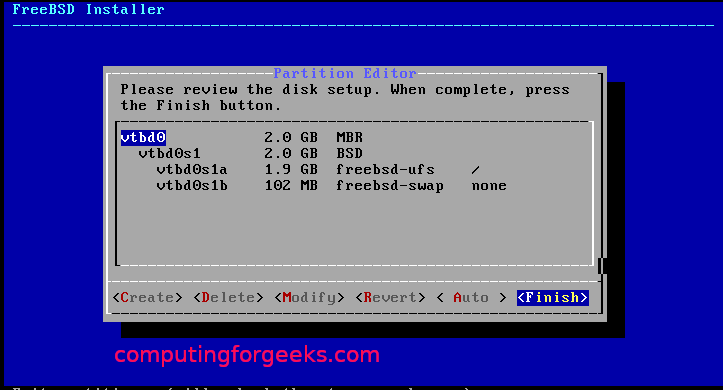
With the partitioning done with, it should start with the installation, as shown below:

https://computingforgeeks.com/wp-content/uploads/2019/10/how-to-install-freebsd-kvm-23-1.png

https://computingforgeeks.com/wp-content/uploads/2019/10/how-to-install-freebsd-kvm-24-1.png
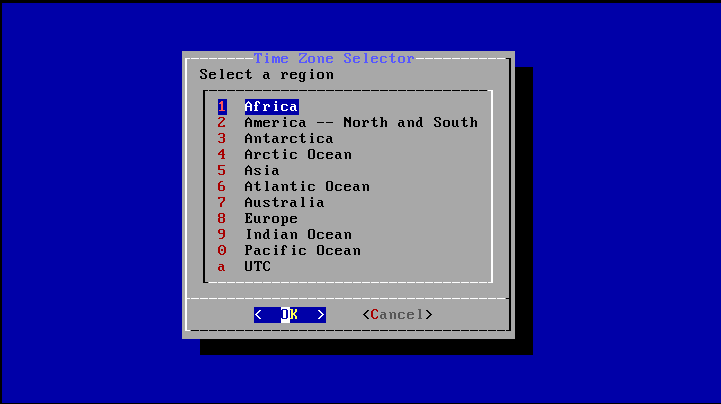
Select a time zone and region:

https://computingforgeeks.com/wp-content/uploads/2019/10/how-to-install-freebsd-kvm-26.png

https://computingforgeeks.com/wp-content/uploads/2019/10/how-to-install-freebsd-kvm-27.png

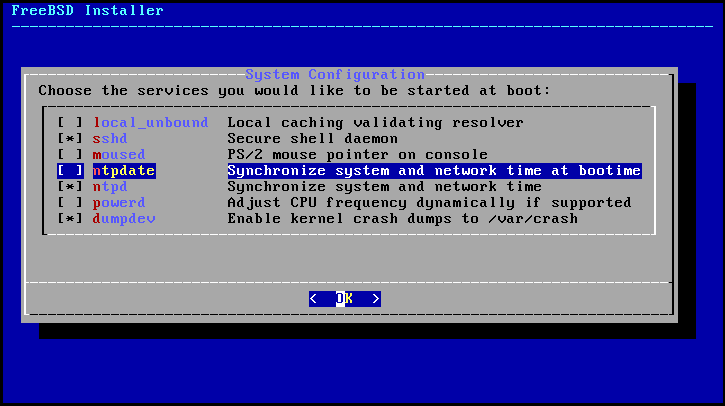
Select the processes you want to run at startup:

https://computingforgeeks.com/wp-content/uploads/2019/10/how-to-install-freebsd-kvm-28.png

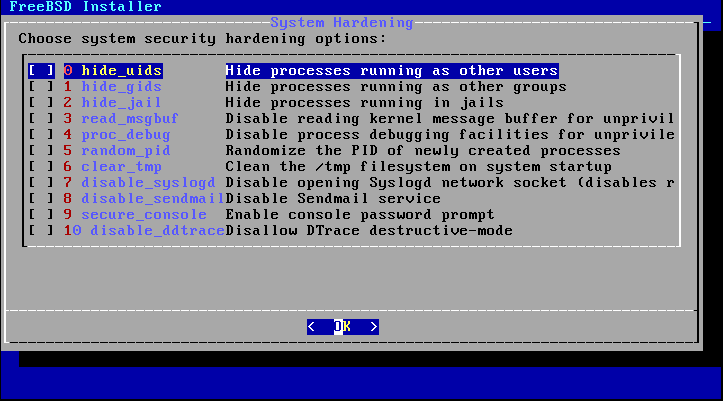
Choose the system hardening options:

https://computingforgeeks.com/wp-content/uploads/2019/10/how-to-install-freebsd-kvm-29.png

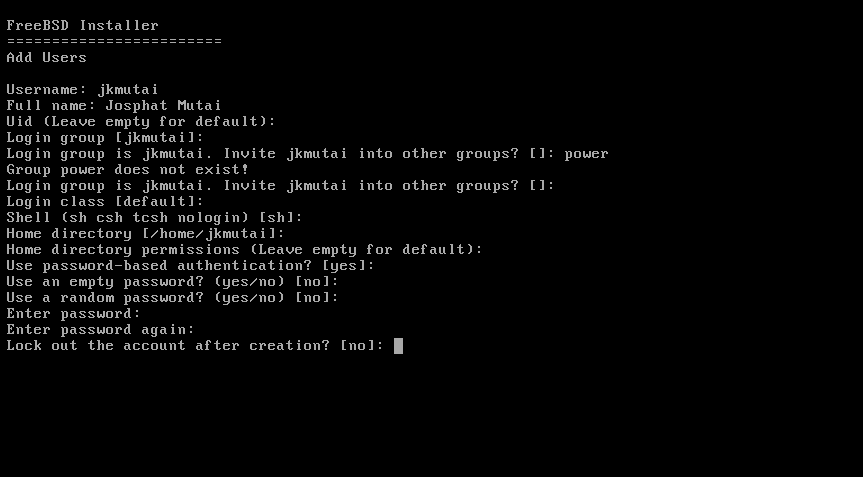
Set the root password and create users:

https://computingforgeeks.com/wp-content/uploads/2019/10/how-to-install-freebsd-kvm-30.png

https://computingforgeeks.com/wp-content/uploads/2019/10/how-to-install-freebsd-kvm-31.png
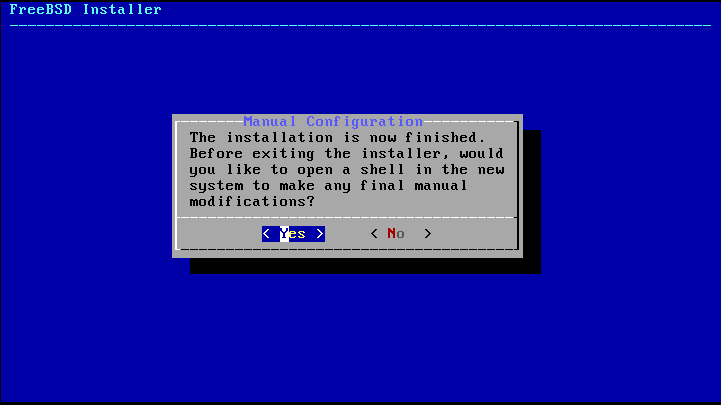
Select ‘Exit’ and click on ‘OK’.

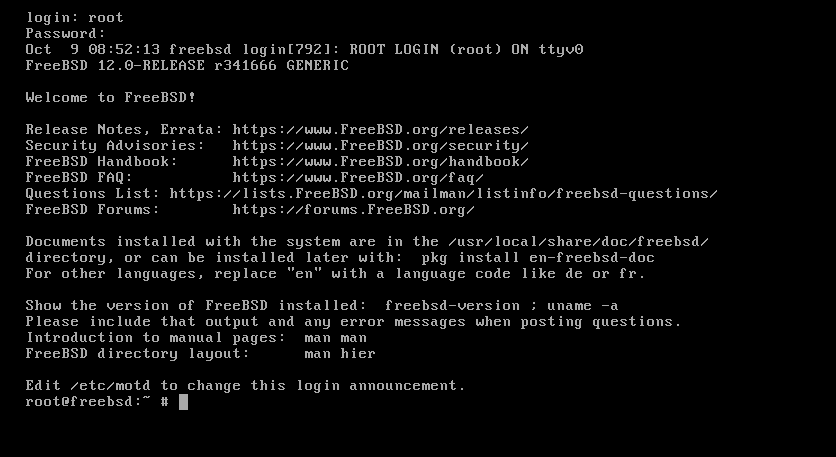
With that, you’ve successfully installed FreeBSD on KVM. Now, you just have to reboot the system.

https://computingforgeeks.com/wp-content/uploads/2019/10/how-to-install-freebsd-kvm-33.png

https://computingforgeeks.com/wp-content/uploads/2019/10/how-to-install-freebsd-kvm-34.png

https://computingforgeeks.com/wp-content/uploads/2019/10/how-to-install-freebsd-kvm-34.png

Wrapping up

This tutorial has demonstrated to Linux users how to set up and configure FreeBSD on KVM.

About the author

Younis Said

I am a freelancing software project developer, a software engineering graduate and a content writer. I love working with Linux and open-source software.