We have implemented this tutorial on an Ubuntu 20.04 Linux system. You can also do the same. Let’s get the minikube cluster up and running on an Ubuntu 20.04 Linux server by using the attached command. For the successful execution of this tutorial, we’ve also installed kubectl:
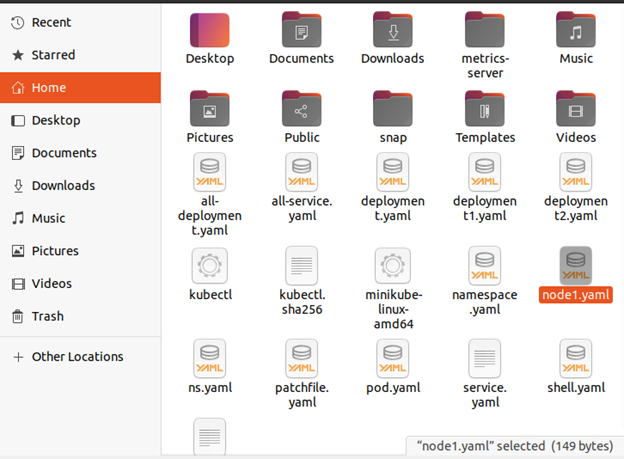
By using the touch command, we have created a file. The touch command is used to make a file that doesn’t have any content. The touch command generated an empty file:
The node1 file is generated with the help of the touch command, as shown in the following screenshot:
Methods for Adding Nodes to the API Server
There are two basic methods for adding Nodes to the API server. The first method is a node’s kubelet self-registers with the control plane. The second method is where a Node object is manually added by you or another human user.
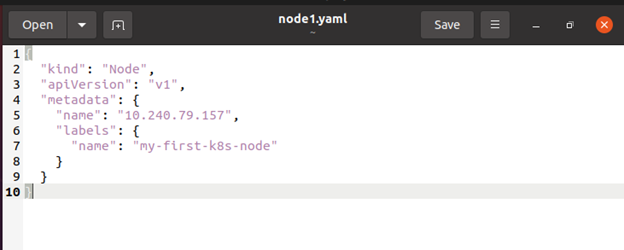
The control plane checks whether a new Node object is legitimate to use after you create it or after the kubelet on a node self-registers. If you try to construct a Node from the JSON manifest below, here is the following example:
Internally, Kubernetes constructs a Node object (the representation). Kubernetes verifies that a kubelet with the metadata.name field of the Node has registered with the API server. The node is eligible to run a Pod if it is healthy, such as all relevant services are running. Otherwise, until that node becomes healthy, it is disregarded for cluster activity.
Please keep in mind that Kubernetes saves the object for the invalid Node and checks to see if it becomes healthy again. To discontinue the health monitoring, you must destroy the Node object.
Create a Node
In the following screenshot, you can see that a node is created with the kubectl create command:
About Node Names
A Node is identified by its name. A resource with the same name is considered the same object. A Node instance identified with the same name is assumed to have the same state and attributes as another Node instance with the same name. It is possible that modifying an instance without altering its name will result in inconsistencies. If an existing Node object is required to be significantly altered or updated, it must first be removed from the API server and then added again after the changes have been made.
Manual Administration of Nodes
Using kubectl, you may create and change Node objects. Use the kubelet parameter —register-node=false to manually create Node instances. Regardless of whether —register-node is enabled, you can change Node instances. For example, you can assign labels to an existing Node or flag it as unscheduled. Marking a node as un-schedulable prevents the scheduler from adding new pods, but it does not affect the current pods.
Obtaining a Node List
To begin working with nodes, you must first create a list of them. You may use the kubectl get nodes command to acquire a list of nodes. According to the command output, we have two nodes that are in the unknown and ready status:
Status of the Node
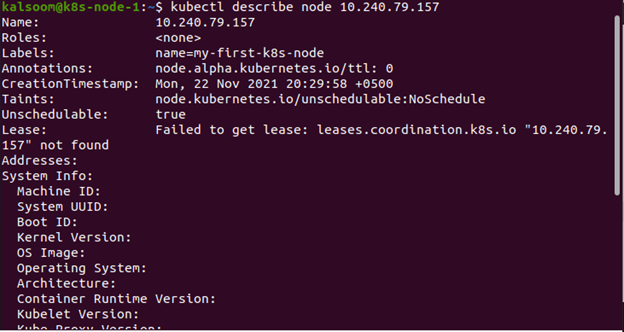
To know the status of the node, the following command is used. It includes addresses, conditions, allocable information, and capacity:
To delete a specific node, the following command is used:
Node Controller
In the life of a node, the node controller plays several roles. When a node is registered, the first step is to assign it a CIDR block.
For the second duty, the internal list of nodes stored by the node controller must be kept up-to-date. The next stage is to monitor the health of the nodes.
Conclusion
We learned how to delete a node and receive information about nodes in this article. We also discussed how to access the node’s status and other information. To effectively destroy a node without affecting any of the pods running on their respective nodes, the procedures must be executed in the correct order. We hope you found this article helpful. Check out Linux Hint for more tips and information.


