In this guide, we will demonstrate how to encrypt a drive on Ubuntu 22.04.
Prerequisites:
To perform the steps that are demonstrated in this guide, you need the following components:
- A properly-configured Ubuntu system. For testing, consider creating an Ubuntu VM using VirtualBox.
- Access to a non-root user with sudo privilege.
Drive Encryption on Ubuntu
Encryption refers to the process of encoding the plaintext (original representation of the data) into ciphertext (encrypted form). The ciphertext can only be read if one has the encryption key. Encryption is the foundation of data security in this day and age.
Ubuntu supports encrypting an entire drive. It can help prevent data theft in case the physical storage is lost or stolen. With the help of tools like VeraCrypt, it’s also possible to create a virtual encrypted disk to store the data.
Encrypting the Drive During Ubuntu Installation
During the installation process, Ubuntu offers full drive encryption using LUKS. LUKS is a standard disk encryption specification that’s supported by nearly all Linux distros. It encrypts the entire block device.
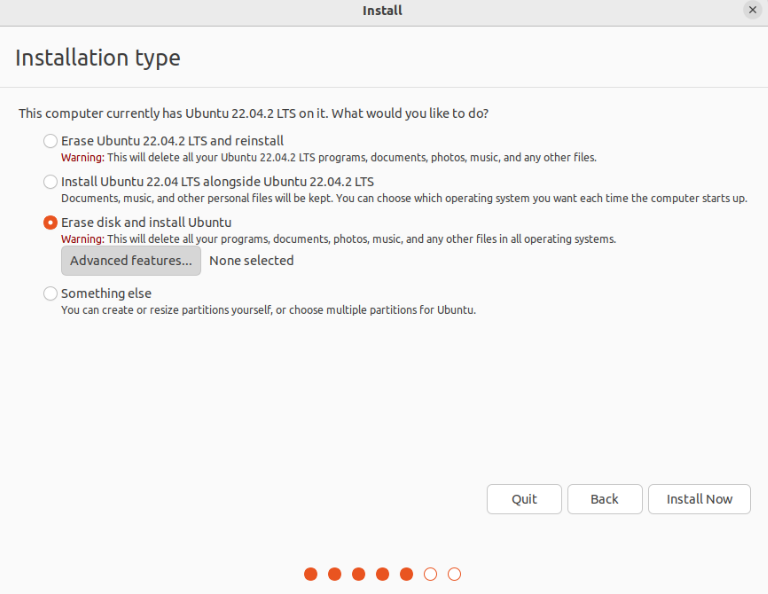
During Ubuntu installation, the option to encrypt the drive is available when you’re asked to decide on the partition scheme. Here, click on “Advanced features”.
From the new window, select the “Use LVM with the new Ubuntu installation” and “Encrypt the new Ubuntu installation for security” options.
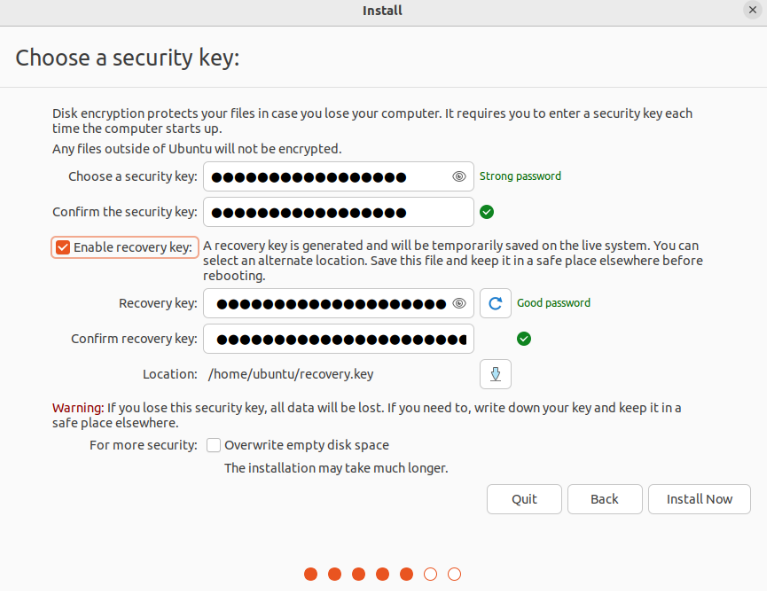
In the next step, you’ll be asked to provide a security key. By default, the recovery key is generated automatically but can be specified manually. The recovery key is useful if the user wants to access the encrypted disk and forgot the security key.
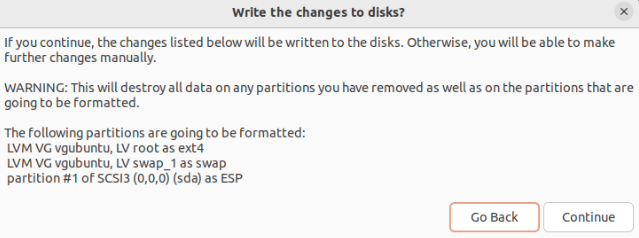
The Ubuntu installer will present you with the new partition scheme. Since we opted for LVM (Logical Volume Management), there will be LVM partitions on the list:
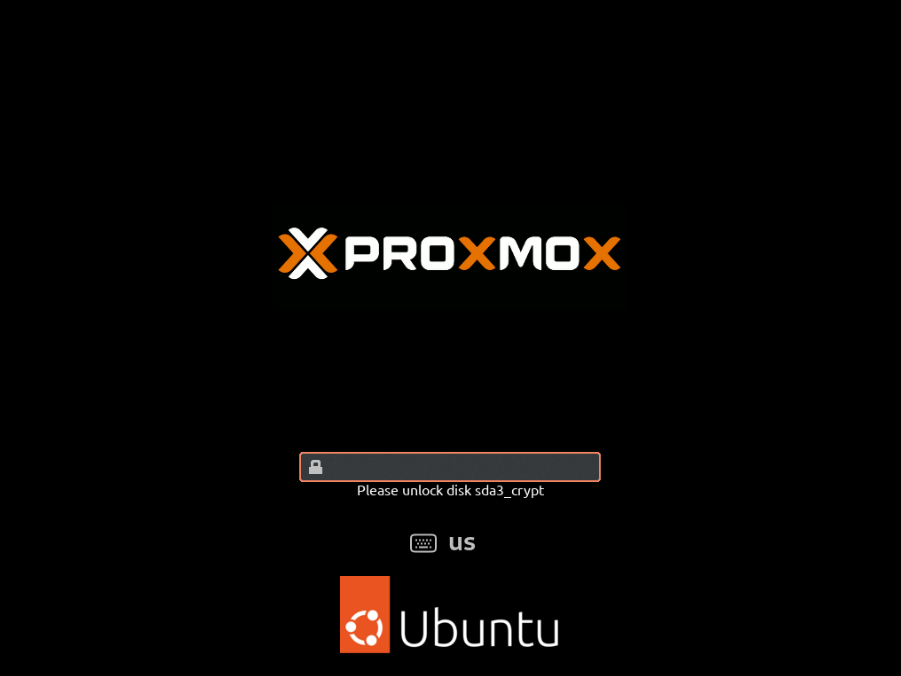
Complete the rest of the installation and reboot the machine. During boot, you’ll be prompted for the security key.
Encrypting the Drive after Ubuntu Installation
If you are already running an Ubuntu system and are not willing to reinstall the operating system from scratch, encryption using LUKS is not an option. However, with the help of certain tools, we can encrypt the home directory (of a specific user) and the swap space. Why encrypt these two places?
- For the most part, user-specific sensitive info is stored in the home directory.
- The operating system periodically moves the data between the RAM and the swap space. An unencrypted swap space can be exploited to reveal sensitive data.
Installing the Necessary Packages
We need the following tools installed to perform the partial encryption:
Creating a Temporary User with Sudo Privilege
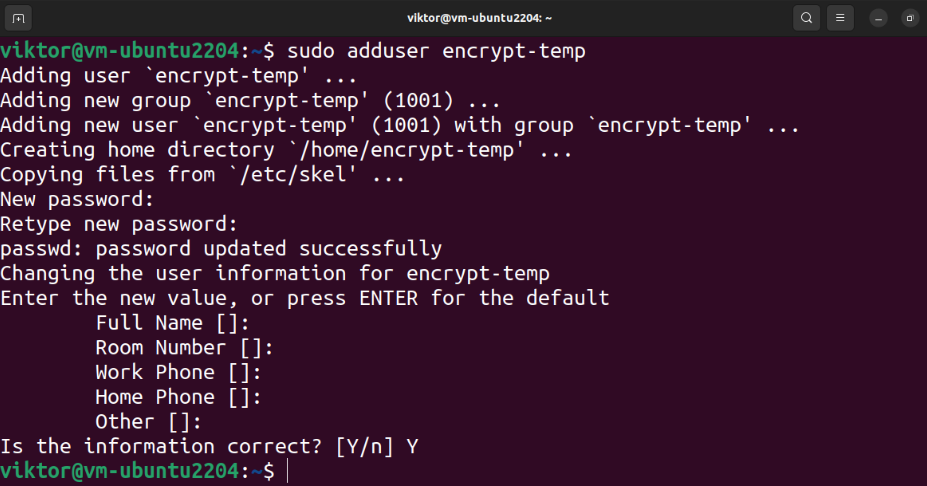
The encryption of the home directory requires access to another privileged user. Create a new user using the following command:
Finally, assign a sudo privilege to the user:
Encrypting the Home Directory
Log out of the current user and log in to the temporary privileged user:
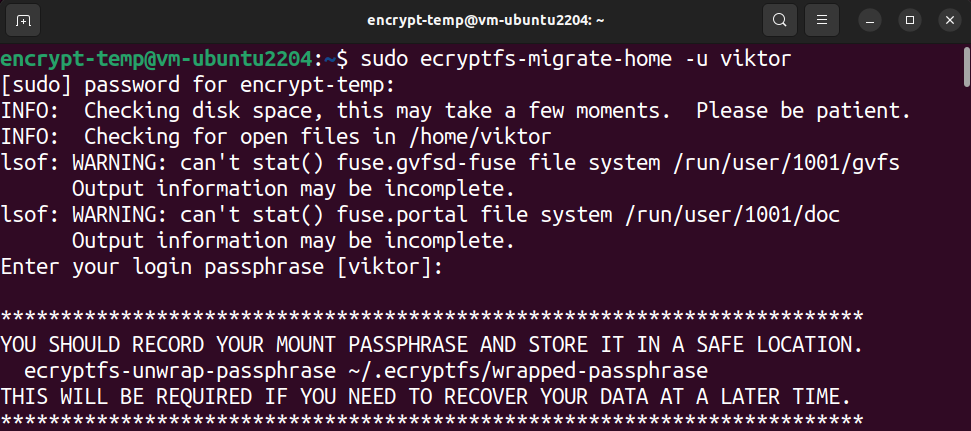
The next command encrypts the home directory of the target user:
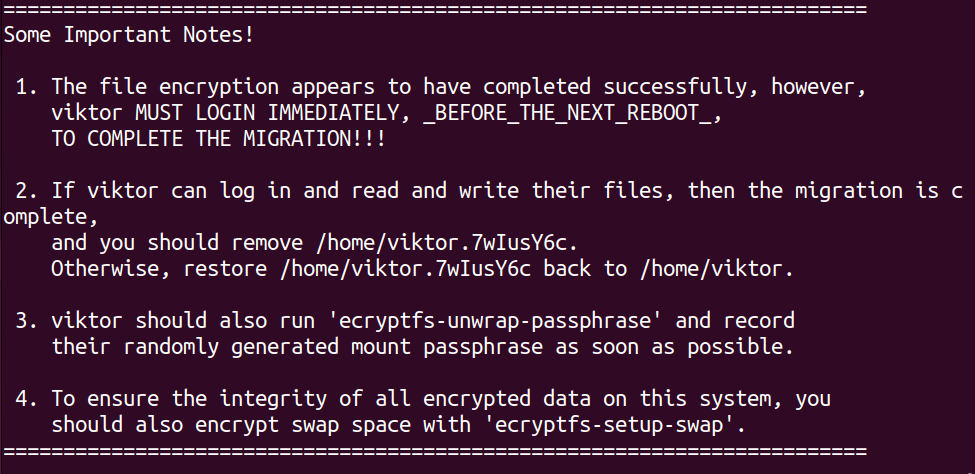
Depending on the size and disk usage of the directory, it can take some time. After the process finishes, it shows some instructions on what to do next.
Confirming Encryption
Now, log out of the temporary user and log back into the original account:
We are going to confirm that we can successfully perform the read/write actions on the home directory. Run the following commands:
$ cat test.txt
If you are able to read and write the data, the encryption process finishes successfully. Upon login, the passphrase to decrypt the home directory is applied successfully.
Recording the Passphrase (Optional)
To get the passphrase, run the following command:
When it asks for a passphrase, provide the login password. The tool should display the recovery passphrase.
Encrypting the Swap Space
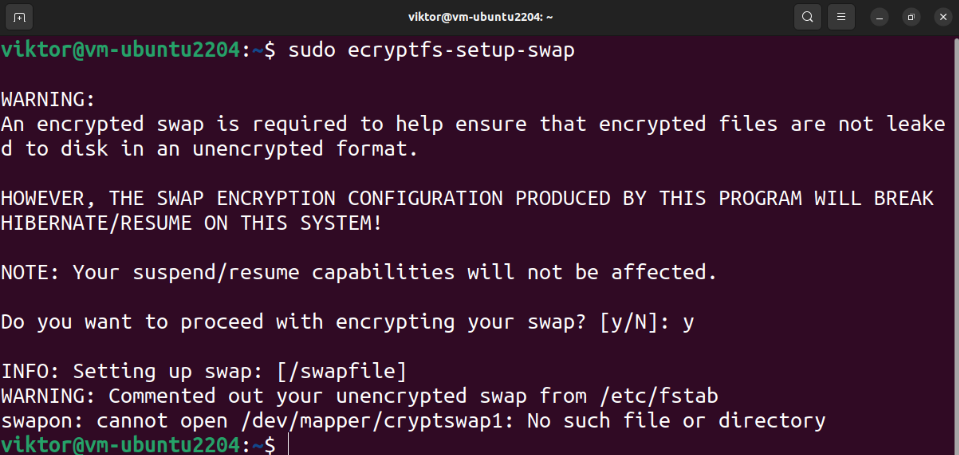
To prevent any sensitive info leaks, it’s recommended to encrypt the swap space as well. However, this breaks the suspension/resumption of the operating system.
The following command displays all the swap spaces:
If you decide to use the auto partition during Ubuntu installation, there should be a dedicated swap partition. We can check the size of the swap space using the following command:
To encrypt the swap space, run the following command:
Cleanup
If the encryption process is successful, we can safely remove the residuals. First, delete the temporary user:
In case something goes south, the encryption tool makes a backup copy of the home directory of the target user:
To delete the backup, run the following command:
Virtual Encrypted Drive
The methods that are demonstrated so far handles the local storage encryption. What if you want to transfer the data securely? You could create the password-protected archives. However, the manual process can become tedious over time.
This is where the tools like VeraCrypt come in. VeraCrypt is an open-source software that allows creating and managing of virtual encryption drives. Moreover, it can also encrypt the entire partitions/devices (a USB stick, for example). VeraCrypt is based on the now-discontinued TrueCrypt project and is audited for security.
Check out how to install and use the VeraCrypt to store the data in an encrypted volume.
Conclusion
We demonstrated how to encrypt an entire drive on Ubuntu. We also showcased how to encrypt the home directory and swap partition.
Interested in learning more about encryption? Check out these guides on Linux file encryption and third-party encryption tools.

