The code autocomplete feature by default included in most of the source code editors through which you can view IntelliSense menu or code suggestions inside the drop-down in a program file. The code autocomplete functionality saves you time for writing complex programs, receives fewer bugs, and you can quickly include methods, attributes, and classes in your code using drop-down suggestions.
In this article, we will show how to enable and use the autocomplete in the Jupyter notebook using different methods. Before starting the demo, the Jupyter notebook environment should be running on your system.
Autocomplete Feature in Jupyter Notebook
Most programmers who use the Jupyter environment for the first time wonder how to use code auto-completion in an IPython notebook. For those users, it is surprising and the good news is that you do not need to install any external tool for using the autocomplete feature in the Jupyter notebook. The autocomplete feature comes with the standard Jupyter notebook setup.
The auto-completion in the Jupyter notebook helps you to choose an appropriate object, modules, classes, and variables inside the notebook. In this way, you can complete your code efficiently and in an easier way.
Autocomplete in Jupyter Notebook Using Tab Control
To use the code auto completion, you have to type the module, object, or class name and then hit the ‘Tab’ button from your keyboard. After pressing the Tab key, the completed suggestions appear in the drop-down box that is shown in the following example:
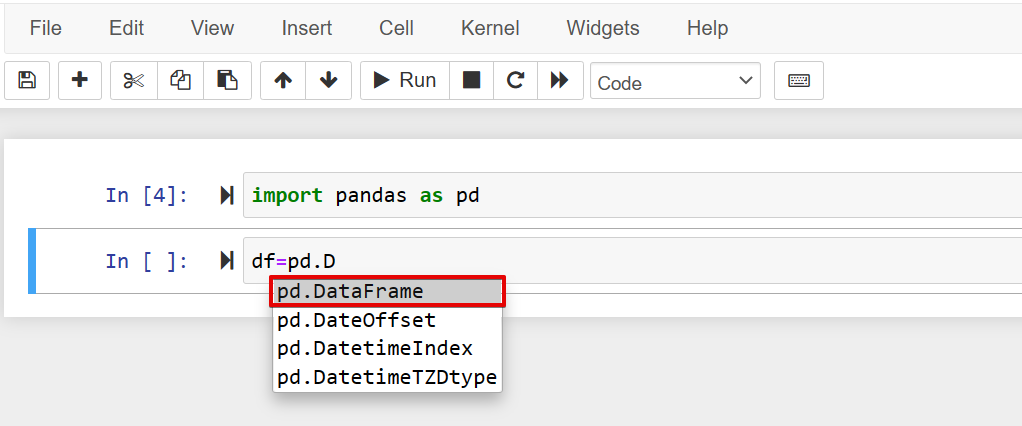
For example, we import a pandas library for solving data science problems. When you create a new object, the autocomplete option also helps you in object creation, which is shown in the following screenshot:
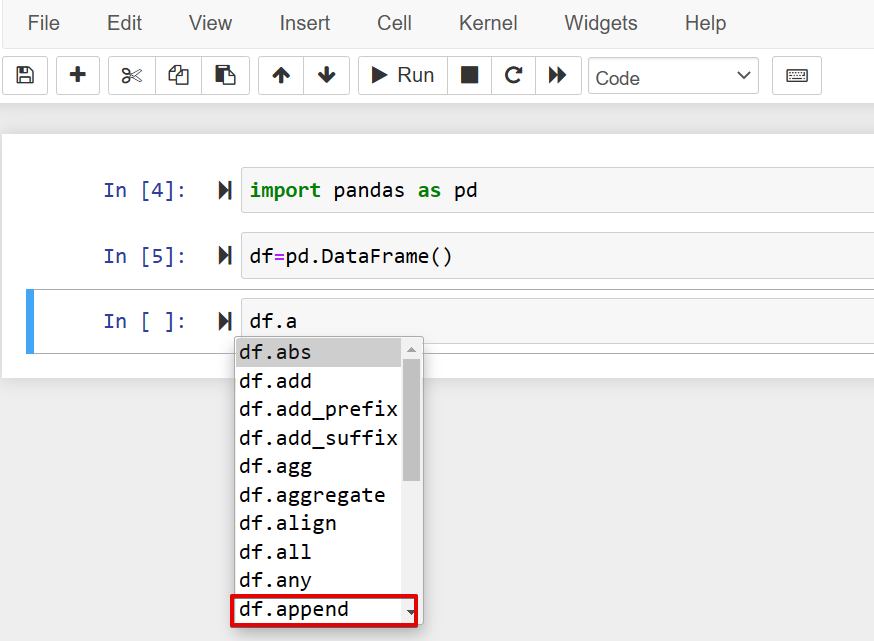
You can also use the auto-completion in the Jupyter notebook when you already have an object and you want to assign it to a variable. Using the autocomplete, you can access the list of parameters and methods of the typed prefix object. For example, the DataFrame object contains various methods and parameters that you can easily access after the ‘.’ dot. Type the first letter of the method and press ‘Tab’ as follows:
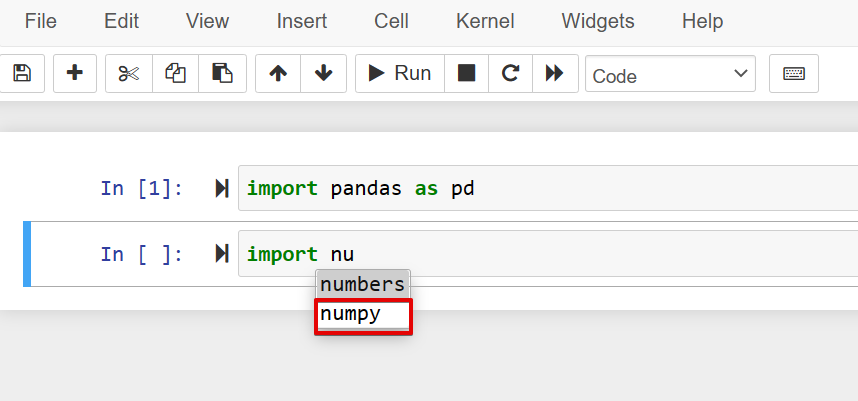
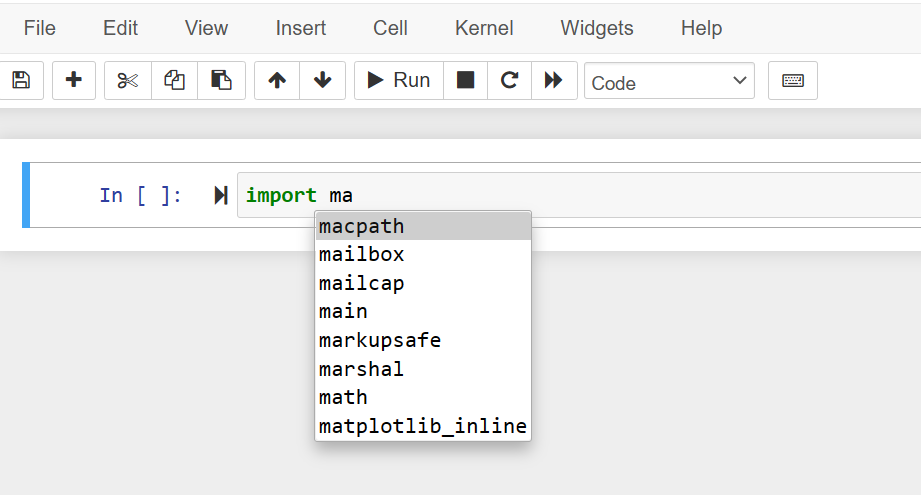
The auto-completion used to import the names of the modules in your Jupyter notebook. The autocomplete features will help you because in most cases you do not remember the exact name of a particular library. However, you know this library provides cool algorithms. To import this module, just type the first one or two letters and then press the ‘Tab’ key from your keyboard. The related suggestions would display under the box as follows:
Choose the desired module, which you want to add to an IPython notebook.
You can also use the autocomplete in the Jupyter notebook while you want to reuse variables, classes, or attributes inside a program. For example, we have initialized two test variables in our program. When we type the prefix of a variable that also start starts with the same letter and press the ‘Tab’ key, it shows us the relevant variable name suggestions in the drop-down box as follows:
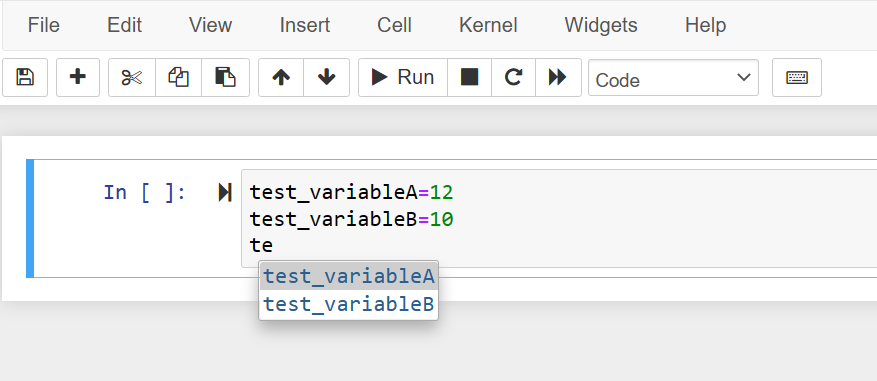
Only one variable will show in suggestions instead of many choices. In this case, it will type the full variable name for us.
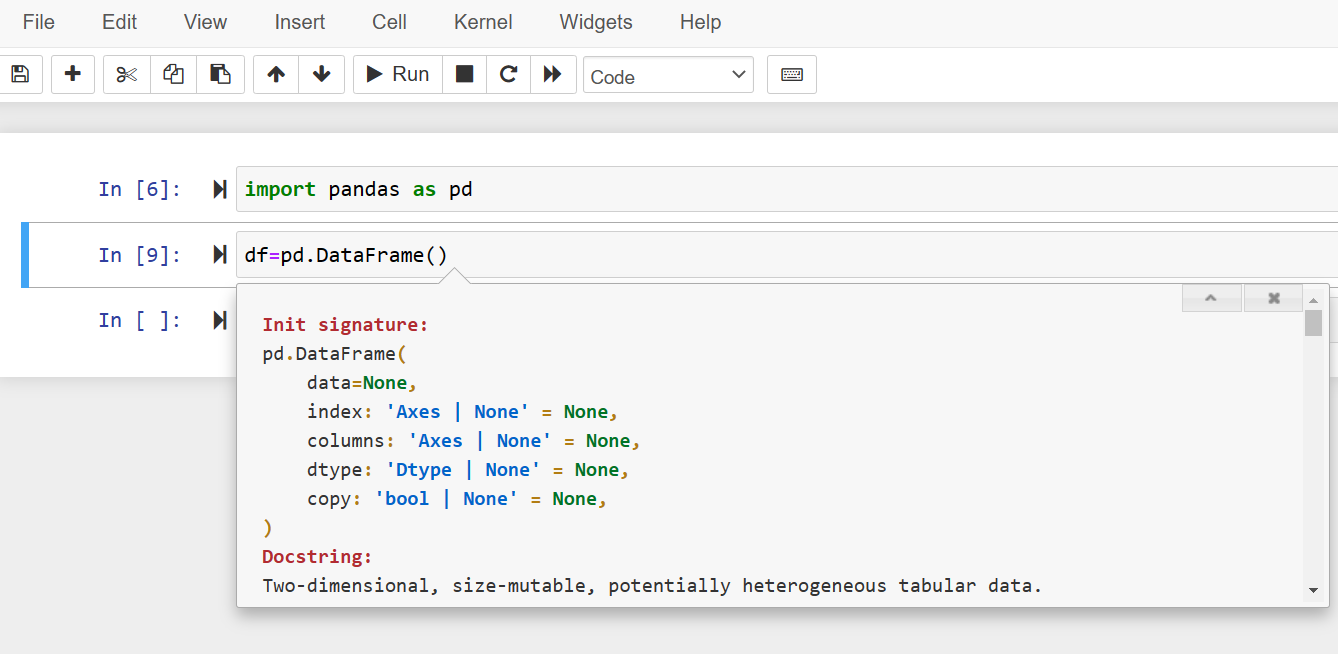
Auto-completion is also helpful, when you press the ‘Shift+Tab’ keys, it shows the function help, type, and tooltip information in a box as follows:
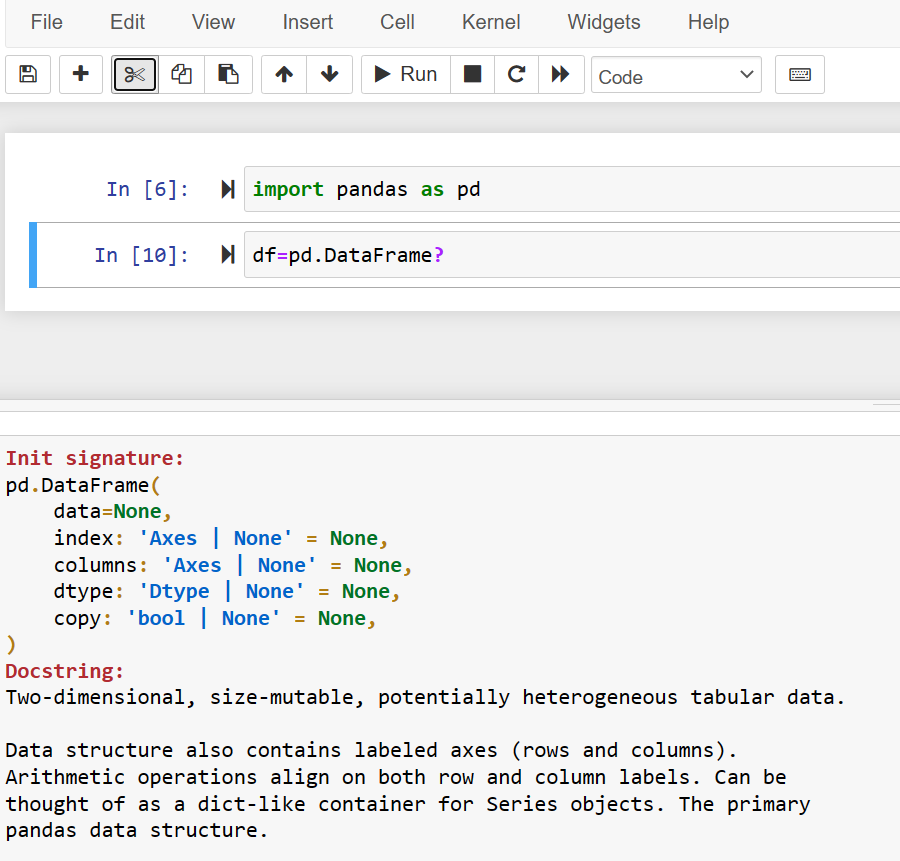
The use of ‘?’ after the function name without using ‘()’ shows the object documentation and methods documentation in the IPython notebook that you can see in the following screenshot:
All auto-completion shortcuts ‘Tab, Shift+Tab, and ?’ by default are enabled in Jupyter notebook without using any extension or a plugin.
Add IntelliSense or Auto-completion in Jupyter Notebook Using the Hinterland Extension
To add the code IntelliSense or auto-completion in the Jupyter notebook, you can use a Jupyter ‘hinterland’ extension. Most users unable to find how to install this extension through the pip package manager directly. Therefore, you can enable this extension in your Jupyter notebook by using the following steps:
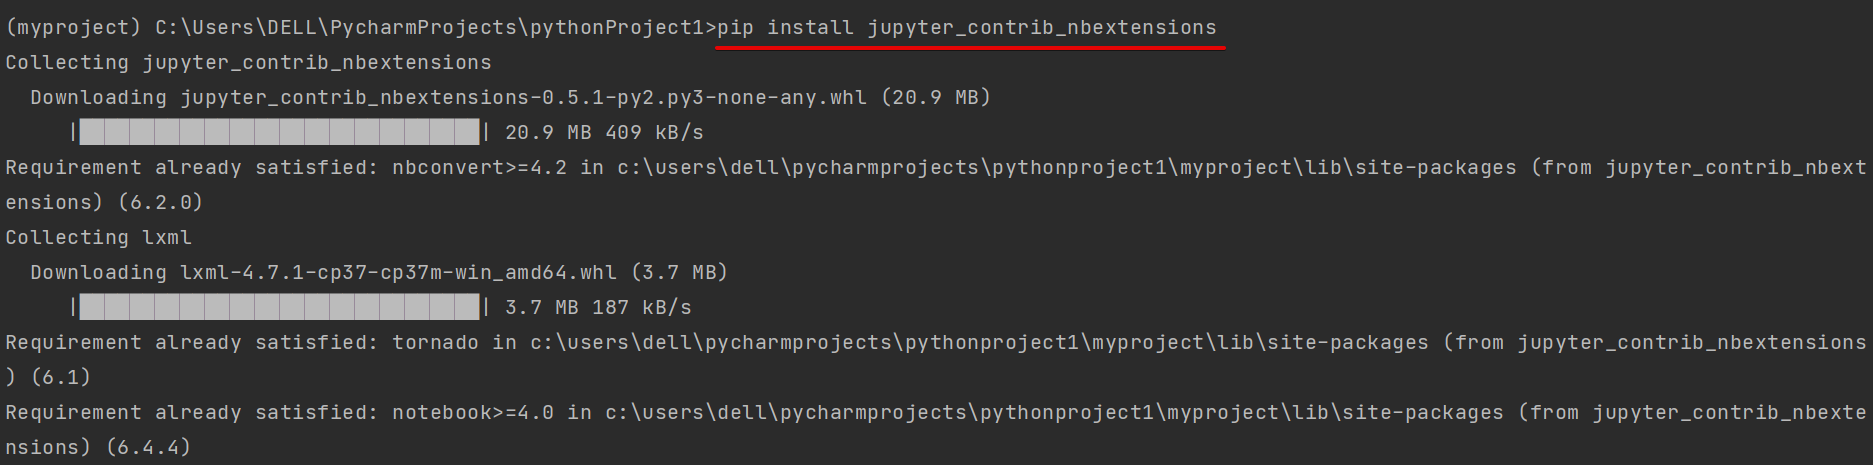
Step 1: First, install the jupyter contrib nbextensions by executing the following command in the terminal:
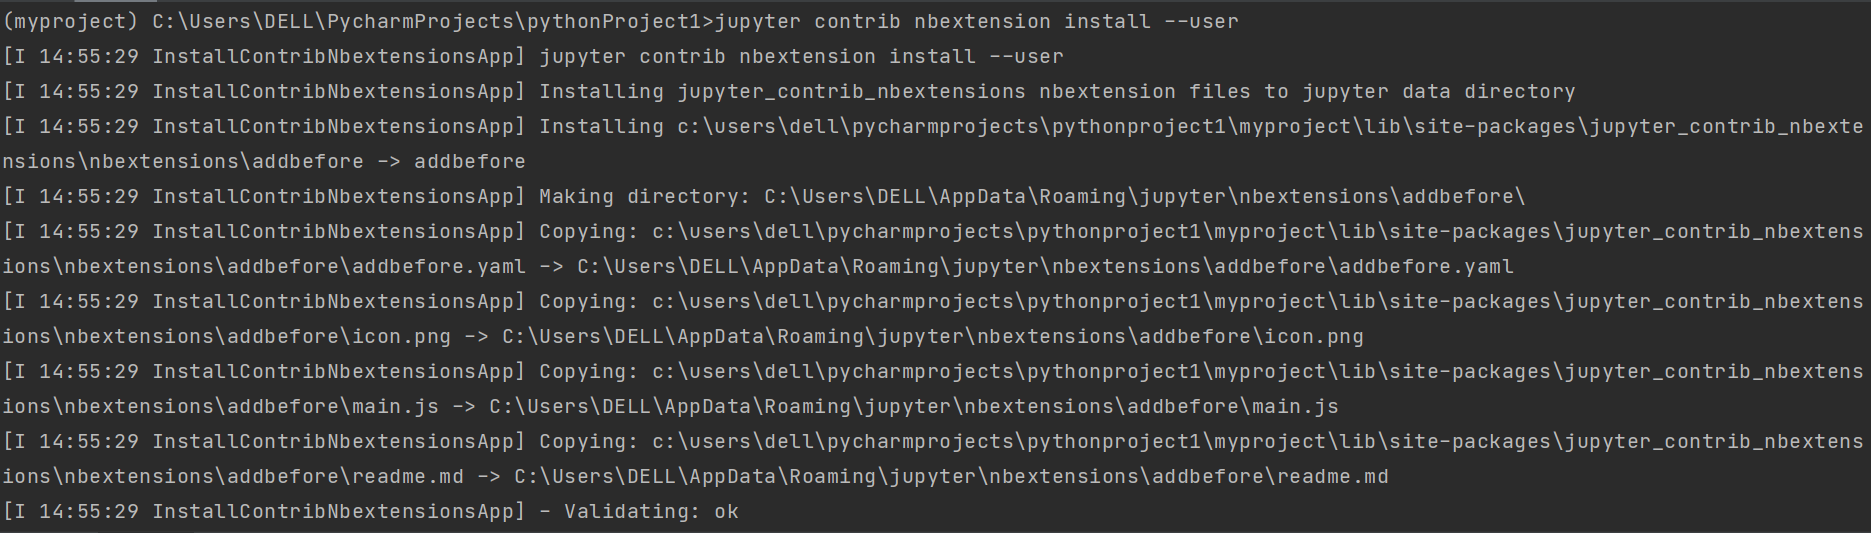
Step 2: Install the CSS and js files for the jupyter environment by using the following command:
Step 3: In the last step, you need to enable the ‘hinterland’ extension
The following output shows in the terminal:

Now, again restart the Jupyter notebook kernel online. Import the modules and create objects. You will notice that auto-completion or IntelliSense automatically shows in the drop-down without using the ‘Tab’ control in the Jupyter notebook as follows:
There are more extensions used for auto-completion but users prefer to use the hinterland and Tab option for auto-completion in the Jupyter notebook.
Conclusion
We have discussed in this tutorial how to enable and use auto-completion or IntelliSense functionality in the Jupyter notebook. We have seen how the ‘Tab, Shift+Tab, and ?’ help us in writing code in a Jupyter notebook. We have also demonstrated how to install and enable hinterland extension in Jupyter notebook for using the code autocomplete feature.