How to Disable IPv6 on CentOS 7.5
IPv6 or Internet Protocol version 6 is the latest version of Internet Protocol (IP). IPv4 or Internet Protocol version 4 is already being widely used. But it has some limitations. The first one is that, IPv4 has 32-bit address scheme. That means only 4.3 billion unique address is possible with IPv4. That is quite limited in today’s world. These days we have many IoT (Internet of Things) devices, smartphones, computers, laptops, servers connected to the internet. Each of these devices need an IP address to communicate to the outside world. So the IPv4 address has shortage.
IPv6 address in the other hand is a 128-bit address. It means about 340,282,366,920,938,463,463,374,607,431,768,211,456 unique IPV6 address is possible in IPv6. That’s a huge number of IP addresses. It is said that, if IPv6 is used, every single device in the world can have its own unique IPv6 address and IPv6 would still be available for new devices. So IPv6 solves issues with limited IP address as in IPv4.
But at the time of this writing, IPv6 support is not available in many countries. It’s not even supported in my country. Though the world is moving to IPv6 slowly, still not everything is IPv6.
If your country has no support for IPv6 yet, there’s no need to keep it enabled on your operating system. So many people tend to disable IPv6 in their operating system.
In this article, I will show you how to disable IPv6 on CentOS 7.5. Let’s get started.
Check Whether IPv6 is Enabled
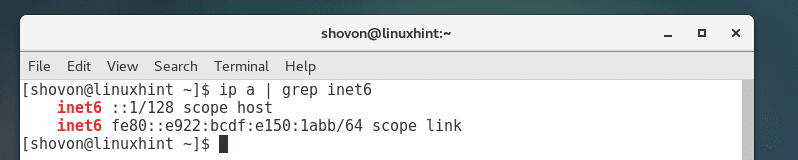
You can check whether IPv6 is enabled on your CentOS 7.5 operating system with the following command:
As you can see, I have IPv6 enabled.
If IPv6 is disabled, you should see no output if you run this command.
Disable IPv6 Using the Kernel Parameter
In this section, I will show you how to disable IPv6 permanently.
You can disable IPv6 when your computer boots by changing the kernel parameter.
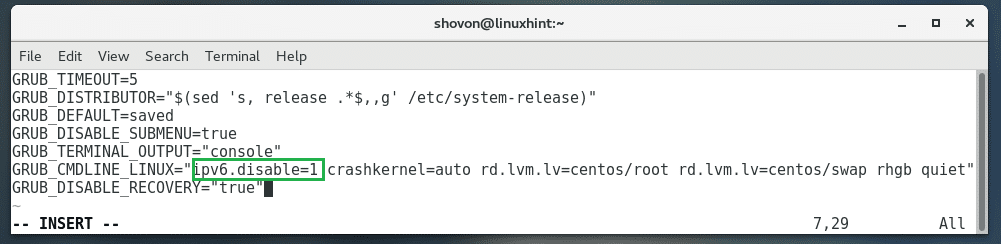
First edit the GRUB configuration file with the following command:

You should see the following window.

First press i to go to INSERT mode.
Now add ipv6.disable=1 before crashkernel=auto in GRUB_CMDLINE_LINUX as marked in the screenshot below.
Now press <Esc> and type in :wq! and then press <Enter> to save the file.
Now update the GRUB configuration file with the following command:

The GRUB configuration should be updated.

Now restart your computer with the following command:
If you run the following command again, you should see no output.

Disable IPv6 Using /etc/sysctl.conf Configuration File
You can also disable IPv6 permanently using the /etc/sysctl.conf configuration file.
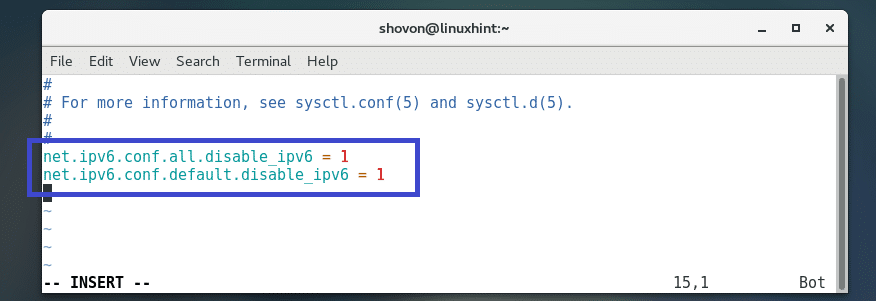
First open the /etc/sysctl.conf file with the following command:

Now add the following lines to it:
net.ipv6.conf.default.disable_ipv6 = 1
Now save the file and reboot your computer with the following command:
IPv6 should be disabled.

Disable IPv6 of Specific Network Interface
You can also disable IPv6 of specific network interface.
First you have to find the network interface that you want to disable with the following command:

You should see the network interface name as marked in the screenshot below.

Let’s say, you want to disable IPv6 for ens36 interface.
First open /etc/sysctl.conf file with the following command:

Now add the following line to the end of the file:

Now save the file and reboot your computer with the following command:
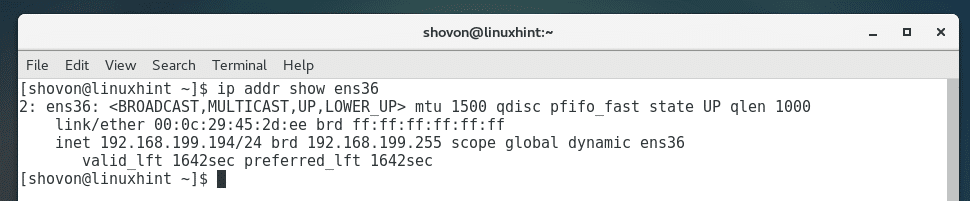
Now check whether IPv6 is disabled for the ens36 interface with the following command:

IPv6 should be disabled for only ens36 interface as you can see from the screenshot below. There is no inet6 line in the output.
Disable IPv6 Temporarily Using sysctl Command
You can also disable IPv6 temporarily. That way IPv6 will be enabled once you reboot your system. This is good for testing whether everything on your CentOS 7.5 operating system works before disabling IPv6 permanently.
Run the following commands to disable IPv6 temporarily:
$ sudo sysctl -w net.ipv6.conf.default.disable_ipv6=1
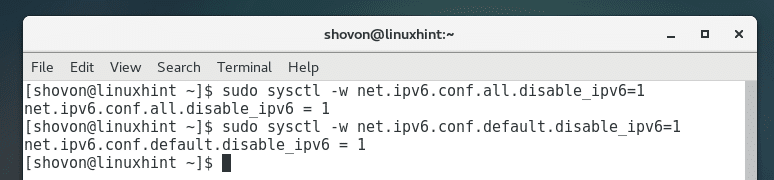
IPv6 should be disabled.

That’s how you disable IPv6 on CentOS 7.5 permanently and temporarily. Thanks for reading this article.