Methods of Disabling Firewall in CentOS 8
A Firewall in CentOS 8 can either be disabled temporarily or permanently. Below, we are going to share both methods with you one by one:
Method of Temporarily Disabling the Firewall in CentOS 8
In this method, we will learn to temporarily disable the Firewall in CentOS 8. It means that after following this method, our Firewall will immediately stop running; however, as soon as you will restart your system, it will be enabled once again. For temporarily disabling the Firewall in CentOS 8, you will need to perform the following steps:
Step 1: Checking the Status of the Firewall Daemon
First, we will launch the terminal in CentOS 8 by looking for it in the Activities search bar. The terminal of CentOS 8 is shown in the image below:

Before disabling our Firewall, we need to ensure if it is running or not in the first place. That can be done by checking its status with the following command:
![]()
Since our Firewall was running by default, that is why the “running” status is shown in the image below:

Step 2: Temporarily Disabling the Firewall in CentOS 8
After ensuring that our Firewall is running, we can easily attempt to disable it temporarily by executing the following command in the terminal:
![]()
Running this command will not display any output on the terminal; rather, the control of the terminal will be handed back to you, as shown in the image below:

Step 3: Verifying if our Firewall has been Temporarily Disabled or not
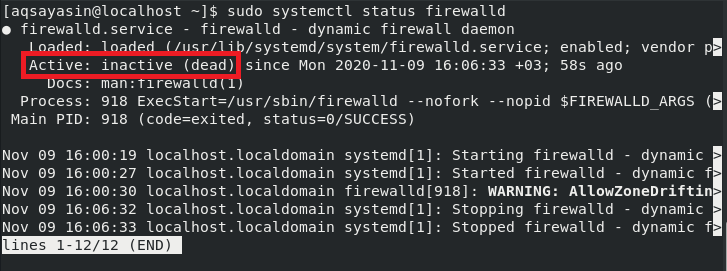
Since the above-mentioned command did not display any output, that is why we are still unsure about whether our Firewall has been temporarily disabled or not. We can verify it by checking the status of our Firewall service in the following manner:
![]()
If your Firewall has been disabled (temporarily) successfully, then you will be able to see the “inactive (dead)” status on your terminal as highlighted in the image shown below:
Now, whenever you restart your system, your Firewall will be enabled automatically; however, for the same session, it will remain disabled until you enable it explicitly.
Method of Permanently Disabling the Firewall in CentOS 8
In this method, we will learn to permanently disable the Firewall in CentOS 8. It means that after following this method, our Firewall will not stop running immediately; rather, a “disabled” status will appear instantly. Also, when you restart your system after following this method, the Firewall will still not be enabled until and unless you enable it explicitly. For permanently disabling the Firewall in CentOS 8, you will need to perform the following steps:
Step 1: Permanently Disabling the Firewall in CentOS 8
Even in this method, you can check the status of your Firewall daemon in the same manner as we explained in Method # 1. After doing that, you can permanently disable the Firewall in CentOS 8 by running the command stated below in your terminal:
![]()
If this command is executed successfully, the following messages will be displayed on your terminal:

Step 2: Verifying if our Firewall has been Permanently Disabled or not
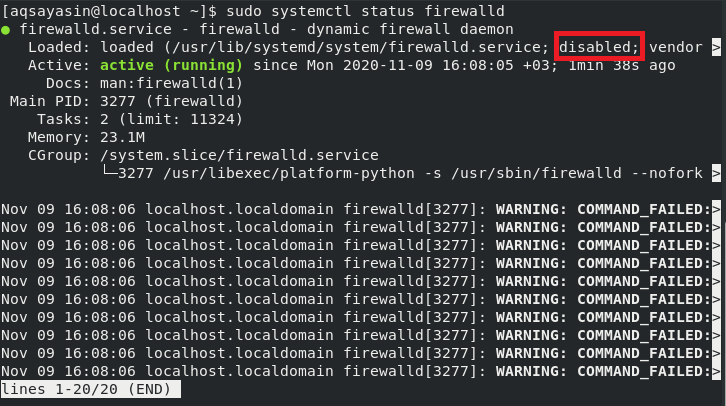
Now we need to verify if our Firewall has been permanently disabled or not. This can be done by running the command stated below in your CentOS 8 terminal:
![]()
Running this command will display the “active (running)” status on your terminal, unlike the method of temporarily disabling the Firewall, but your Firewall will be disabled as highlighted in the following image:
Step 3: Masking the Firewall Daemon Service
By now, our Firewall has been disabled permanently, which means that it will not be enabled automatically even after restarting your system; rather, you will have to manually enable it; however, at times, it happens that any other process or service running on your CentOS 8 system may manage to enable your Firewall. You can stop this from happening by masking your Firewall daemon by executing the command stated below in your CentOS 8 terminal:
![]()
If your Firewall daemon has been masked successfully, you will be able to see the following message on your CentOS 8 terminal:

Now, your Firewall daemon service has been masked, which means that you will not be able to enable it again unless you unmask it first. It also implies that no other process or service will now have the privileges of enabling your Firewall.
Conclusion
Depending upon your particular scenario, you can choose to either temporarily or permanently disable the Firewall in your CentOS 8 system by following either of the two methods explained in this article. However, it is highly recommended that as soon as you finish performing that task for which you have attempted to disable your Firewall, you enable it once again so that it can easily protect your system from all the viruses and malware as well as from any unauthorized access attempts.