Categories of Kubernetes services
Kubernetes services are divided into four basic categories:
ClusterIP
In Kubernetes, the ClusterIP service is indeed the standard form of service. It provides a service within the Kubernetes cluster that other Kubernetes apps can manage without providing access from the outside. It is an IP address that the Kubernetes cluster and all of its Services can use internally. UNLIKE THE POD IP ADDRESS, the IP address utilized in the ClusterIP is not reachable beyond the cluster.
NodePort
Each node in your cluster has an open port called a NodePort. Even if your app runs on a different node, Kubernetes straightforwardly routes traffic from the NodePort to the service. Every Kubernetes cluster accepts NodePort, but you have to modify your firewalls if you’re using a cloud service provider like Google Cloud.
LoadBalancer
A LoadBalancer is a popular way to introduce a Kubernetes service to the outside world through the internet. LoadBalancer can be used in a similar way to ClusterIP and NodePort.The cluster will approach the cloud provider and build a load balancer if you select LoadBalancer as the service category. Traffic will be redirected to the backend pods when it arrives at this load balancer. The particulars of this method are determined by how each load balancing supplier implements its technology.
ExternalName
Since ExternalName services don’t have any selectors or fixed ports or endpoints, they can redirect traffic to an outsides service. This form associates the service with the external name field’s elements. It completes this by returning the record value of a CNAME.
Create a deployment along with service
A Kubernetes Deployment monitors the Pod’s health and, if necessary, reset the Pod’s Container. Deployments are the method of managing Pod formation and scaling. So to manage a pod, we are going to create a deployment. For this purpose, let’s open the terminal of your Ubuntu 20.04 LTS operating system. You can use the Application area or shortcut key for this purpose. Make sure you have minikube installed in your system.
Execute the below-stated command to start minikube.

In the output of this command, you will see the version of minikube. After this command, you have to open the minikube dashboard with the help of this below-listed command.

Now we are all ready to create a deployment using the create command. You have to write the below-appended command as shown in the terminal.

You can view that the hello node has been created. If you want to view the deployments, you can easily do this by running the cited command.

In the output, you can see the basic information related to an already created deployment. You can view the pod by the execution of this command:

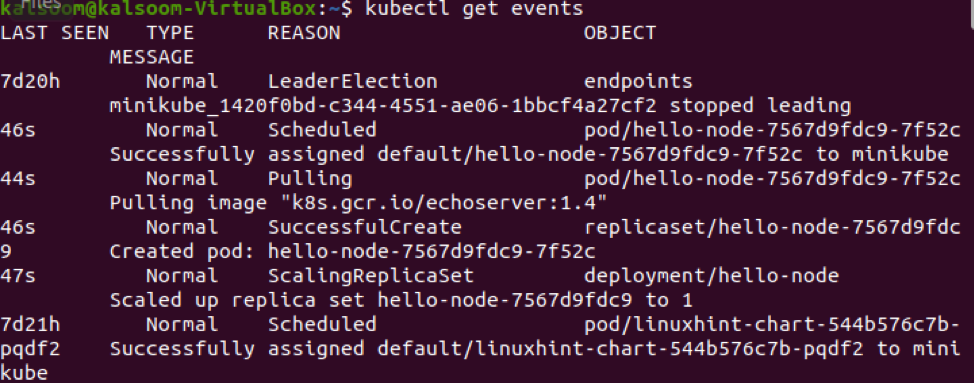
In the below-shown output, you can easily view all the relevant information related to the listed pods. If you want to list the cluster events, you can use the following basic command for this purpose.
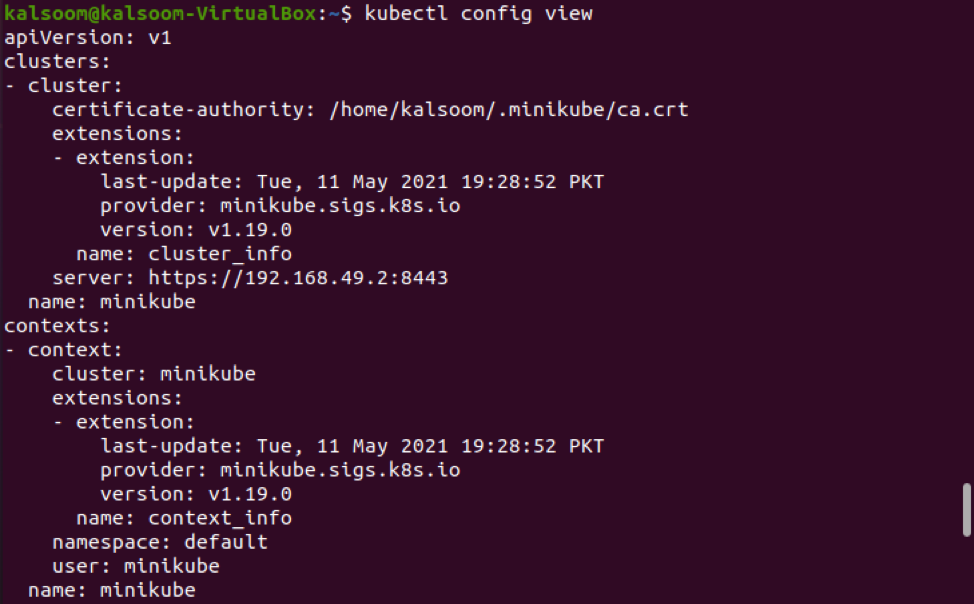
Now, you can view the kubectl configuration by using the below-stated command:
Inside the Kubernetes cluster, the Pod would be only available by its inner IP address. It would be best to expose the hello-node container as a Kubernetes Service to make it available outward of the Kubernetes virtual network. Now we are going to expose the pod by using the below-listed command. Also, you can see that —type=LoadBalancer that will expose the related service outside of the Cluster.

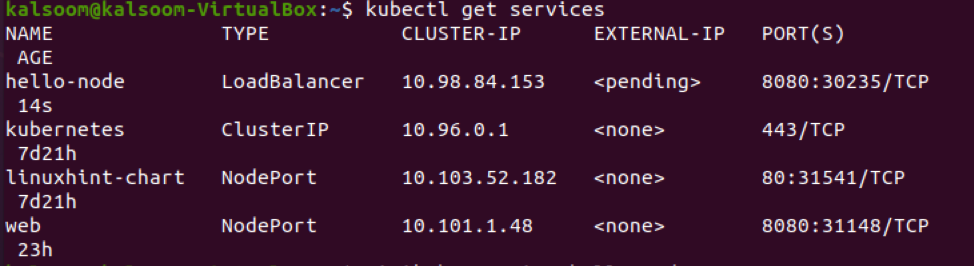
Now is the time to view the created service. So, for this purpose, you can utilize the below-shown command. The output shall be similar to the one displayed in the attached image.
To view the hello node service information, you can use the following displayed command along with the minikube keyword.
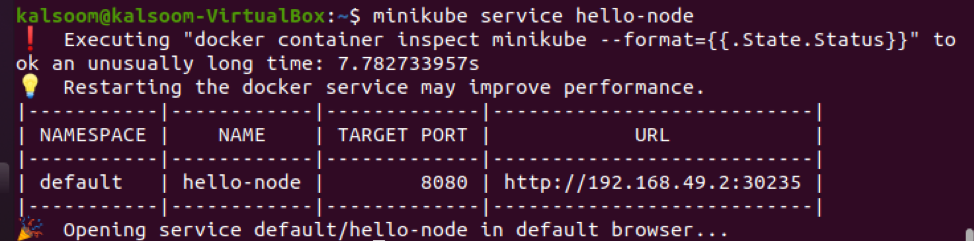
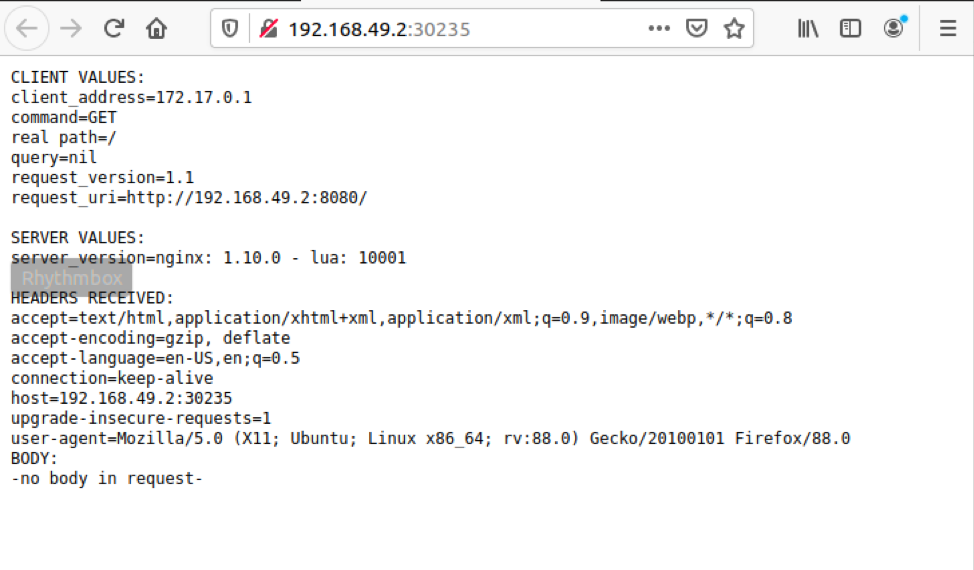
You can see the node URL is also displayed in the attached screenshot along with the target port. Luckily, the service will be open in the browser of your operating system. You can check that the service information is displayed in your system’s browser.
Conclusion
In this guide, we have elaborated the concept of services in Kubernetes along with its different categories. Also, we have explained a basic example for the creation of deployment along with relevant service. By reading and implementing this above guide, I hope you can easily understand the concept of Kubernetes services and its creation.