Yum is one of those repositories. It is the base repository for RPM packages used in RedHat and RedHat-based distributions. RPM is easy to configure and use, allowing users to install software packages in their systems easily and quickly.
Yum packages can be hosted on a server and served remotely via HTTP, HTTPS, and FTP or local installation of the repository. Local installation involves downloading the packages and store them on the local disk.
The purpose of this tutorial is to teach you how to set up a locally hosted Yum repository on CentOS.
Prerequisites
To follow along with the tutorial, you need to meet the following requirements:
A REHL or CentOS distribution; A root user or user in the sudo group; Access to an Internet connection; Yum package manager installed and up to date.
Step 1: Install a Web Server
Typically, yum packages are served on HTTP/HTTPS or FTP protocol. However, since we cannot use both, I choose a web server as it is, in my opinion, the easier option to set up and configure.
We will be using Apache. Use the command below to install and start the server.
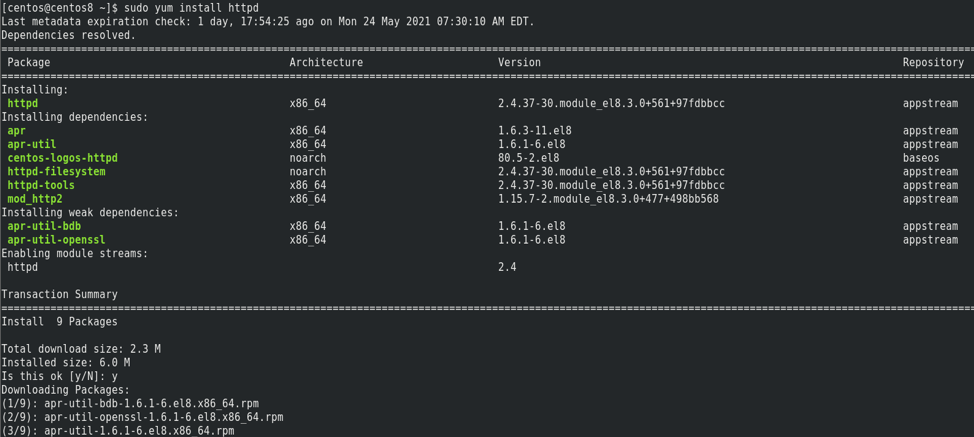
It is good to note that you can use either FTP or HTTP/HTTPS for your local repository. You can also use other web servers such as Nginx.
$ sudo systemctl enable httpd
$ sudo systemctl status httpd
Once we have Apache installed and started successfully, we can proceed to set up the local repository.
Step 2: Install Required Packages
As the second step, we need to install the packages and tools to help in creating, configuring, and managing the local repository.
The tools we need are createrepo package that bundles the .rpm files together into repomd repo and yum-utils for managing the repository. You can install the packages using the command:

Step 3: Create Repository Directories
The third step is to create the required directories for setting up the repositories. Since we are using a web server, creating them in /var/www/html directory makes sense.
The directories we require are:
- Baseos
- Extras
- Appstream
- Epel
Use the command show below to set up the directories.
NOTE: Depending on various factors, you may not require to create the directories. However, to be on the safe side, create them beforehand and delete them if an error arises.
Step 4: Synchronize Yum Repositories
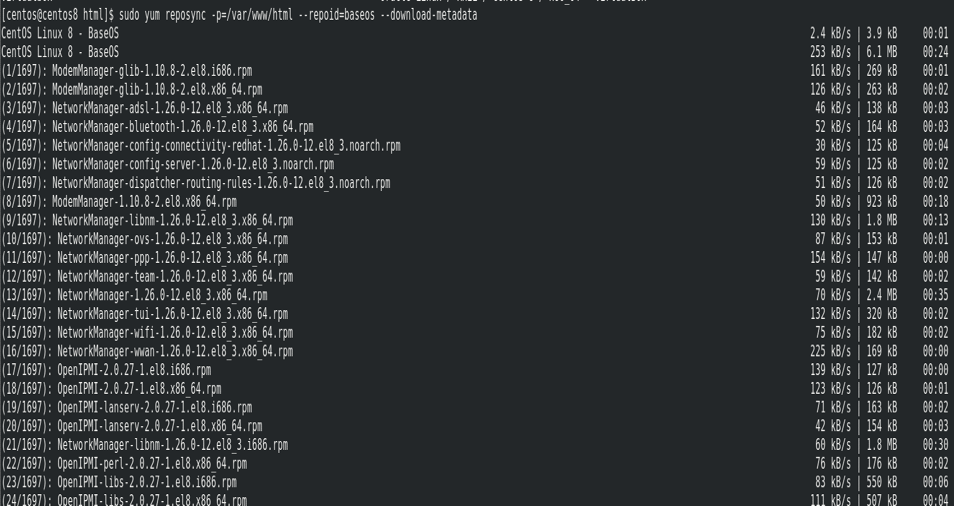
In this step, we shall synchronize the repositories to the directories we created in the previous step. We are going to use the reposync tool as:
$ sudo yum reposync -p=/var/www/html --repoid=extras --download-metadata
$ sudo yum reposync -p=/var/www/html --repoid=appstream --download-metadata
$ sudo yum reposync -p=/var/www/html --repoid=epel --download-metadata
Step 5: Create New Repository
The final step is to create a repository using the createrepo tool. The command for that is:
This will start repo creation and the output as shown below:
Directory walk done - 2817 packages
Temporary output repo path: /var/www/html/.repodata/
Preparing sqlite DBs
Pool started (with 5 workers)
Pool finished
Step 6: Setup Local Repo on Client Machine
The final step is to tell the client machines about the local repository and the link to download them.
Enter the command as:
Inside the file, add the following entries.
name=Yum Local Base
baseurl=http://192.168.0.20:80/base
enabled=1
gpgcheck=0
[local-extras]
name=Yum Local Extras
baseurl=http://192.168.0.20:80/extras
enabled=1
gpgcheck=0
[local-appstream]
name=Yum Local Appstream
baseurl=http://192.168.0.20:80/appstream
enabled=1
gpgcheck=0
[local-epel]
name=Yum Local Epel
baseurl=http://192.168.0.20:80/epel
enabled=1
gpgcheck=0
Step 7: Confirm Repolist
To check if the repolist are available, use the command:
This will give you a list of all your repositories as:

You can also navigate to the repo list using the url

Conclusion
That is all for this article. In the guide, we talked about how to set up a Local Yum repository based on CentOS. Hopefully, this guide gave you some value and helped you solve a problem.
Thank you for reading and sharing!