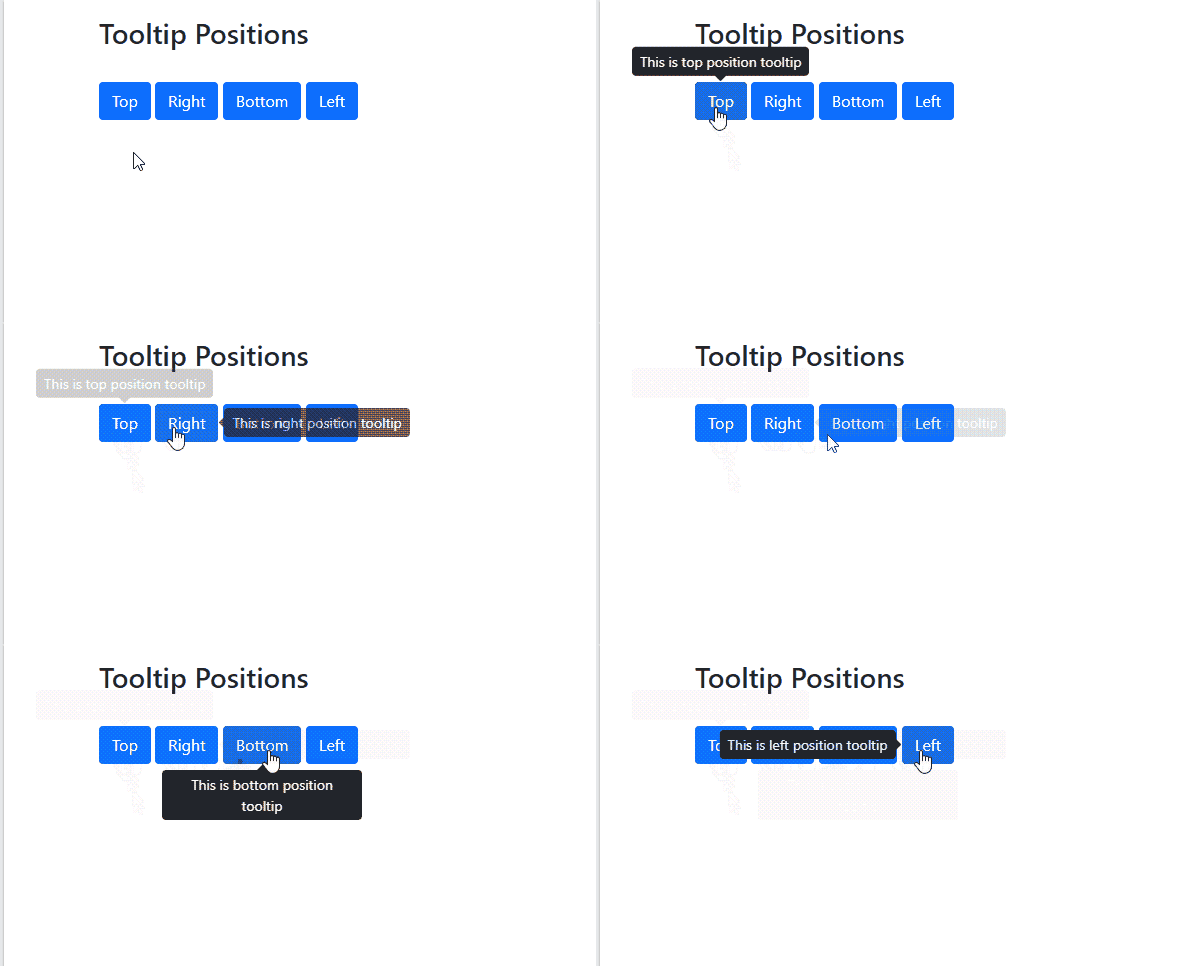
Tooltip is a small popup box that appears when a user move the cursor over a button or a link which give the user, knowledge or a hint about that specific button or link. Tooltips are useful for the new users of a website to save them from confusion or any kind of a problem while exploring your website.
This article will teach you about
How to create tooltip
To create a tooltip use, data attribute “data-bs-toggle=”tooltip” in your <a> tag or <button> tag and the text which is shown in tooltip must be written using the title attribute.

<div class="container" style="margin-top: 15px;">
<div class="row">
<div class="col-lg">
<h2>Tooltip with Link</h2>
<br>
<a href="#" data-bs-toggle="tooltip" title="This tooltip is created for link">Place cursor here</a>
</div>
<div class="col-lg">
<h1>Tooltip with button</h1>
<br>
<button type="button" class="btn btn-primary" data-bs-toggle="tooltip" title="This tooltip is created for button">Place cursor here</button>
</div>
</div>
</div>
</script>
$(document).ready(function(){
$('[data-bs-toggle="tooltip"]').tooltip();
});
</script>
<script src="https://cdn.jsdelivr.net/npm/[email protected]/dist/js/bootstrap.bundle.min.js"></script>
<script src="https://cdn.jsdelivr.net/npm/@popperjs/[email protected]/dist/umd/popper.min.js" ></script>
<script src="https://cdn.jsdelivr.net/npm/[email protected]/dist/js/bootstrap.min.js"></script>
</body>
Now let me tell you that in bootstrap 5 to create a tooltip we need to add data attributes in <a> tag or <button> tag and also write a jquery to enable it. So I break the creation process into steps which will give you better understanding.
Steps
Creating a tooltip in bootstrap 5 is a simple two step process
Step 1: Add data-bs-toggle=”tooltip” and title=”Tooltip text goes here” attributes in your <button> or <a> tag.
<h2>Tooltip with Link</h2>
<br>
<a href="#" data-bs-toggle="tooltip" title="This tooltip is created for link">Place cursor here</a>
</div>
<div class="col-lg">
<h2>Tooltip with button</h2>
<br>
<button type="button" class="btn btn-primary" data-bs-toggle="tooltip" title="This tooltip is created for button">Place cursor here</button>
</div>
Step 2: Enable tooltips by writing jquery following code
Positioning of tooltips
So to position a tooltip as your requirement just add data-bs-placement=”top/right/left/bottom” attribute to your <a> or <button> tag to change tooltip position.
<button class="btn btn-primary" data-bs-toggle="tooltip" data-bs-placement="top" title="Top position tooltip">Top</button>
<button class="btn btn-primary" data-bs-toggle="tooltip" data-bs-placement="right" title="Right position tooltip">Right</button>
<button class="btn btn-primary" data-bs-toggle="tooltip" data-bs-placement="bottom" title="Bottom position tooltip">bottom</button>
<button class="btn btn-primary" data-bs-toggle="tooltip" data-bs-placement="left" title="Left position tooltip">left</button>
</div>
Conclusion
Tooltips are created by adding data-bs-toggle=”tooltip” and title=”Tooltip text goes here” attributes in <button> or <a> tag and enable it by writing a javascript code. For positioning just add data-bs-placement=”top/bottom/right/left” attribute to <button> or <a> tag.

