Method 01: Via pgAdmin GUI
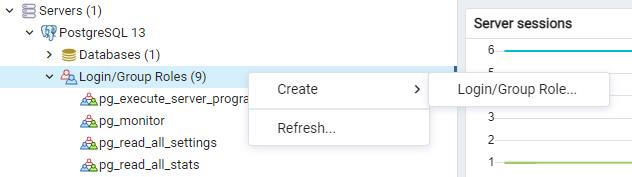
The first method to create a new user in PostgreSQL is via the pgAdmin interface of PostgreSQL. So, you need to search the pgAdmin from the Start menu of Windows 10 and tap on it upon highlighted at the screen. The pgAdmin interface will be opened in a few seconds on your Windows 10 desktop. After the opening, it asks you to enter the Master password to get into it. Upon adding the password, it requires the password for the Server of PostgreSQL to start using the currently selected server. Hence, enter your already set password and tap on the Submit button to continue using pgAdmin GUI. As we have to create a new user, we will be using the Login/Group Roles option as shown. Upon clicking or expanding the Login/Group Roles option, you can find the already defined roles or users, e.g., Postgres.

Right-click on the Login/Group Roles option to create a new role or user. Upon that, a dialogue will appear. Hover over the “Create” option, and it will expand further. Tap on the “Login/Group Role…” to create a new user or role in our PostgreSQL pgAdmin GUI as presented.
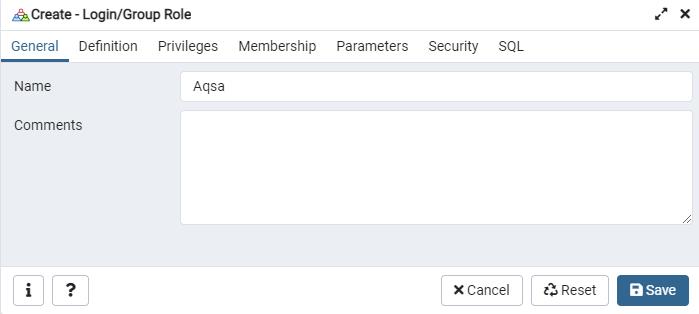
Right-after the click on the “Login/Group Role…” option, a dialogue box will appear on your screen named “Create – Login/Group Role”. On this screen, you can create a new user by simply doing little steps. Tap on the General section of user creation, and you have to add up a name of a role to be created. As you can see from the image below, we have added a user name as “Aqsa”. Add some comments about this newly created role in the comment section.
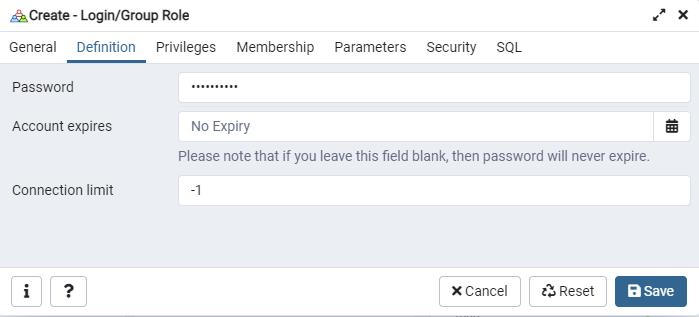
Now, tap on the menu of Definition to set some attributes for a new user to be created. You can set a password by adding it in the Password section. You can add the expiry date of this user by selecting a date from a calendar and setting the connection limit.
Now, we will be going to the Privileges section to assign rights to a new user, “Aqsa”. You can assign any right to a user to be created according to your choice of requirements for a user or role. We have assigned login rights, superuser rights, role creation rights, database creation rights, and inheritance rights to the user “Aqsa”.

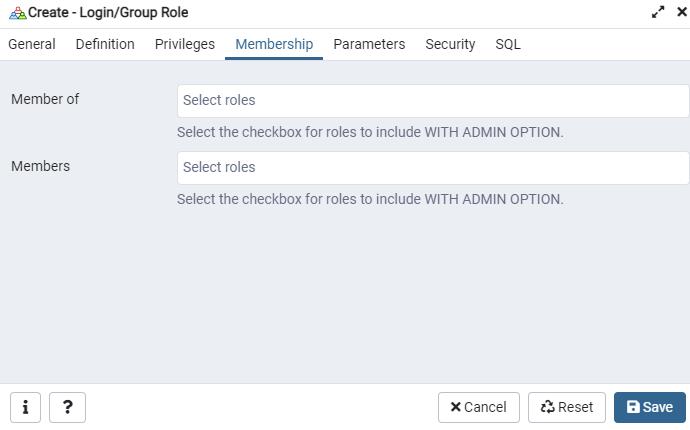
Now, you can also assign the Membership privileges to the user. We have left it to default and tapped on the button of “Save” to save our set requirements and to make a new role “Aqsa”.
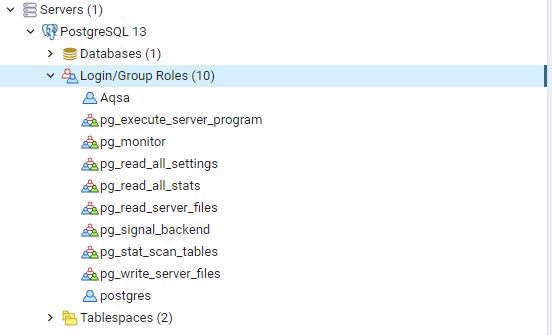
Now, after saving the records, go to the options side of the PostgreSQL 13 server. Expand the Login/Group Roles option or refresh it to see a change. You can see the newly created Role “Aqsa” has been listed at the top of all the already defined roles.
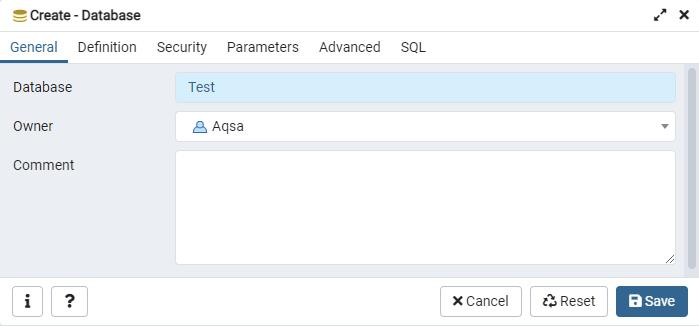
Let’s create a new database from the Database option listed under the PostgreSQL 13 server. Right-click on the “Database”, hover over the “Create” option, and tap “New” to create a new database. The screen window named “Create – Database” will be shown beneath. Write the name of a database to be created in the text box of the Database, e.g., Test. Now, you have to select the owner of this database. We have just created the user “Aqsa” within PostgreSQL Server; we will assign ownership rights to the role “Aqsa”. After that, hit the “Save” button to save the creation of a database “test”.
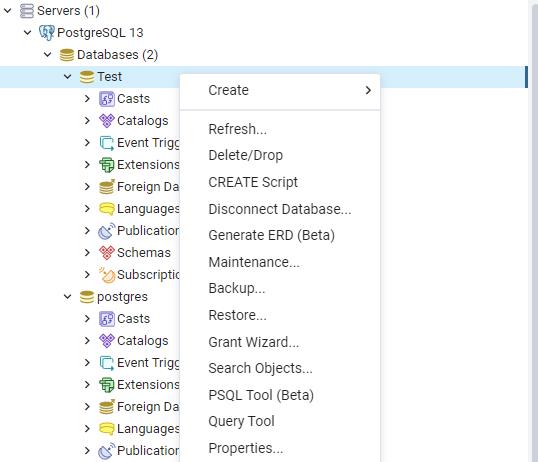
Refresh the Database option, and you will find a newly created database “Test” in this list. We have to set some properties of a database Test as well. Hence, right-click on it and choose the Properties option from the shown list of options.
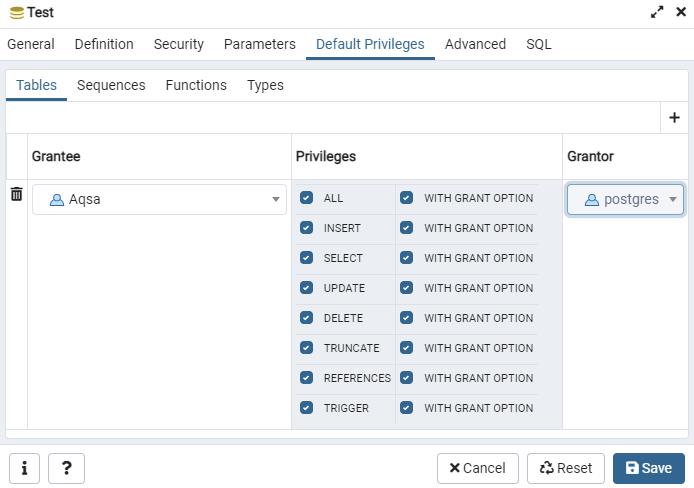
After the opening of a window “Test”, navigate towards the Default Privileges menu bar. You will find different options within its Tables section, e.g., Grantee, Privileges, and Grantor. We have chosen the user “Aqsa” as Grantee for the database “Test”. After that, we have assigned all the Insert, select, update, delete, truncate, references, and trigger rights to the role “Aqsa” along with All Grant Option checked-marked. Grantor would be automatically selected by default by the system. You have to click on the button “Save” to update the properties of the database “Test”. The user “Aqsa” can do anything it wants with the database “Test” as it has all the required rights.
Method 02: Via SQL Shell
Another method to create a new user is via the PostgreSQL shell terminal. Open it from the search start menu of Windows 10. Add the required localhost, Database you want to work on, post number, username for a user you want to work on, and finally, the password for the user to start using the terminal shell of SQL. You can see from the image below that we have chosen a newly created database, “Test” and a newly created user, “Aqsa” to work within. The SQL shell has been fully prepared now.

Firstly, you have to see the list of already built users within the PostgreSQL server. You have to use the following “du” command along with the slash sign in the shell. The output shows that the PostgreSQL server has 2 defined roles and attributes, e.g., Aqsa and Postgres.

Let’s create a new simple user with no assigned attributes. It would be a most simple and less privileged user in the system. So, we have used the CREATE USER command in the SQL shell and the name of a user, e.g., “Yasin” to create a new user or role as the query works right.
![]()
Upon checking the list of users once again, you can see that the user “Yasin” is now listed in it with no such privileges as the other two users have.

You can delete the user by a DROP USER query as below.
![]()
We can also create a user by assigning it a password as per the below CREATE USER instruction.
![]()
A newly created role, “AqsaYasin” can be seen in the list, and the user “Yasin” has been removed.

Let’s create another user “test” with some extra privileges compared to the previously created users. So, we created a user “test” with login rights, superuser rights, create DB rights, inheritance rights, no replication rights, connection limit -1 rights, and assign a password to it. The role “test” has been created via the below query.
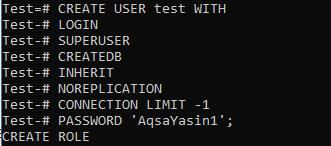
Now you can find the new role “test” with its role attributes within the user’s list.

Conclusion:
We have implemented two ways to create any new user or role in PostgreSQL, e.g., pgAdmin and SQL shell. We hope you like it.