Jenkins Blue Ocean is a free modern user interface plugin for Jenkins which is designed to remove the intimidating features of Jenkins. Instead, it offers simplistic and intuitive features to build the Jenkins pipelines.
One outstanding feature of Jenkins Blue Ocean is the Graphical Pipeline Editor. This allows you to define the pipeline stages and steps using a graphical interface instead of a script editor. With the Blue Ocean pipeline editor, the users can create the pipelines by dragging and dropping the pre-defined steps, rather than writing the code which makes it very approachable for beginners.
Jenkins Blue Ocean also includes other features such as a dashboard that provides an overview of all pipelines’ status and the ability to view and interact with the pipeline runs in real time. Additionally, it includes integrations with popular version control systems, such as Git and Mercurial, and support for a wide range of tools and technologies.
This tutorial teaches you how to create a simple pipeline using the Jenkins Blue Ocean dashboard.
Install the Blue Ocean Plugin on Jenkins
The first step is to ensure that we have the Blue Ocean Plugin installed on our Jenkins server.
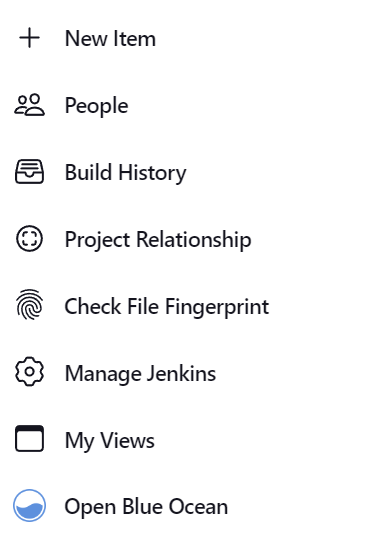
Open the Jenkins Dashboard -> Manage Jenkins -> Manage Plugins -> Available Plugins and search for Blue Ocean.
Locate the Blue Ocean plugin. Then, select and click install. Once downloaded, restart the Jenkins server to install and apply the Blue Ocean plugin.
Launch the Blue Ocean Interface
Once you have the Blue Ocean plugin installed, you can find the option to login into Blue Ocean on your Jenkins dashboard.
Alternatively, you can navigate to your Jenkins URL/blue to log in to the Blue Ocean dashboard.
Once you are logged into the dashboard, you will see a list of all the pipelines that you created and the option to create new pipelines.
This tutorial demonstrates how to create a new pipeline using the simple Node.JS and React Web Application.
The repository is provided in the following link:
https://github.com/jenkins-docs/simple-node-js-react-npm-app
Create a New Pipeline on Blue Ocean
On the Blue Ocean dashboard, click “New Pipeline” to launch a new pipeline.
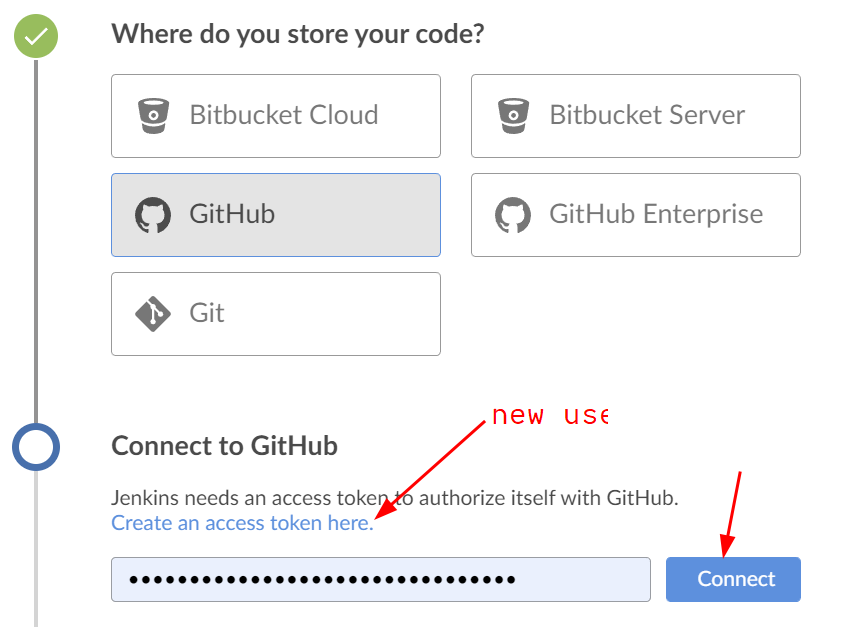
Select the source of your application. In our example, the source code is hosted on GitHub. We can select GitHub and click on connect to connect with our GitHub account.
If you have not connected your Jenkins instance to GitHub before, select “create new access token” and login into your GitHub account.
This allows you to generate a new access token for Jenkins. Select the scope of the access token (default should work) and click “Create”.
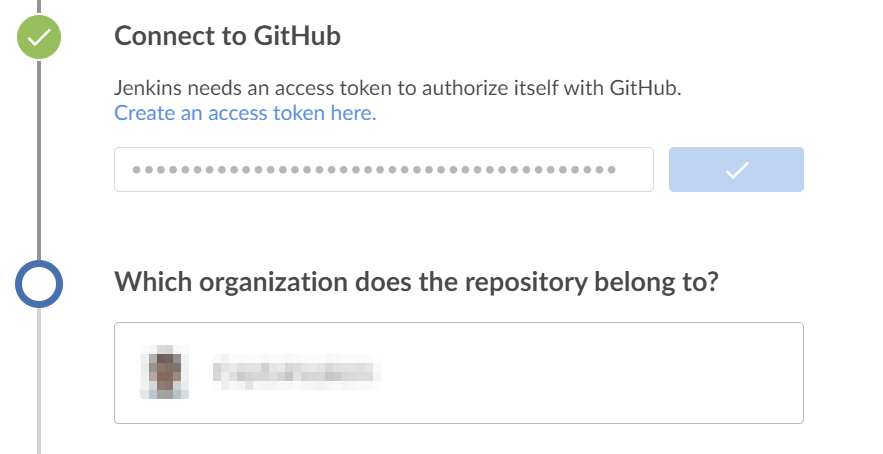
Copy the generated token and paste it into Jenkins. Click “Connect”.
Once connected, select your desired organization to proceed.
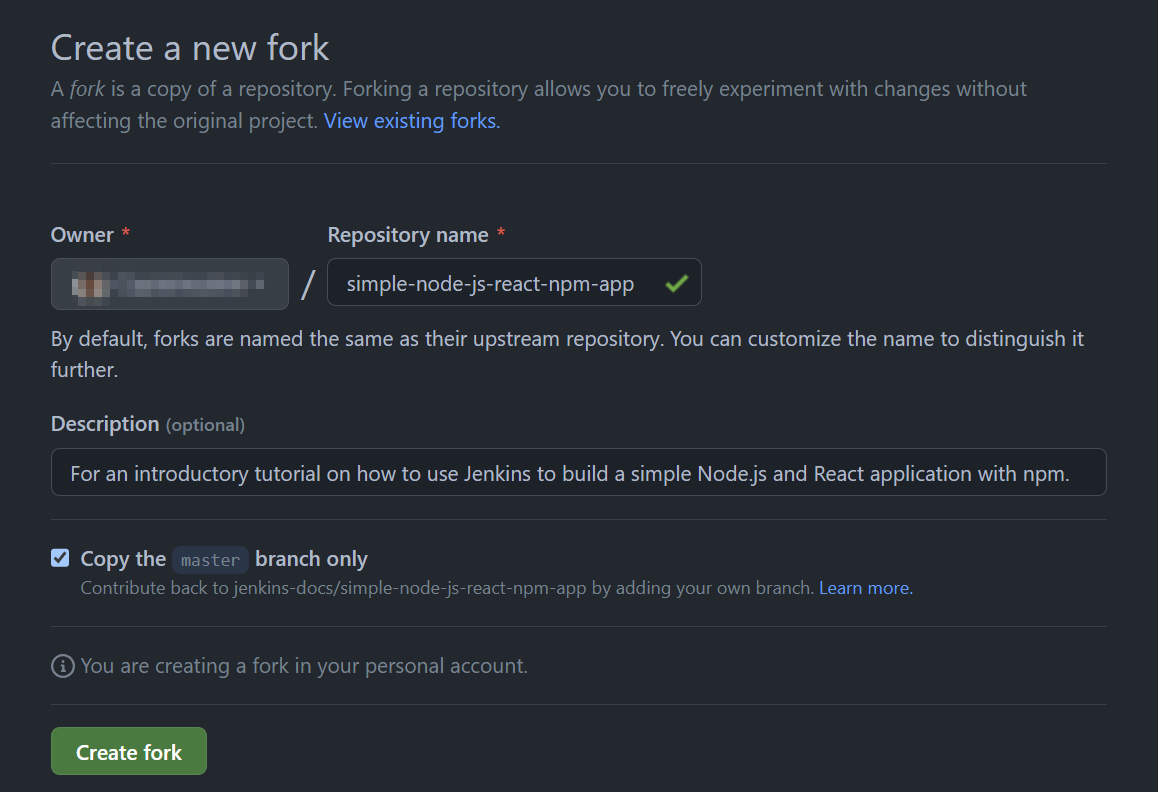
Next, go back to the simple-node-js-react-npm-app repository and fork the repository to your account.
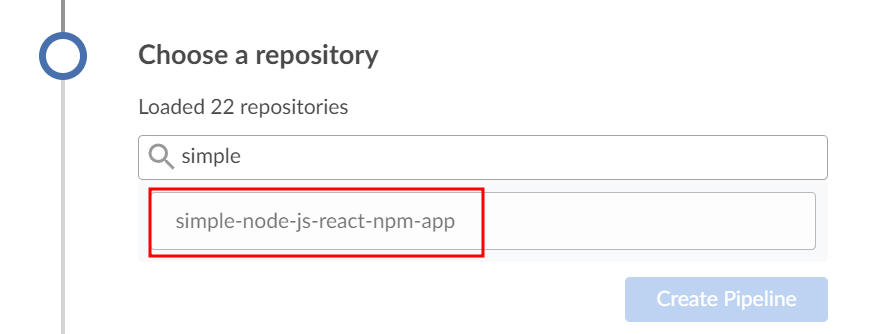
Go back to the Blue Oceans dashboard and select the simple-node-js-react-npm-app repository.
Next, click “Create Pipeline” to create a pipeline from the repository.
Once the pipeline is created, Jenkins will alert you that there is no Jenkinsfile that is defined in the repository. This forces you to define the pipeline instructions using the Blue Ocean Pipeline Editor.
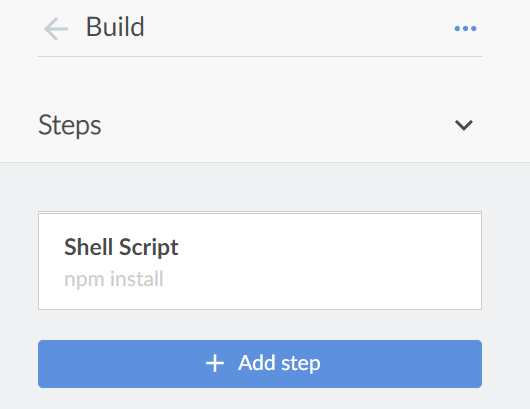
Click on the (+) icon to add a new stage. Enter the stage name as “Build” and add the step as “Shell Script.”
Add the shell script command as “npm install”.
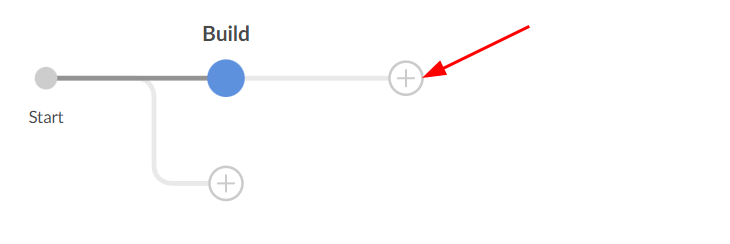
Next, click on the plus icon (+) to add a new stage to your pipeline.
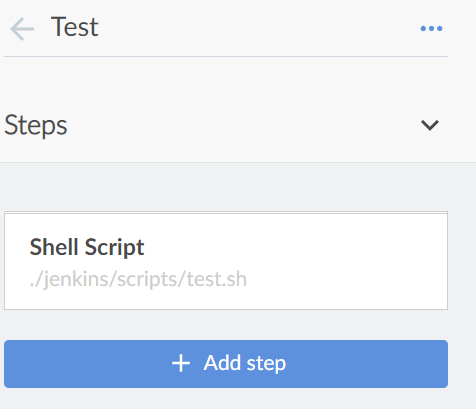
Give the stage with the name of “Test” and add a build step as “Shell Script.” Then, add the script command as follows:
This allows the script to go into the Jenkins/scripts directory and run the test.sh file.
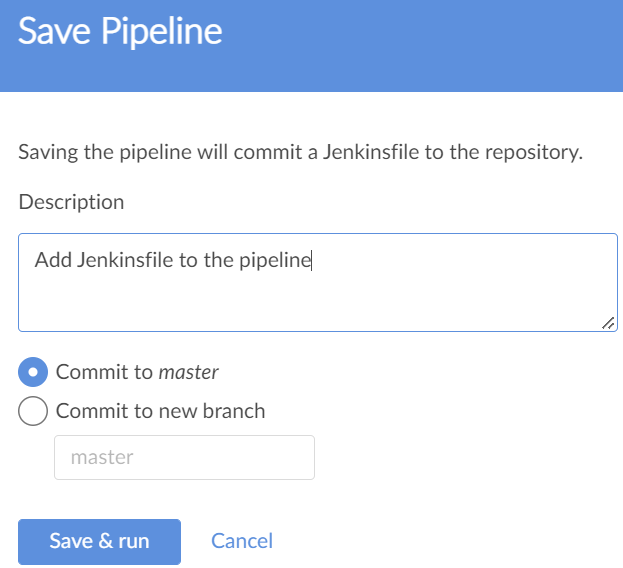
Once completed, click “Save” to save and run the pipeline.
This should commit the changes to the master branch of the forked repo and build the steps which are defined in the pipeline.
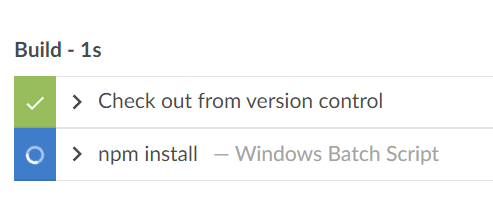
You can go back to the Blue Ocean dashboard and click on your pipeline to check the progress.
NOTE: If your Jenkins instance is running on Windows, you need to use the Windows batch script instead of a shell script.
Conclusion
You now learned how to install, configure, and use the Blue Ocean plugin on Jenkins. You also learned how to connect the Jenkins with GitHub and create a pipeline using the Blue Ocean interface.

