
How to create a menu using Arduino on LCD
Creating a menu using Arduino can be useful for performing multiple tasks when needed. Practically we can see the use of menus in our cell phones or any smart device capable of doing some specific functions. In short, the menu is a list of options or actions that one can do with the respective device so we have used the following hardware for creating a menu using Arduino on LCD:
- Arduino Uno
- Connecting wires
- One potentiometer
- Four push buttons
- One LED
- One Liquid Crystal Display (16×2)
- One buzzer
- One temperature sensor (LM35)
The schematics is given below:
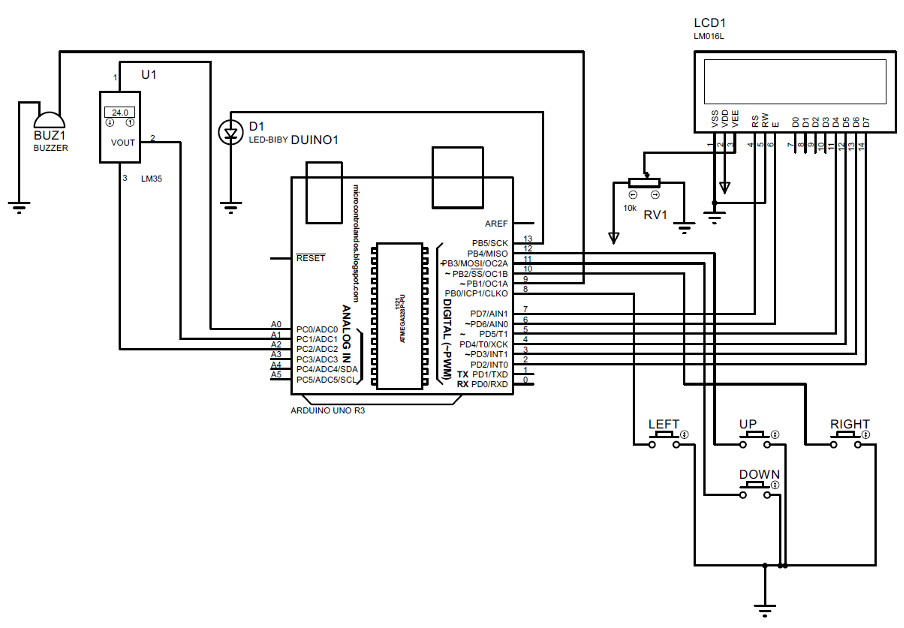
Hardware assembly for creating menu using Arduino
We have assembled the components in such a way that first we have placed all the components on a breadboard and then using the connecting wires each component is interfaced with Arduino. We have posted an image below for the hardware assembly through which the connections of the components can be understood easily.
The green wires connect the data pins of the LCD with Arduino whereas the gray wires connect the push buttons with Arduino. The temperature sensor is directly connected to the Arduino without any connecting wires because connecting wires sometimes distort the output of the sensor. The components are powered up by using the 5 volt pin of Arduino.
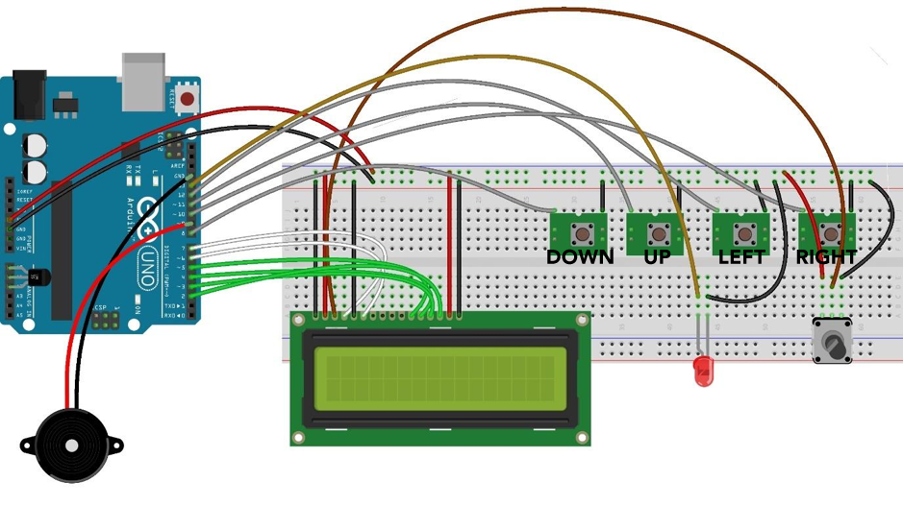
The button sequence is mentioned in the above image.
Arduino code for creating a menu
We have created a menu having three option one is to turn on and off the LED, the second is measuring the temperature and the third one is sounding an alarm:
LiquidCrystal lcd(7,6, 5, 4, 3, 2);// Arduino pins for the LCD
int vcc=A0; // A0 pin supply of LM35
int vout=A1; // A1 pin for the output of the LM35
int gnd=A2; //A2 pin for the output of the LM35
float temp;// variable for storing the temperature value
float value;// storing the value of the temperature sensor
const byte upButtonPin = 12;// Arduino pin for up button
const byte downButtonPin = 11; // Arduino pin for down button
const byte rightButtonPin = 10;// Arduino pin for right button
const byte leftButtonPin = 8;// Arduino pin for left button
const byte buzzerPin = 9; // Arduino pin for buzzer
const byte ledPin = 13;// Arduino pin for LED
String MenuItems[] = { // creating the string of the options in menu
"LED Switch",
"Temperature",
"Buzzer Switch "
};
void menuFunctions(int menu, byte right, byte left) /* creating the functions of the options provided in the menu */
{
if(menu == 1) // for first option
{
if(right == 1) //if right button is pressed
{
lcd.setCursor(0, 1);// setting the place for the data on LCD
lcd.print("Off ");// printing the off option
lcd.setCursor(10, 1);// setting the place for the data on LCD
lcd.print("On <<");// move the cursor on the ON option
digitalWrite(ledPin, HIGH); //turn the LED on
}
if(left == 1) // if left button is pressed then
{
lcd.setCursor(0, 1); //setting the place for the data on LCD
lcd.print("Off <<");// printing the off option
lcd.setCursor(10, 1);// setting the place for the data on LCD
lcd.print("On ");// printing the on option
digitalWrite(ledPin, LOW);// turning off the LED
}
}
if(menu == 2)// if the second option in the menu is selected
{
value=analogRead(vout); // reading the output of the sensor
temp= value*0.48; // converting analog values to temperature values
lcd.setCursor(0, 1);// setting the place for the data on LCD
lcd.print("Temperature: ");// displaying the data
lcd.setCursor(12, 1);// setting the place for the data on LCD
lcd.print(temp);// displaying the value of temperature
}
if(menu == 3) // if third option is selected
{
if(right == 1)// if right button is pressed
{
lcd.setCursor(0, 1);// setting the place for the data on LCD
lcd.print("Off "); // printing the off option
lcd.setCursor(10, 1);// setting the place for the data on LCD
lcd.print("On <<");// move the cursor on the ON option
tone(buzzerPin,125); // turn the buzzer on
}
if(left == 1)// if left button is pressed
{
lcd.setCursor(0, 1);// setting the place for the data on LCD
lcd.print("Off <<");// move the cursor on the off option
lcd.setCursor(10, 1);// setting the place for the data on LCD
lcd.print("On "); // printing the on option
noTone(buzzerPin);// turn off the buzzer
}
}
}
// creating the template of menu
template /* variable for name of option and for size of the menu*/
size_t MenuItemsSize(T (&) [NumberOfSize]){ return NumberOfSize; }/* menu option name and the number of option*/
int numberOfMenuItems = MenuItemsSize(MenuItems) - 1;
int currentMenuItem = 0;// variable for storing current option
int previousMenuItem = 1;// variable for storing the previous option
byte button_flag = 0;
unsigned long previousMillis = millis();
// setup function
void setup()
{
pinMode(ledPin, OUTPUT); // defining pin mode for LED
pinMode(vcc,OUTPUT); // defining pin mode for supply pin for sensor
pinMode(vout,INPUT); // defining pin mode for output pin of the sensor
pinMode(gnd,OUTPUT); //defining pin mode for ground pin of the sensor
// defining the states for the supply and ground pins for the sensors
digitalWrite(vcc,HIGH);//giving the Arduino A0 pin HIGH state
digitalWrite(gnd,LOW); //giving the Arduino A2 pin LOW state
pinMode(upButtonPin, INPUT_PULLUP);//assigning the up button INPUT_PULLUP mode
pinMode(downButtonPin, INPUT_PULLUP);/*assigning the up button INPUT_PULLUP mode*/
pinMode(rightButtonPin, INPUT_PULLUP);/*assigning the up button INPUT_PULLUP mode*/
pinMode(leftButtonPin, INPUT_PULLUP); /*assigning the up button INPUT_PULLUP mode*/
lcd.begin(16,2);// initializing the dimensions of LCD
lcd.clear();// clearing the LCD
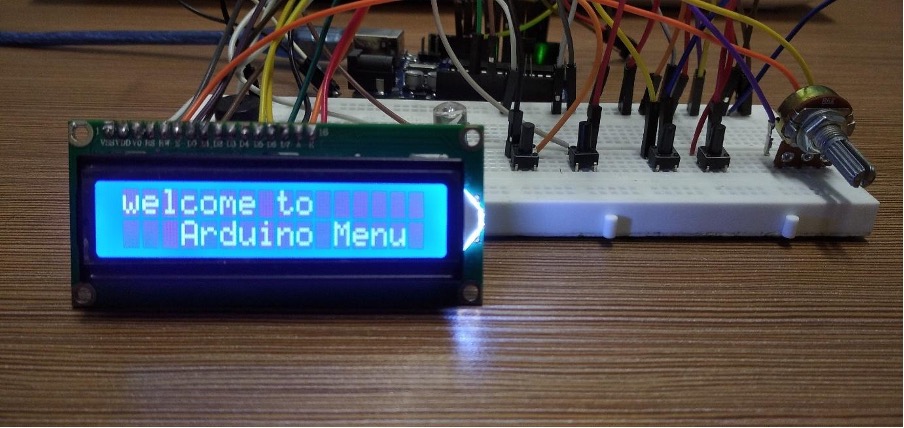
lcd.setCursor(0, 0);// setting place for data to be displayed on LCD
lcd.print("welcome to");// data to be displayed on LCD
lcd.setCursor(3, 1); // setting place for data to be displayed on LCD
lcd.print("Arduino Menu");// data to be displayed on LCD
delay(6000);// time for which the data will be displayed on LCD
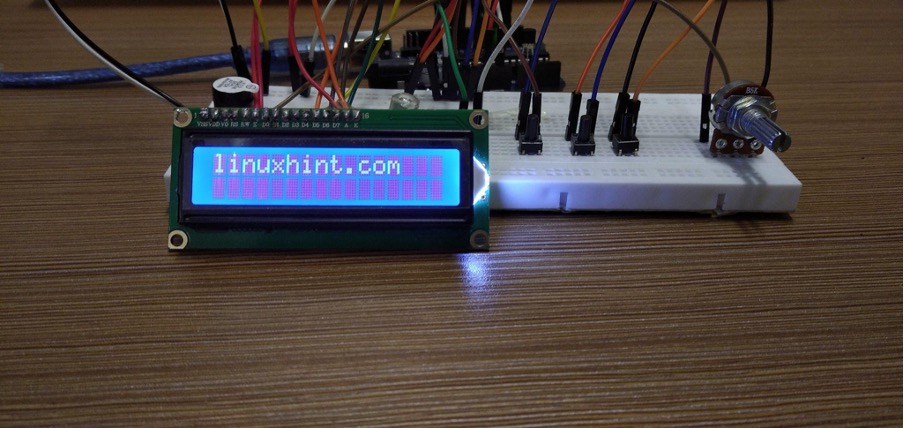
lcd.clear();// clearing the LCD
lcd.setCursor(0, 0); //setting place for data to be displayed on LCD
lcd.print("linuxhint.com");// data to be displayed on LCD
delay(7000);// time for which the data will be displayed on LCD
lcd.clear();//clearing the LCD
}
// using if conditions for defining the functionality of each button
void loop()
{
if(digitalRead(rightButtonPin) == LOW && button_flag == 0)/*if right button is pressed */
{
menuFunctions(currentMenuItem + 1, 1, 0);//move one step to right
button_flag = 1;
previousMillis = millis();
}
if(digitalRead(leftButtonPin) == LOW && button_flag == 0)/*if left button is pressed*/
{
menuFunctions(currentMenuItem + 1, 0, 1);
button_flag = 1;
previousMillis = millis();
}
if(digitalRead(upButtonPin) == LOW && button_flag == 0) /*if up button is pressed*/
{
++currentMenuItem;
if(currentMenuItem > numberOfMenuItems )
{
currentMenuItem = numberOfMenuItems ;
}
button_flag = 1;
previousMillis = millis();
}
else if(digitalRead(downButtonPin) == LOW && button_flag == 0) /*if down button is pressed*/
{
currentMenuItem--;
if(currentMenuItem = 400)
{
previousMillis = millis();
button_flag = 0;
}
}
To summarize the working of the Arduino code given above we can say that at first, we have assigned pins to LCD, temperature sensor, buzzer and push buttons. Then we have created a menu by having some options like switching of LED, temperature sensing and switching of buzzer.
We have used the if conditions for each option that we have given in the menu and after that we have created a template for making the menu and defining some variables for remembering the options in the menu.
In the setup function all Arduino pins are assigned their modes and the dimension of the LCD is initialized.
Coming to the loop function we have defined the functionality of each button used in the Arduino program. There are four buttons that are used in this program: two are the toggle buttons and the other two are used as an on/off switch for the connected devices.
Hardware implementation for creating a menu using Arduino Uno
The images of the output of the Arduino program on hardware are posted in the sequence of the flow of Arduino code. To navigate the menu press “UP” and “Down” buttons to perform functions press “Left” and “RIGHT” buttons.
The first option of the menu is the LED switch:
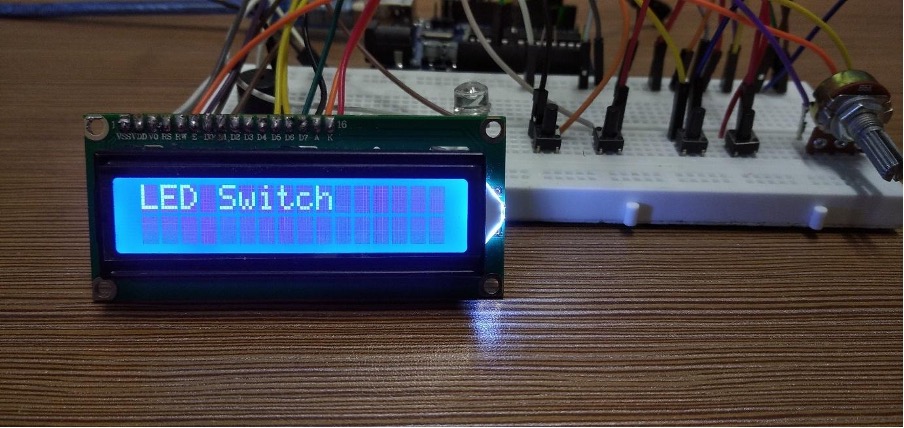
When the LED is in Off state:

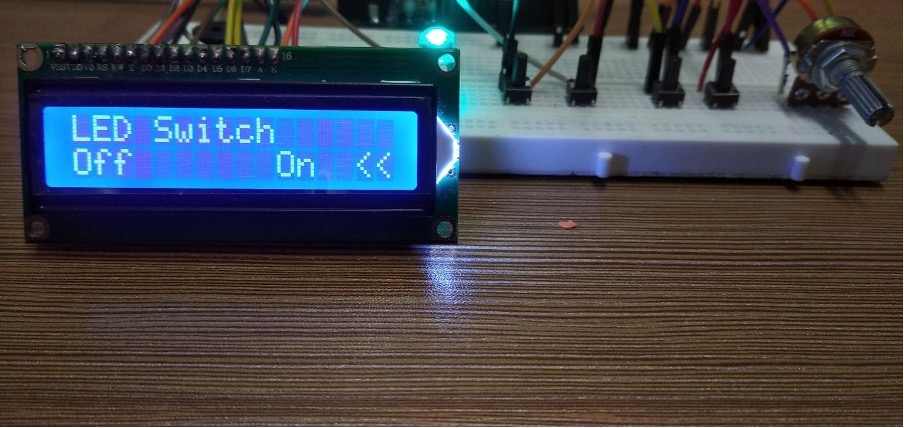
When the right button is pressed the LED will be turned on:
The second option in the menu is temperature:

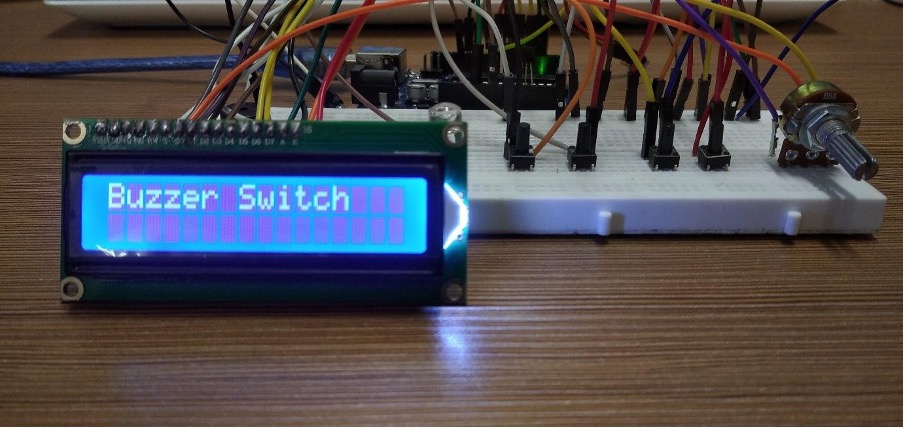
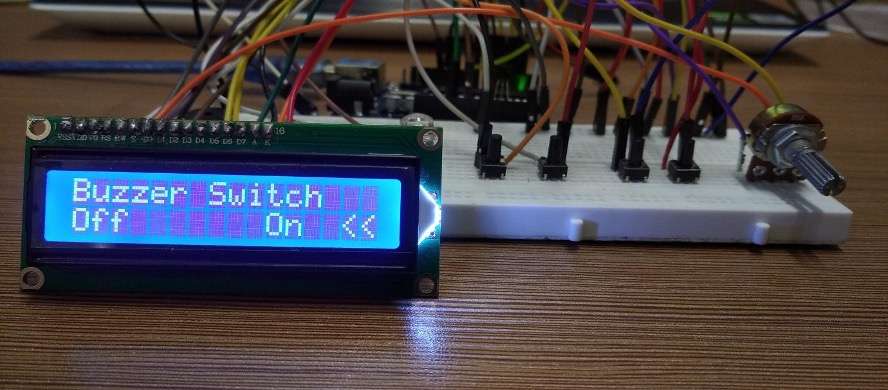
The next option is the switching of buzzer:
When the buzzer is in on state when the right button is pressed:
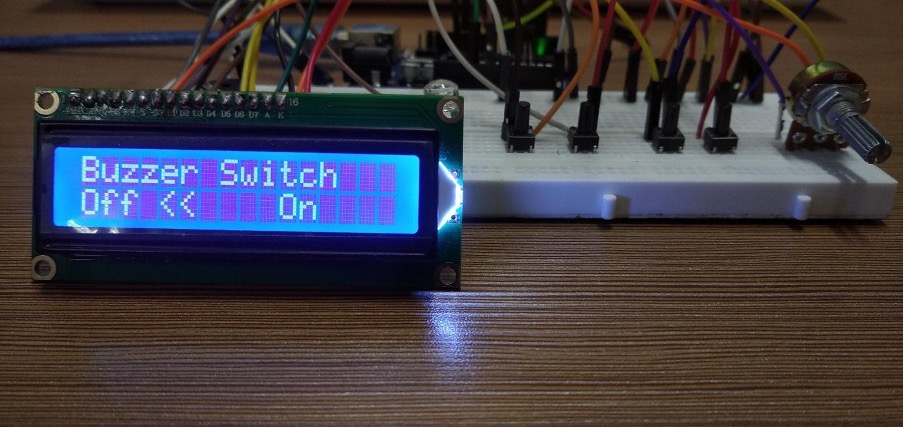
The buzzer is turned off when the left button is pressed:
Conclusion
To make different projects on the beginner or advanced level the most feasible way that comes to one’s mind is using the Arduino platform. This platform provides a variety of options for the users based on the requirements of the project. Similarly this platform is kind of a complete package as it provides both types of assistance software and hardware. So, making projects using Arduino gives a chance of learning and understanding different concepts about circuits. We have also made a project of creating a menu using an Arduino Uno board and displaying it on a 16×2 LCD.