What is CRD in Kubernetes?
CRD stands for Custom Resource Definition used for new resources without adding another API server. To work with CRDs, you do not have to understand API aggregation. It is a very powerful feature introduced in Kubernetes 1.7 to be shipped with various in-built resources and API objects. It allows you to define custom resources with a schema and name of your choice.
CRDs extend the Kubernetes API abilities exceeding the default installation by utilizing the custom resource definitions. By utilizing CRDs, you can guide Kubernetes in a way that can handle more than just containers. You can create a custom resource of your own choice and make it declarative by using the custom controllers. Now, let us learn how to create a custom resource definition and then design a custom controller to control the CRD. And then how to delete CDR to see its impact of it on Kubernetes.
Prerequisite
Before we move on to the CRD creation and deletion steps, let us make sure that our system meets all the needs of the prerequisites.
- Ubuntu 20.04 or any other latest version to have a Linux/Unix environment to work.
- Kubernetes cluster.
- Kubectl CLI to use kubectl commands, cluster communication, and manage the development environment.
- minikube or any other Kubernetes playground for creating the clusters
Install these tools, if you have not installed them yet, before proceeding to the next section.
Now, we will move on to the step-by-step guide on how to create CRDs in Kubernetes.
Step # 1: Start Kubernetes
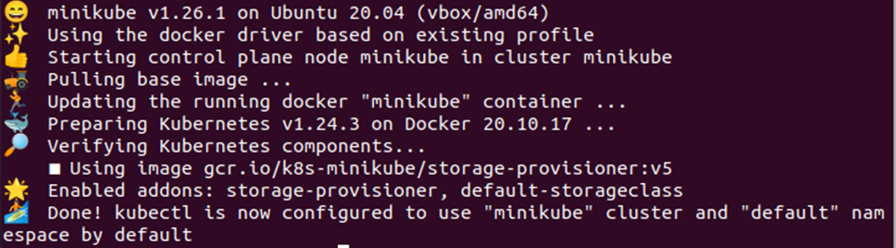
To work with CDRs, you must have a cluster with at least two Kubernetes nodes which are not working as control plane hosts. We are using the minikube to create and use the cluster. So, use the command given below to start the minikube:
When you execute this command, you will get a similar output to the one given below:
Step # 2: Open or Create a Configuration File
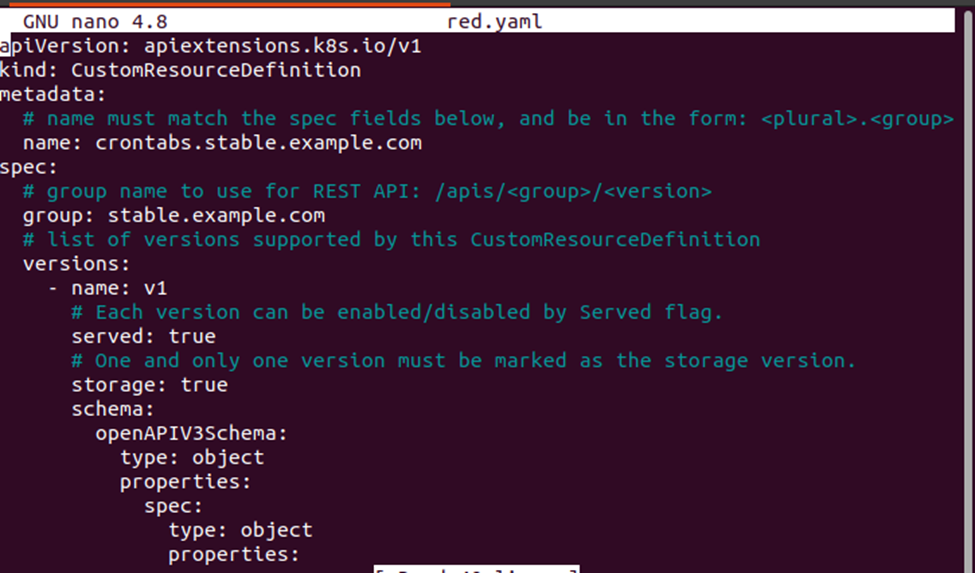
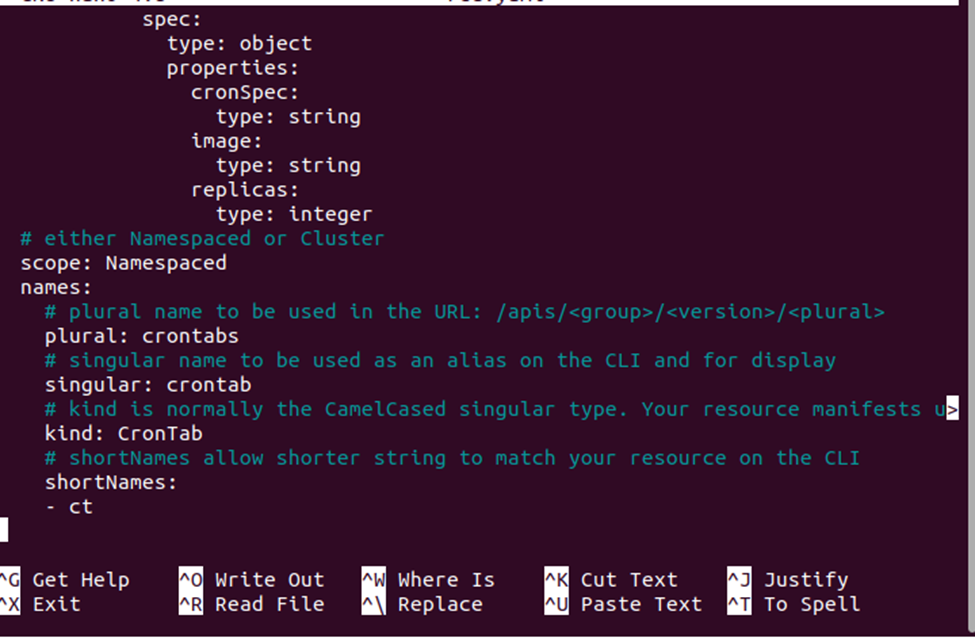
Now that our minikube is up and running, let us open the configuration file. The ‘nano’ command is used to open the configuration files. All you need to do is to provide the file name next to the nano command followed by the file extension and press enter. Here, we have the ‘red.yaml’ file which contains the configuration details for creating the CRDs. Here is the complete nano command that you can use to open your desired file:
When you execute this command, the following file will open in your terminal:
Step # 3: Create an Endpoint Resource
The configuration resources have been saved in the red.yaml. We will be using that to create the new namespaced RESTful API endpoint. Kubectl provides the ‘apply’ command to create an endpoint from a configuration file. Here is the complete ‘apply’ command that is used to create the new namespaced RESTful API:
The endpoint created by this command will be used to create the custom object that will control the CRD. The following output will be generated for the namespaced resource:

Step # 4: Create a Custom Object to Control the CRD
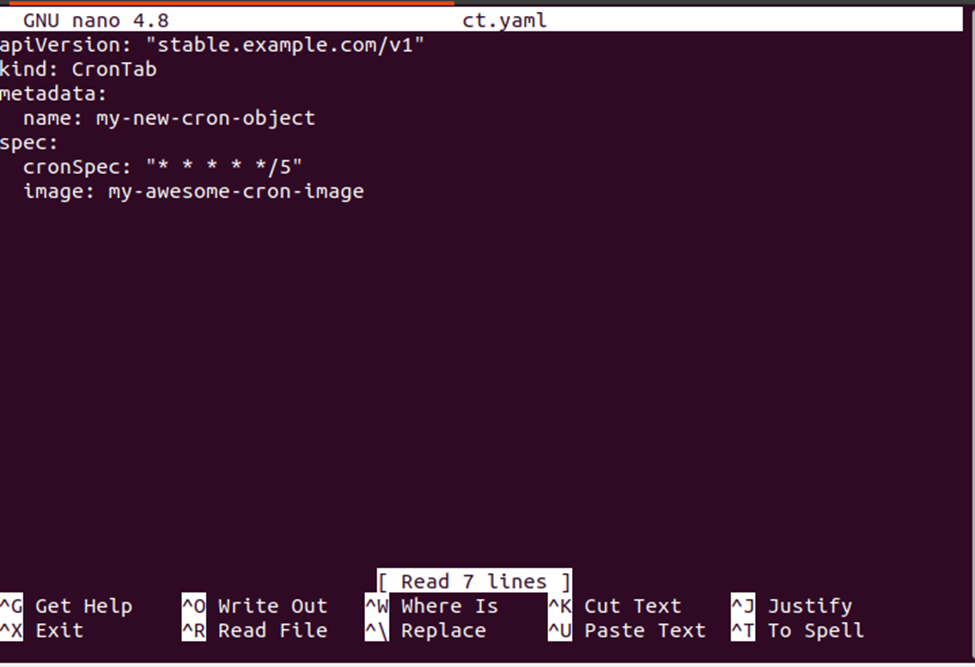
The CRDs are controlled by the custom objects. We can create them once the custom resource definition has been created. The custom objects contain the custom fields of arbitrary JSON. To create the custom object, we again need a YAML configuration file. Use the ‘nano’ command to create the YAML configuration file:
Save the required fields with the specific details in the YAML file. The sample configuration details are shown in the sample below:
Now, use that same YAML file to create the custom object. Use the ‘apply’ command to create the custom object from the specified YAML file. See the complete command given below:
Upon successful execution of this command, you will get the following output:

Step # 5: Manage the CRD with a Custom Object
The custom objects are used to manage the CRDs. So, let us learn how we can utilize the recently created custom object to manage the already created CRD. Here, we are going to check the details containing the custom object by using the ‘get’ command. See the command given in the code snippet below:
When you execute this command in the minikube terminal, the following output will be generated:

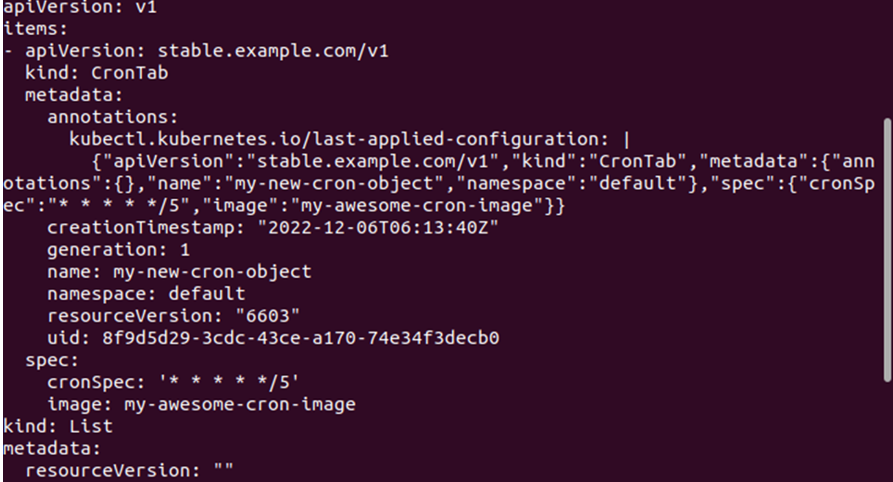
If you want to check the raw data contained in the YAML file, then you can use this command:
This will show the raw data in the YAML file like the sample given below:
This is how we can create the CRD and a custom object to manage and control the created CRD. Now, if you want to delete the created CRD, then you can follow the procedure given below.
How to Delete the CRDs Created in Kubernetes?
The kubectl commands allow you to delete the CRDs in Kubernetes. When you attempt to delete the CRD in Kubernetes, the custom resources associated with it will also be deleted. The kubectl provides the ‘delete’ command to delete any resource. The command given below is used to delete the CRD which we have created in the steps above:
Upon successful execution of this command, you will get the following result:

Now that the CRD and the custom objects associated with it have been deleted, you will get an error from the server if you try to access it. See the command given below where we are trying to access the namespaced RESTful API:
Since the ‘crontabs’ has been deleted, the server will raise the error for this action. See the output of this command given below:

Conclusion
This article was a quick overview of how to create the custom resource definition, how to create a custom object to control the CRDs, and how to delete the CRD from Kubernetes. With the help of sample examples, we demonstrated each step to help you understand the process easily and quickly.