TFTP is the short form of ‘Trivial File Transfer Protocol’ that works as a medium for file transfer without user authentication. It is beneficial for efficient file transfers, network booting, firmware updates, backups, etc. TFTP is the simple version of FTP and works on the UDP or User Datagram Protocol. However, the TFTP server requires correct configuration involving setting up the storage directory and providing access permissions. That’s why many Rocky Linux beginners always need clarification while setting up a TFTP server and get errors. So this article has the complete method to configure and run a TFTP server on Rocky Linux 9.
How to Configure and Run TFTP Server on Rocky Linux 9
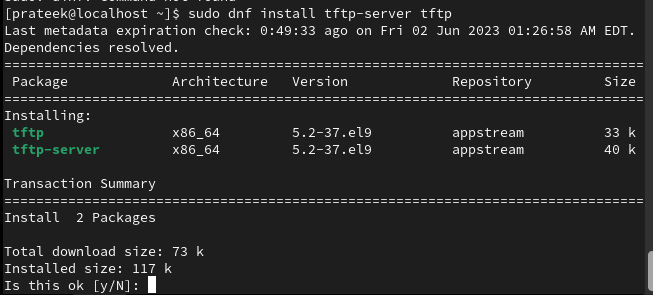
First, please update the current system as per the latest updates available in Rocky Linux 9 and then install the TFTP server utility:
sudo dnf install tftp-server
After installing the TFTP server, you must copy the tftp.service to tftp-server.service and tftp.socket to tftp-server.socket. First, copy tftp.service and tftp-server.service using the cp command:
Now, copy the tftp.socket to the tftp-server.socket:

Once you copy the services to the TFTP server, you need to edit the TFTP-server.service in the text editor:
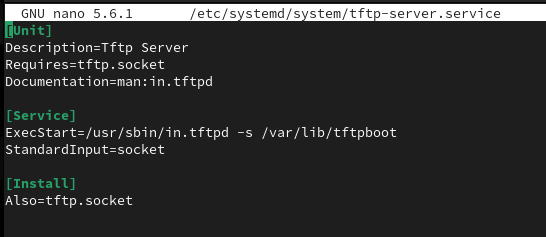
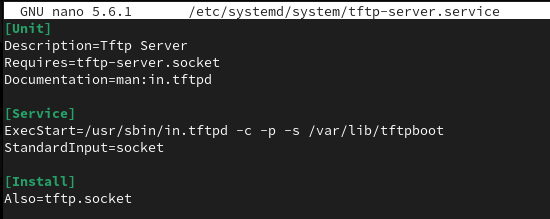
In the above text, please replace the tftp.socket with the tftp-server.socket and replace the ExecStart as we did below:
In the above line, the -c option lets the TFTP server create the file, which means the client can upload files to your TFTP server. On the other hand, the -p option lets the TFTP server create the files with the current permission the source file includes.
Once done, please save the file to make the modification successful. After that, you can reload the daemon and enable the TFTP server:
sudo systemctl enable --now tftp-server

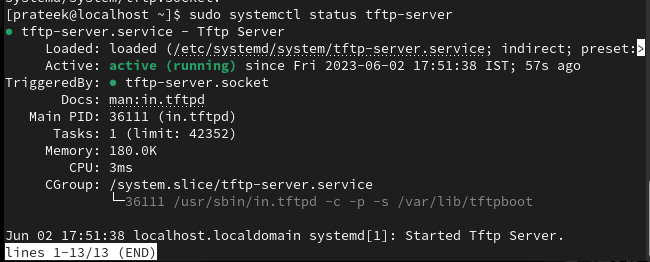
Moreover, you can also check the status of the currently running TFTP-server:
Now, you can run the following command to enable the read and write permission for TFTP server to upload folders:
![]()
Finally, allow the traffic from the TFTP server to your terminal through the below command:
sudo firewall-cmd --reload
;

How to Run TFTP Server
Now it is time to run the TFTP server in the terminal, so please run the following command for it:

Please replace the <server_ip> with the IP address of your TFTP server. You can also run the below command to display the TFTP client options:
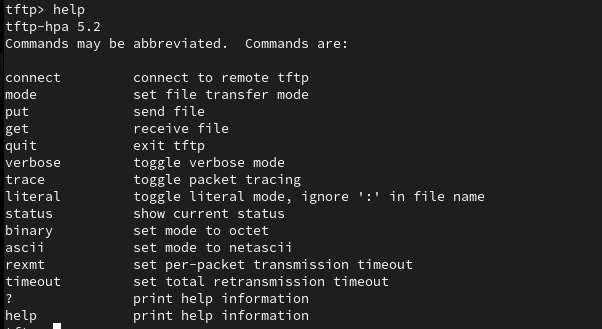
You can use the above arguments to download, upload and perform various tasks on the TFTP server.
Conclusion
So this is how you can perform TFTP server configuration on Rocky Linux 9. Setting up a TFTP server is simple, but all you need to do is be careful while configuring the server. TFTP may not be highly secured, so make sure you do regular security checkups in the system to make it invulnerable to attacks.