OpenStack has full capability to deploy virtual machines (VMs) and handle various tasks required for managing a cloud environment. With its horizontal scaling feature, it can spin up more as per requirement.
One of the important features of OpenStack is that it an open-source software. Microstack is a tool for installing the OpenStack environment in a very easy way. If you have previously gone through the custom steps of installing OpenStack, you might see the real pain of customizing and configuring various installation steps. But with Microstack, it is simply 2-3 steps of the process. In this guide, we have used the Microstack based variant of OpenStack. You can use any other way to install OpenStack, but with Microstack, things got very simple.
Let us review some of the major components of OpenStack here:
- Nova: Manages various aspects of compute instances on demand. It is the compute engine of OpenStack for managing and deploying VMs.
- Neutron: Provides OpenStack networking services. It helps in establishing a communication path between various OpenStack instances.
- Swift: Provide storage services for files and objects inside an OpenStack environment.
- Horizon: It is a web-based graphical dashboard interface of OpenStack for managing OpenStack’s different operations.
- Keystone: It is an identity service for authentication, access control, authorization, and various other services.
- Glance: It is an image service of OpenStack for managing virtual machine images. These images can be used as a template for launching new VMs.
- Heat: It is basically an orchestration tool of OpenStack for launching multiple composite cloud applications using an orchestration template like HOT (Heat Orchestration Template).
The installation process of OpenStack is very resource and time-consuming. Before we get our hands dirty in configuring the OpenStack service, we assume that you have already installed OpenStack on your system or inside a VM. If not, you can follow our previous guide for installation. In this guide, we have installed the OpenStack using the Microstack from the snap repository.
Configuration of Our Machine:
Operating System: Ubuntu 20.04
RAM: 16 GB
Hard Disk: 160 GB
OpenStack Variant: Microstack.
In this tutorial, we will see how we can configure networking services in OpenStack. To simplify things, we have provided snapshots of various stages of configuration. So let’s jump right into it.
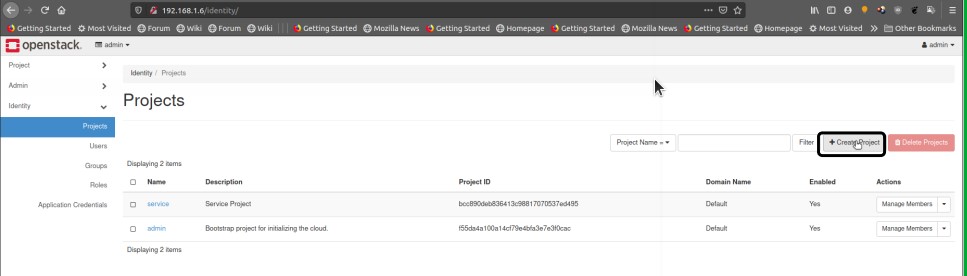
Step 1. Log in to the OpenStack dashboard with the admin account. Once you are logged in, you need to create a new project. Follow the below path:
Identity -> Projects -> Create Project

Step 2. Now, as our project has been created with the name “MyProject1”, we will now have to go to the path:
Identity -> Users -> Create User
And create a new user.
Here we have to give our user a name (“LHuser” in our case) and an optional description for this user. Create a password for this user.
In the primary project menu, select our project (MyProject1). Now finish this step by clicking the “Create User” button.

Step 3. Now we will configure the OpenStack network. First, log out from the admin account and login with the newly created user LHuser. Now navigate to the path:
Project -> Networks → Create Network
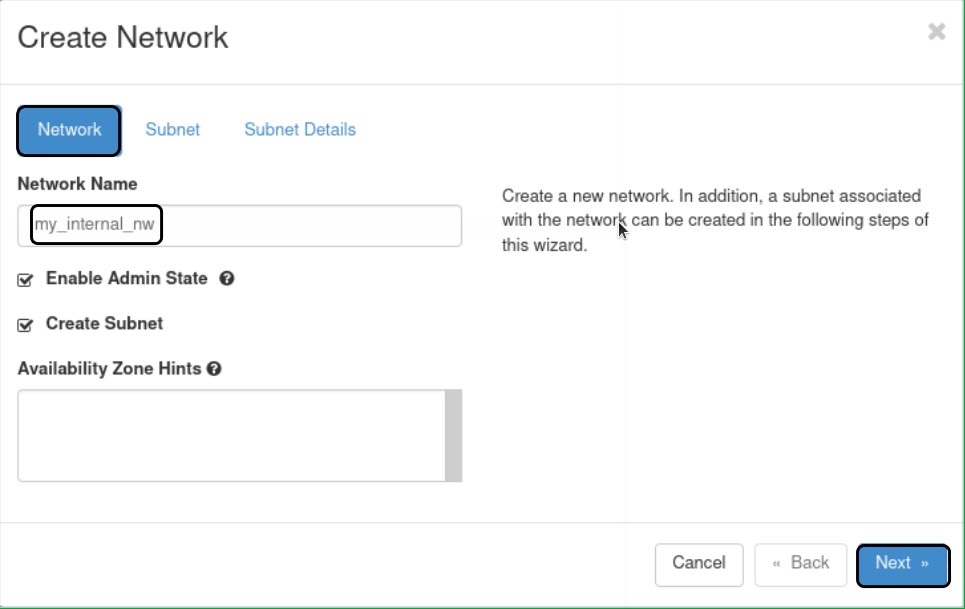
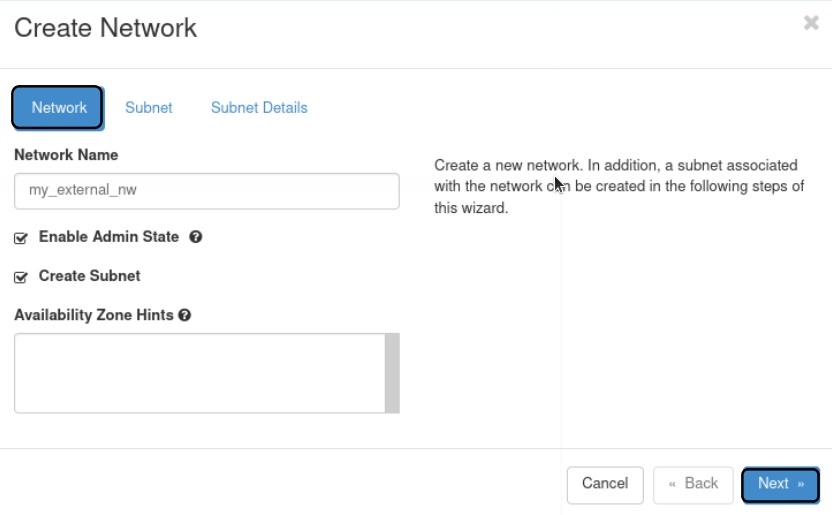
I) Internal Network
a) First, we will create an internal network. Our Specification for the internal network is as follows:
Network Name: my_internal_nw
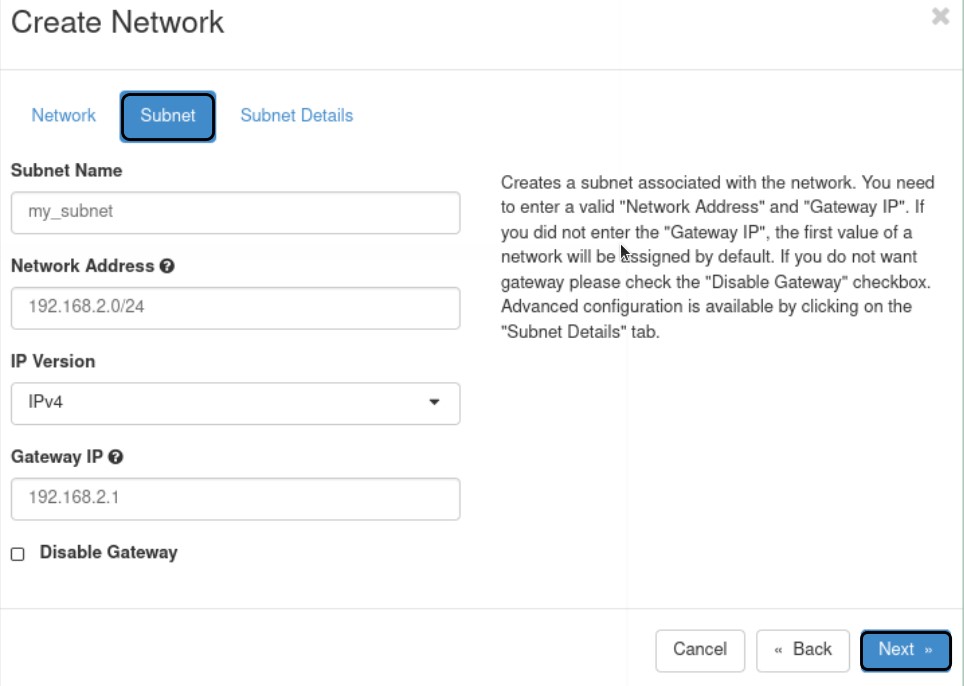
Subnet Name: my_subnet
Network Address: 192.168.2.0/24
Gateway IP: 192.168.2.10
IP Version: IPv4
Also, remember to check the “Enable Admin State.”
b) subnet
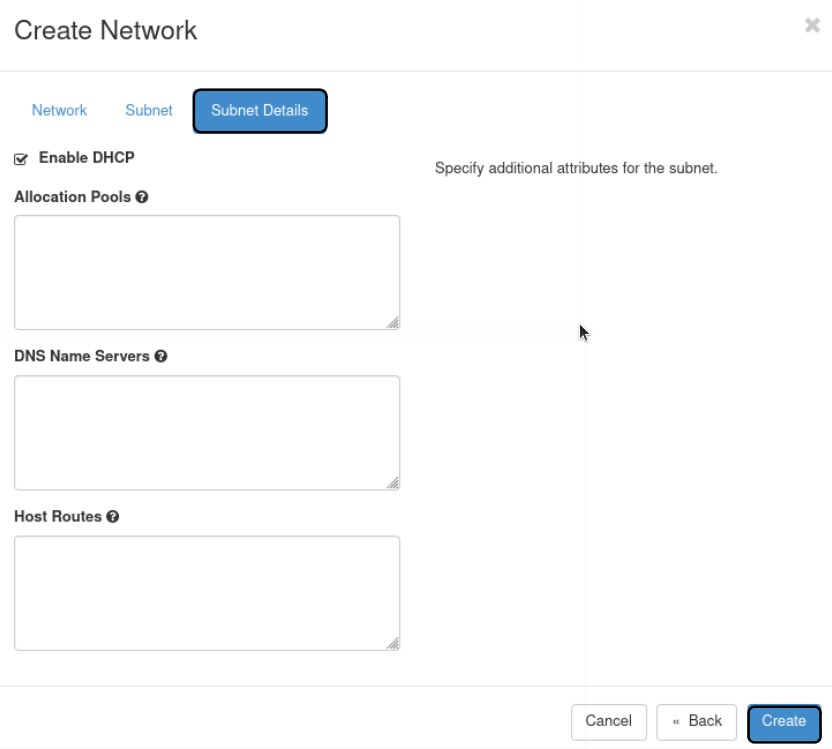
c) subnet details
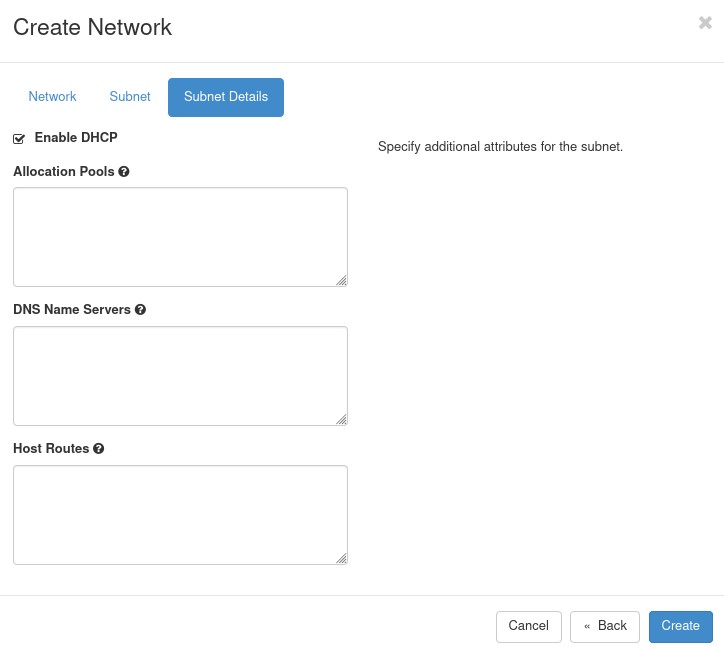
II) External Network
The steps for creating the external network are the same as that of the internal network. The only difference is that the network configuration here depends on the br-ex interface created with OpenStack installation. So use the same network address and gateway IP as that of the br-ex interface. In our case, the specifications are as follow:
Network Name: my_external_nw
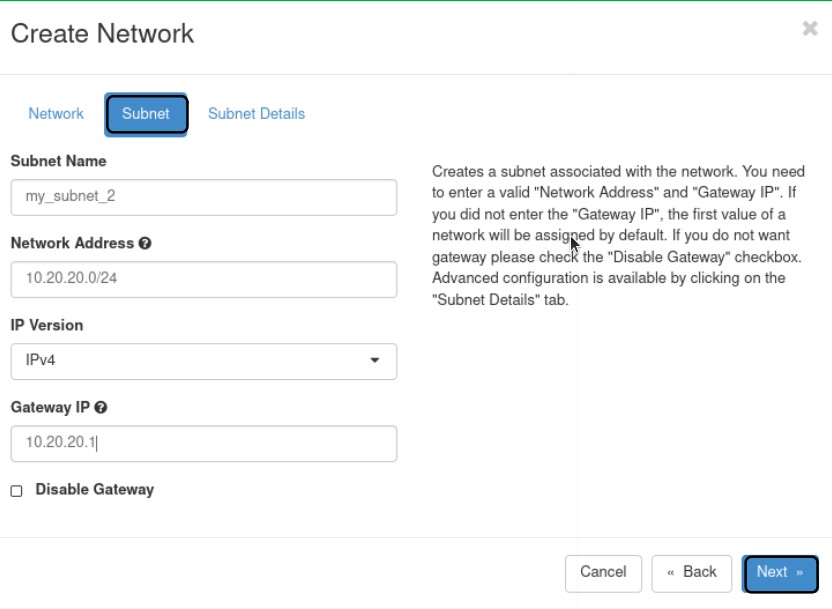
Subnet Name: my_subnet_2
Network Address: 10.20.20.0/24
Gateway IP: 10.20.20.1
IP Version: IPv4
Also, check the “Enable Admin State.”
2) Subnet
3. Subnet details

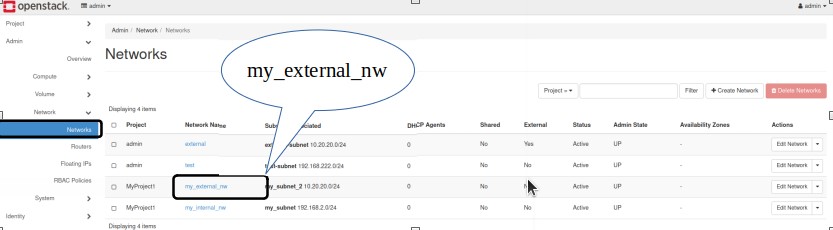
Step 4. After finishing the process of creating networks, log out of the new user account and again login with an admin account. On the OpenStack, dashboard goes to:
1. Admin -> System-> Networks
And select the network named “my_external_nw” and click the “edit network” in the right corresponding to this network.
2. A new window will prompt up. Here simply mark this network as an External network. Click the “Save Changes.” button to apply settings.

Step 5. Now, logout from the admin user and log in with the new user.
Step 6. We will have to create a router for the two networks to create a communication path between these two. Go to
Project -> Network -> Routers
And click the “create router” button.

Step 7. It will ask about router details. Fill them in and select “my_external_nw” as the External Network and click the “create router” button.

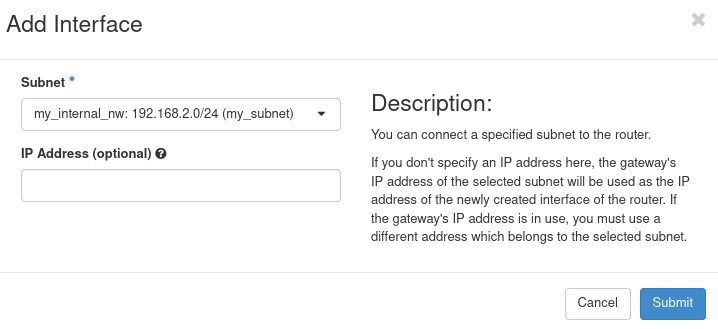
Step 8. After the above step, select the router from the router name column, go to the Interfaces tab and click on the “Add Interface” button.

Step 9. A new prompt window will appear. In the subnet dropbox, select the internal subnet “my_subnet.” In the IP Address field, do not fill anything. Now click Submit button to complete this step.
Step 10. Now, as all the steps are finished for configuring the network, we will verify OpenStack network settings. Follow the path:
Project -> Network -> Network Topology
A network map as shown below should appear:

That’s all, Folks. We have successfully configured a basic network configuration on OpenStack. Try to add some flavor to this configuration by adding more networks and creating a communication path between multiple VMs inside OpenStack.