Hence, you can manually configure the network interface in the system. Although there is a simple way of network configuration, many users always get confused about it. In this long guide, we will briefly explain the method to configure the network interface on Rocky Linux 9.
How to Configure the Network Interface on Rocky Linux 9
Before starting the configuration part, you need to get the information about the network interfaces through one of the following commands:
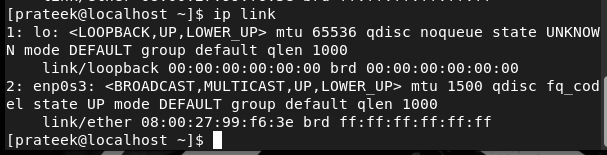
If you want to go for simpler results, run the following command:

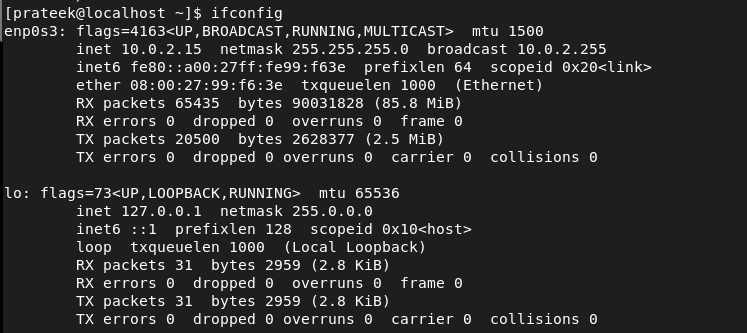
Moreover, you can also check the IP address through the following command:
Once you get the information about the currently available network interfaces, it is time to configure them. You can modify the /etc/network/interfaces file to configure the network interface.
You can change the parameters in this configuration file including the netmask, IP address, DNS servers, gateway, etc. Overall, the/etc/network/interfaces config file has an essential value in the system because it is the central location to set up and manage the network interface.
Let’s take an example to configure the static and dynamic IP in the /etc/network/interfaces config file. For static IP, use the following details for the config file:
PROXY_METHOD=none
BROWSER_ONLY=no
BOOTPROTO=none
DEFROUTE=yes
IPV4_FAILURE_FATAL=no
IPV6INIT=no
NAME=enp0s3
UUID=ID
ONBOOT=yes
IPADDR=IP Address
NETMASK=255.255.255.0
GATEWAY=Default Gateway
DNS1=8.8.8.8
DNS2=8.8.4.4
If you are unable to modify the previous details as per your system, here are the ways to find them:
For UUID, run the following command in the terminal:

For NETMASK, you can use the following command:
To get the information about the GATEWAY, use the following command:

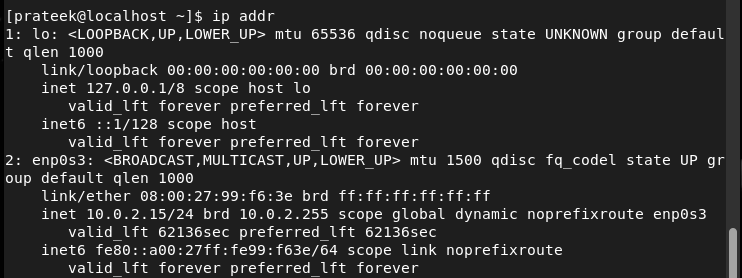
For the IP address, you can run the first command for static IP and the second command for dynamic IP:

In the previous result, inet 10.0.2.15 shows the static IP address.

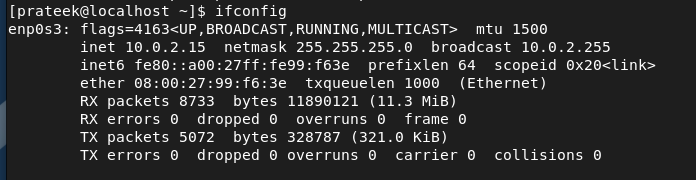
Hence, the dynamic IP address of the system is 10.0.2.15. Now, it is time to create the config file including all the details:
PROXY_METHOD=none
BROWSER_ONLY=no
BOOTPROTO=none
DEFROUTE=yes
IPV4_FAILURE_FATAL=no
IPV6INIT=no
NAME=enp0s3
UUID=4504201a-a8ec-3f8d-a6e4-dfb53cdbb02c
ONBOOT=yes
IPADDR=10.0.2.15
NETMASK=255.255.255.0
GATEWAY=10.0.2.2
DNS1=8.8.8.8
DNS2=8.8.4.4
For the dynamic IP, you need to change the BOOTPROTO from none to dhcp, as shown in the following:
PROXY_METHOD=none
BROWSER_ONLY=no
BOOTPROTO=dhcp
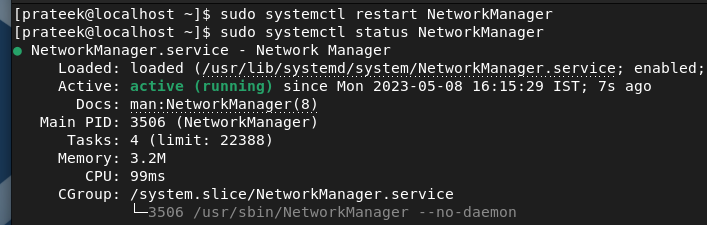
Finally, run the following command to restart the network system and finalize the changes:
Conclusion
This is all about configuring the network interface on Rocky Linux 9. We explained almost everything that you need to create a config file for static and dynamic IP accordingly. We recommend that you use the commands carefully, or you may get major errors while accessing the network through the system.