The full form of LVM is Logical Volume Manager which manages the storage device and offers highly advanced management options. LVM is used in various places including virtualization platforms, enterprises, large-scale storage platforms, etc. This technology provides an efficient and flexible storage management medium to fulfill the requirements easily.
LVM simplifies the disk management, offers advanced features, and improves data security. Furthermore, LWM allows the users to allocate a dynamic and flexible disk space to manage the storage volumes. In this tutorial, we will describe the complete method to configure LVM on Rocky Linux 9.
How to Configure LVM on Rocky Linux 9
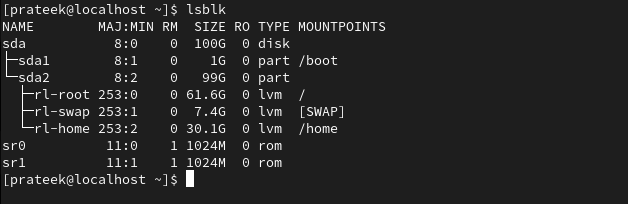
First of all, you need to check the disk and its partition to find the correct amount of space for LVM. You can check it through the following command:
You can also connect an additional hard disk to the system to turn it into an LVM. Now, if your system doesn’t contain LVM, you can install it by running the following command:

It is time to initialize the available physical volumes that you want to use with LVM. Hence, run the following command by including the device path for the physical volume:
In the previous command, /dev/sdb is the device name for physical volume, but you can change it accordingly. After that, create a volume group by specifying the name of the volume group and the physical volume in the following command:
Once you are done, it is time to create a logical volume in the volume group. Here, we use the lvcreate to create a logical volume:
In the previous command, the -L option is used to create the linear LV, the logical_volume is the name of the required logical volume, and the volume_group is the volume group. Moreover, 1G is the size of the logical volume.
Now, format the logical volume through the following command:
In the previous command, we formatted the “mkfs.txt” for ext4. Now, let’s create the mount point directory in which you mount the logical volume:
After that, you can mount the logical volume to the mount point that you defined in the previous step:
Once you mount the logical volume, it is time to add the entry to the /etc/fstab. This step ensures that the logical volume is automatically mounted while booting the system:
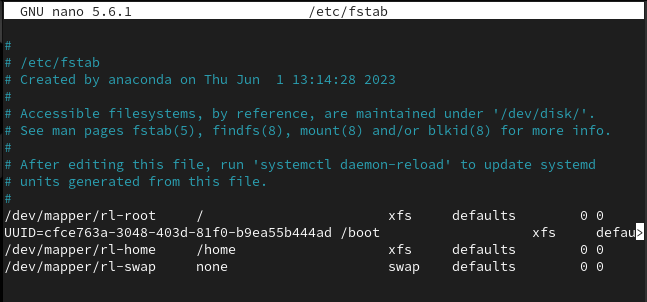
Finally, add the following line in the text file and save it to make the changes successful:

Furthermore, you can check the LVM configuration through one of the following commands in the terminal:
sudo vgs
sudo lvs
Conclusion
This is how you can configure LVM on Rocky Linux 9 without facing any errors. We recommend that you setup and configure LVM carefully, or you may get errors during the boot process. Moreover, you can also connect the extra hard drive in the system to configure it as LVM.