It provides each device on a network with a dynamic IP address and other network setup settings to connect with other IP networks. But there is a possibility that your system is not configured correctly or configured with a static IP. This article is a comprehensive guide on how to configure a DHCP server on Linux Mint system:
How to configure DHCP server on Linux Mint
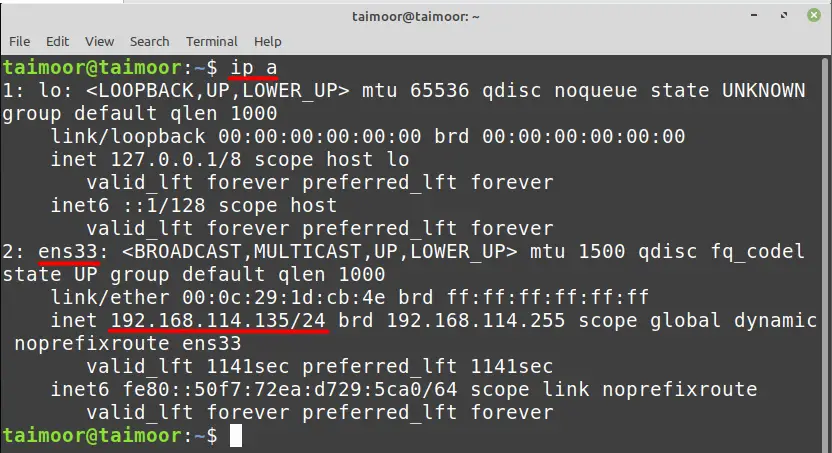
A DHCP server listens to the network and assigns the IP address and services to the host computer (DHCP client) based on that from the pool of addresses that is currently available. You can configure your DHCP server based on your IP address and for that, you need to type.
This command will provide you the name of the interface which is ”ens33” in our case and also the IP address which is 192.168.114.135 that will be different in your case.
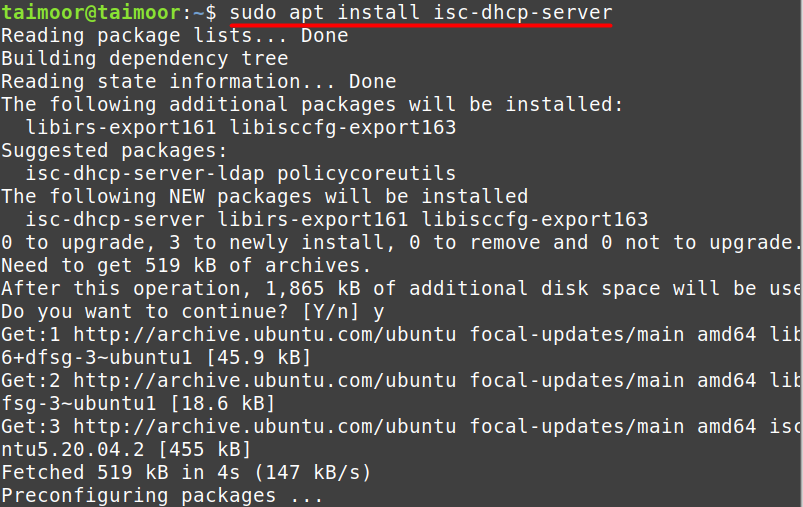
You need to first install the DHCP server utility to configure it by typing
Now the next thing is to configure the DHCP server file which you can find by accessing /etc/default/isc-dhcp-server by typing:
Now, you need to provide the network interface name which is “ens33” in our case against the Interfacesv4 field that we got from the previous step as shown below. This is a necessary step as you are telling the server that this is my network address and you need to use this for communication.
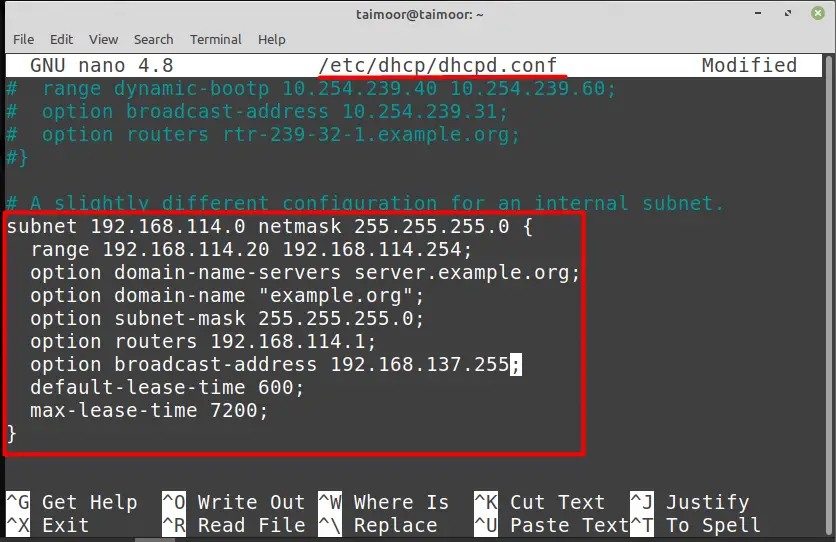
After that, you need to open and configure another file which is /etc/dhcp/dhcpd.conf by typing.
After opening this file you need to scroll down and look for the line which states “A slightly different configuration for an internal subnet”. The values that you can see in the below image are all available by default, you just need to uncomment them starting from the subnet and end at max-lease-time till the bracket (}). Now I set these values as per my network configuration. You need to set them accordingly as per your network.
A subnet is another name of your IP or network address so you need to write the first three octets of your own IP address and you can set forth one to 0 just like we did. The next one is the netmask where you are providing the range of network addresses that can communicate with your network server. You also need to define the range of the IP address that you want to lease so you can write any range as you like. Now next you need to change is the option router which is also known as the default gateway so you need to set this value as per your IP address as well.
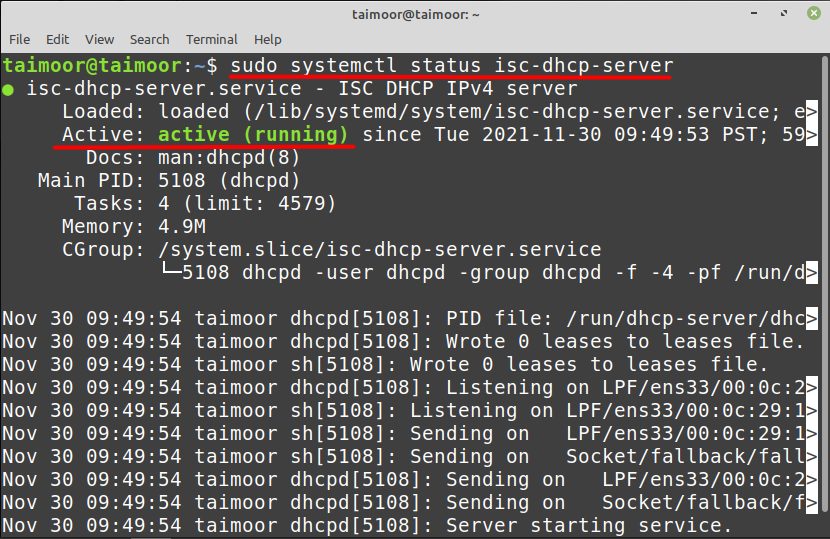
After this modification, you need to save and exit this file and restart the service of the DHCP server to apply these newly made settings by typing.
So, if you have followed the above process correctly, then you should be able to activate your DHCP server that you can see in our case by typing.
Conclusion
DHCP is a protocol that automatically configures your network settings, saving you the time and effort of manually configuring them. It also monitors your network and gives you the best possible settings, ensuring that it is reliable and efficient. So, if your network speed is poor or not operating correctly on Linux Mint OS, you need to verify if it is properly configured to DHCP, and you can obtain all the necessary information from this page.


