
In this article we will show you the process of how to clear your Chrome DNS Cache.
First a little background information so you have a clear understanding of how things work, in order to save you time in the future.
The Domain Name System (DNS) is the actual directory of the internet in which the domain names of the sites containing information that the user requires or searches for are stored in the DNS servers. All the web browsers use Internet protocols (IP) addresses to look for resources and services available over the internet. The Domain name system interprets the human-friendly domain names into Internet protocol (IP) addresses, usually consisting of complex numbers and alphanumeric characters so that the browser can locate the services and devices present on that certain address.
The DNS cache acts as a boost to speed up the lookup process of the Domain Name System. DNS cache, also known as DNS Resolver cache, is the temporary storage on independent devices which stores the frequently visited sites on that device and assists the Domain name system by suggesting the visited sites and resources.
Clearing the DNS Cache Process
Although the DNS Cache boosts the DNS lookup process and improves our internet surfing experience, it also has several downsides. Sometimes, the DNS cache contains outdated or old Internet protocol addresses, which will lead to misleading or wrong information or even provide no information as the address is no longer available. This will end up as a bad experience. The DNS cache is also a data privacy hazard. It contains the addresses of the sites you have visited, so if someone gets a hold of this cache, it can be manipulated and used for malicious purposes. Usually, hackers change these addresses to their similar designed websites to gain access to more information, this is called DNS spoofing or DNS poisoning.
Cybersecurity experts suggest companies working over the internet clear their caches regularly so that no attempt to manipulate or tamper with the data can happen to ensure a seamless working flow and tighten up the loose security concerns. Overall, to have a secure and trouble-free experience, you must clear the DNS Cache on your device and browser.
So here is how you can clear your DNS cache from your browser and your device to have a swift and secure internet experience:
Step 1: Open your device, which has the browser that you use daily.
Step 2: Open your browser and click on the search bar and type this: “chrome://net-internals/#dns”
In our case, we are using Google Chrome, but you can change the browser name in the link with whatever browser you are using daily.
Step 3: After typing the above link, press enter, and you will be directed to a page as shown below. There are several options present in the menu bar on the left-hand side of the page, but as we typed DNS in the link, we are directed to the DNS option automatically:

Step 4: Now, we have to move over the button present on the current page, right next to the Host Resolver cache labeled as “Clear host cache”. Select this option by clicking on the button:
![]()
Step 5: After clearing the host cache, we will move towards the sockets option present on the left-hand side menu. The DNS option is shown below. Select the sockets option by clicking on it. You can also access this page by typing this link in the search bar “chrome://net-internals/#sockets”, this will automatically direct you to the sockets page:
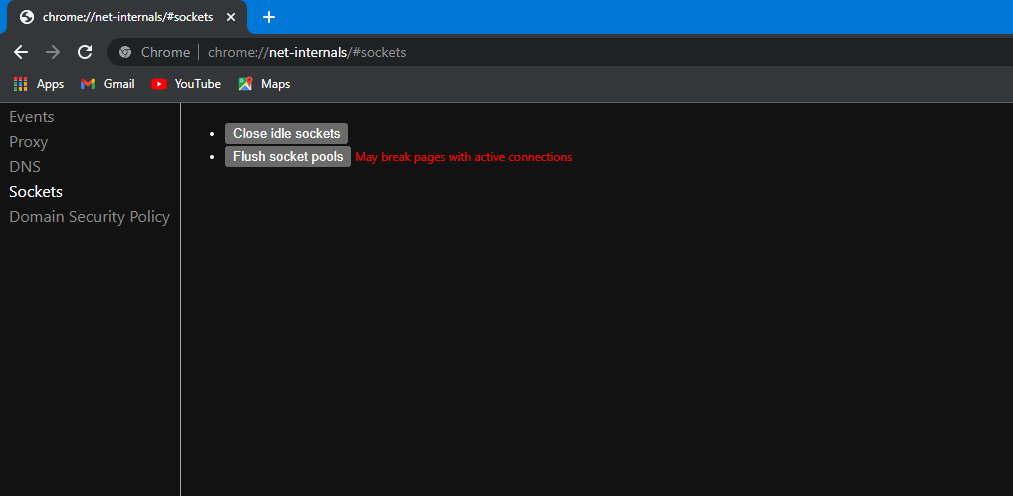
Step 6: As you reach the sockets page, you will have two buttons appearing on the screen labeled as “Close Idle sockets” and “Flush socket pools”. This button comes with a follow-up alert message “May break pages with active connection”. Go ahead and click the first button labelled as “Close Idle sockets”and close the ideal sockets:
![]()
Step 7: After closing the idle sockets, we will move towards flushing the socket pools; we have to select the Flush socket pools by clicking on the button labelled as “Flush socket pools”. This may result in breaking the pages with active connections, so do not be alarmed:
![]()
Step 8: As you have flushed the socket pools, you are done with this whole page and can close this tab and move over to a new tab. We will go over our browser’s history to delete any data left on the browser.
Step 9: To open your browser’s history, you can go into the browser’s settings and go into privacy settings and select the option labeled as “Clear browsing data”, or you can directly press “Ctrl + H”. This will directly move you to the history page where you can select the option labeled as “Clear browsing data”:

If you go directly to the history page:

Step 10: After selecting the “Clear browsing data” option, a pop-up window will appear on the screen:
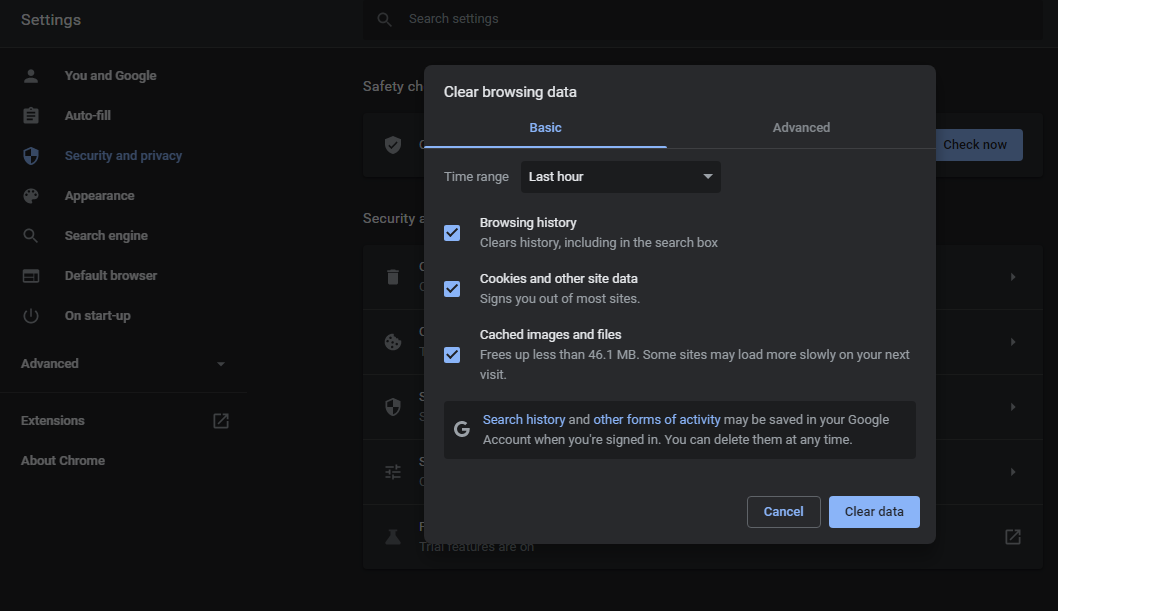
Now, we can select the time range in the given list as “All time”. Then, deselect the “Browsing history” and “Cookies and other site data” as they are already selected.
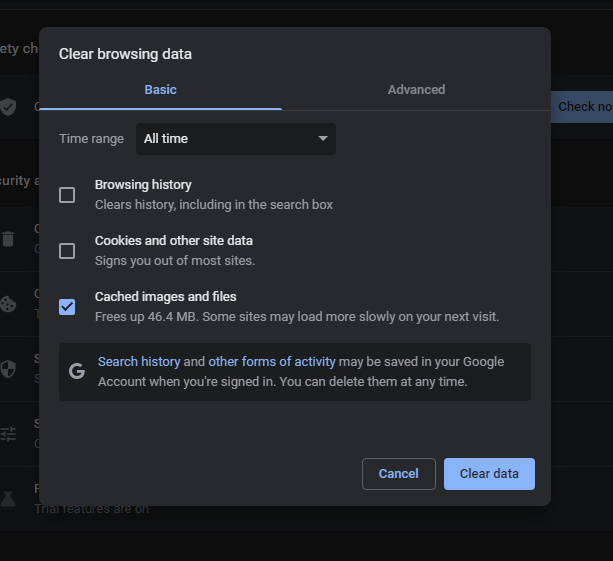
Step 11: After selecting the time range as all-time and only selecting the “Cached Images and files”, you can click on the clear data button:
All the DNS cache is flushed or cleared off your browser now. However, it will be present on the operating system you are using. If you are using Windows, you can open CMD by running it as administrator and flush the DNS cache from there, as well by typing this command “ipconfig /flushdns”. Entering this command will flush all your DNS cache from the system:

Conclusion:
DNS cache speeds up the DNS lookup process. The system directly switches over to the saved sites which are frequently visited. It avoids the whole process of looking up the domain name against the complex Internet Protocol (IP) addresses as it only happens once when we visit a site for the first time, and then Domain Name System saves it in the DNS cache. Although the DNS cache helps improve our internet experience, this comes with some downsides like data privacy and even misleading information if the address is changed or has expired. It is highly recommended to clear your DNS cache regularly by the steps provided to continue your fruitful and secure internet surfing and work. We hope you found this article helpful. Check out other Linux Hint articles for more tips and information.