So, let’s just get started by the login from Ubuntu 20.04 system. After login, try to open your Ubuntu 20.04 terminal console application from its application area using the search activity bar. Write “terminal” and tap Enter. An application named “terminal” will be shown. Click on it to open it. If you want to avoid this complex and long procedure, just use the “Ctrl+Alt+T” shortcut. Let’s get started with the newly launched terminal shell and the system update in it.
For the system update, we need to make use of the “apt” package in the command along with the “update” keyword. This command must be executed with the sudo rights to avoid any issue. Within a few minutes, all the updates will be installed and applied to your Linux system. The output is attached in the appended screenshot.
Now, the system update has been done, we need to upgrade the system as well. For that, you must use the same “apt” package command with sudo rights to upgrade your system. Use the keyword “upgrade” to do so. Within a few minutes, your system will be upgraded as well. The output is attached in the appended screenshot.
Let’s start with the checking of the PHP installed version on our system using the simple and most used “version” command. For this, you have to use the word “PHP” with the flag “—version” and execute it as a single command by pressing the Enter key. On execution, we have got the below-shown output. The output is showing that the PHP has no version installed on our system and it is suggesting a command to install the newest version available for our system. So, it is clear that we must have some version of the PHP language already configured at our end. The output is attached in the appended screenshot.
We can also use the same version command with a shortcut. For this, we don’t need to use the “—version” full word flag. We can utilize the simple “-v” flag to do so as shown below.
So, before checking the installed version on our system with the command, we have to install it for sure. For installation, we require sudo rights to be used in the command. Within the query area, you have to use the “apt” package to install the “PHP” language. Also, if you don’t know any PHP version, just use the word “PHP” after the “install” keyword in the command beneath. It will start getting the necessary information regarding this installation. The output is attached in the appended screenshot.
It will show you a list in this command output that is going to be installed on our Ubuntu 20.04 system. This list contains many of the server packages, some utilities, and necessary libraries to make it usable on our Linux system.
After the above listing, the system will pause the installation process and let you know about the memory space it is going to be taken after the installation i.e., 25.9 MB. If you are willing to give such space to the PHP language on your system, then simply click “y” from the keyword and hit the key “Enter” to continue the installation process as we did beneath.
Right after your click on the Enter key, the system will start executing all the listed libraries, packages, and utilities on the Linux system. The below-shown progress will be shown and different links will be created to add PHP within the system.
Within no more than 10 minutes, the newest PHP version will be installed and successfully configured on our system. The complete output of the last processing lines is shown below.
After the PHP installation, we will take a look at its installed version through the version command with i.e., “-v” flag as below. You will see that it will display an installed version of PHP within your system i.e., 7.4.3. You will also get other information regarding the installation date and time, and the owner of PHP. The output is attached in the appended screenshot.
The same thing can be achieved by the “—version” flag in the “PHP” command as beneath. The output is attached in the appended screenshot.
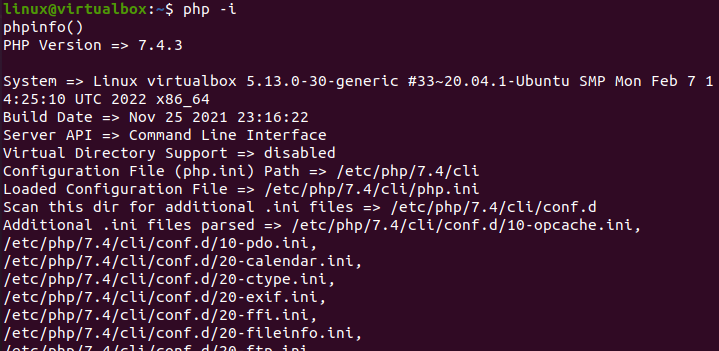
These were the simplest and most used commands to get to know about the PHP version in the Ubuntu 20.04 CLI. There are other commands too. For example, we can also use the keyword “PHP” with the flag “-i” to get the PHP version and other information regarding it. After running it, the “phpinfo()” function got executed and displayed the version of PHP along with extra info. The output is attached in the appended screenshot.
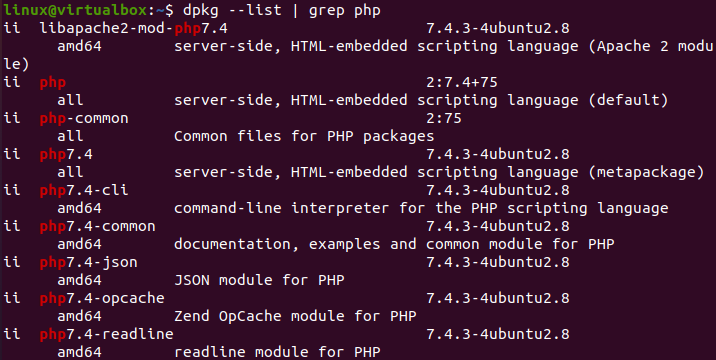
You can also check out all the other utilities of PHP installed within your system along with it using the “dpkg” list command with the “—list” flag. You have to use the “grep” keyword with the “PHP” keyword. The output is attached in the appended screenshot.
Conclusion
To sum up, this was all about the checking of the PHP installed version on our Ubuntu 20.04 system. To achieve this, you need to have a mounted version of PHP on your system. If not, you have to go through the above article from start to end and you will understand everything. The details provided in this article were all quite simple and we must say will be easy to do.


