There are two different ways an existing user can be added to sudoers.
- Add User to Sudo group
- Add User to Sudoers file
Adding a User to the Sudo group
You can give a user sudo privileges by adding them to the sudo group defined in the sudoers file. In any Linux-based Operating system like CentOS 8 or any other RedHat-based distributions, members of the sudo group (“wheel” group) have sudo privileges.
Adding a User to Sudoers file
We can use the method to give sudo privileges to an already existing user by adding them to the sudoers file. This file has the information dictating which user or group gets sudo privileges. It also defines the level of privileges the user or a group gets.
Well, we can also give a new user sudo privileges while creating their profile.
Let’s begin and learn how to add a user to the sudo group.
Add a user to the Sudo Group in the Sudoers File
The quickest way to grant a user sudo rights is by adding them to the “wheel” group. The sudo privileges of the members of this group are sufficient in most use cases. The members are asked to verify themselves by inputting their passwords in case they use sudo commands.
To add a user to the sudo group, input the command “usermod -aG wheel” followed by the username in the Linux terminal as a root user or a user with sudo privileges.
As an example, we will use the username “test-user”:
![]()
Once you have changed the group of the test-user to the wheel group, log in as the test user by executing the command typed below:

After logging in, verify sudo privileges by running the command given below:
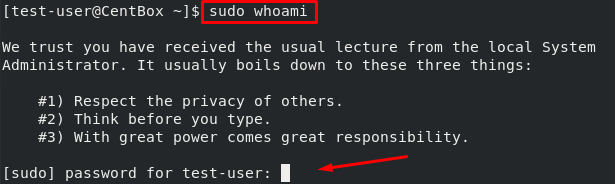
The user will be asked to enter the password, type the password.
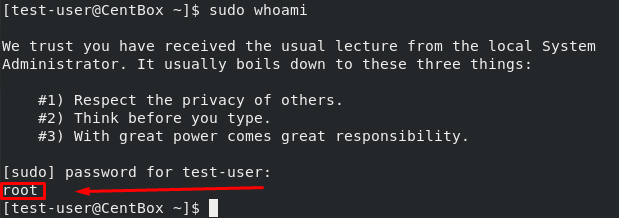
That’s it. The user now has sudo privileges.
If you get a notification like “user is not in the sudoers file,” the process was unsuccessful, and the user did not get any sudo privileges. Please repeat the process again.
Adding a user to the Sudoers file
The default location of the sudoers file in CentOS 8 is /etc/sudoers. This file defines the users who get administrative rights and the commands they can run. A user can be given customized access to commands if they’re added to this file. You can also modify the security policies of the user by adding them to this file.
However, you should never change the sudoers file yourself, as it can get you locked out of your host if you leave any errors in the file.
We will use the nano editor to open the /etc/sudoers file to change sudoers files.
Open the /etc/sudoers file by executing the command mentioned below:
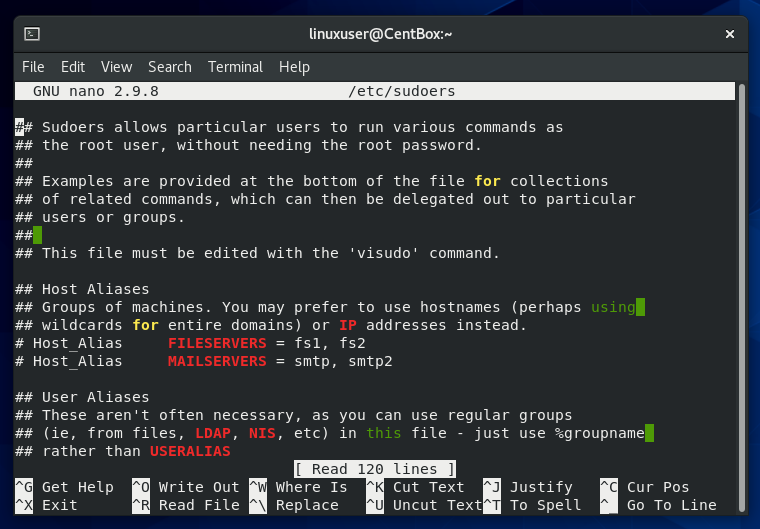
Scroll down to find the user privilege specification section and add the following line:

Remember to replace test-user with actual username to whom you want to grant sudo privileges.
You have allowed the user to run sudo commands without password authentication by adding the line above. You can grant different levels of sudo privileges by inputting different commands.
Creating a new user with Sudo privileges
You can give sudo privileges to a user while creating their profile. To make a new user, run the following command:
![]()
Use the “passwd” command to set a new password for the user.

Type the new password for the test user that you want to set

Retype the password to confirm.
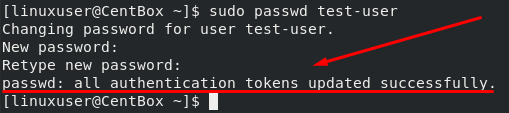
The password is successfully set.
Now add the user in the “wheel” Group by running the command:
![]()
The new user now has full sudo access. To verify the users’ sudo access, follow the steps mentioned in the “Adding User to the Sudo Group in the Sudoers File” section.
Conclusion
Today we learned how to grant sudo rights to a user. We learned two different ways to give sudo rights to an already existing user.
Adding User to the Sudo Group in the Sudoers File was the first method we learned. This is the quickest and easiest method.
The second method, “Adding the user to the sudoers file,” gives you more control over the level of privilege you want to grant to a specific user. Moreover, we also learned how we could give a new user sudo privileges.