
Network Topology:
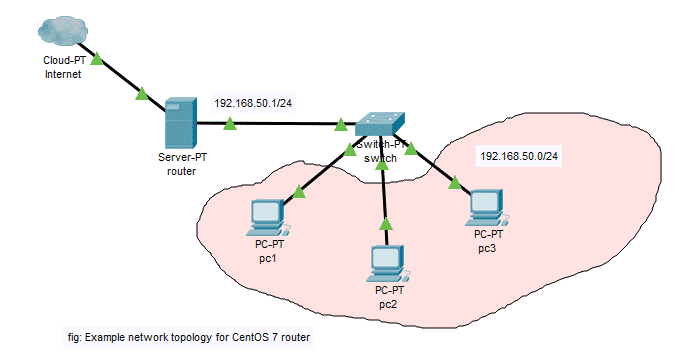
In this article, I am going to implement the network topology as given above in the figure. The server router has CentOS 7 installed and I am going to configure it as a router on the network. It has 2 NICs (Network Interface Cards). One NIC connects to the internet via the regional ISP and the other NIC is used for private networking and is connected to the switch. I am using the network 192.168.50.0/24 for the private network. So, the NIC that connects to the switch should have the IP address 192.168.50.1/24 (you can use others, but routers are usually configured to use the first usable IP address in the network).
The router will act as a DHCP server and forward IP packets to the private network. I will configure the DHCP pool in the range 192.168.50.50/24 to 192.168.50.100/24.
This is how I am going to configure the CentOS 7 router in this article.
Configuring Static IP Address:
The first thing you should do is to configure a static IP address to the NIC that connects to the switch in the private network.
To configure a static IP on CentOS 7, I am going to use nmtui.
Start nmtui with the following command:
![]()
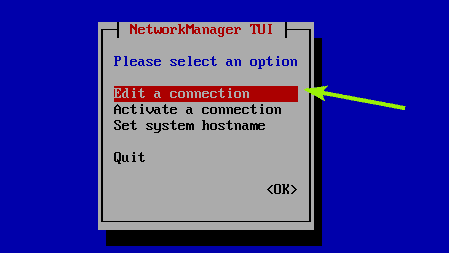
Now, select Edit a connection and press <Enter>.
So, select Wired connection 1 and press <Tab>. Then, select <Edit…> and press <Enter>.

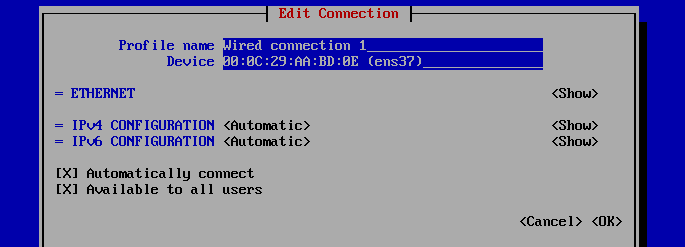
You should see the following window.
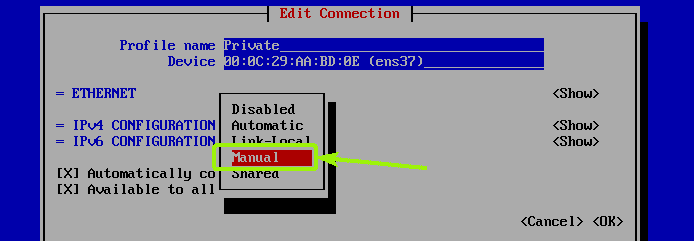
Now, change the profile name to Private. Giving a descriptive name is always a good idea. It will help your work much simpler. Now, select <Automatic> from the IPv4 CONFIGURATION section and press <Enter>.
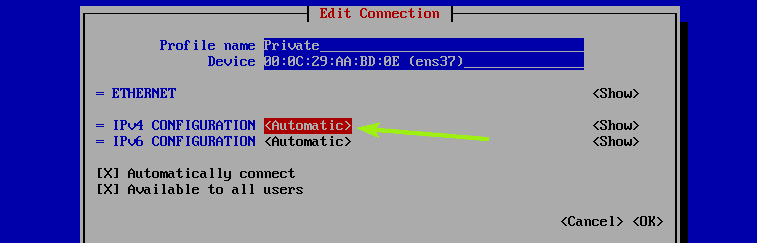
Now, select Manual and press <Enter>.
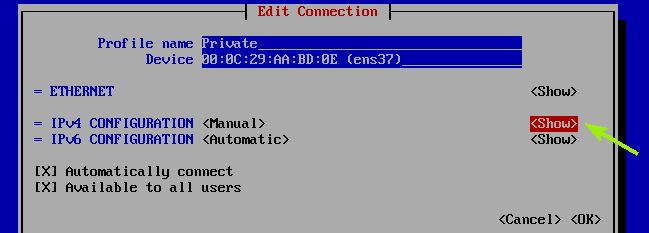
Now, select <Show> and press <Enter> as marked in the screenshot below.
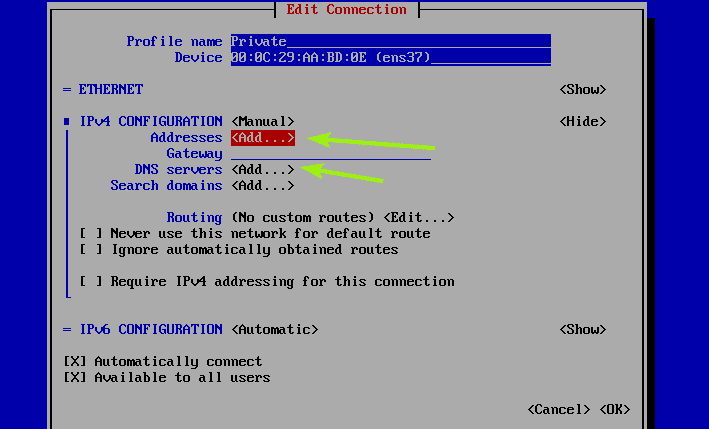
Now, you have to add the IP address and DNS information here.
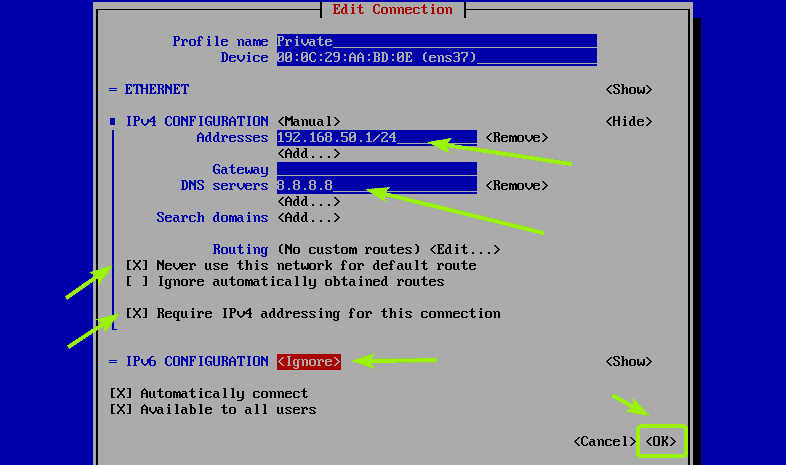
Once you’ve added the IP address and DNS server address, make sure Never use this network for default route, Require IPv4 addressing for this connection and Automatically connect check boxes are checked. I am also going to set IPv6 CONFIGURATION to Ignore as I don’t want to use IPv6. Then, select <OK> and press <Enter>.
Now, press <Esc> twice. You should be back to the command prompt.

Now, reboot your CentOS 7 machine with the following command:
![]()
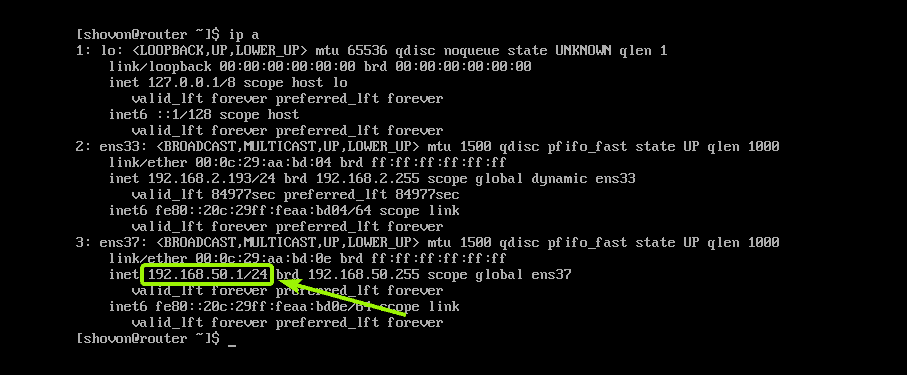
Once you CentOS 7 machine starts, check whether the correct IP address is assigned with the following command:
The assigned IP address is correct. Great!
Configuring DHCP Server:
Now, I am going configure DHCP on the router.
DHCP server is not installed on CentOS 7 by default. But, all the required packages are available in the official package repository of CentOS 7. So, you can easily install it with the YUM package manager as follows:
![]()
Now, press y and then press <Enter>.

DHCP server should be installed.

Now, open the DHCP server configuration file /etc/dhcp/dhcpd.conf with the following command:
![]()
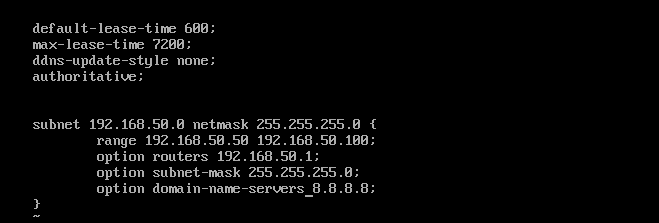
Now, press i to go to edit mode and type in the following lines.
max-lease-time 7200;
ddns-update-style none;
authoritative;
subnet 192.168.50.0 netmask 255.255.255.0 {
range 192.168.50.50 192.168.50.100;
option routers 192.168.50.1;
option subnet-mask 255.255.255.0;
option domain-name-servers 8.8.8.8;
}
Then press <Esc>, type in :wq! and press <Enter> to save the configuration file.
Now, restart the dhcpd service with the following command:
![]()
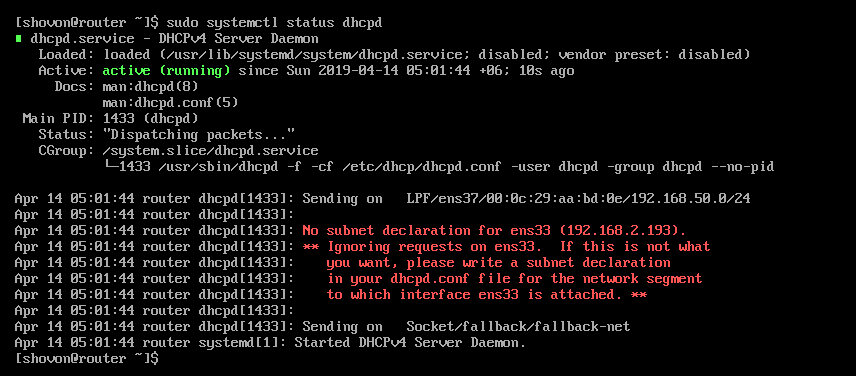
Now, check whether the dhcpd service is running with the following command:
As you can see, dhcpd service is running.
Configuring Firewalld:
Now, I am going to configure the Firewalld firewall program.
First, allow the DHCP ports to be accessible from the outside network with the following command:

Now, enable masquerading with the following command:

Finally, reload firewalld rules with the following command:

Testing Router Configuration:
Now, I am going to test whether each computer on the network can get IP addresses via DHCP and they can access the internet. I am also going to check whether the IP packets are going through the CentOS 7 router that I just configured.
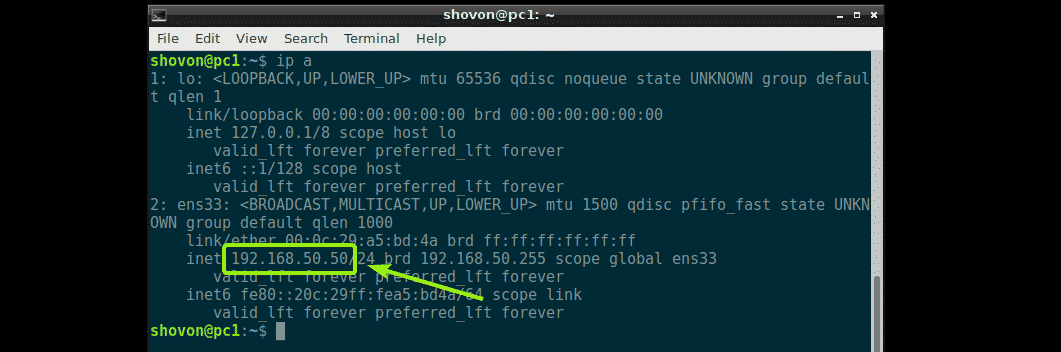
On the first computer pc1, I ran ip a command and as you can see, it got the IP address 192.168.50.50/24. So, DHCP is working.
I can ping google.com and access google.com from the web browser from pc1 as well. So, internet is working.
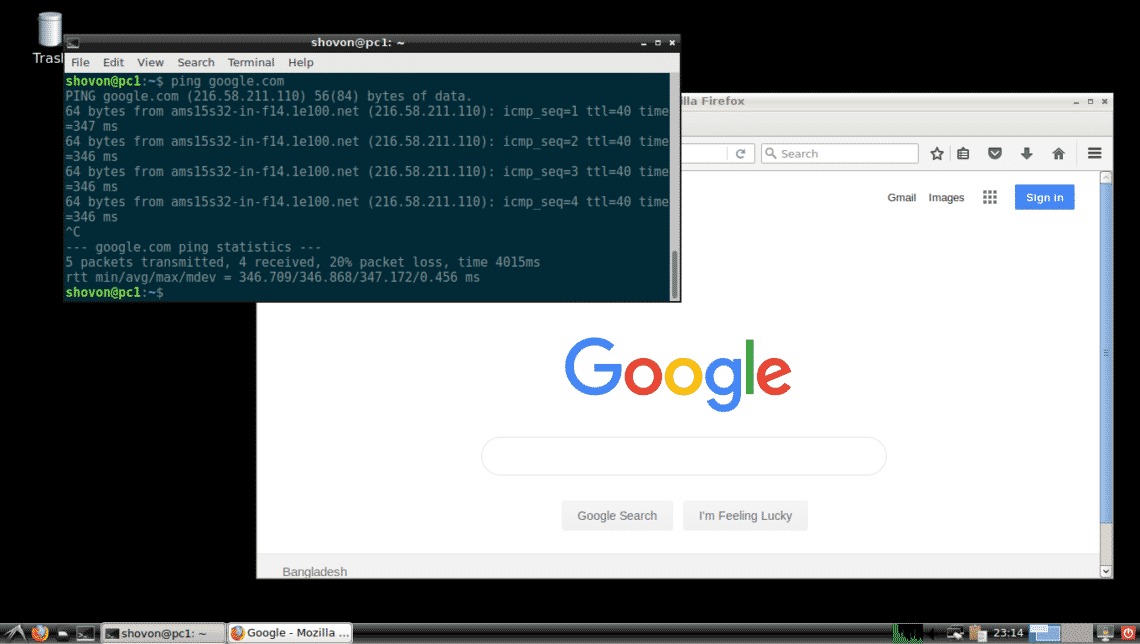
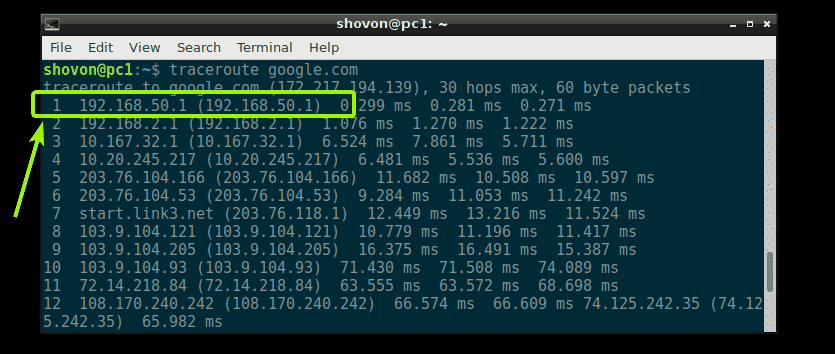
I ran traceroute google.com and as you can see, the first router the packet goes through is our CentOS 7 router with the IP address 192.168.50.1/24. This is the one we just configured. So, IP routing works in pc1.
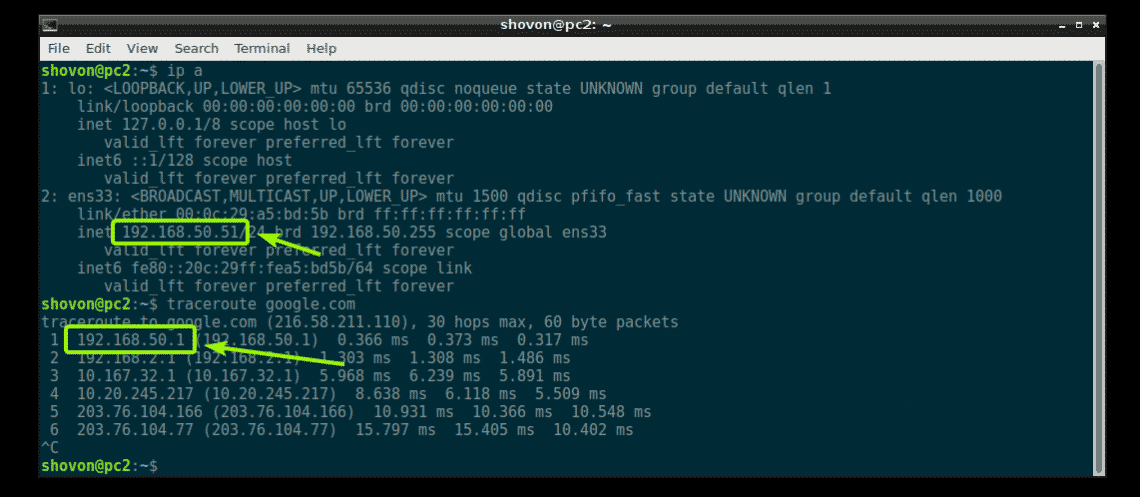
I checked the same things on pc2 and it’s working.
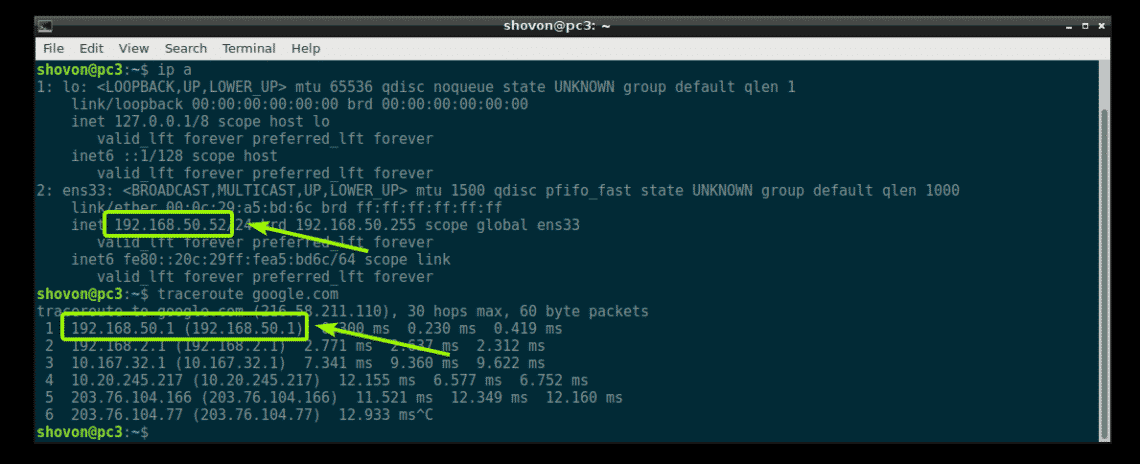
Everything works on pc3 as well. So, the CentOS 7 router configuration was a success.
So, that’s how you make a CentOS 7 router. It’s very easy. Thanks for reading this article.