Backups are critical for Jenkins as they provide a way to recover from data loss or corruption. Although it may depend on your server configuration and the target data, the following are some critical Jenkinsfiles that you need to back up:
- Configuration Files – This includes the Jenkins configuration files such as the jenkins.xml file and the global configuration settings.
- Builds – This includes the build logs, artifacts, and test results for each build.
- Plugins – This includes the plugin files and configuration settings for installed plugins.
- User data – This includes user accounts, credentials, and user-specific configuration settings.
By regularly backing up this data, you can restore Jenkins to a previous state in case of a problem such as a server crash or data corruption. This can save time and effort in a disaster, allowing you to get Jenkins up and running again with minimal downtime.
This tutorial looks at the various methods and techniques to back up and restore Jenkins.
Method 1: Using Jenkins Backup Plugin
Jenkins provides a large ecosystem of plugins that allows you to extend the functionality by native Jenkins. An example is a backup plugin which enables you to take the backups of your Jenkins server quickly.
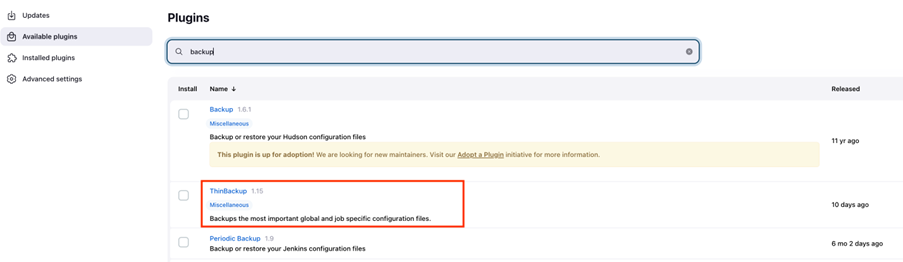
From the main menu, select Manage Jenkins. Then, go to Manage Plugins>Available and search for backup.
Select the Backup plugin that suits your needs and click install. We recommend using the ThinBackup plugin which is free to use and is regularly maintained.
Once installed, restart Jenkins and log back into the Jenkins dashboard.
Navigate to Manage Jenkins -> ThinBackup to backup or restore your Jenkins server.
Open the Settings option to define the settings for your Jenkins backups. Start by setting the backup directory. This is the location where Jenkins stores your backup files.
It is recommended to set up a schedule for full backups. Use the cron format to determine the schedule.
You can also set a schedule for differential backups, but this depends heavily on your needs and available resources.
You can also configure the other options such as max number of backups to take the files to exclude in the backup, etc.
Once satisfied with your settings, click on save.
To take a backup, you can select “Backup Now.” This initiates the backup process and creates a copy with all the current Jenkinsfiles. The backup naming format takes the name, FULL-YEAR-MONTIH-DATE-HOUR-MINUTE.
To restore from a given backup, select the “Restore” option.
Choose the backup from which you wish to restore and select the items that you wish to restore. For example, you can select to restore the plugins, etc.
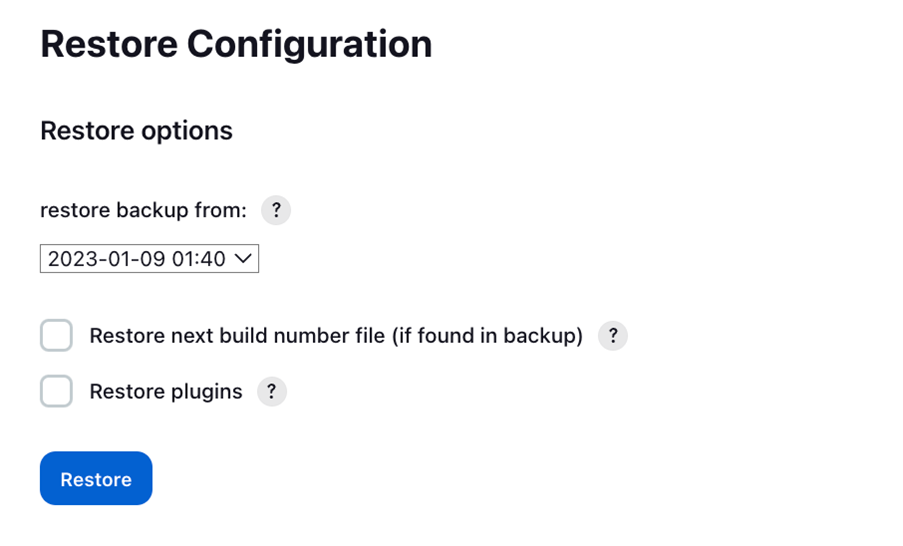
Once satisfied, click on Restore to begin the restoration process.
Conclusion
You learned how to use the Jenkins ThinBackup plugin to backup and restore a Jenkins server.