Arduino Nano is a small size development board which uses ATmega328 for processing instructions. Arduino Nano is a low-cost board making it best for different electronics projects. The Nano board features a number of GPIO pins that can be used to connect to sensors and other devices. It can be programmed using the Arduino Integrated Development Environment (IDE) and a variety of programming languages, including C++ and Python.
This tutorial will cover following topics:
1: Why We Need Arduino Nano Drivers
2: How to Identify Arduino Nano Boards UART Chip
3: How to Check Arduino Nano Drivers Installed or Not
4: Installing Arduino Nano Drivers in Windows
1: Why We Need Arduino Nano Drivers
Arduino drivers is a program that establishes serial communication between Arduino and PC. Using the serial driver Arduino Nano can be controlled through a computer. They are necessary because different computer operating systems (such as Windows, MacOS, and Linux) have different methods of communicating with hardware devices like the Arduino.
After connecting Arduino Nano with PC, it will be recognized as a new hardware device. However, for the computer to be able to send and receive data from the Arduino, it needs a driver that understands how to communicate with the Arduino. Without the appropriate driver, the computer will not be able to communicate with the Arduino, and you will not be able to use the Arduino to control or sense the environment around it.
In general, you will need to install an Arduino driver on your computer whenever you want to use an Arduino with your computer. Arduino Nano comes with a different UART chip for serial communication. Now we will see how one can identify Arduino Nano UART chips.
2: How to Identify Arduino Nano Boards UART Chip
Different versions of Arduino Nano are available in the market that are designed by multiple manufacturers. Not all Arduino Nano come with the same UART chip for serial communication so it’s important to first identify the UART chip. So, we install the correct drivers for Arduino Nano.
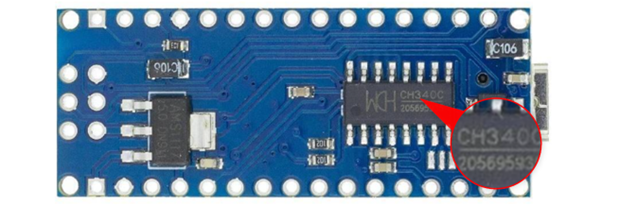
One of the simple methods for identifying chip names is to look it over the UART chip itself. Most UART chips contain names over their head which can be easily readable.
Usually, Arduino Nano comes with CH340 UART chip but some of the third-party manufacturer’s boards have CP2102 UART chip for communication.

Below image shows an Arduino Nano with CH340 UART chip.
This tutorial will cover drivers’ installation of CH340 Arduino Nano chip however you can read about both chips’ driver installation method separately in the mentioned articles:
3: How to Check Arduino Nano Drivers Installed or Not
Before installation of new drivers, it’s recommended to check if the board needs drivers or not. Also, there might be a possibility you already have installed the serial drivers. Arduino drivers’ installation can be checked using two ways:
- Using Arduino IDE
- Using Device Manager
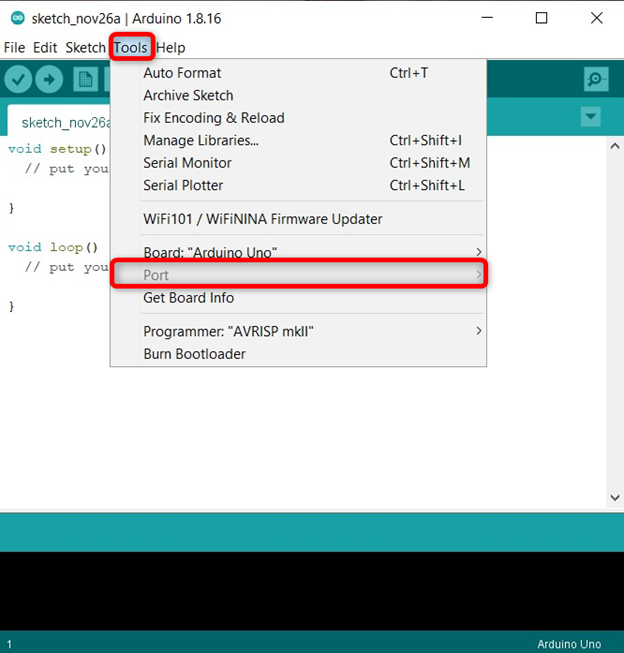
3.1: Using Arduino IDE
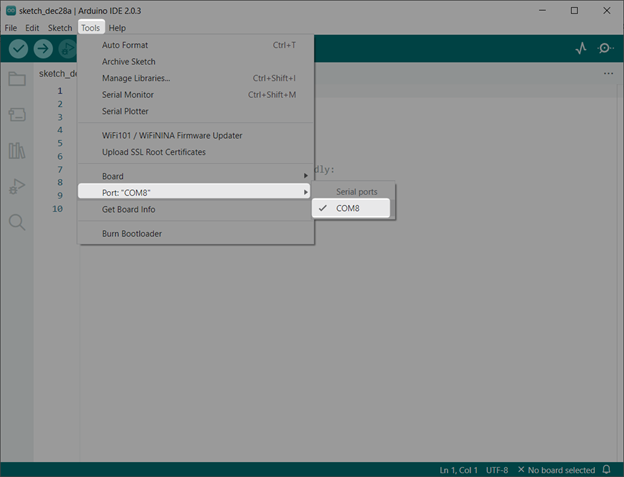
Connect the Arduino Nano with the PC. Open IDE then go to Tools>Port. If the Arduino Nano drivers are missing the COM port option will be grayed out. Here is a sample screenshot:
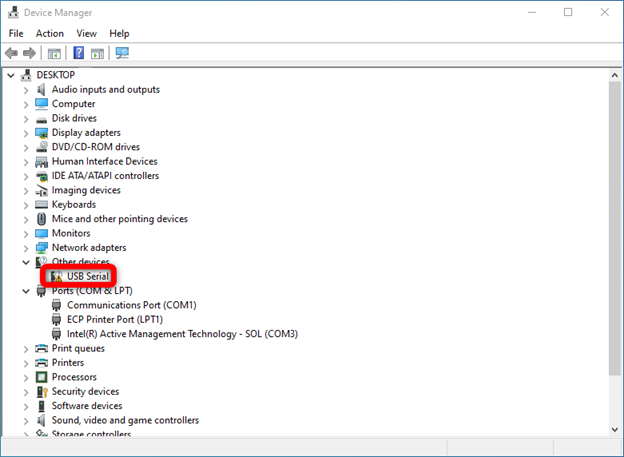
3.2: Using Device Manager
Another way to confirm Arduino Nano drivers installation is by going to the Device manager in Windows. In device manager look for the serial drivers under devices or COM & LPT section. If the Arduino Nano driver is missing a yellow symbol will be there.
Now we have identified that the Arduino Nano chip driver is missing. Next step is to install Arduino Nano drivers on the PC.
4: Installing Arduino Nano Drivers in Windows
Serial drivers are necessary for serial communication. Follow the steps to install Arduino Nano drivers in windows.
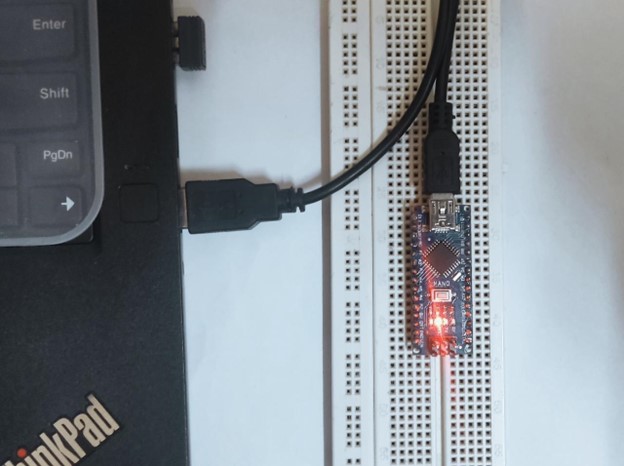
Step 1: Connect Arduino Nano with PC:
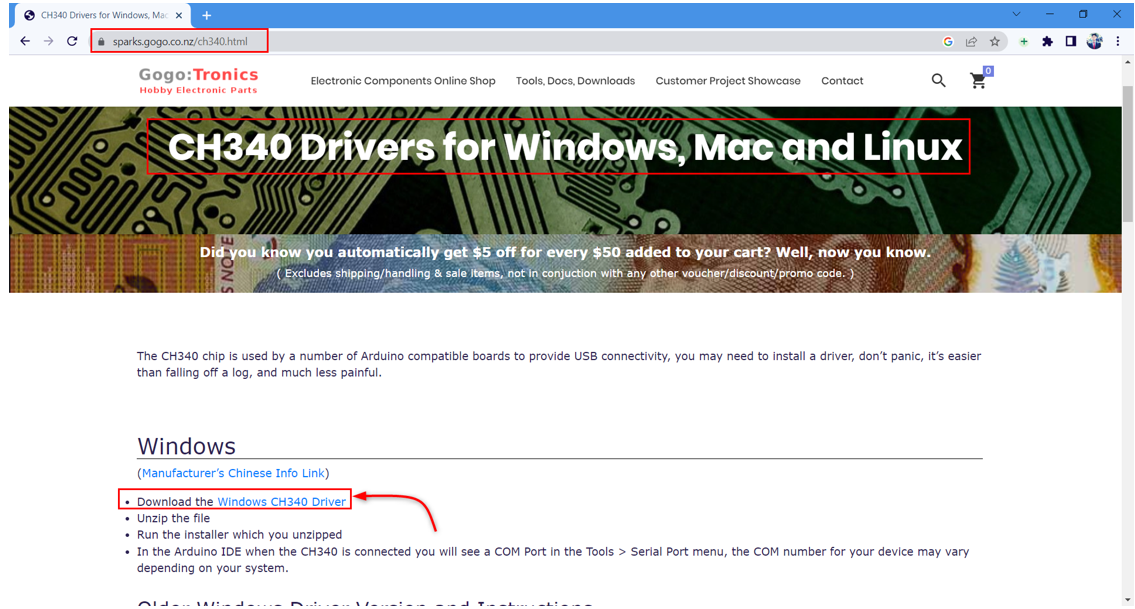
Step 2: Download the Arduino Nano CH340 Drivers:
Step 3: Extract and unzip the downloaded drivers:
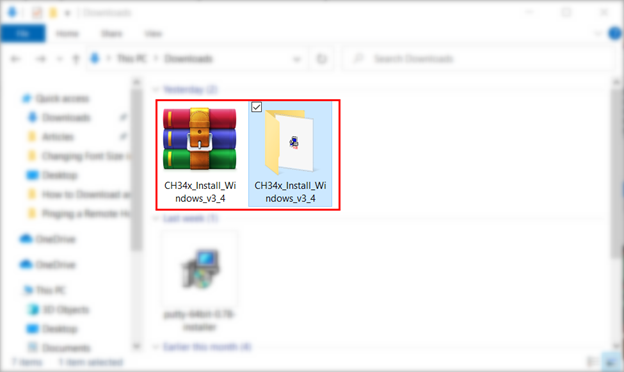
Step 4: Open the unzipped folder and run the installer:

Step 5: Click INSTALL.
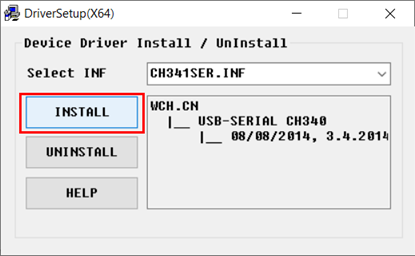
Step 6: After successful installation of drivers click OK:

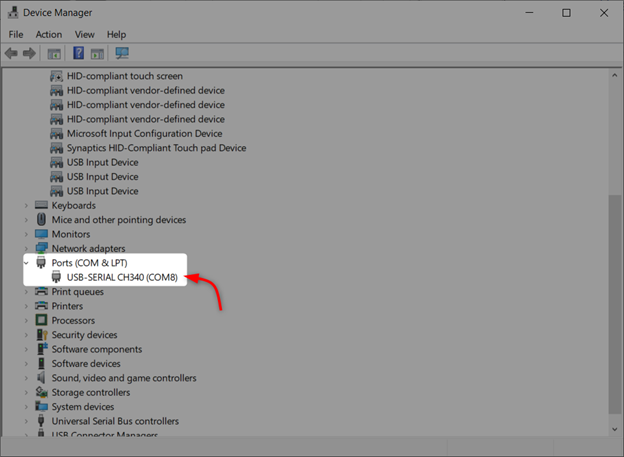
Step 7: Now open Device Manager and you will see Arduino Nano drivers are successfully installed. Here Arduino Nano is connected at COM port 8:
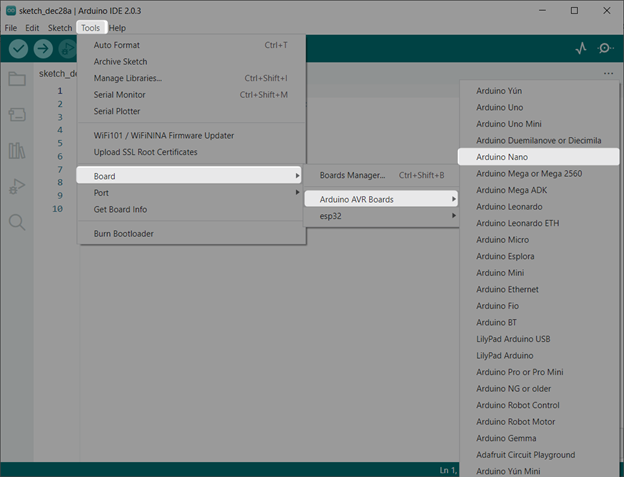
Step 8: Now open Arduino IDE and select the Arduino Nano board:
Step 9: Select the COM port at which Arduino Nano is connected:
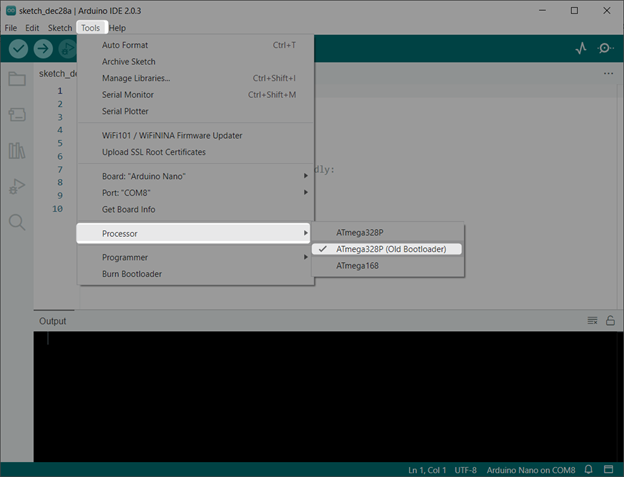
Step 10: Select the Old Bootloader for Atmega328P. Go to: Tools>Processor>ATmega328P (Old Bootloader):
Step 11: Now upload a blank sketch to confirm the Arduino Nano driver’s installation in Windows:
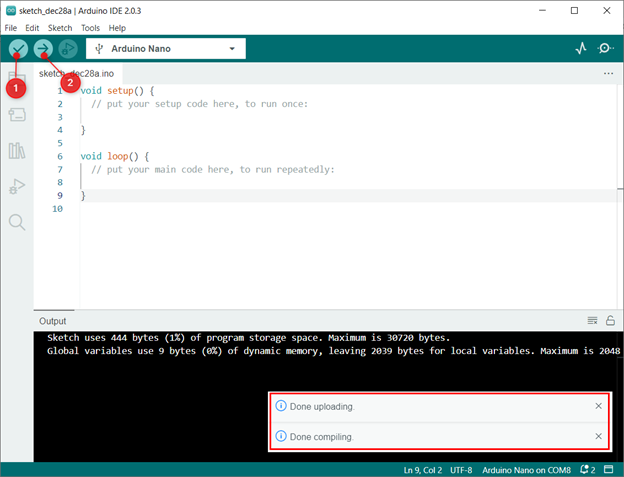
We have successfully installed Arduino Nano drivers in Windows.
Note: If you encounter any error during the whole process make sure the Arduino core for the Nano board is installed in the Arduino IDE. Read the article on How to Install an Arduino Core.
Conclusion
Arduino Nano is a versatile and powerful microcontroller that is well-suited for a wide range of projects. To upload code and communicate with Arduino Nano drivers need to be installed in Windows. This article will guide you on all steps needed to install the required drivers in windows and help you to upload your first program in Arduino Nano board.