These libraries contain built-in functions that help the users to use the keypad with Arduino more conveniently and all these built-in functions are explained in this write-up.
What is the keypad library in Arduino
Like other electronic modules such as an LCD, we have to include the library of the respective module in the sketch of Arduino, similarly, we have to include the library, “Keypad.h” at the top of the Arduino code to use the keypad with Arduino. There are two ways of installing the libraries in the Arduino IDE. The first is from “Manage Libraries..” and the other id through zip file. We will install the library from the official website of Arduino and can be added to the Arduino IDE by the following steps:
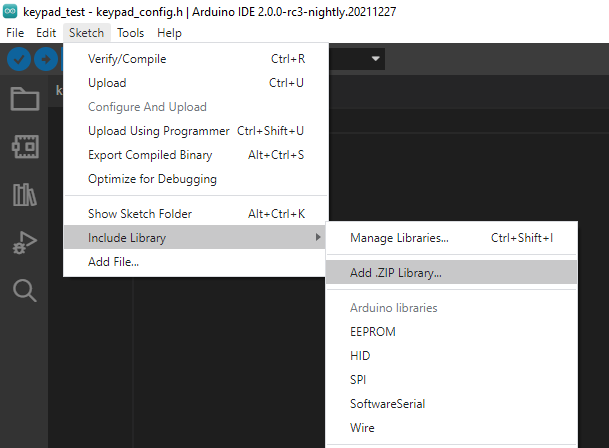
Open the Arduino IDE and go to the “Sketch”, in the top bar, a drop-down menu will appear, choose the “Include Library”, another side drop-down menu will appear, go and click on the “Add .ZIP Library..”:
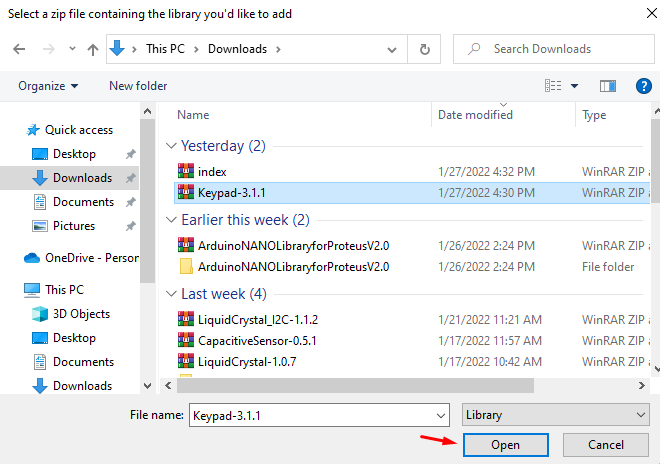
Choose the zip file of the library you want to include and click on the “Open” button:
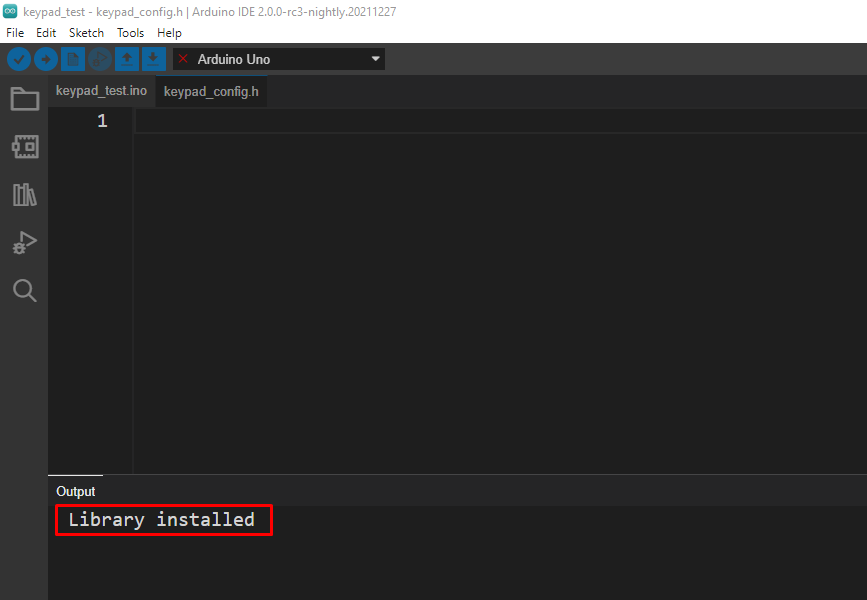
In the output, a notification of “Library installed” will appears on the successful installation of the library:
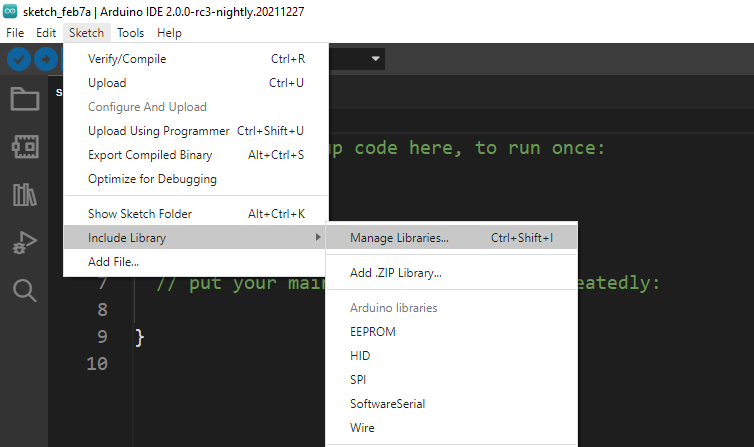
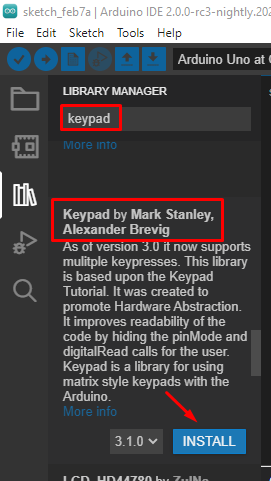
And if you want to install it from Arduino IDE libraries, for this, go to the “Sketch”, then “Include Library” and click on the “Manage Libraries..”:
Type a keyword of “keypad”, scroll down the menu to search the library of “Keypad by Mark Stanley, Alexander Brevig” and click on the “INSTALL” button:
On successful installation, a notification will appears on the Serial Monitor Output:
The library of “Keypad.h” contains different functions which are used in interfacing the keypad with Arduino in different projects. The major functions and their utilization in Arduino IDE are explained in the next section.
Arduino keypad Library functions
There are different functions in the keypad library that are used to read the data from the buttons and apply different operations to them. Some of the important functions of this library are:
Keypad(makeKeymap(userKeymap), row[], col[], rows, cols): This function is used to assign the Arduino pins (declared in “row[]” and “col[]”) to the button (buttons are stored in variables of rows and cols). This is saved in any function name and then all the built-in functions of this library are called in code with this particular function name.
waitForKey(): This function is used with the “char” data type and it will hold the execution of the entire program until any key of the keypad is not pressed.
getKey(): This function is used to read the input from the buttons of the keypad but unlike the waitForKey(), this function will not halt the other statements of the Arduino code but only read the input from the keypad if its button is pressed. This function is also called the char data type because the input it reads from the keypad is in characters data type.
KeyState getState(): There are four possible states of the buttons of keypad interfaced with Arduino which are:
- “Pressed” which means the button is pressed
- “Released” means the button is released
- “Hold” means the button has been pressed and not released
- “Idle” means the button is not being used in the Arduino code
When the “getState()” function is called in the code, it will return any of the above states of the button as an output.
boolean keyStateChanged(): This function is very useful for testing the buttons of the keypad as it tells us whether the button has changed its state or not.
setHoldTime(unsigned int time): This will set the time of hold for the buttons of the keypad which is in milliseconds. The user has to press the button for such a time period as the hold state will be triggered for that specific time.
setDebounceTime(unsigned int time): This function is used to produce the delay in the buttons of the keypad, for example, if you have set the delay of one second, it will not read the input from any other button till 1 second time duration.
Conclusion
The keypads are used in different Arduino projects like calculators and security locks applications. To use the keypad with Arduino, we have to include the library of “Keypad.h” in the Arduino code which includes different functions. In this write-up, the functions of the “Keypad.h” library are explained that can be used in different operations of the keypad.

