
This write-up will explain a procedure for adding an image inside the table cell in HTML.
How to Add an Image Inside Table Cell in HTML?
The HTML “<img>” tag is utilized to insert an image into a table cell.
Syntax
Follow the syntax to embed an image inside the table cell:
Here:
- “<td>” element indicates the table cell where the image needs to be added.
- “<img>” tag is utilized to specify the image.
- “src” attribute sets the image’s path.
- “alt” signifies the text that will be displayed on the screen in case the image fails to load.
- “width” determines the image’s width.
Example
In the HTML file, create a table by following the provided instructions:
- “<table>” element is utilized to create a table.
- “<tr>” element specifies a row.
- “<th>” adjusts a heading where the “colspan” property signifies how many columns a cell should cover.
- “<td>” creates table cells for data. The “<img>” tags with the required attributes are inserted within this tag to embed the images in a table cell:
<tr>
<th colspan="3" style="font-size: 28px;">Fruits and Vegetables</th>
</tr>
<tr>
<th>Name</th>
<th style="width: 250px;">Picture</th>
<th>Fruit/Vegetable</th>
</tr>
<tr>
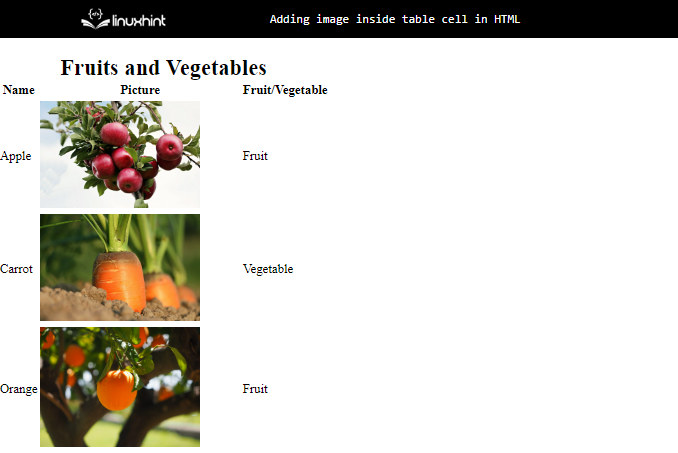
<td>Apple</td>
<td><img src="/images/apples.jpg" alt="apple" width="200"></td>
<td>Fruit</td>
</tr>
<tr>
<td>Carrot</th>
<td><img src="/images/carrot.jpg" alt="carrot" width="200"></th>
<td>Vegetable</th>
</tr>
<tr>
<td>Orange</th>
<td><img src="/images/orang.jpg" alt="orange" width="200"></th>
<td>Fruit</th>
</tr>
</table>
It can be observed that the HTML table has been successfully created along with embedded images:
CSS
Now, we will discuss the CSS properties utilized to set the layout of the table.
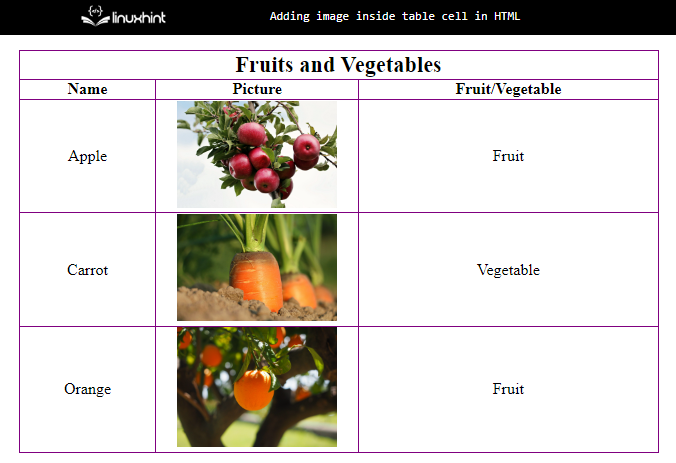
Style “table” Element
First, access the “<table>” element by tag name and apply the following properties:
text-align: center;
width: 800px;
border-collapse: collapse;
margin: auto;
font-size: 20px;
}
The description of the above code is given below:
- “text-align” sets the text alignment.
- “width” determines the table’s width.
- “border-collapse” property defines whether the border is collapsed or not.
- “margin” adds space around the table.
- “font-size” defines the table’s text font size.
Style “th” and “td” Element
border: 1px solid purple;
}
Here, the “border” property adjusts the border around the elements by specifying the values for border width, style, and color.
Output
This post is all about inserting images in the table cell in HTML.
Conclusion
To add an image inside the “<table>” cell, use the “<img>” tag within the HTML “<td>” element. The “<img>” element specifies the “src” attribute to provide the image URL. More specifically, to adjust the image size, add the “height” and “width” attributes within the “<img>” tag. This blog has illustrated the procedure to add an image in the HTML table cell.