
Security-Enhanced Linux or SELinux is a Linux-based security architecture that permits the system administrators to have additional control over the system access. The US National Security Agency developed this architecture as a series of security patches utilizing the security modules of Linux in its kernel. This security architecture is also used to specify how much a user should have access to the system. Moreover, it also helps a Linux user enforce policies related to using a system’s applications, resources, and services.
In this guide, we will cover these 19 points related to SELinux:
- What does the term “Security-Enhanced” mean?
- How does SELinux work?
- SELinux Features
- Setting Up SELinux on CentOS
- SELinux Modes
- Enabling SELinux on CentOS
- Policy of SELinux
- Updating SELinux Boolean settings
- Demonstrating SELinux capabilities
- Security-Enhanced structure for files and processes
- File context in SELinux
- Process Context in SELinux
- How does a process access any resource?
- Configuring Firewall for HTTP
- Directories and Files Context Inheritance
- Context Error in a test file
- Modifying and Restoring the File Context
- User Settings in SELinux
- Restricting access for a switched user
What does the term “Security-Enhanced” mean?
Non-profit groups, volunteers, and companies are all working to improve the Linux kernel code. SELinux is a standalone security module that acts as an extension of the Linux kernel. In 2003, it was formally included in the Linux kernel. Some Linux distributions include SELinux as a regular feature; however, if you don’t want to utilize its services, you can easily disable it. SELinux permits the system administrators to control the programs that operate on their machines. It blocks all of the processes which are considered “necessary.” As a result, the risks associated with security vulnerabilities in user programs are noticeably reduced.
Although you trust any software, it is still a great idea to limit its permissions related to accessing. Your trusted software can cause severe consequences if any third party hijacks it. Also, Malware-infected programs can cause a lot of damage if they have complete access to the processes and system data. SELinux reduces the risk of damage by restricting access.
How does SELinux work?
SELinux establishes controls for accessing system files, applications, and processes. To enforce the access granted by a policy, it utilizes security policies, which comprises rules that instruct SELinux about the system access restrictions.
SELinux checks the access rights through Access Vector Cache (AVC) that stores permission for objects and subjects. SELinux goes through the AVC when any process or application requests to access any object. If SELinux cannot make access decisions based on cached permissions, it transmits the request to the security server. After that, the security server looks for the process or application and the file security context. The SELinux policy database is utilized to apply security context. After that, permission is given or denied.
An “avc: refused” message will appear in /var/log.messages if the SELinux denies the permission.
SELinux Features:
SELinux includes the following features:
- It provides an adaptable security policy for any Linux-based system.
- A clear separation of policy and enforcement.
- It also can support querying policy and then implementing their access control.
- Process execution, inheritance, and its initialization are all under the control of this security system.
- Policy interfaces are well-defined in this security architecture.
- It controls open file descriptors, file systems, directories, network interfaces, sockets, and related messages.
- Specific security-label types and contents are not dependent on one other.
- Policy interfaces are well-defined in this security architecture.
- Policy changes are supported.
- Specific policies and policy languages are self-contained.
- It also controls how “capabilities” are used.
- The AVC caches information about access decisions.
- The policy disallows anything that is not explicitly defined.
- Data confidentiality and system integrity are protected separately.
- Kernel services and objects have their labels and controls.
Let’s understand a few things straight before we get started.
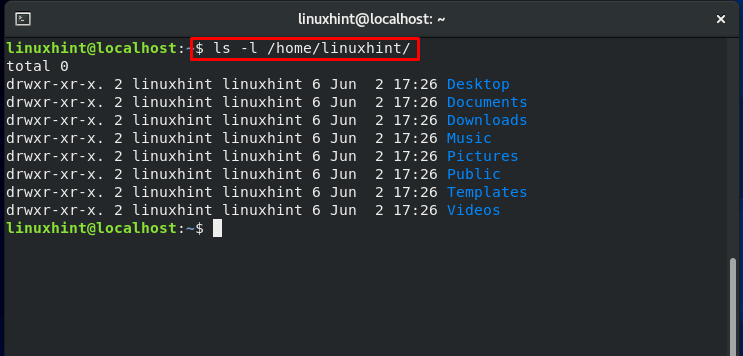
MAC, which is an acronym for Mandatory Access Control, is a feature of SELinux. MAC is built on top of the Discretionary Access Control (DAC), which is already included in all Linux distributions. Let’s look at how regular Linux file security works first to get a better understanding of DAC. We have three entities in a standard security model: UGO (User, Group, Others). Each of these entities has its combination of permission on a directory or file.
For example, we have a “Linuxhint” user in our home directory. This “Linuxhint” user has certain permissions related to its group and other groups, which you can see in the output of the below-given command:
The “Linuxhint” user can now change this access. It can limit and grant access to this file to other groups, users and modify the file’s owner. These operations may expose essential files to the user accounts that do not require access.
Now, let’s consider the following scenario: A Linux process operates as the root user or user with superuser rights. Now, If a hacker gains control of the running program, he can utilize it to access any accessible resource of that particular user.
Consider another situation in which you want to prevent users from running shell scripts from their home directories. You may face this situation when you have a team of developers working on a production system if you want your team to check out the log files. But in the same case, you don’t want your developers to execute scripts from the home directories. Then what is the possible solution for this matter?
SELinux is a tool used for fine-tuning access control requirements like these. Using this security architecture, you have restricted access for users or processes. It isolates each process into its domain, allowing it to deal with specific processes and files from the domains. This forbids a hacker from gaining access to the system by hijacking any process.
Setting Up SELinux on CentOS
Now, we are going to set up a Security-Enhanced system on CentOS 8. For this, firstly, we have to install SFTP and Apache services. Utilize the below-given command to install Apache on your system:
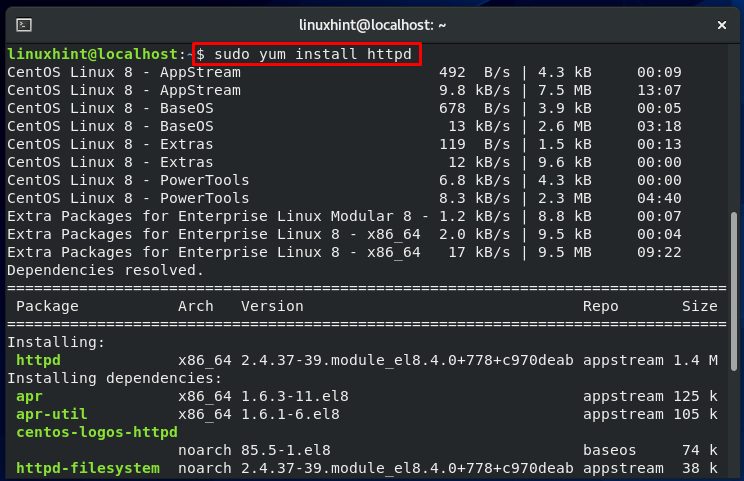
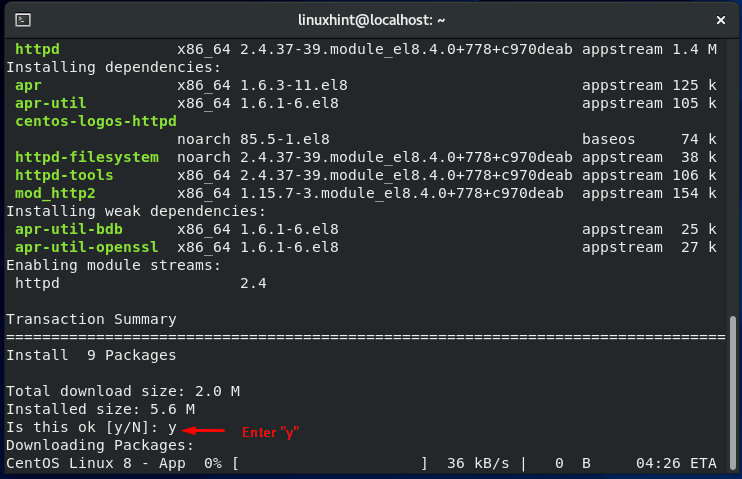
Enter “y” to permit the process to install Apache.

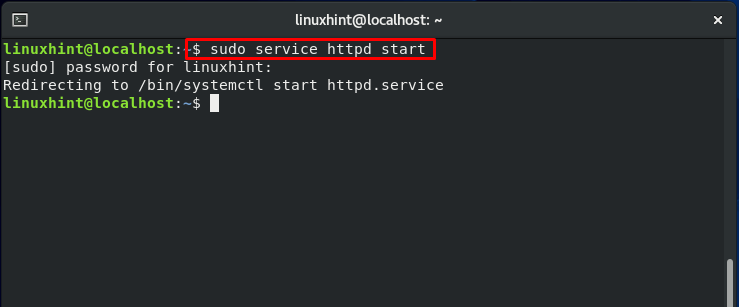
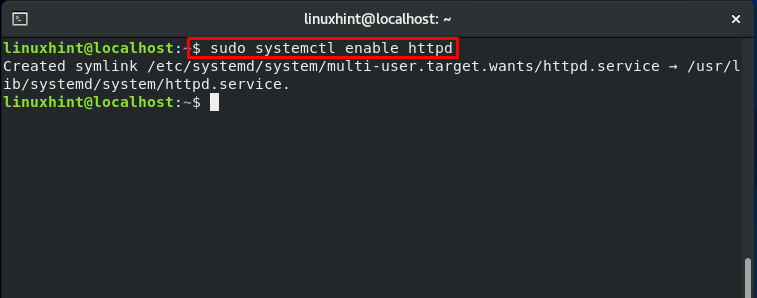
Start the “httpd” service:

The other package we are about to install on our CentOS is “vsftpd.” Follow these commands for its installation:
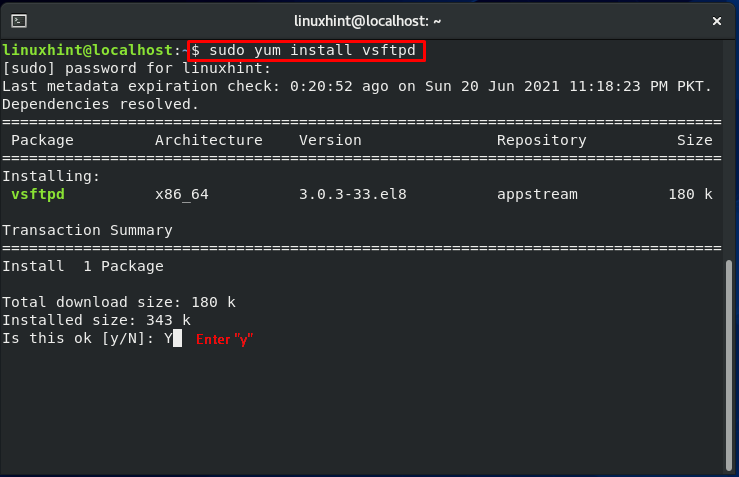
Now, enable the “vsftpd” service:

SELinux uses a lot of packages. Some of them are pre-installed in a Linux distro. A list of Red Hat-based distributions can be found here:
- selinux-policy: It issues SELinux reference policy
- libselinux-utils: tools related to SELinux management
- setools is a suite of tools to solve problems related to file context management, querying policy, and monitoring of audit logs.
- policycoreutils-python is a Python package that implements policycoreutils
- setools-console is a command-line interface for SETools
- mcstrans: it provides tools for translating different levels to easy-to-understand format
- policycoreutils is a set of policy-related utilities
- selinux-policy-targeted: issues targeted policy of SELinux
- setroubleshoot-server: tools that are used to troubleshoot a server
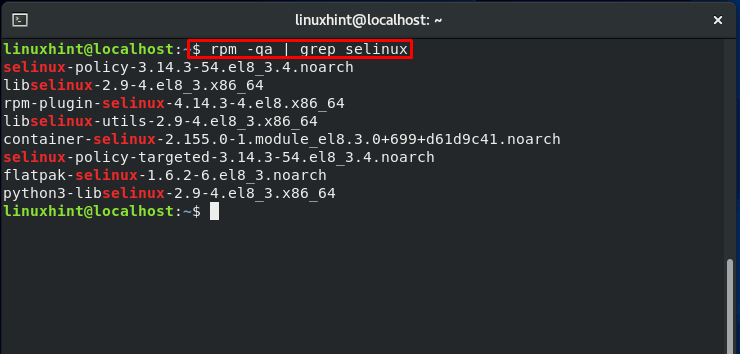
As a root user, utilize the following commands to see what SELinux packages are installed on your CentOS 8 system:
Write out this command to install the SELinux missing packages on your system:
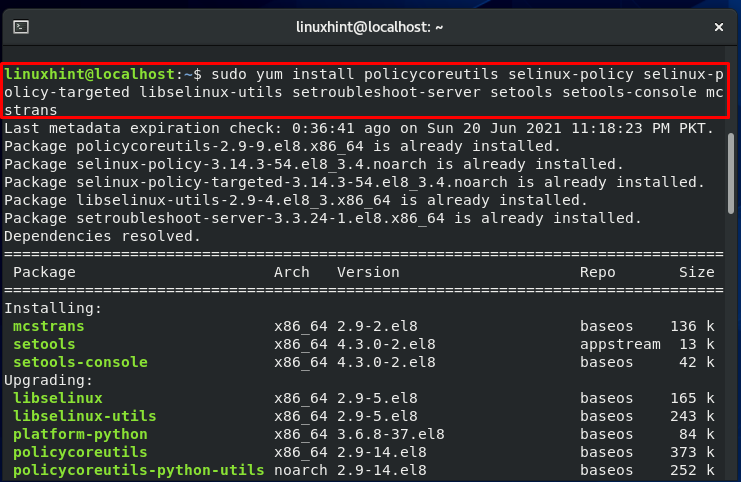


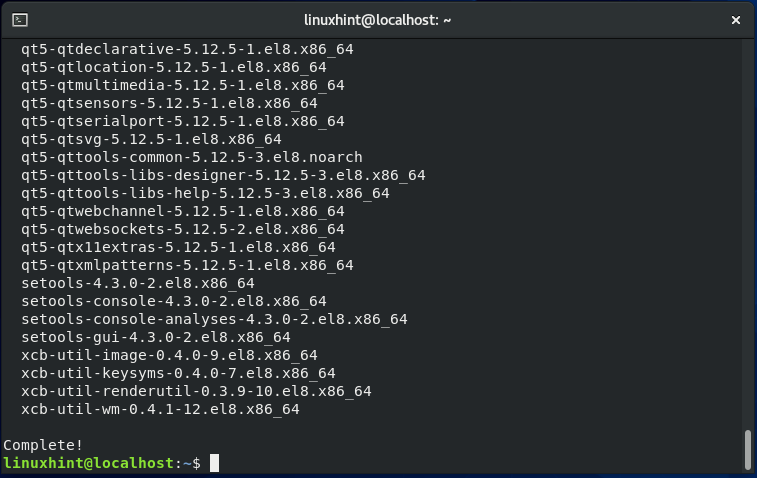
After completing the installations, now you have a machine with all of the required SELinux utilities.
SFTP and Apache servers are operating with default settings.
SELinux Modes:
SELinux operates in one of these three modes :
- Permissive: Permissive mode is similar to a partially enabled state. In this mode, the Security-Enhanced architecture does not claim its policy. Therefore no access is prohibited, but still, audit files record any policy violation that happens. This mode is considered an excellent approach to put SELinux on the testing test before enforcing it.
- Enforcing: In this mode, SELinux will implement its policy by refusing any unauthorized access attempts by processes and users. Additional functionality of this mode is that the access denials will also be written to the appropriate log files.
- Disabled: In this mode, the Linux system will work without the enhanced security.
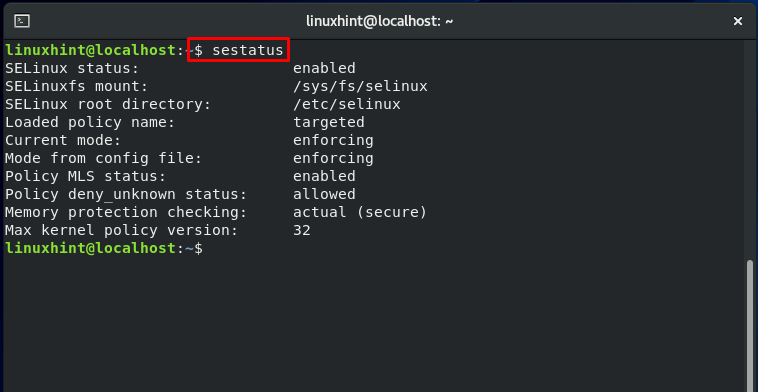
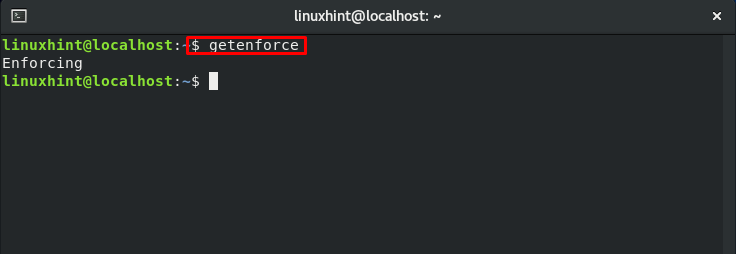
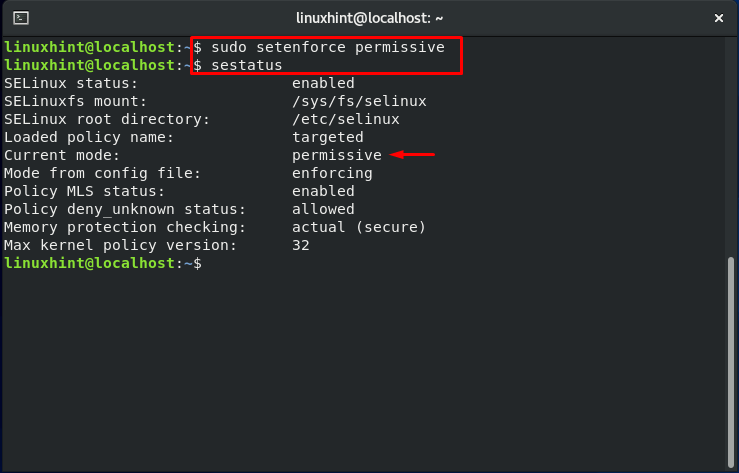
To know the currently enabled SELinux mode on your system, utilize the “getenforce” command:

“setstatus” will show an elaborated output related to your SELinux mode.
Now, let’s check out the SELinux configuration file by utilizing the below-given command:
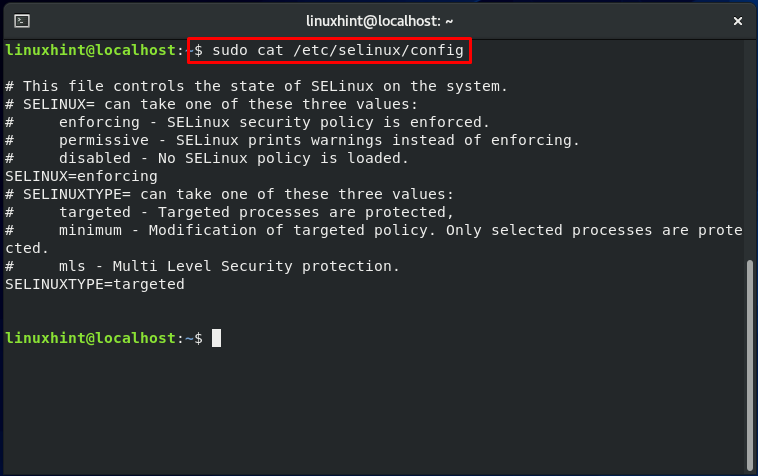
This file contains two directives. As we explained previously, the SELINUX will specify the SELinux mode and can take one of three values: Permissive, Disabled or Enforcing.
“Targeted” is the default value of the SELINUXTYPE. This part of the file is used to declare policy. SELinux permits you to fine-tune and modify access control rights with a specific policy. The alternative option is Multi-level Security (MLS) which is a more advanced form of security protection.
Enabling SELinux on CentOS:
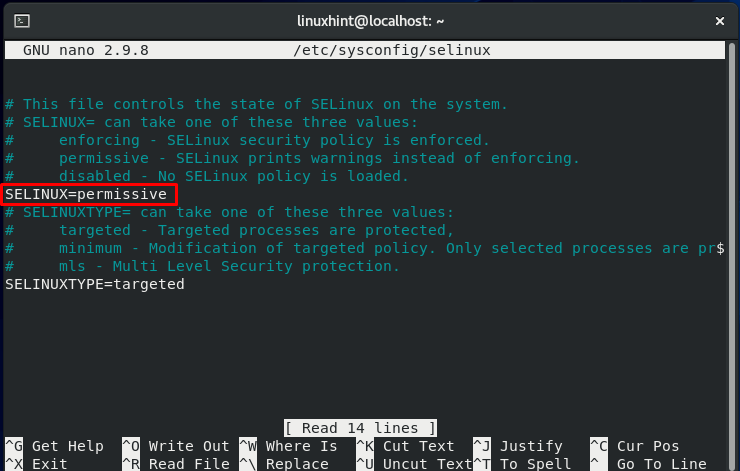
Follow this procedure to enable SELinux on your system. Firstly, open up the SELinux configuration file to make some essential changes:
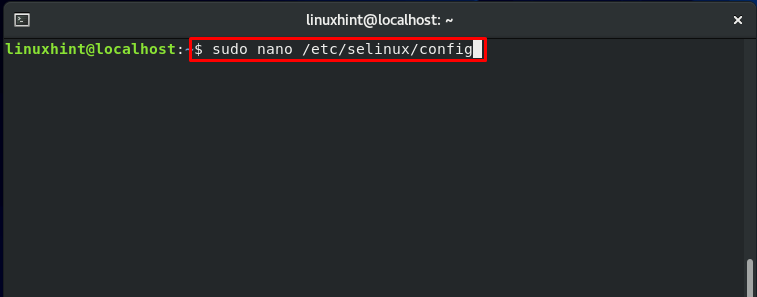
You can see that the status of the SELinux directive is set to “enforcing.” Modify the status to the value “permissive.”

You must know that each system file should have its context. Before enforcing SELinux on your system, setting the status to “permissive” is required. Wrong-labeled files cause the processes to fail miserably. As a result of this, the boot process may fail or begin with a lot of errors.

Now reboot your CentOS system:
All files that exist on the server will be labeled using an SELinux context during the reboot procedure. SELinux access denials and faults will be notified because the system is permissive but will prevent nothing.
After that, look for the string SELinux is preventing:
Move to the next step if there no errors are shown in the output.

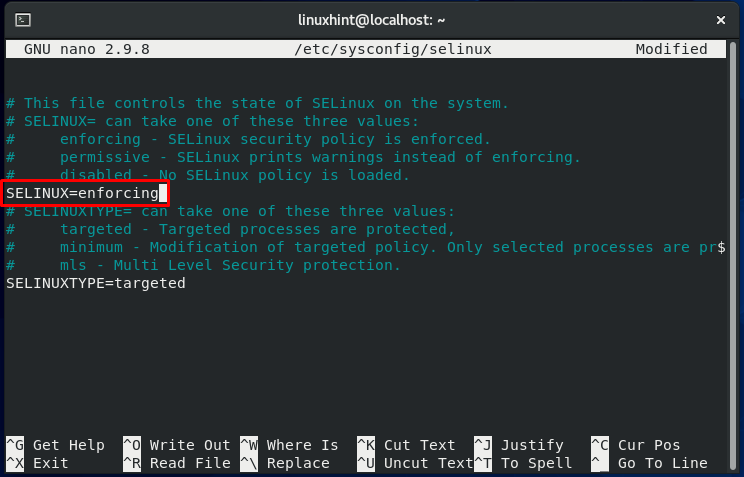
In the other half of this procedure, we will change the SELinux directive value. For that, open up the SELinux configuration file.
Change the SELinux value to “enforcing” and save the changes by pressing “CTRL+O.”
Now, again reboot your CentOS:

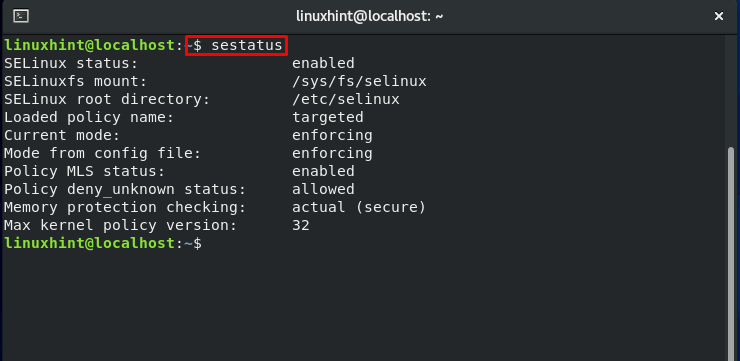
Now, check your SELinux status:
Also, check if the SELinux mode is updated or not:
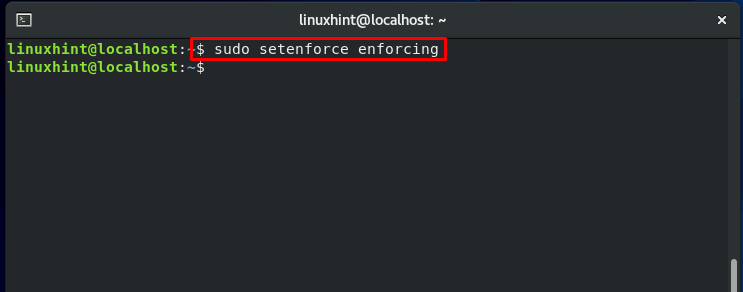
“setenforce” command is utilized to switch between the SELinux modes.
To switch the SELinux mode back to enforcing, write out the “setenforce” command in the following way:
The policy of SELinux:
According to the Security-Enhanced architecture policy, the user must first be granted permission to specify a role, and then the role must be granted permission for domain access. After that, the domain can only access specific files. This part of the SELinux implements Role-Based Access Control (RBAC).
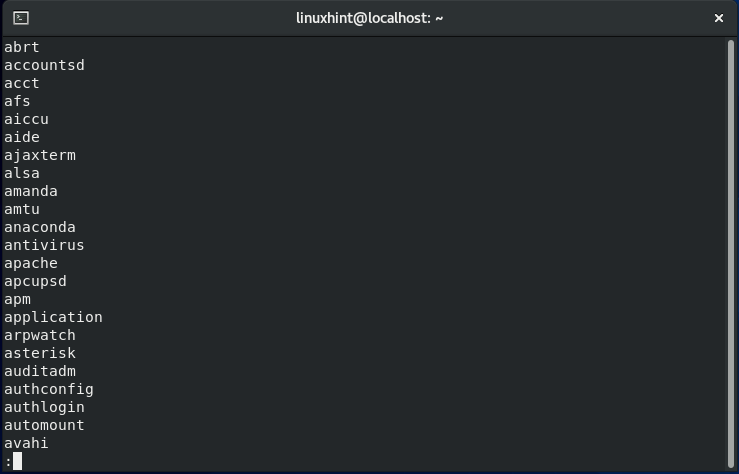
The policy is loaded into memory when an SELinux-enabled system boots up. The policy of this security architecture is organized in modules. They can also be dynamically added and withdrawn from memory at runtime, precisely like kernel modules. The store of the SELinux keeps track of the loaded module. The “sestatus” command displays the name of the policy store.” The “semodule -l” tool displays the currently loaded SELinux policy modules in the memory.
Let’s run the semodule command to get a better idea of it:
Installing, uninstalling, updating, enabling, disabling, and reloading SELinux policy modules is possible with semodule.

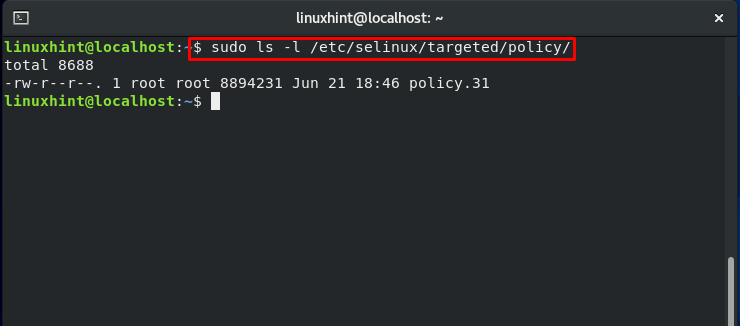
To know the location of the loaded security policy module, write out below-given command in your terminal:
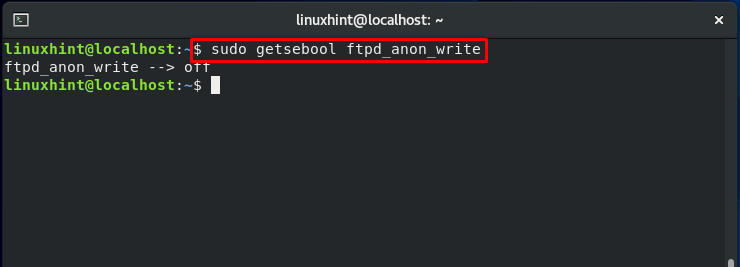
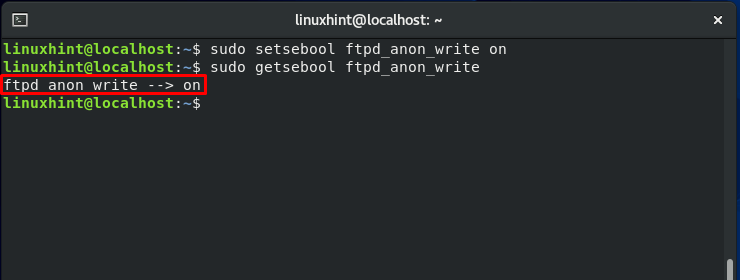
Updating SELinux Boolean settings:
Execute this command to view the status of various switches present in the loaded policy:
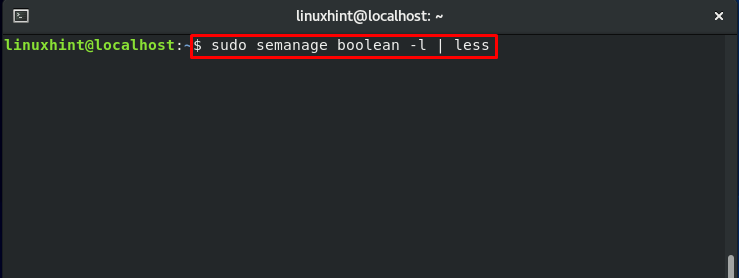
The output will show you the current status of each switch:

“getsebool” is the command that is viewing the status of these switches, and “setsebool” will allow you to modify the current switch status. To demonstrate these commands, we will take a quick example to enable the write access of “ftpd.”
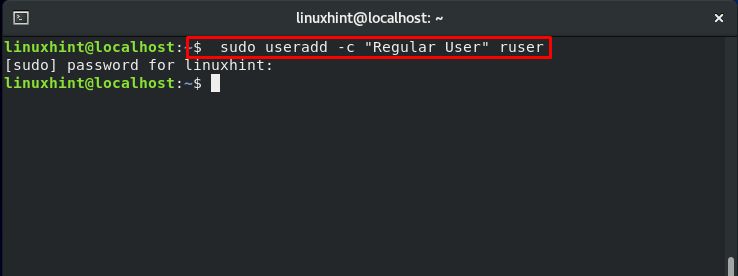
Demonstrating SELinux capabilities:
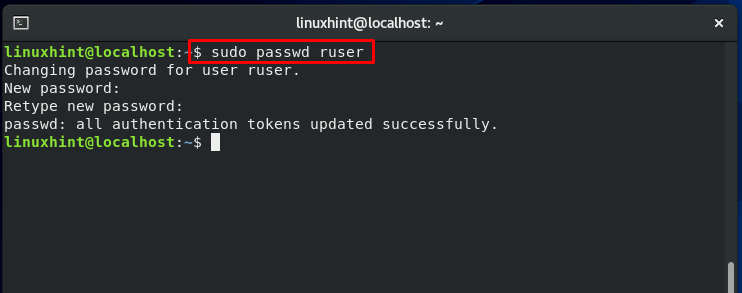
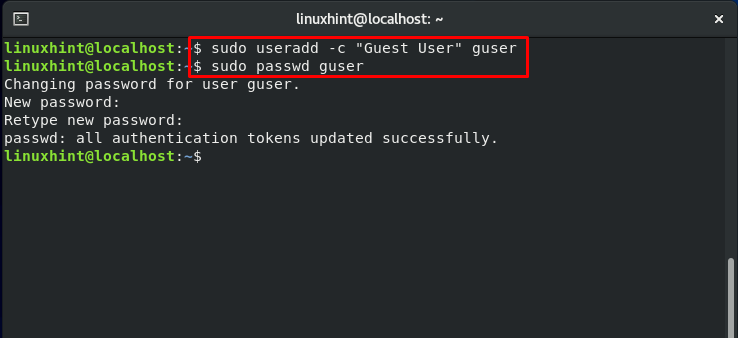
To move along with us in this section, you have to create four test accounts. In our case, we have made the following users:
- “suser” for switched user
- “restuser” for restricted user
- “ruser” for the regular user
- “guser” for guest user


Security-Enhanced structure for files and processes:
The goal of SELinux is to secure the access of files and processes in a Linux-based environment. If SELinux is not enabled, the user who started any application or process, such as the Apache daemon, will execute under its context. So, suppose any miscreant application operating as root has complete control over your system. In that case, this application can do whatever it desires to cause the root has full control over all files. This is highly terrifying.
SELinux is here to eliminate this risk. An application or a process will have only access when it requires to function with SELinux. The application SELinux policy will define the process and application access.
File context in SELinux:
In a Linux system, the first step towards security enhancement is to assign a label to each entity. A label indicates the resource context. Now the question is, what exactly is a context? A context is a set of security-related data that SELinux uses to decide access controls. A security context can be assigned to anything in a Linux system, including port, directories, files, and user accounts. For different types of objects, the security context is meant differently.
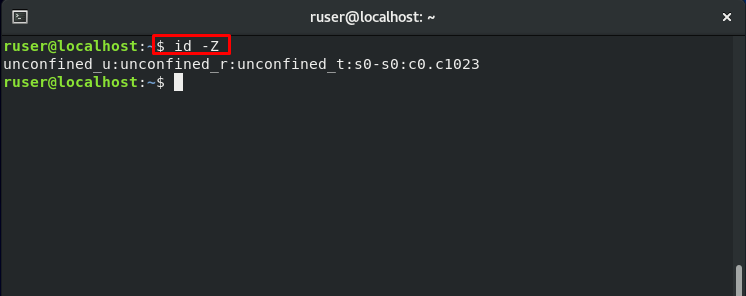
Now, check out the execution of the below-given command:
Now, add the “-Z” flag in the same command, and notice the difference:
The output will show you an additional column about the ownership of the user and group, which is also known as the “security context of a file.”


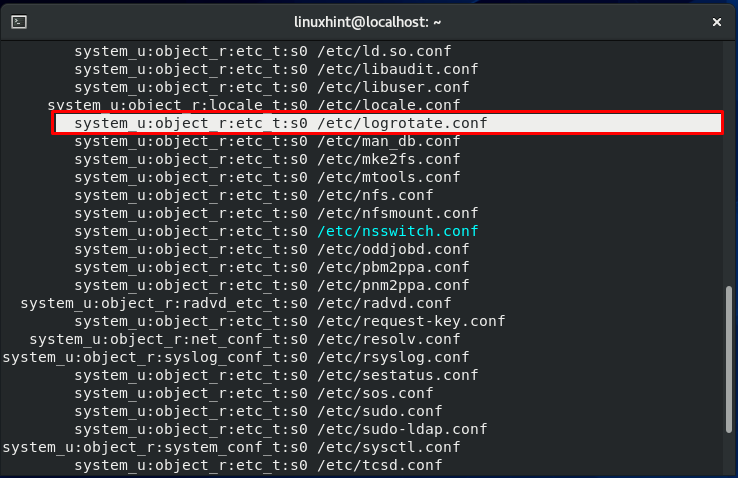
Now, let’s talk about the above-highlighted line. This line represents the security context. It is divided into 4 sections; a colon (:) is used to separate the sections. The user context is in the first section, also indicated by “u.” Account of each Linux user corresponds to an SELinux user. The SELinux role “object_r” is specified in the second section. The third part is the file type given as “etc_t,” which is the most crucial part. This is the section that specifies the type of directory of the file. The file context of the “etc.” directory is the “etc_t” type. Type can be thought of as a file attribute or group, which can be used for classifying the file.
Process Context in SELinux:
First of all, start the services of SFTP and Apache:

Now, utilize the “ps” command with the “-Z” flag to display security context.
The output will show you a list of processes with PID, Parent process ID, and security context.
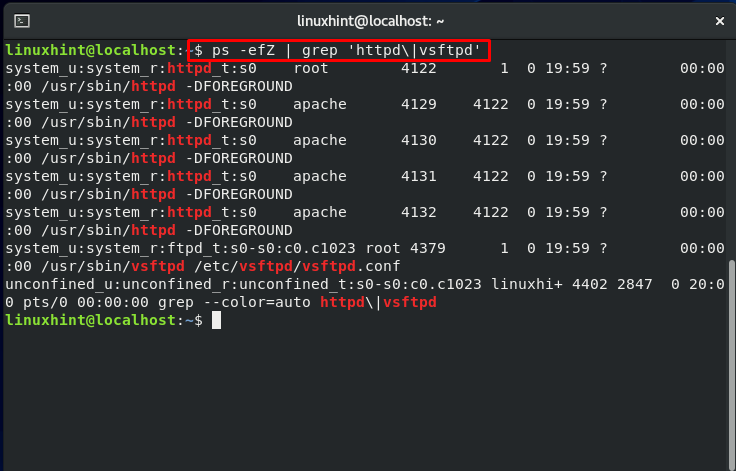
The section belonging to security context is:
User, role, domain, and sensitivity are the four sections of the security context. The user, role, and sensitivity contexts work in the same way that they do for files. Processes have their domain. So, how does the domain affect processes? It provides a context for the process to operate in. It specifies the capability of the process. This restriction ensures that each process domain can only work on specific file types.
Even if another malicious user or process hijacks a process, the worst that can happen is that the files it has access to are damaged. This limitation is implemented at the kernel level and makes access control essential; it is enforced when the SELinux policy is loaded into the memory.

Note:
- “_r” suffix is specified for roles.
- “_u” for SELinux users.
- “_t” for file types or process domain.
How a process access any resource?
This method comprises of the following steps:
- Allow access if a process belongs to a specific domain
- The resource object, the process seeking to access, belongs to a particular type and class.
Otherwise, access to the resource will be denied.
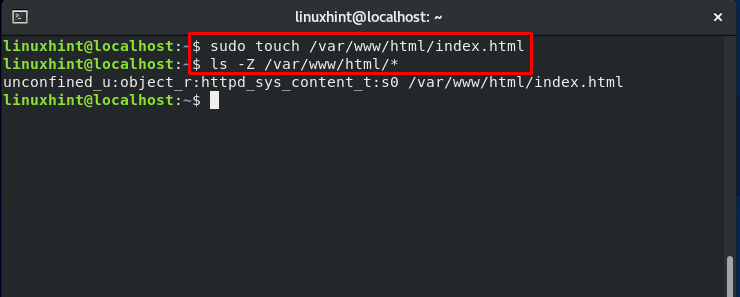
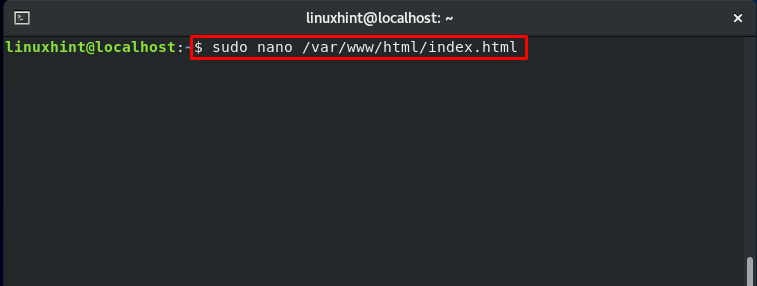
To move further, we will create a sample file named “index.html” in our web server default home directory.
As you can see in the output, “httpd_sys_content_t” is the file context for the content d
going to be displayed on the web.
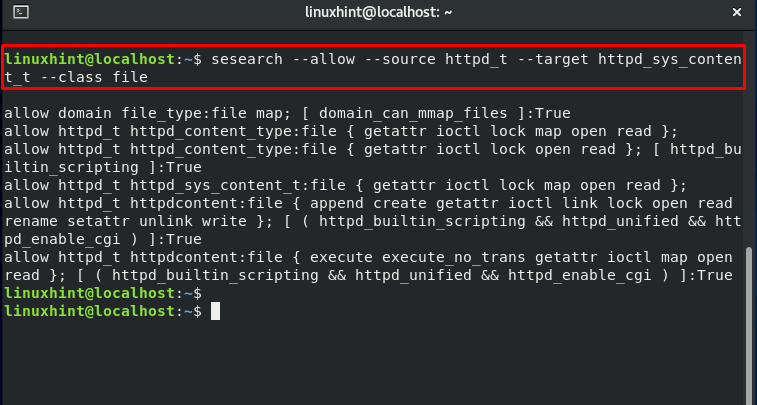
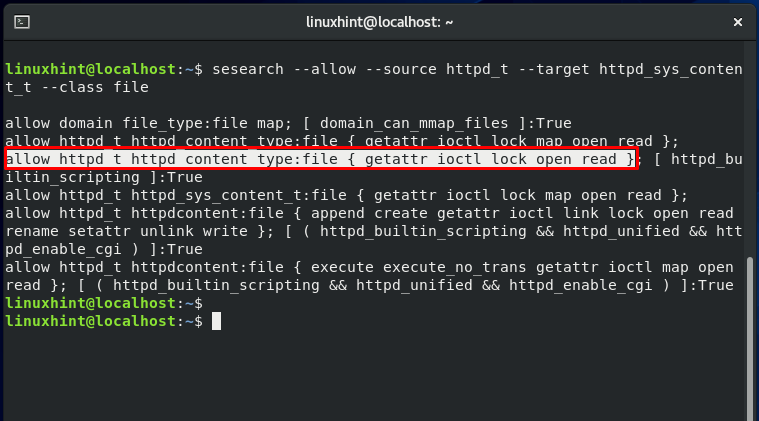
Utilize the “sesearch” to view the access type permitted to the httpd. The output declares that httpd has read, write, open, I/O control, and get_attribute access to the httpd files.
 Now, we will add some content to the already created “index.html” file.

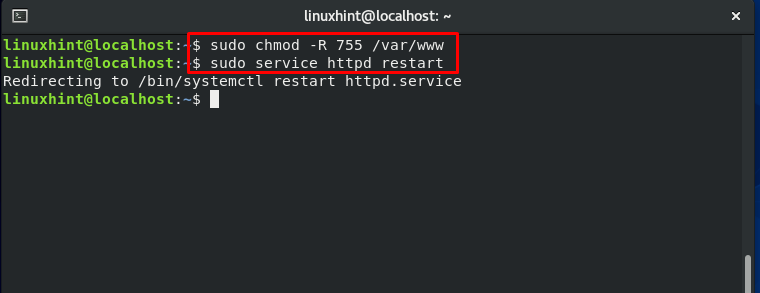
Changing the “index.html” file permission:
Now, we will restart the “httpd” service:
Also, check the status of “httpd” and enable it:

Note: If your system is already configured on port 80 for the incoming HTTP traffic, ignore the section below and move ahead. In the other case, firstly, you have to enable your port 80 for the HTTP traffic.
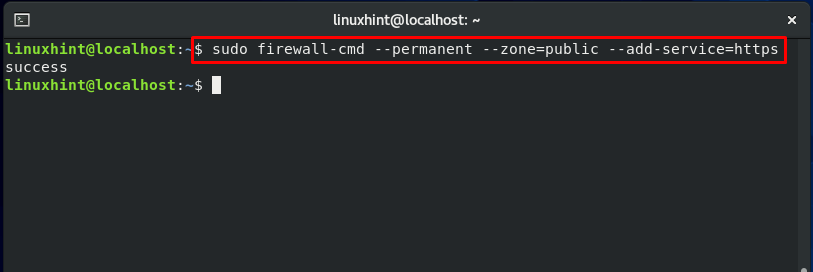
Configuring Firewall for HTTP:
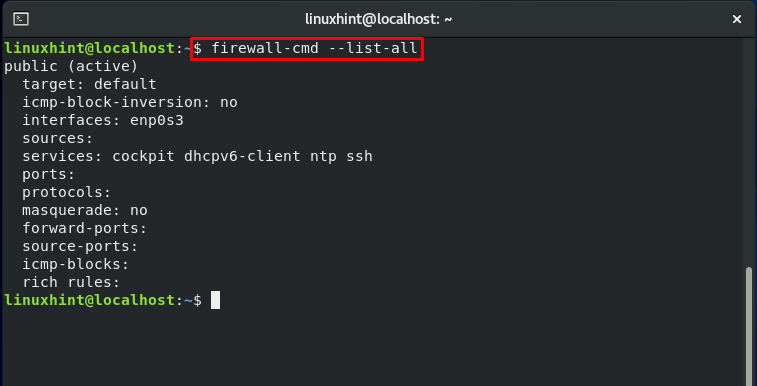
First of all, check out the services which are currently allowed by Firewall.
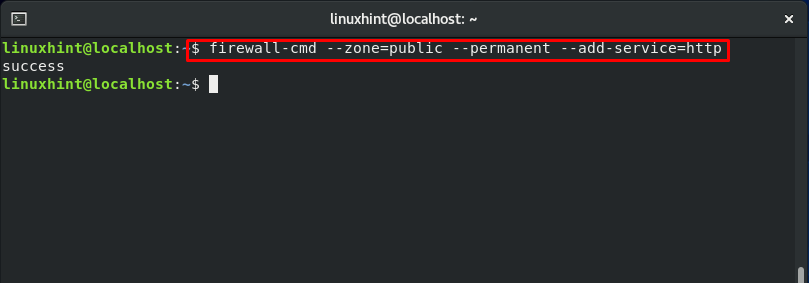
Now authorize the ports for the services: http and https
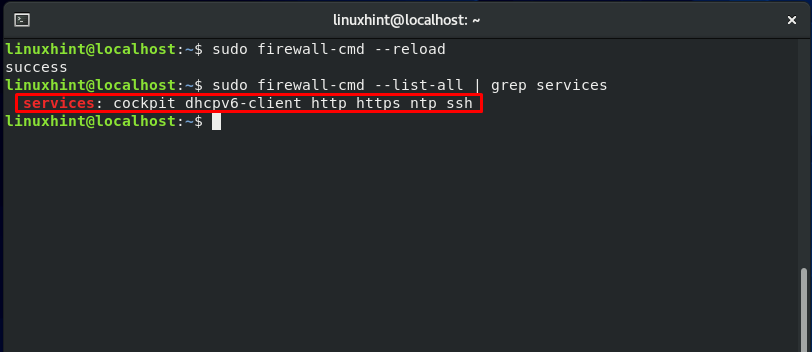
Now, reload the firewall settings:
List out the services allowed by Firewall using this command:
Here, you can see that HTTPS and HTTP are configured.
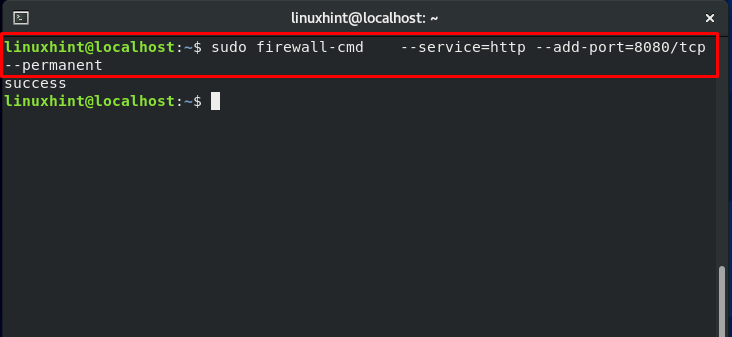
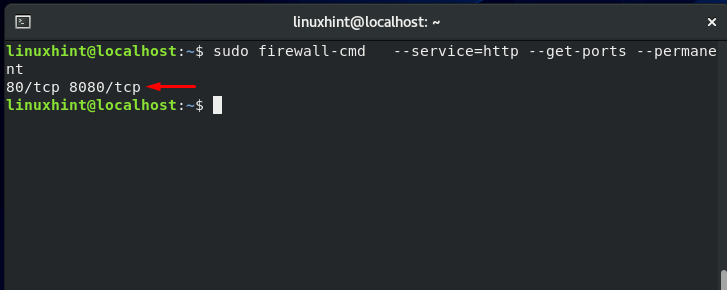
Open up the other ports as well, and check the status:
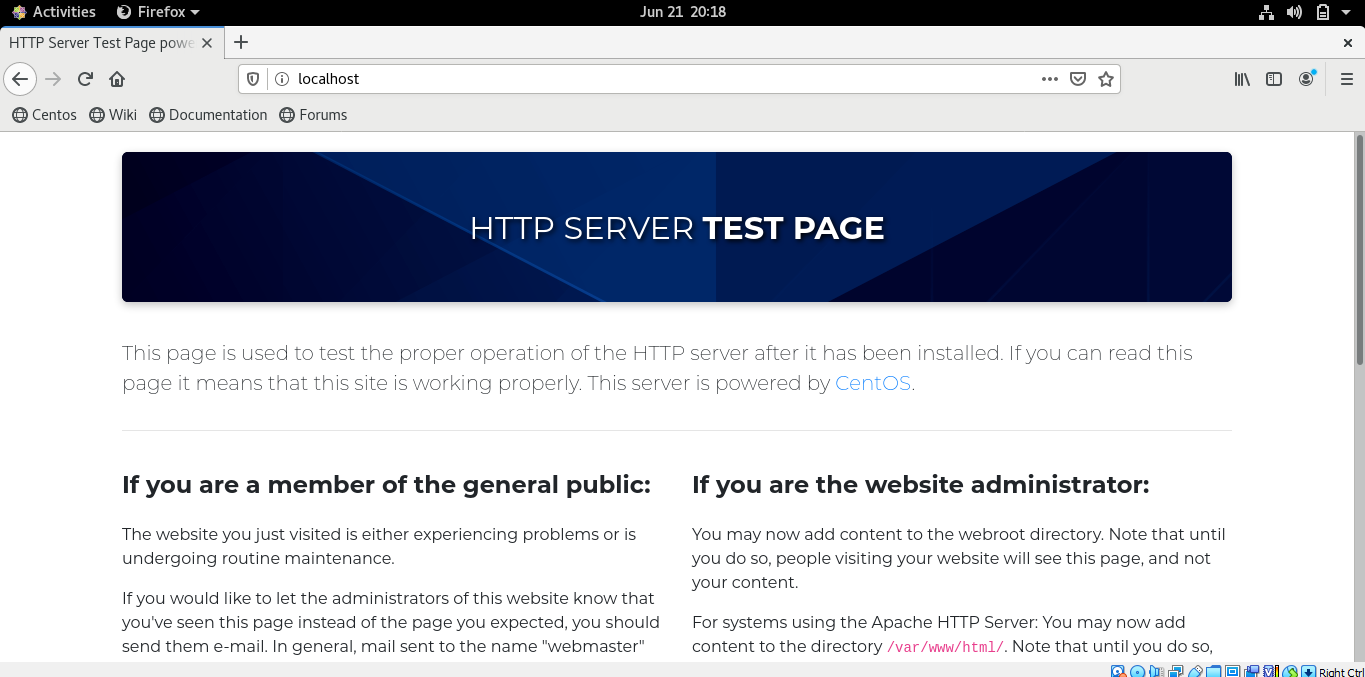
Now, Open the index file in your browser. It will show you the following content:

Everything is going pretty smoothly. Now, we turn things around and make some changes in the file context. “chcon” command is used for this purpose. With the “–type,” you can specify a particular type for the resource.
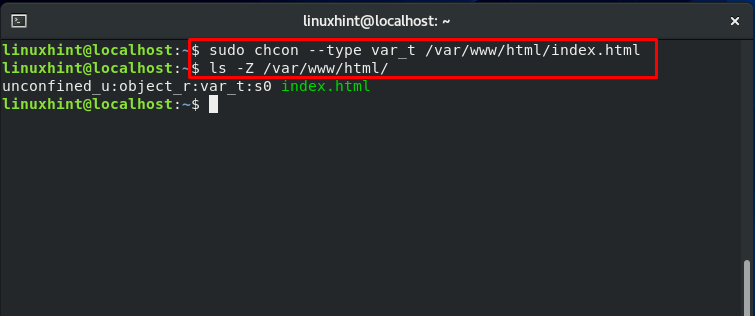
Again access this “index.html” web page. It will show you the following error:
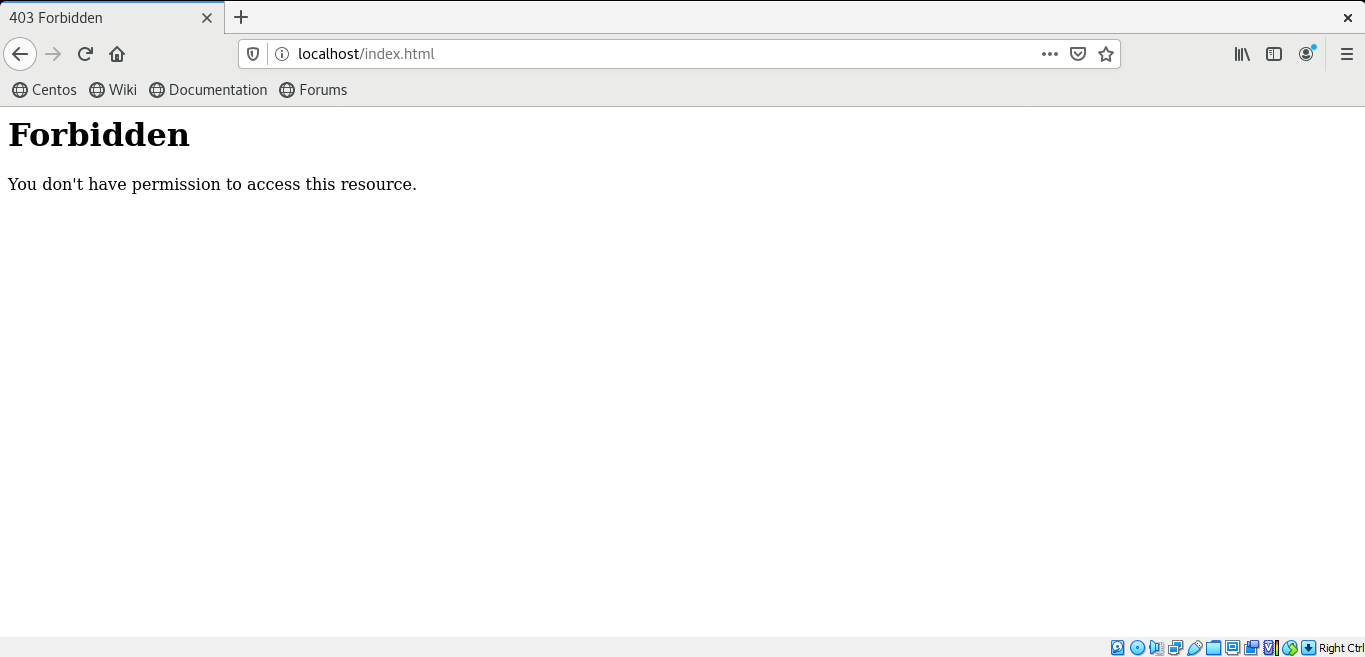
What exactly is going on? The file access is denied, but to whom is this access being denied? The web server can only access specific files under SELinux, and the “var_t” is not one of them. As we have modified the file context of the “index.html” file, Apache is now unable to access it. Utilize the “restorecon” for restoring the “index.html” file context.
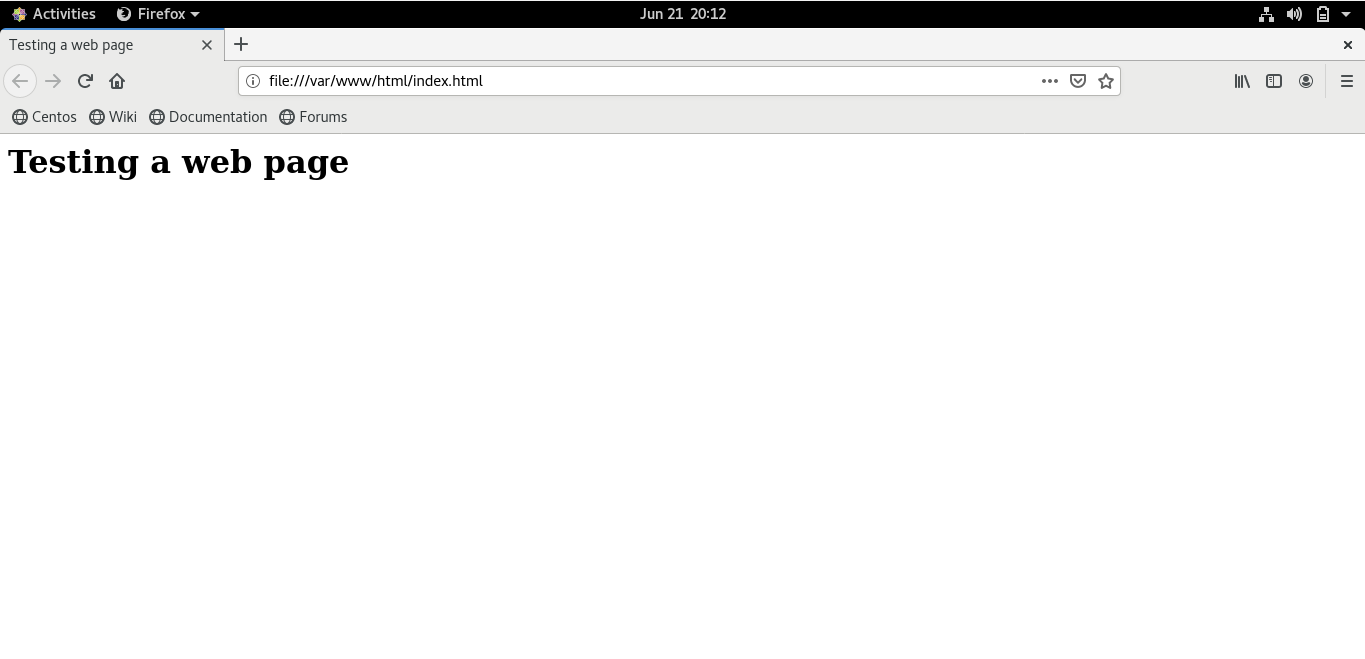
Again, access the web page, and you will access its content.
Directories and Files Context Inheritance:
SELinux imposes a concept known as “context inheritance.” The context inheritance state that file and processes are generated according to their parent context unless SELinux indicates it.
This section will teach you the concept that when you copy from one directory and save it to other, its file context is not preserved as the original one but is changed to the directory context where it is saved now. In contrast, when we move a file from one destination to another, its file context is preserved and will not change.

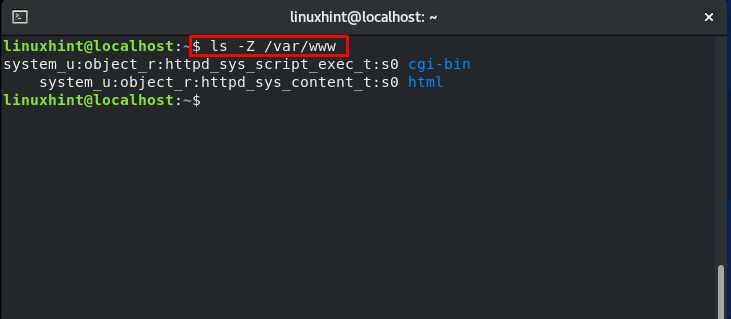
Have a look at the file context of the “www” directory:
Now, utilize this command to copy the file to the other destination:

Now, again check the “index.html” file context, and you will notice that it is changed to “var_t,” which is the file context of the “var” directory.
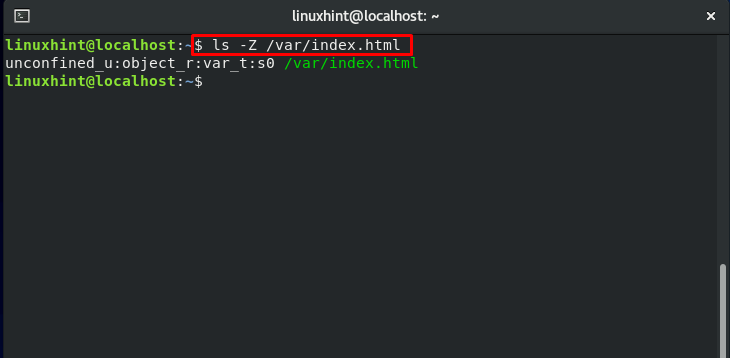
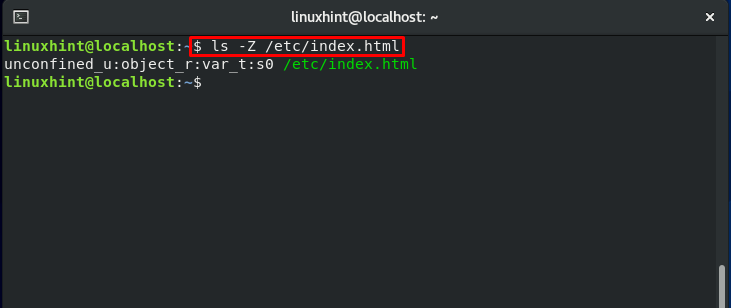
But in the other case, when you move this file to another directory, for instance in “etc.”:

The “index.html” file context will not change.
Context Error in a test file:
First of all, we will create a directory “html” in the “www” folder:

Check out the context of the “www” directory:

Now, we will copy the content of the “var/www/html” to “/www/html”:
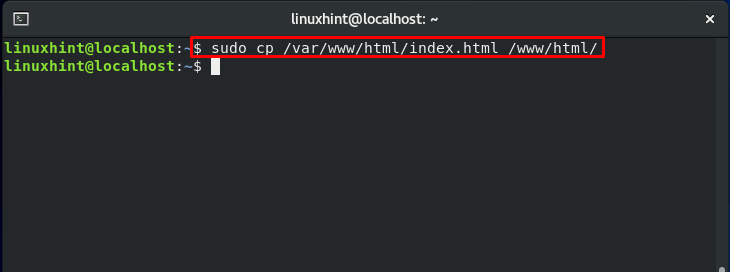
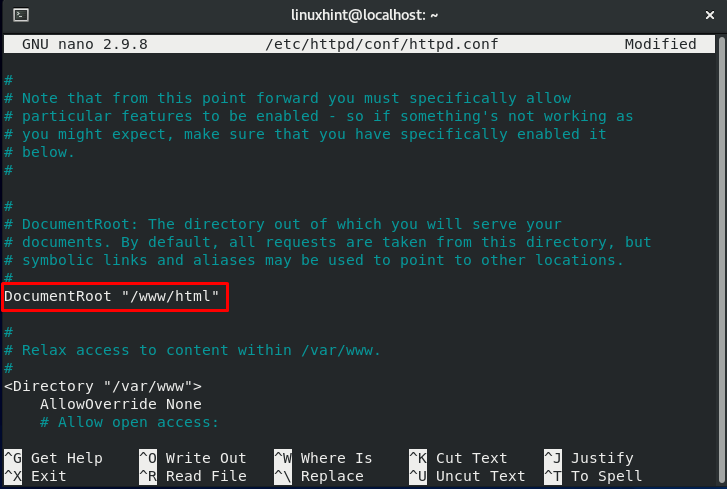
According to the previous section, the file context of the copied file should be changed now. Moving further, we will modify the configuration file of “httpd”:
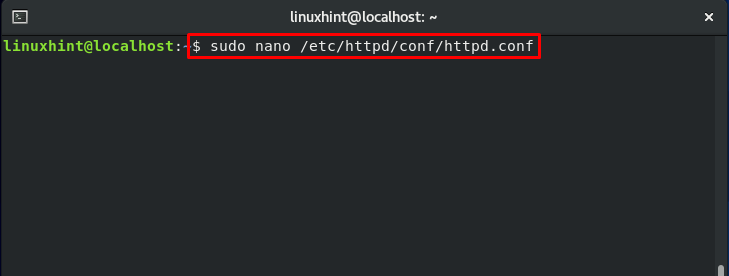
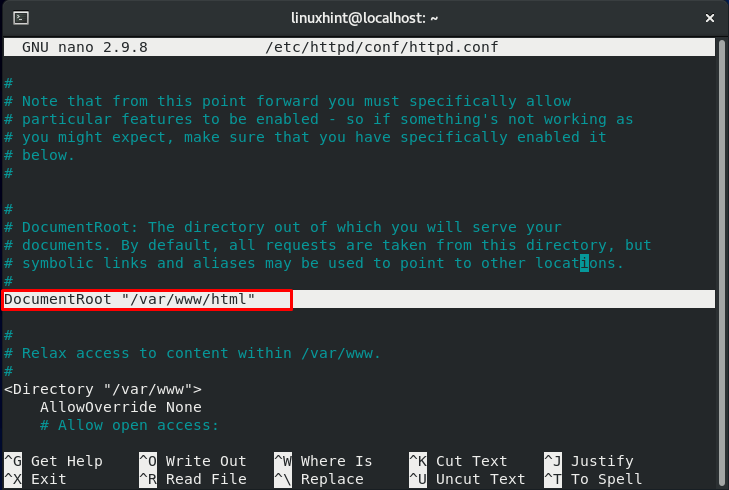
Update the document root to :
We also have to update the access right section, which is highlighted in the below-given image.
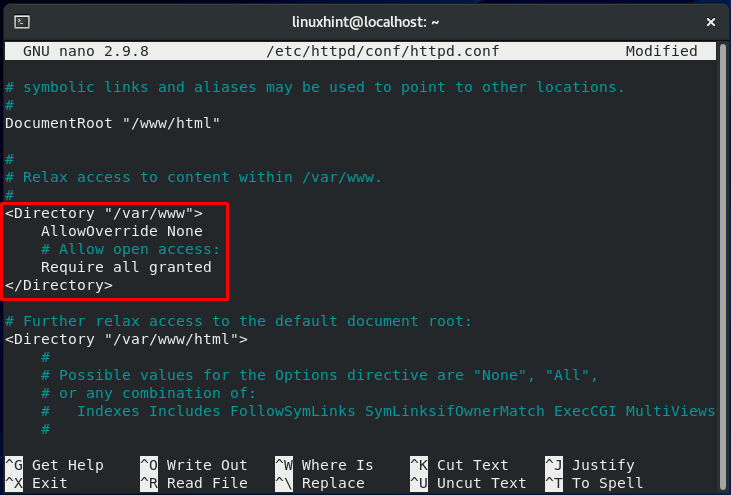
You have only to change the “var/www” file to “/www.”

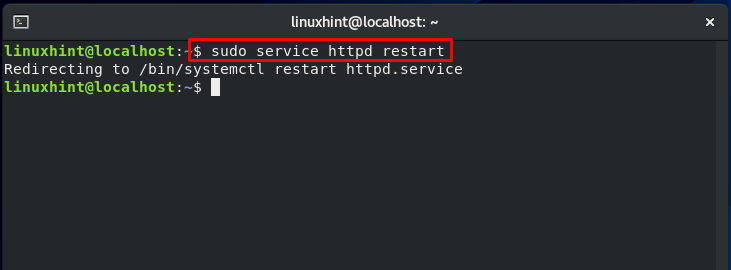
Save the changes we made into the “httpd” Configuration file, and restart its service:
Again access the page:

We are having this error because the “index.html” file context is changed. To access this web page, it is required to set it back to its original context.
Modifying and Restoring the File Context:
“restorecon” and “chcon” are the commands that are used for changing the context of any file. “restorecon” revert the context of any file to the original one, and you do not have to specify it in its command. Whereas, “chcon” command is used to change the file context temporarily, and you have to determine the correct context in its command.
Now, let’ see the context of some file by writing the following command:


A two-step method must be followed to permanently modify the context of our “index.html” file under “/www/html”:
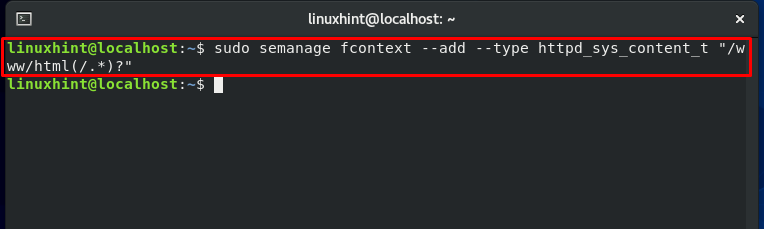
Firstly, we will execute the “semanage fcontext” command. The execution of this command will add the specified file context in the local context file.
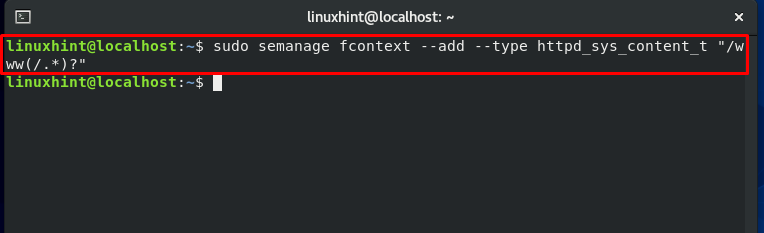
Doing the same execution for the other directory:
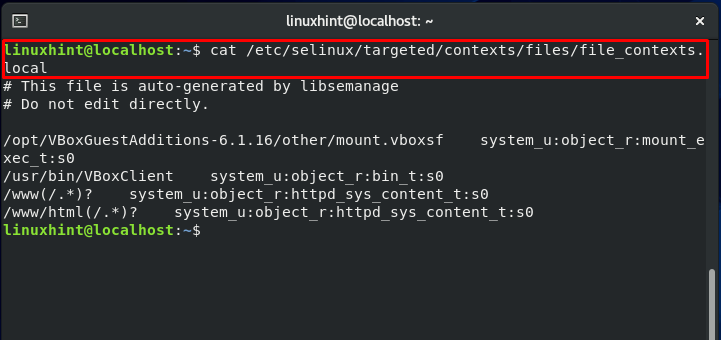
Again, check the local file storing files context and notice the changed context of both directories.
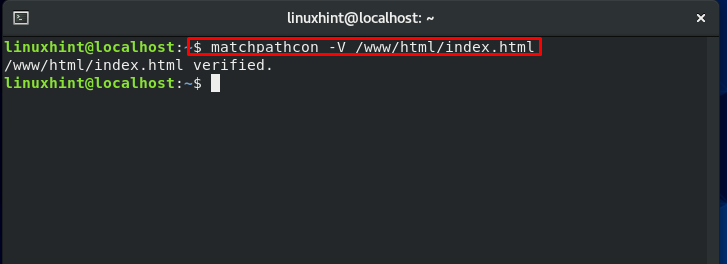
Now, relabel the file by utilizing the “restorecon” command:

“matchpathcon” command is used to compare the context of the file present in the local context file and what is labeled on the file:
The “verified” state that we have the same context.
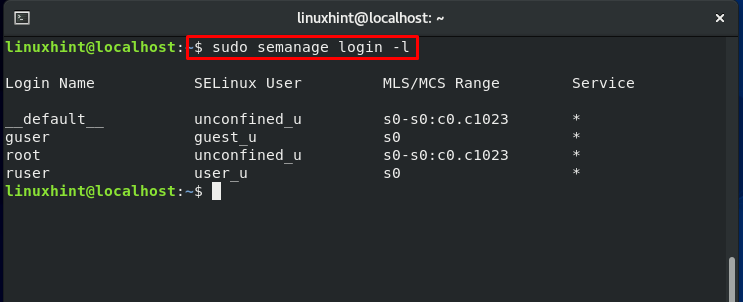
User Settings in SELinux:
SELinux users, including the root account, are distinct from regular user accounts. At boot time, Security-Enhanced Linux users are loaded in the memory. The thing which makes SELinux users valuable is their access level which it provides to the system.
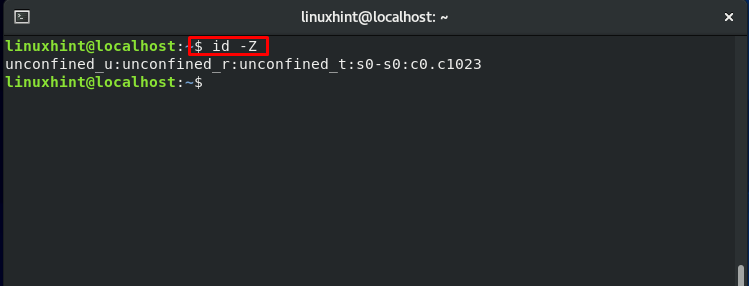
The SELinux user is stated in the first section of the security context. A user label displays the Security-Enhanced Linux user with whom the process is executing. Multiple user accounts can link to a single SELinux user. This process of mapping allows a standard account to inherit the SELinux counterpart’s permissions.
All regular user accounts are mapped to the “default” login name, whereas the second column’s SELinux users are represented by the entity “unconfined_u.”
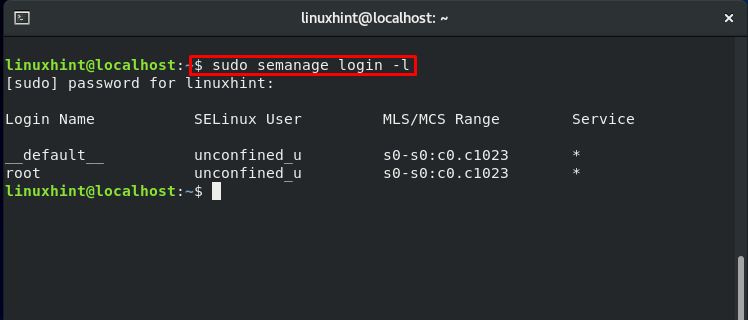
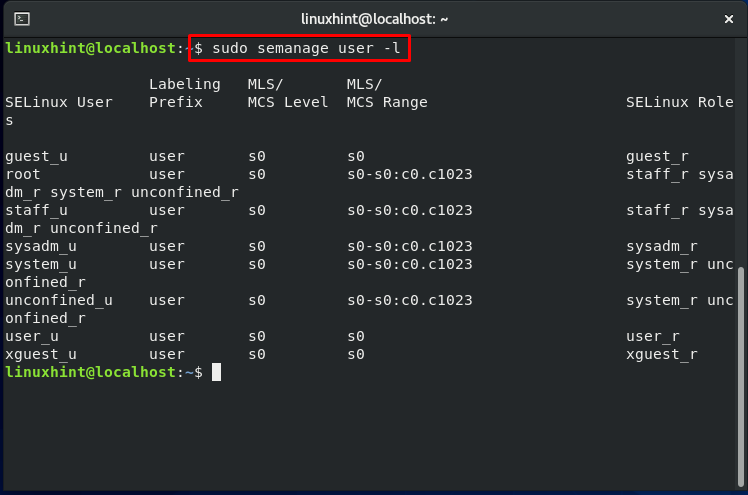
To get more details about users, write out the below-given command:
This command will show you all of the SELinux users defined by the policy and the roles associated with them.
As discussed earlier, the user represented by the “default” login name is mapped to “unconfined_u,” which means that they have the right to open any application. In the above output, we can see that mapping of “unconfined_user” is done to the roles: “unconfined_r” and “system_r.” We can conclude from these statements that a user will have access to execute any application if mapped to the “confined_u.”
The output of the below-mentioned command will justify our statement:
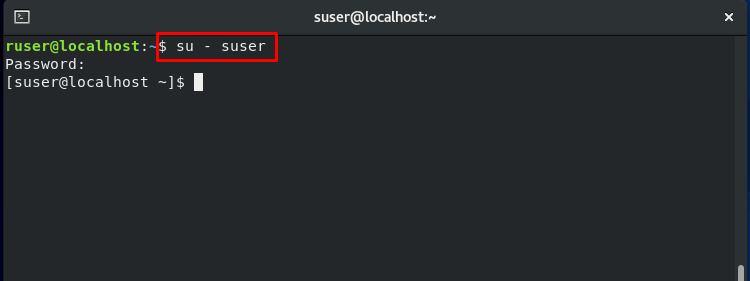
Switching to the Regular user:
As we have mentioned in the starting section of the post, we have created four test accounts: ‘ruser,’ which symbolizes Regular User. To switch to the “ruser,” use the “su” command in the following way:
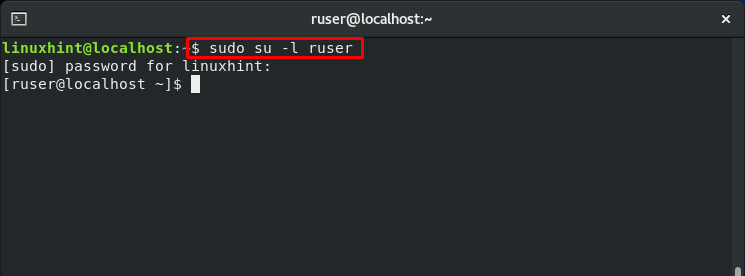
Now check out its mapping, role, and domain.
Restricting access for the switched user:
To better view how SELinux restricts the access of resources, directories, and processes for a particular user, we will switch from our regular user account to the “suser.”
Note: “suser” symbolizes switched users, and it was created for testing purposes.
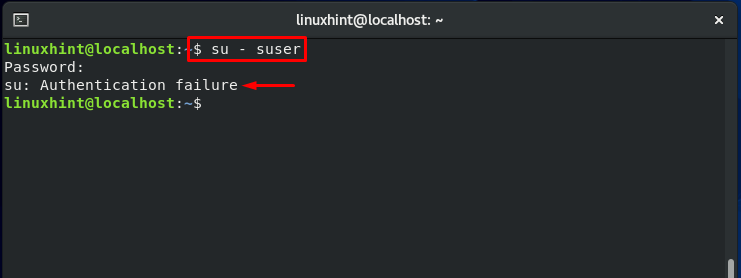
Now, switch back to the superuser or root and change the SELinux regular user ‘ruser‘ mapping.
Specifying the “-a” flag will the regular user ‘ruser’ to the SELinux users accounts. Log out and then Log in back for the system to take the effect of the modifications.

Now, again switch it back to the switched user account ‘suser’:
It will show you the error of the “Authentication failure.”
Restricting SELinux User permission for executing scripts:

Now, modify the mapping of the guest user:
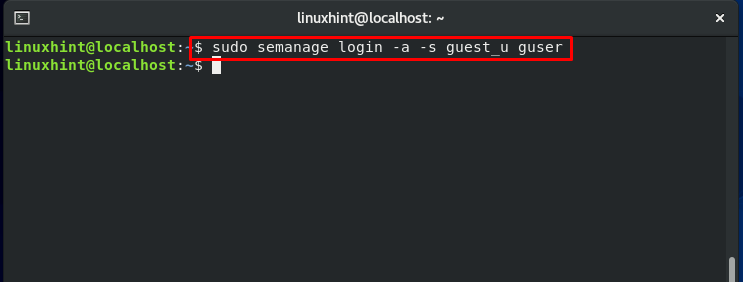
Confirm the mapping changes:
Now, Log out and Log in back as a ‘guser’ guest user:

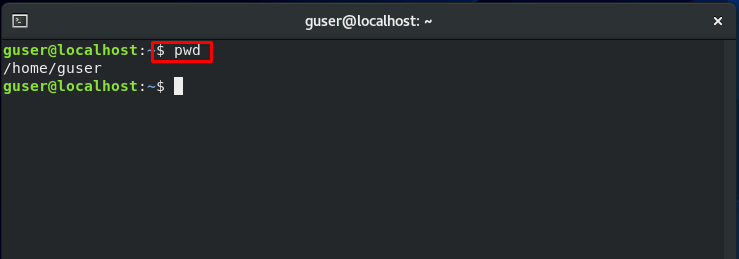
Check out the current working directory:
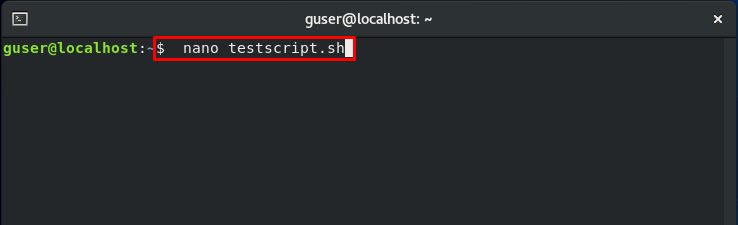
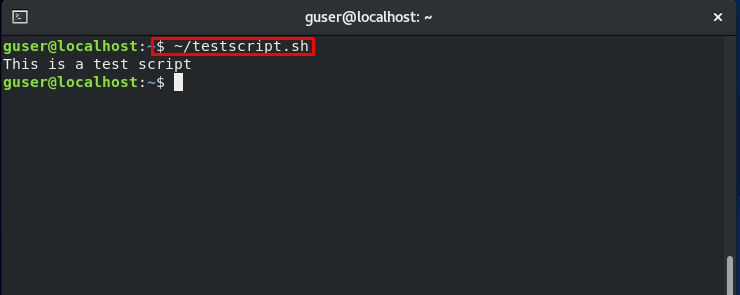
We will now check that according to the changes we made, the SELinux will still restrict the ‘guser‘ access to execute scripts. For that, firstly, we will create a test script named “testscript.sh”.
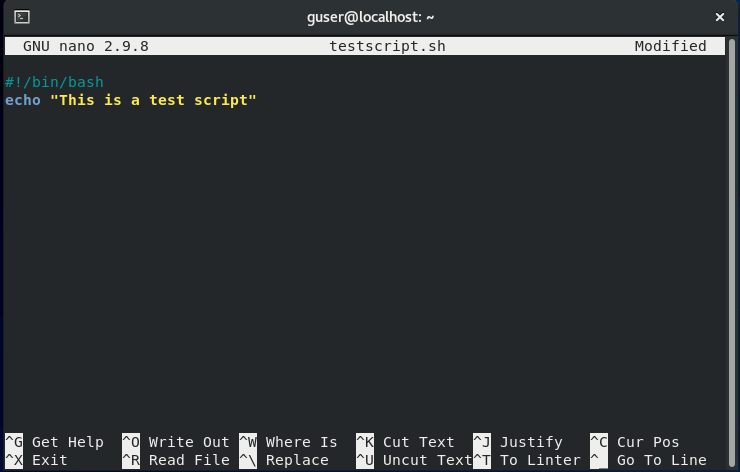
Add some content in this script as follows:
echo "This is a test script"
Change the “testscript.sh” permissions:
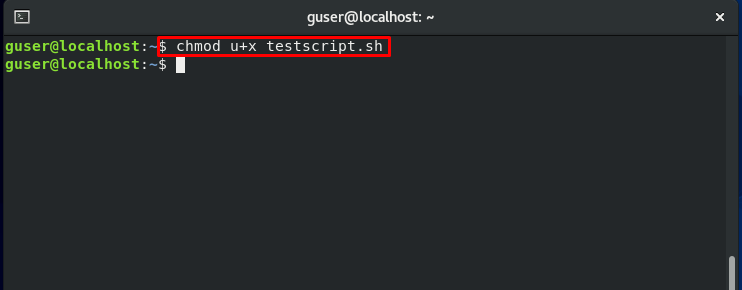
Now execute the created test script from the terminal.
Note: You are trying to execute the script as a ‘guser’ Guest User.
For prohibiting the ‘guser’ to execute the scripts, follow the below-given command sequentially:


Now, try to execute the same script. The output will show you the “Permission denied error.”
Conclusion:
SELinux may be challenging to set up for a beginner Linux user, but it is a fantastic introduction to several approaches for managing access control to your systems. This guide discussed SELinux, from its theoretical meaning, modes, and policies to its practical application. Furthermore, we have also shown you different ways of restricting access to your system.