
The most practical way in 2026 to connect an office network with cloud network is via a site-to-site business VPN. Rather than exposing your office servers, dashboards, virtual machines or databases to the public internet (which is unsafe), you can use a site-to-site business VPN to establish a secure and private tunnel between your office network and the cloud network. Both networks communicate with each other with their private IPs which makes the whole operation super secure.
The question is however, how do we build a site-to-site VPN? That’s where OpenVPN Access Server comes in, I have been using it for half a year personally and the more I use it the more I fall in love with the Access Server. In this tutorial, I will show you how to use OpenVPN Access Server to create a Microsoft Azure site-to-site business VPN. We’ll cover every step with no steps skipped. Consider this if you want to know how to create a site-to-site VPN on AWS. Also if you want to learn about setting up a site-to-site VPN on GCP.
In this setup, we will use OpenVPN Access Server’s listing on Azure marketplace. On the cloud side, We will deploy the OpenVPN access server on a VM inside an Azure Virtual Network. On the local side, we’ll be using our Linux machine as a gateway between our local LAN and Azure Virtual Network. This gateway machine will connect with the OpenVPN access server via a connection profile that we will download later in this guide. In this tutorial, we will use a private range 10.30.0.0/16 for Azure Virtual Network, a private IP range 10.30.1.0/24 for Azure subnet and our local LAN will use the IP range 192.168.1.0/24. You might have noticed that they are distinctively separate and that’s on purpose. They must not overlap, otherwise your system won’t be able to differentiate whether the destination is local or remote and the purpose of routing vanishes. So for routing, take care of these ranges and ensure they are separate.
For this tutorial, I will use:
| Component | IP Range/Address |
|---|---|
| Azure Virtual Network | 10.30.0.0/16 |
| Azure subnet | 10.30.1.0/24 |
| Local LAN | 192.168.1.0/24 |
| Local Linux gateway IP | 192.168.1.11 |
- How to Build Microsoft Azure Site-to-Site Business VPN with OpenVPN Access Server
- Step 1: Create a Resource Group in Azure
- Step 2: Create a Virtual Network and Subnet in Azure
- Step 3: Deploy OpenVPN Access Server from Azure Marketplace
- Step 4: Enable IP Forwarding on the OpenVPN Access Server VM NIC
- Step 5: Verify Azure Network Security Group Rules
- Step 6: Access the OpenVPN Access Server Admin UI
- Step 7: Configure OpenVPN Access Server for Site-to-Site Routing
- Step 8: Download the OpenVPN Connection Profile
- Step 9: Connect the Local Linux Gateway to OpenVPN Access Server
- Step 10: Enable IP Forwarding on the Local Linux Gateway Machine
- Step 11: Configure NAT and Forwarding Rules on Local Linux Gateway
- Step 12: Create an Azure Route Table and Routes
- Step 13: Create a Private Test VM in Azure
- Step 14: Test Site-to-Site VPN Connectivity
- Production Notes
- Conclusion
How to Build Microsoft Azure Site-to-Site Business VPN with OpenVPN Access Server (step-by-step)
Step 1: Create a Resource Group in Azure
First off, you need to create a resource group in Azure, even before creating any other resource. The reason behind that is that this resource group will act as a container and it can hold off everything that we add into it separately. This is very useful and we can separate our specific OpenVPN access server related resources. If you wanna find specific resources or want to delete all the resources at once, this resource group will be great for those purposes.
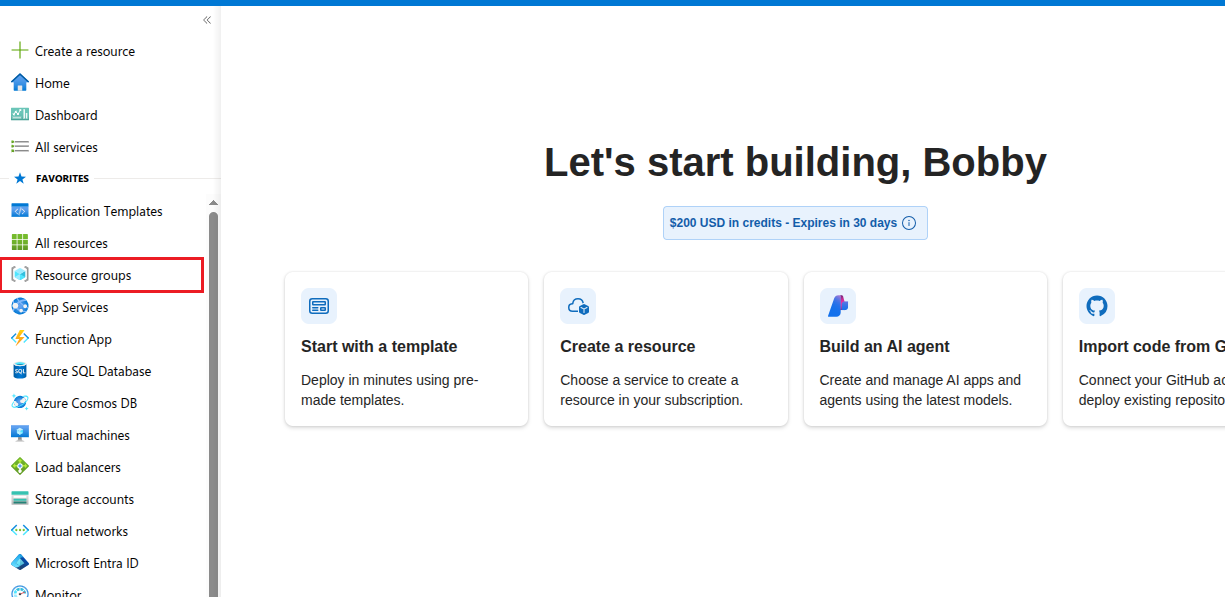
On your dashboard, on the left side you will see an option Resource groups. Click on that:
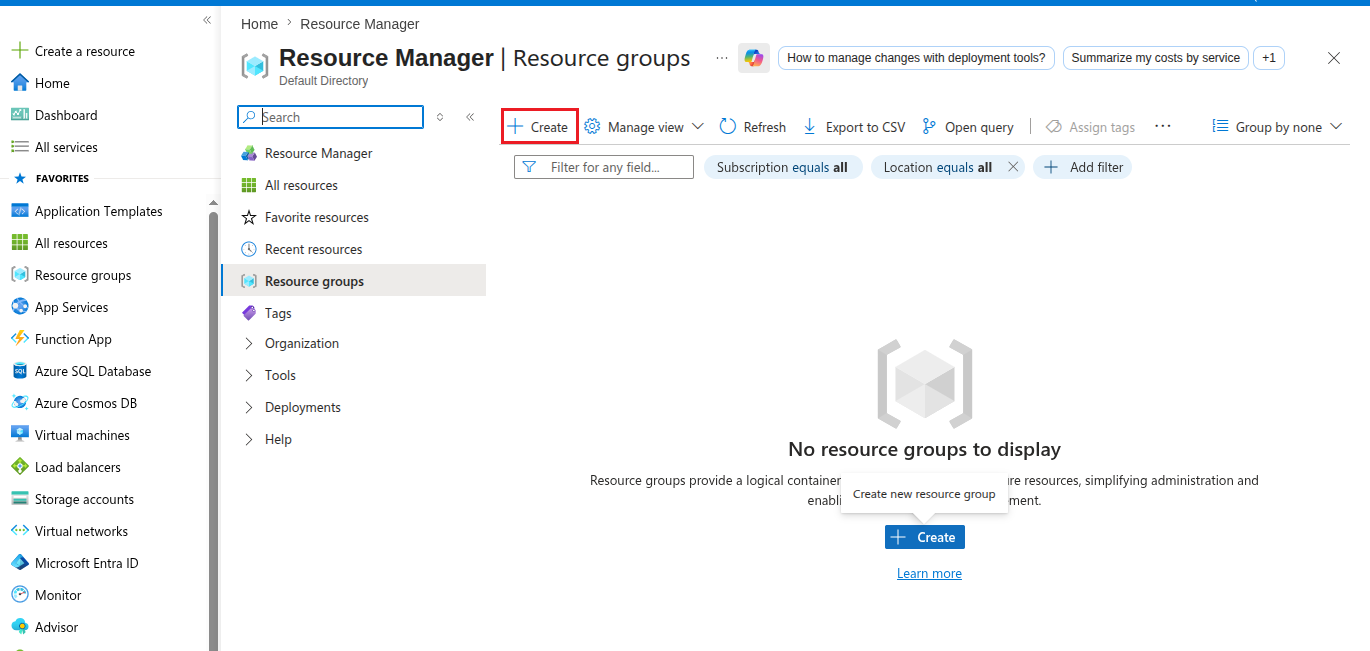
Then click on the Create button you see in the Resource groups dashboard.
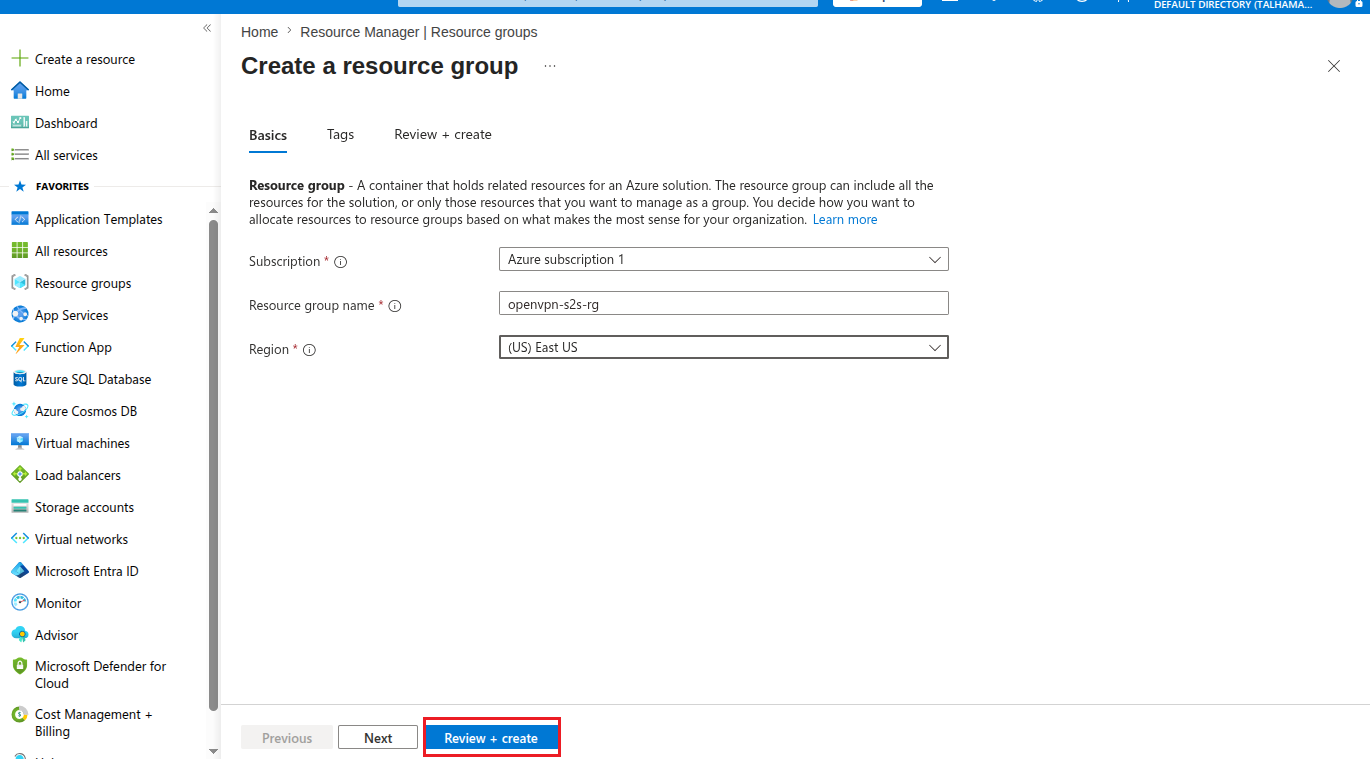
Now fill in the details, I’ll keep the subscription as it is, add the Resource group name as openvpn-s2s-rg and then the Region I’ll add as (US) East US. I’ll click on Review + create.
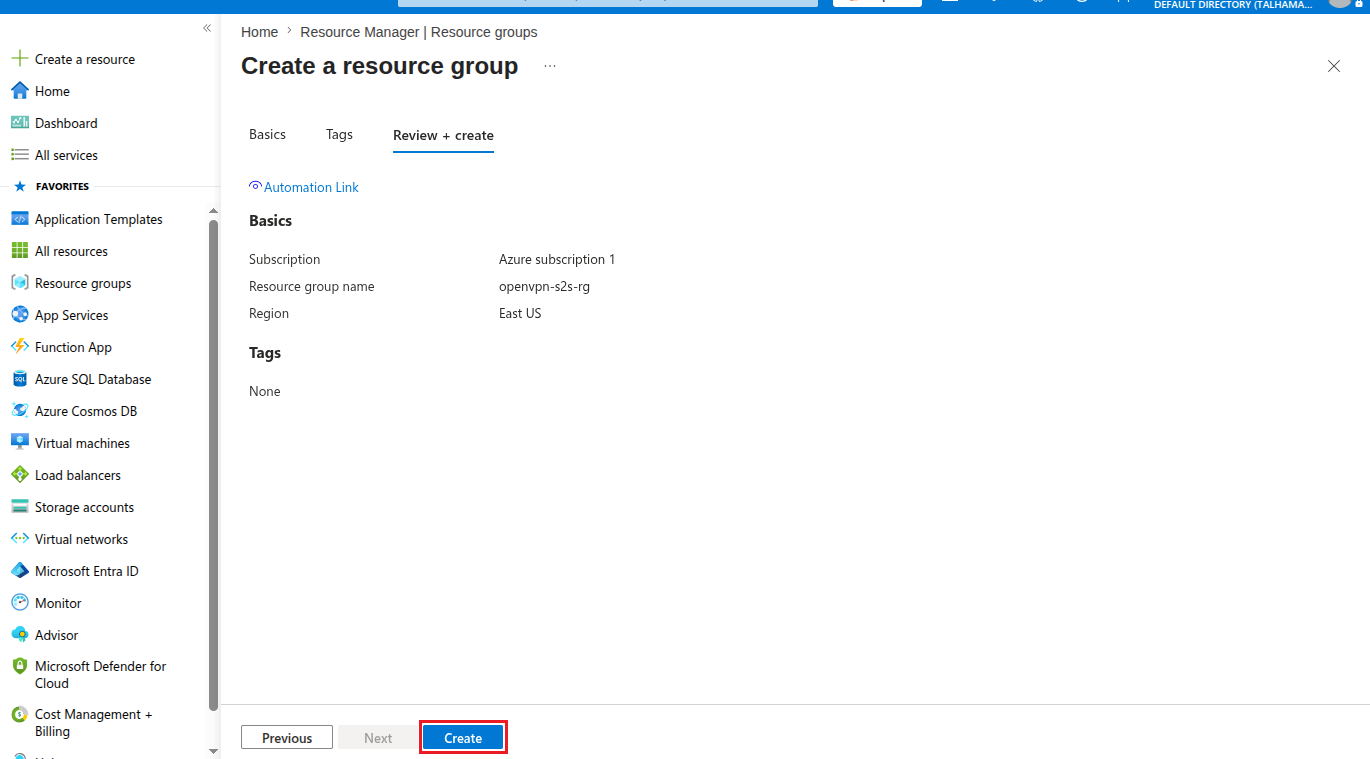
Quickly review and finally click on the button Create.
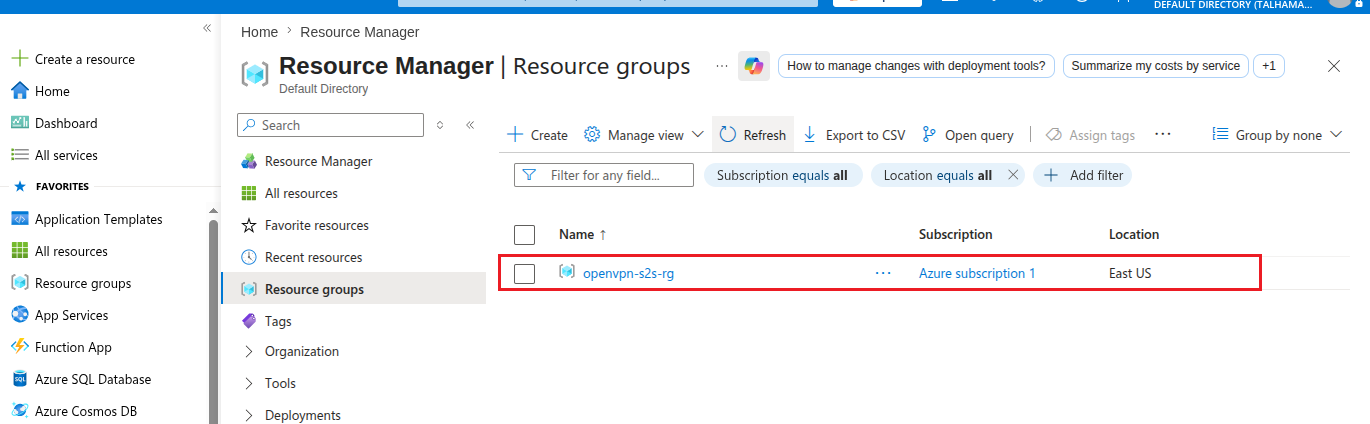
And now I am able to see my resource group openvpn-s2s-rg in the Resource groups dashboard.
Step 2: Create a Virtual Network and Subnet in Azure
After creating a resource group, now we need to create a virtual network where the OpenVPN access server VM will be hosted.
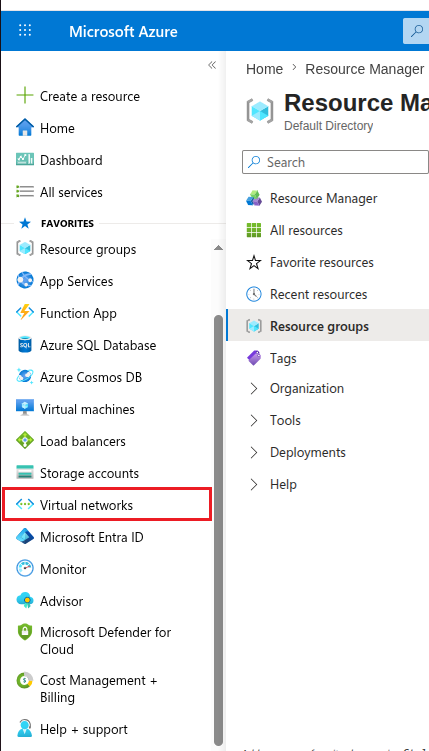
Go to your dashboard, on the left side, scroll down and click on Virtual networks.
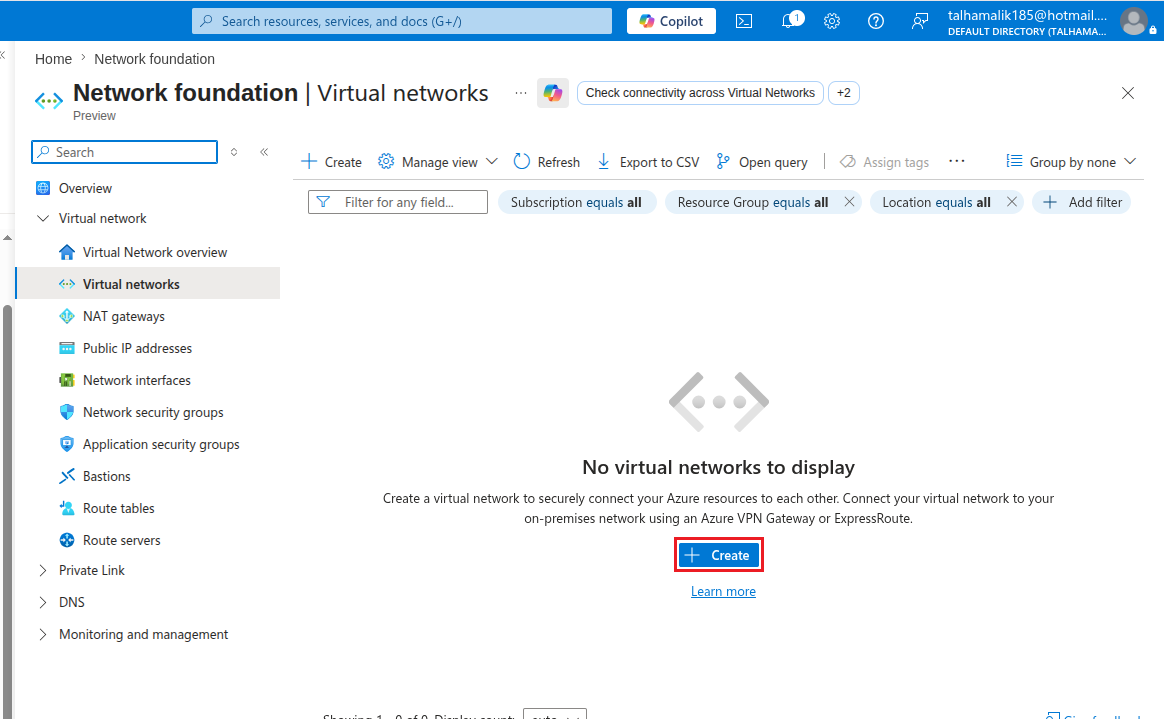
In the virtual networks dashboard, click on Create.
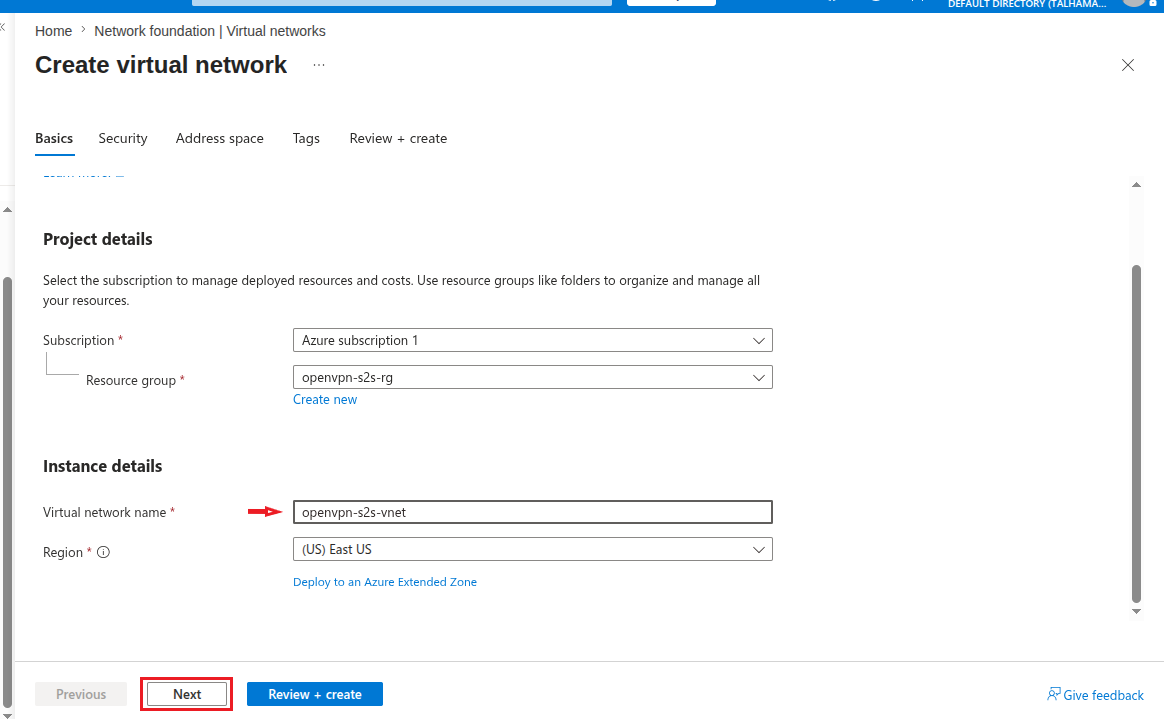
Now here, fill in the details. In the Basic tab, I’ll add the Virtual network name in Instance details as openvpn-s2s-vnet. Keep other details such as Resource group and Region the same.
Click on Next.
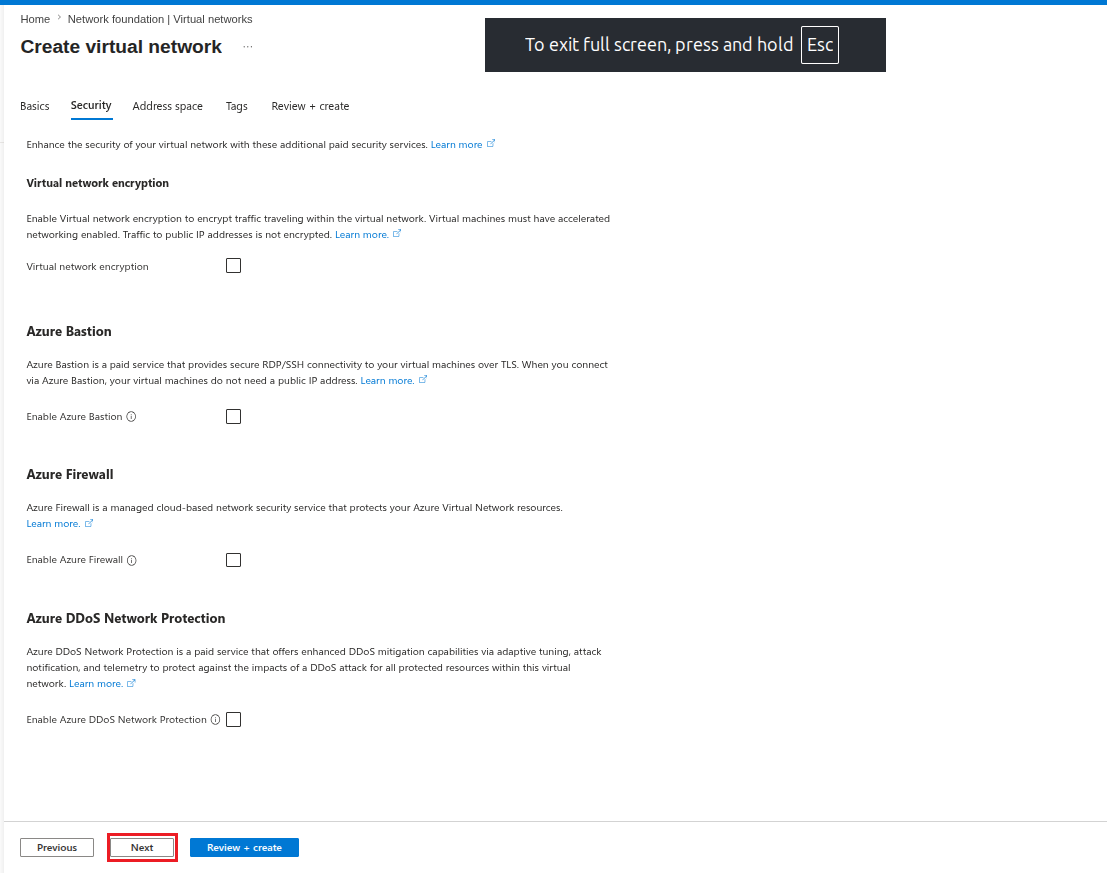
In the Security tab, leave all options unchecked and click on Next.
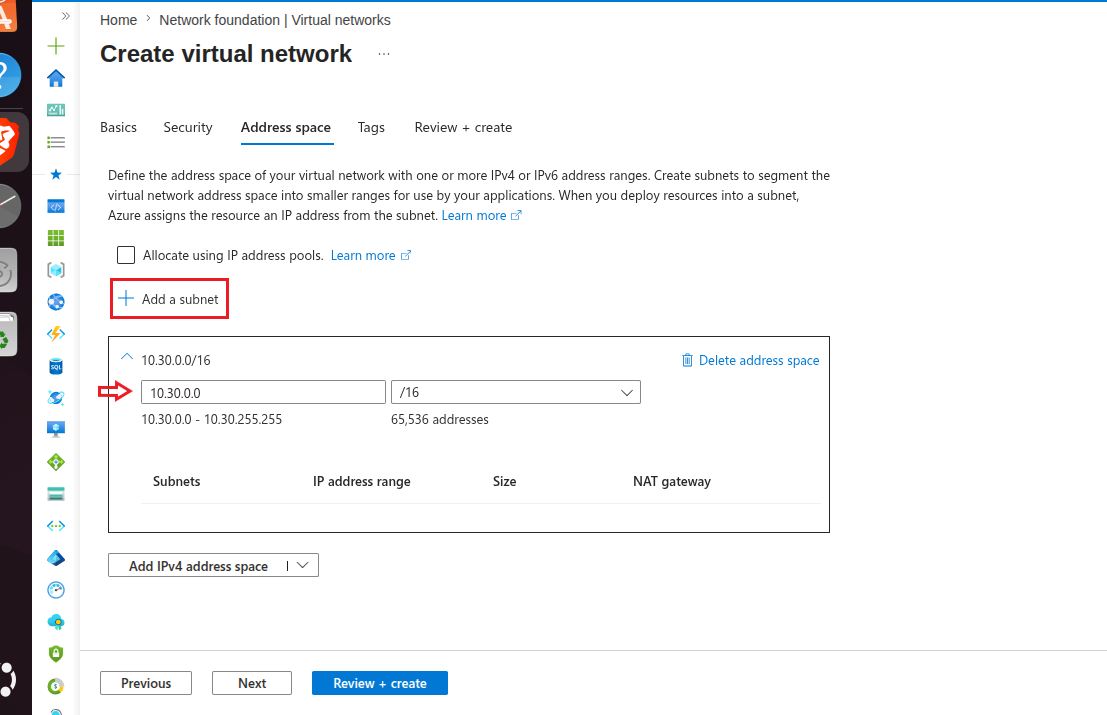
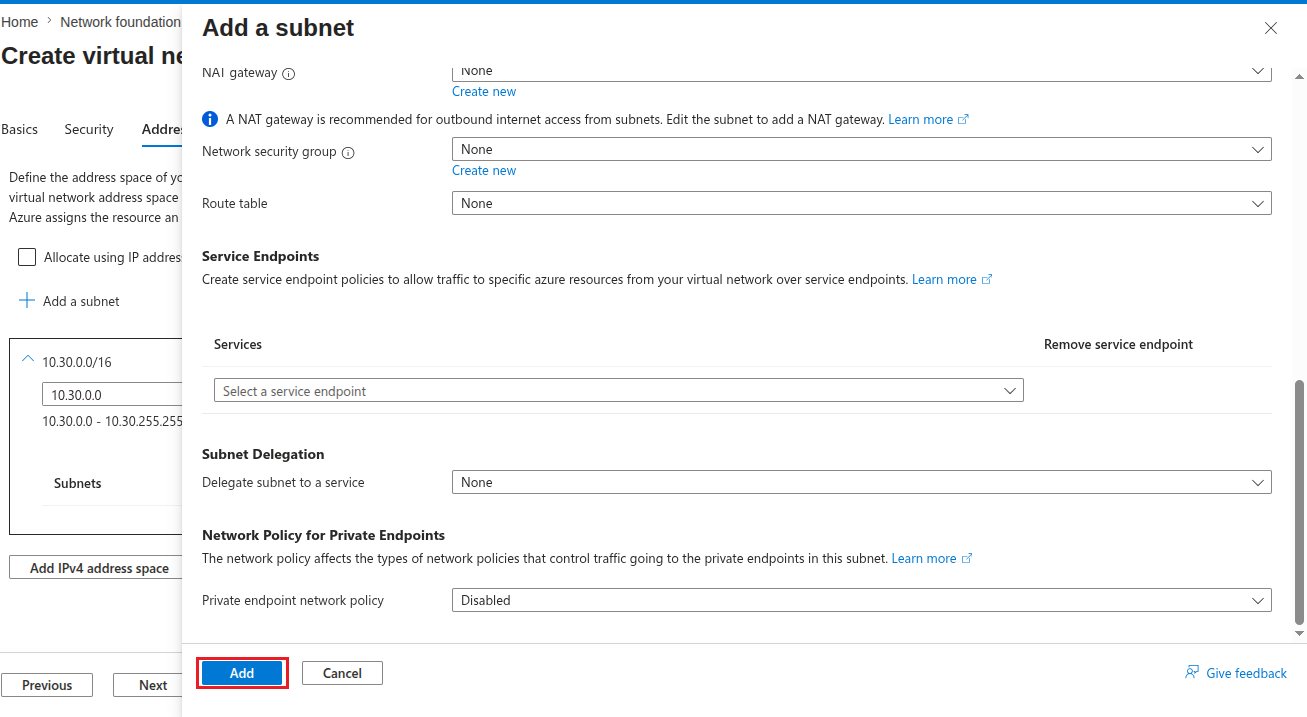
In the Address space tab, add the address space as 10.30.0.0 and in the next field add /16. Also click on Add a subnet.
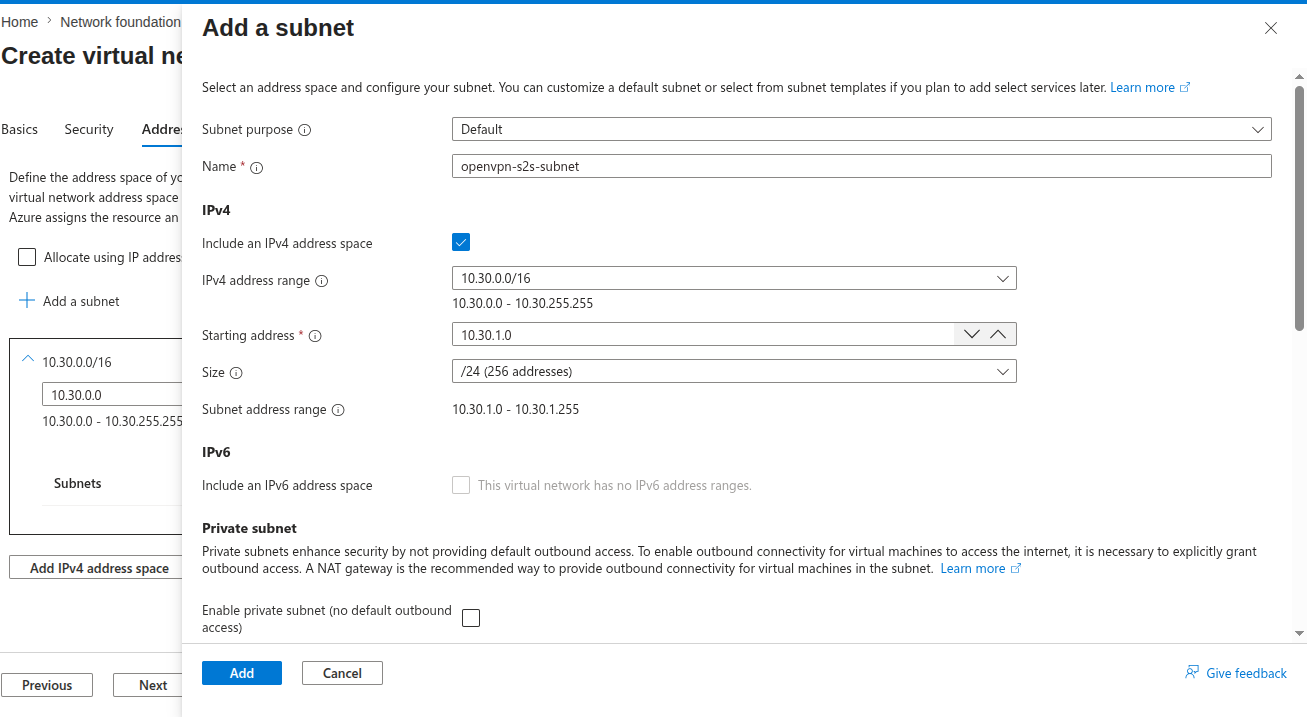
In here, you can fill in the details as follows:
| Field | Value |
|---|---|
| Subnet purpose | Default |
| Name | openvpn-s2s-subnet |
| Include an IPv4 address space | Checked |
| IPv4 address range | 10.30.0.0/16 |
| Starting address | 10.30.1.0 |
| Size | /24 |
| IPv6 | Unchecked |
| Enable private subnet (no default outbound access) | Unchecked |
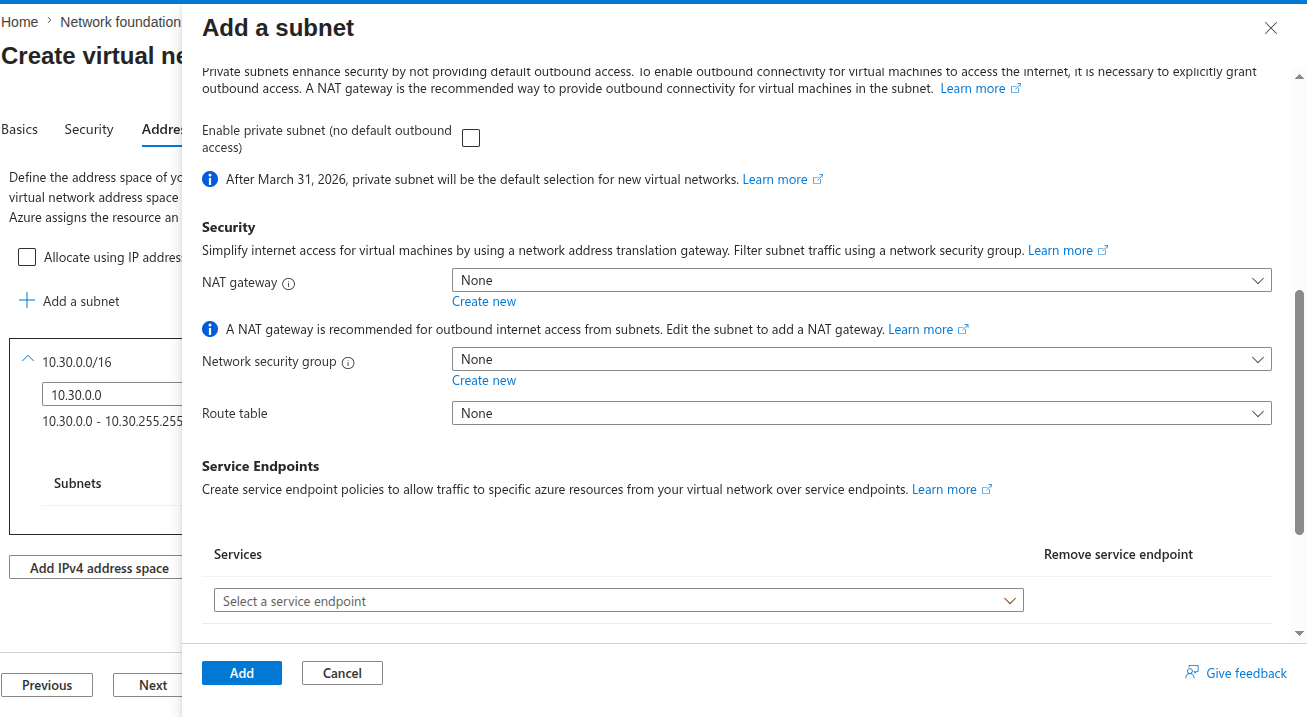
| NAT gateway | None |
| Network security group | None |
| Route table | None |
| Service Endpoints | None |
| Subnet Delegation | None |
| Private endpoint network policy | Disabled |
Finally click on Add.
Subnet was added successfully and now it can be seen on the dashboard.
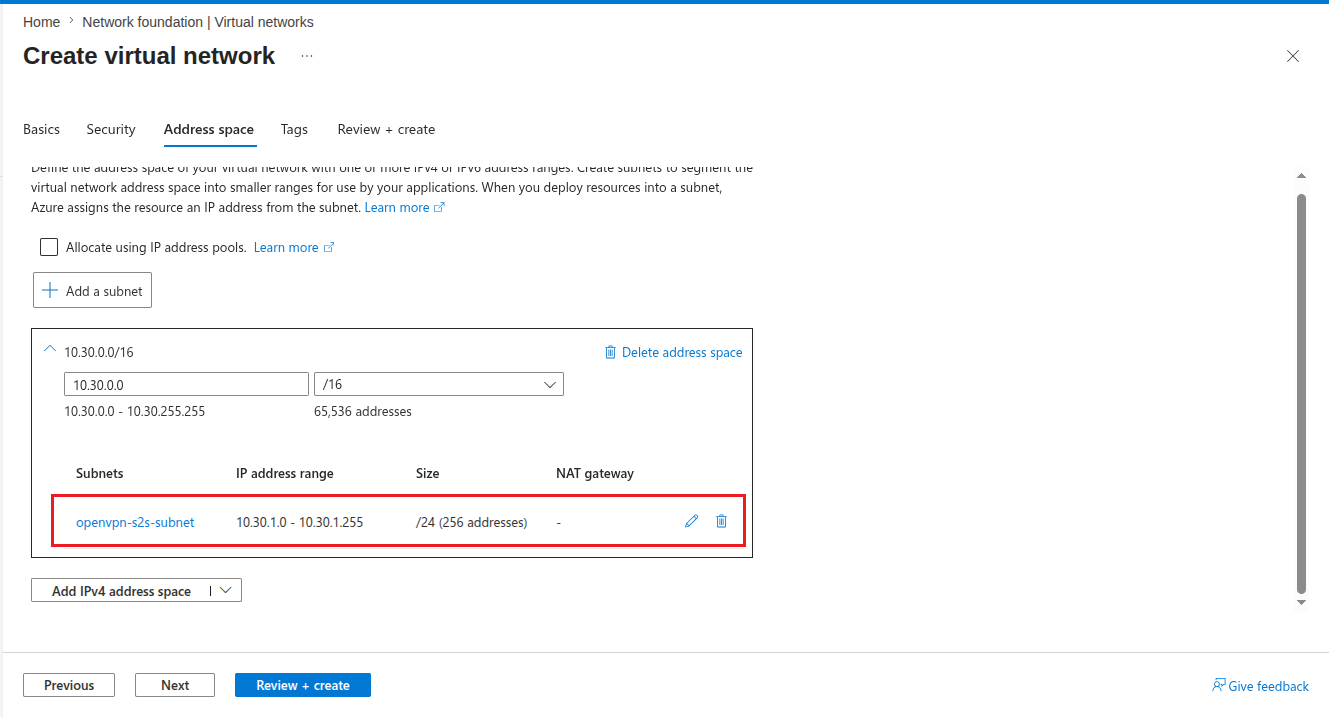
Now go to the Review + create tab and here after reviewing all the details click on Create.
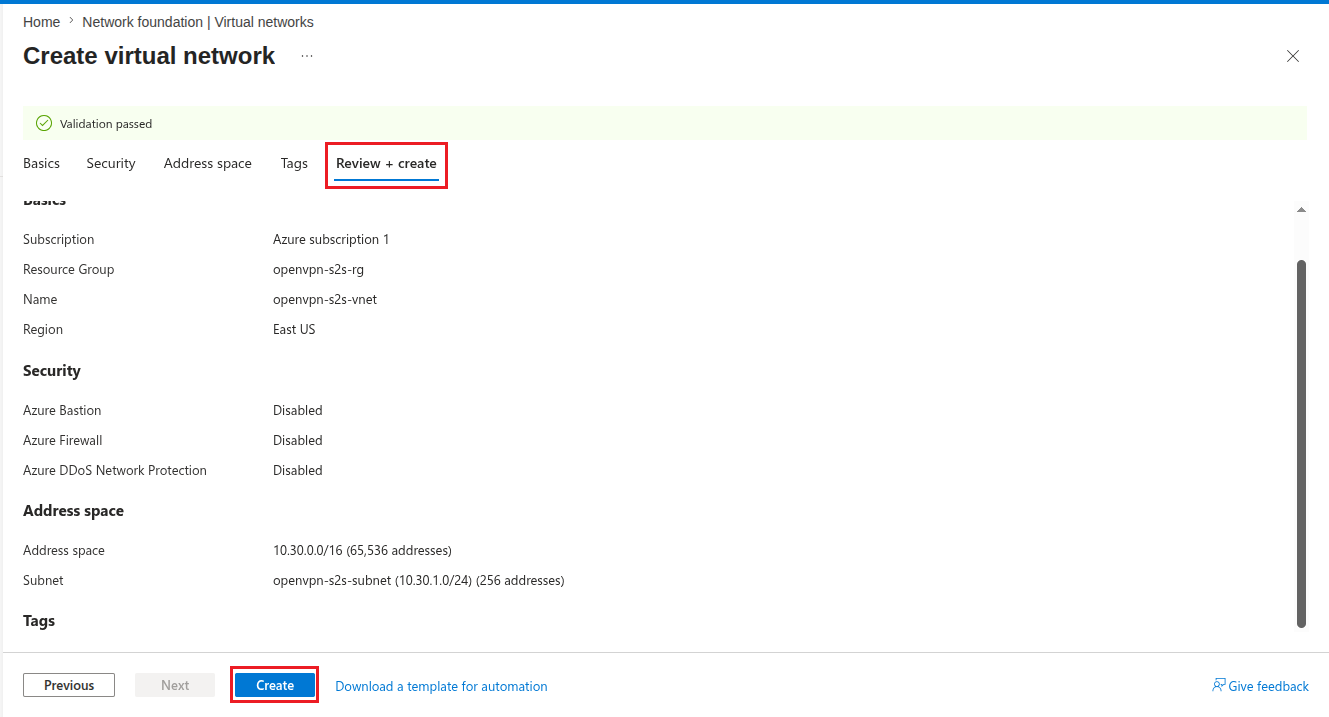
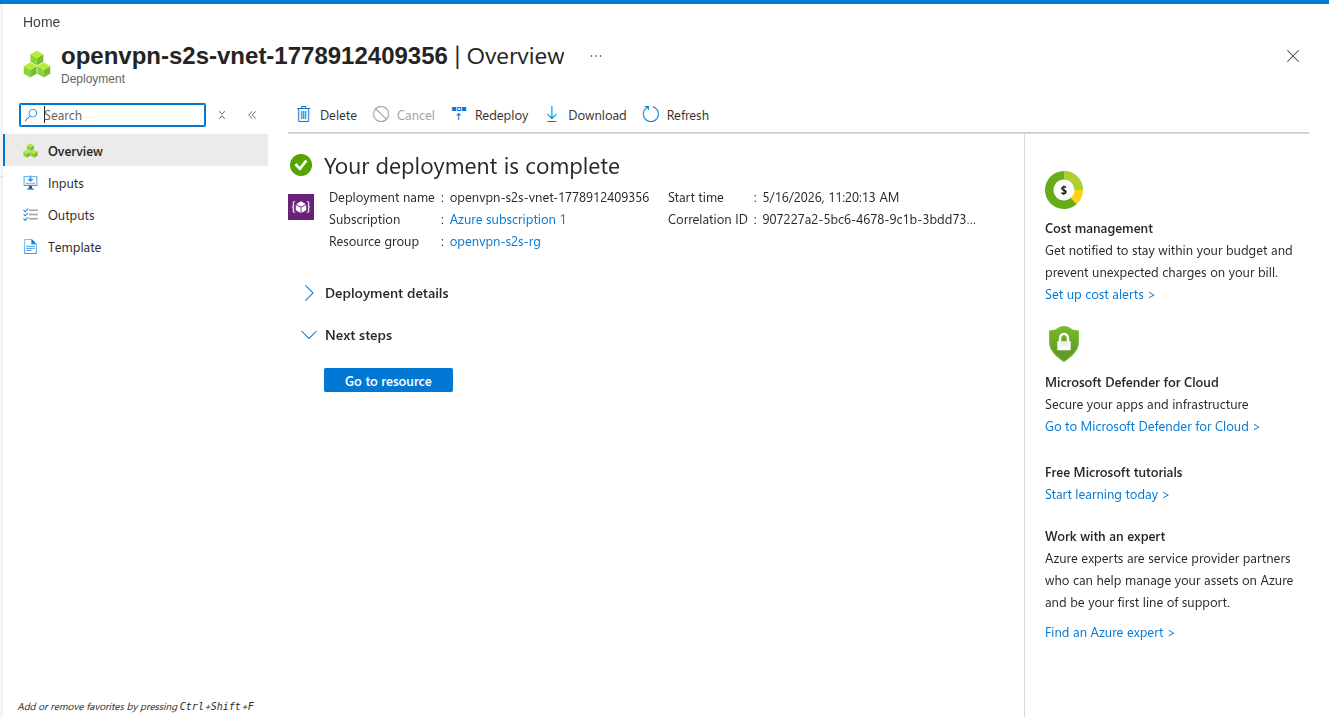
Now it will initialize the deployment and take a few moments, then the deployment will be completed and hence your virtual network has been created.
Step 3: Deploy OpenVPN Access Server from Azure Marketplace
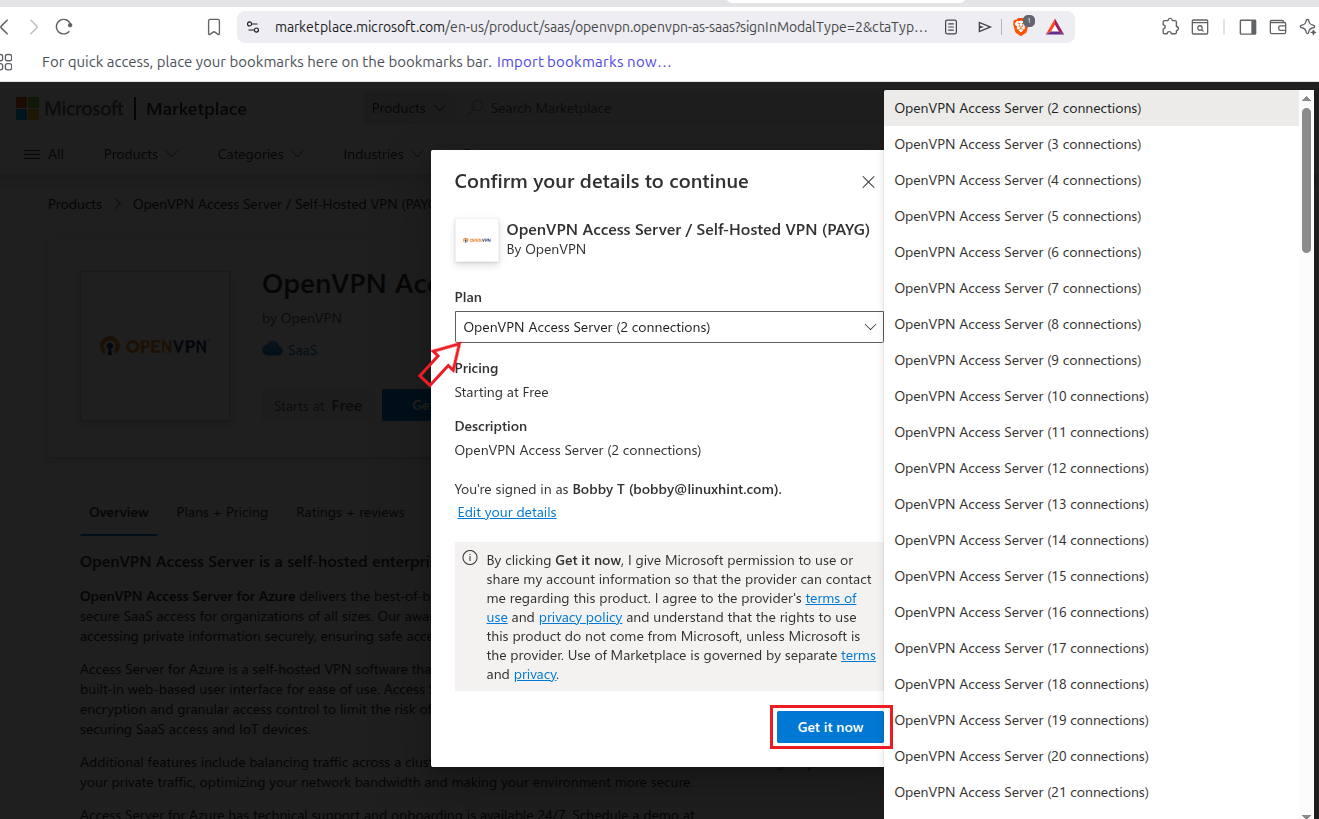
Go to OpenVPN access server listing in Microsoft Azure marketplace, select the no. of connections you want and then click on Get it now.
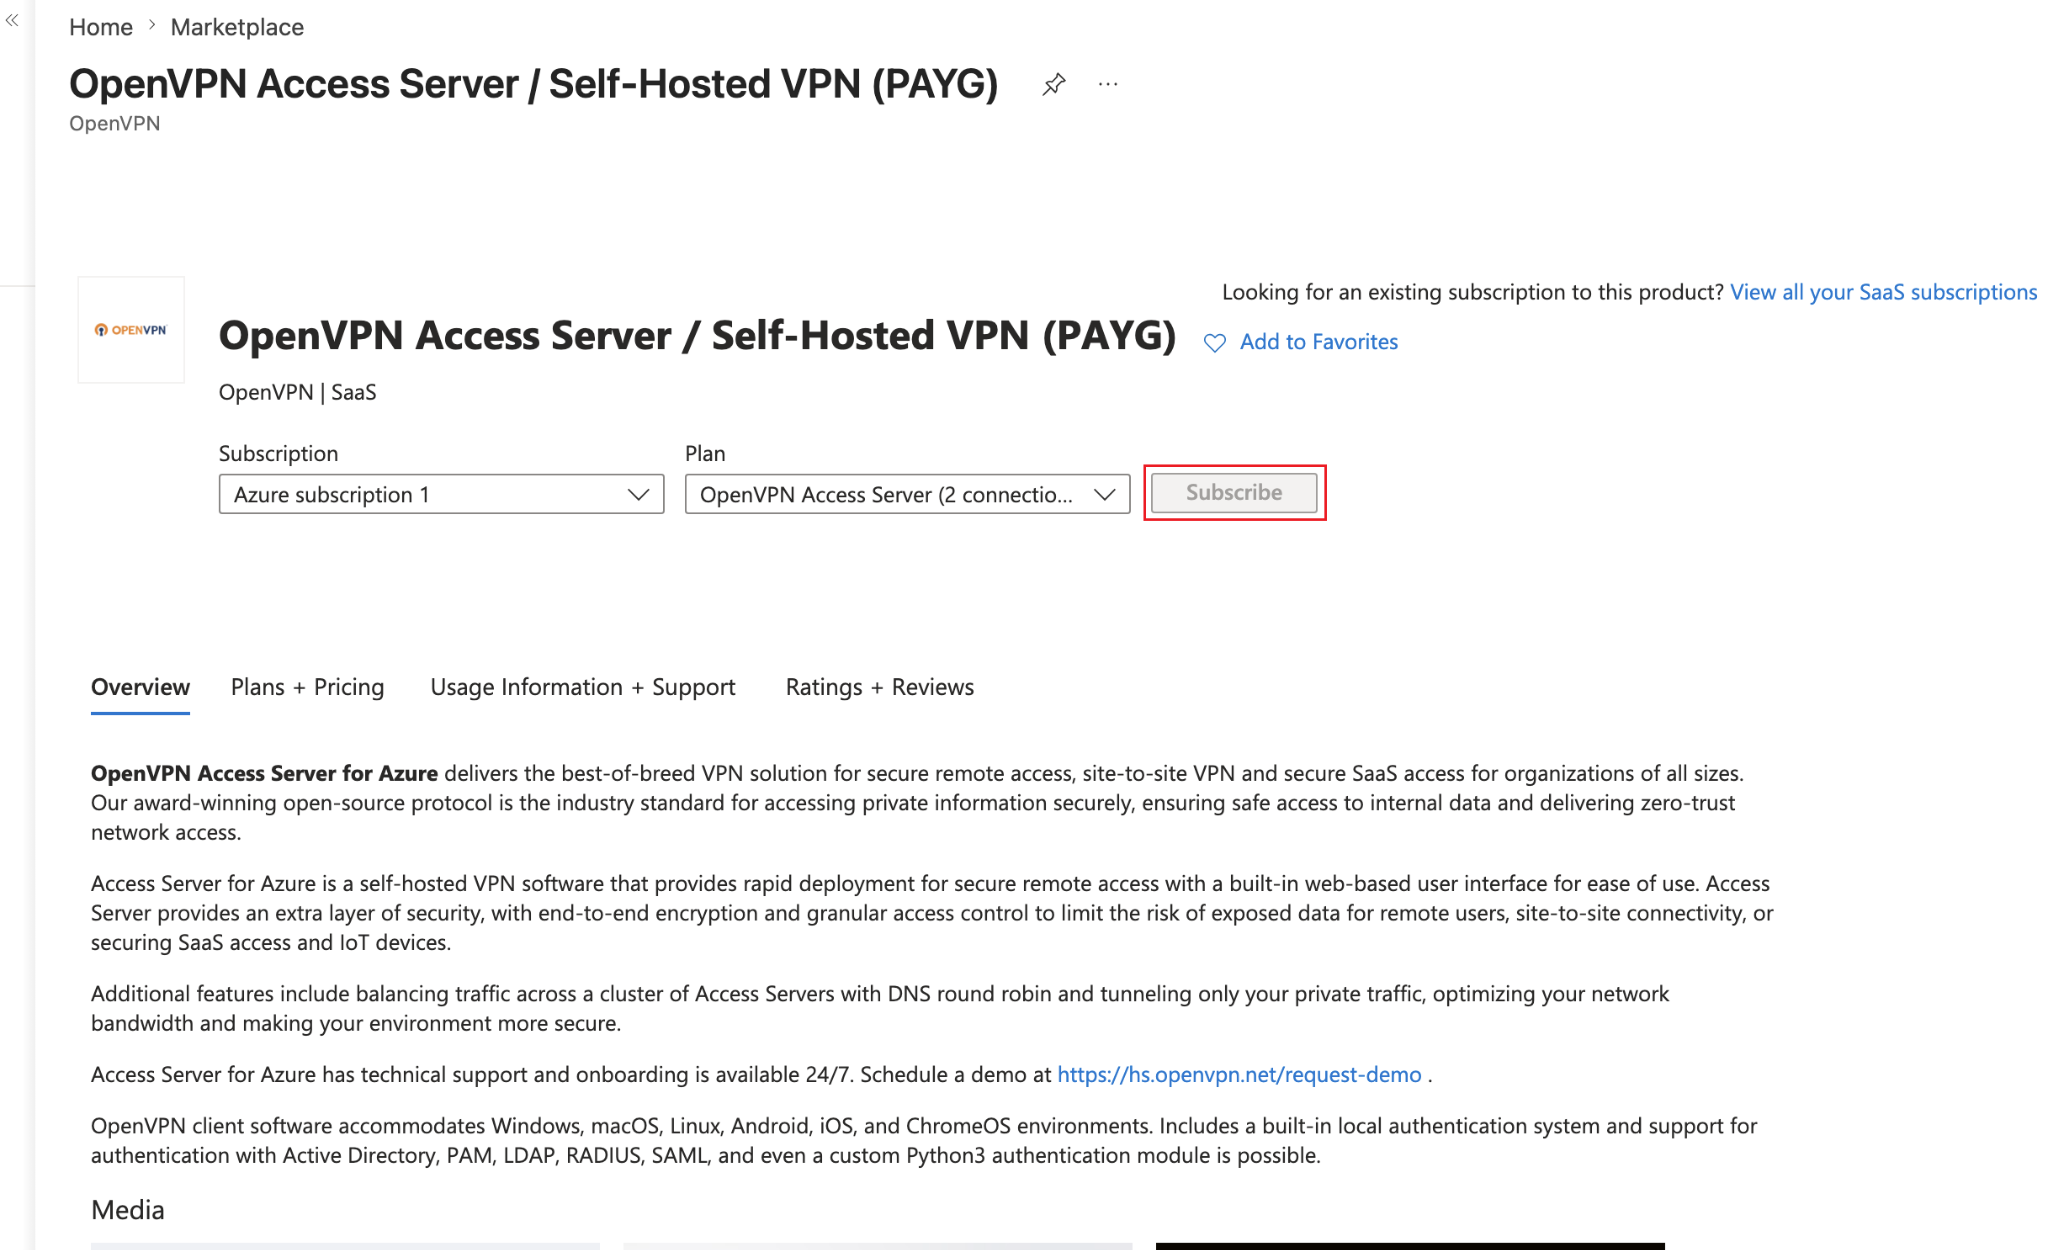
Finally click on subscribe:
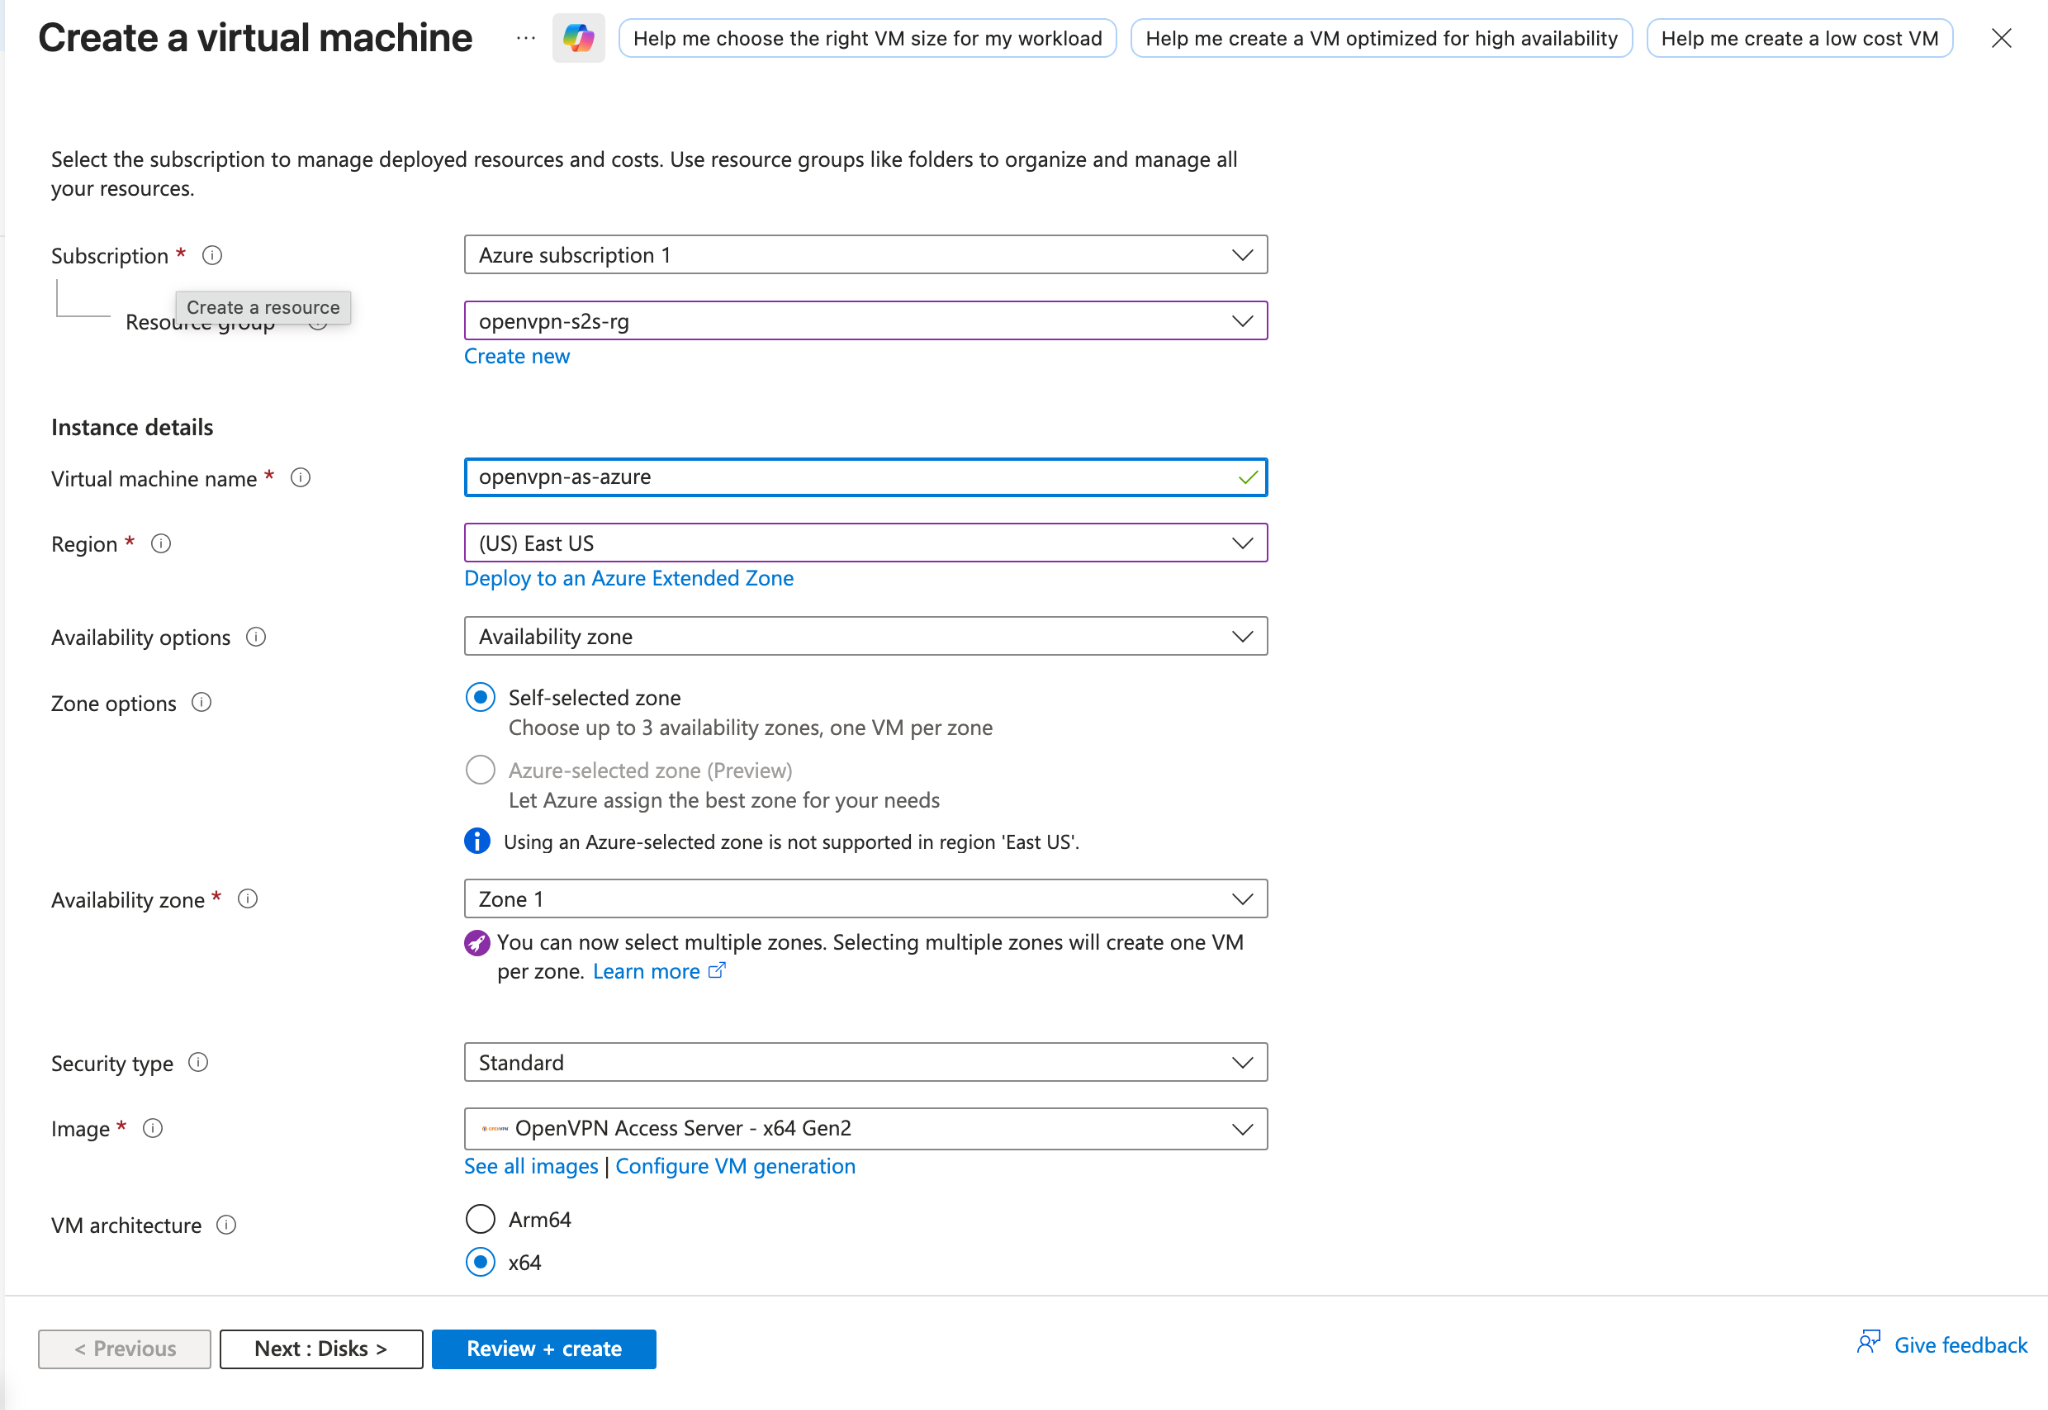
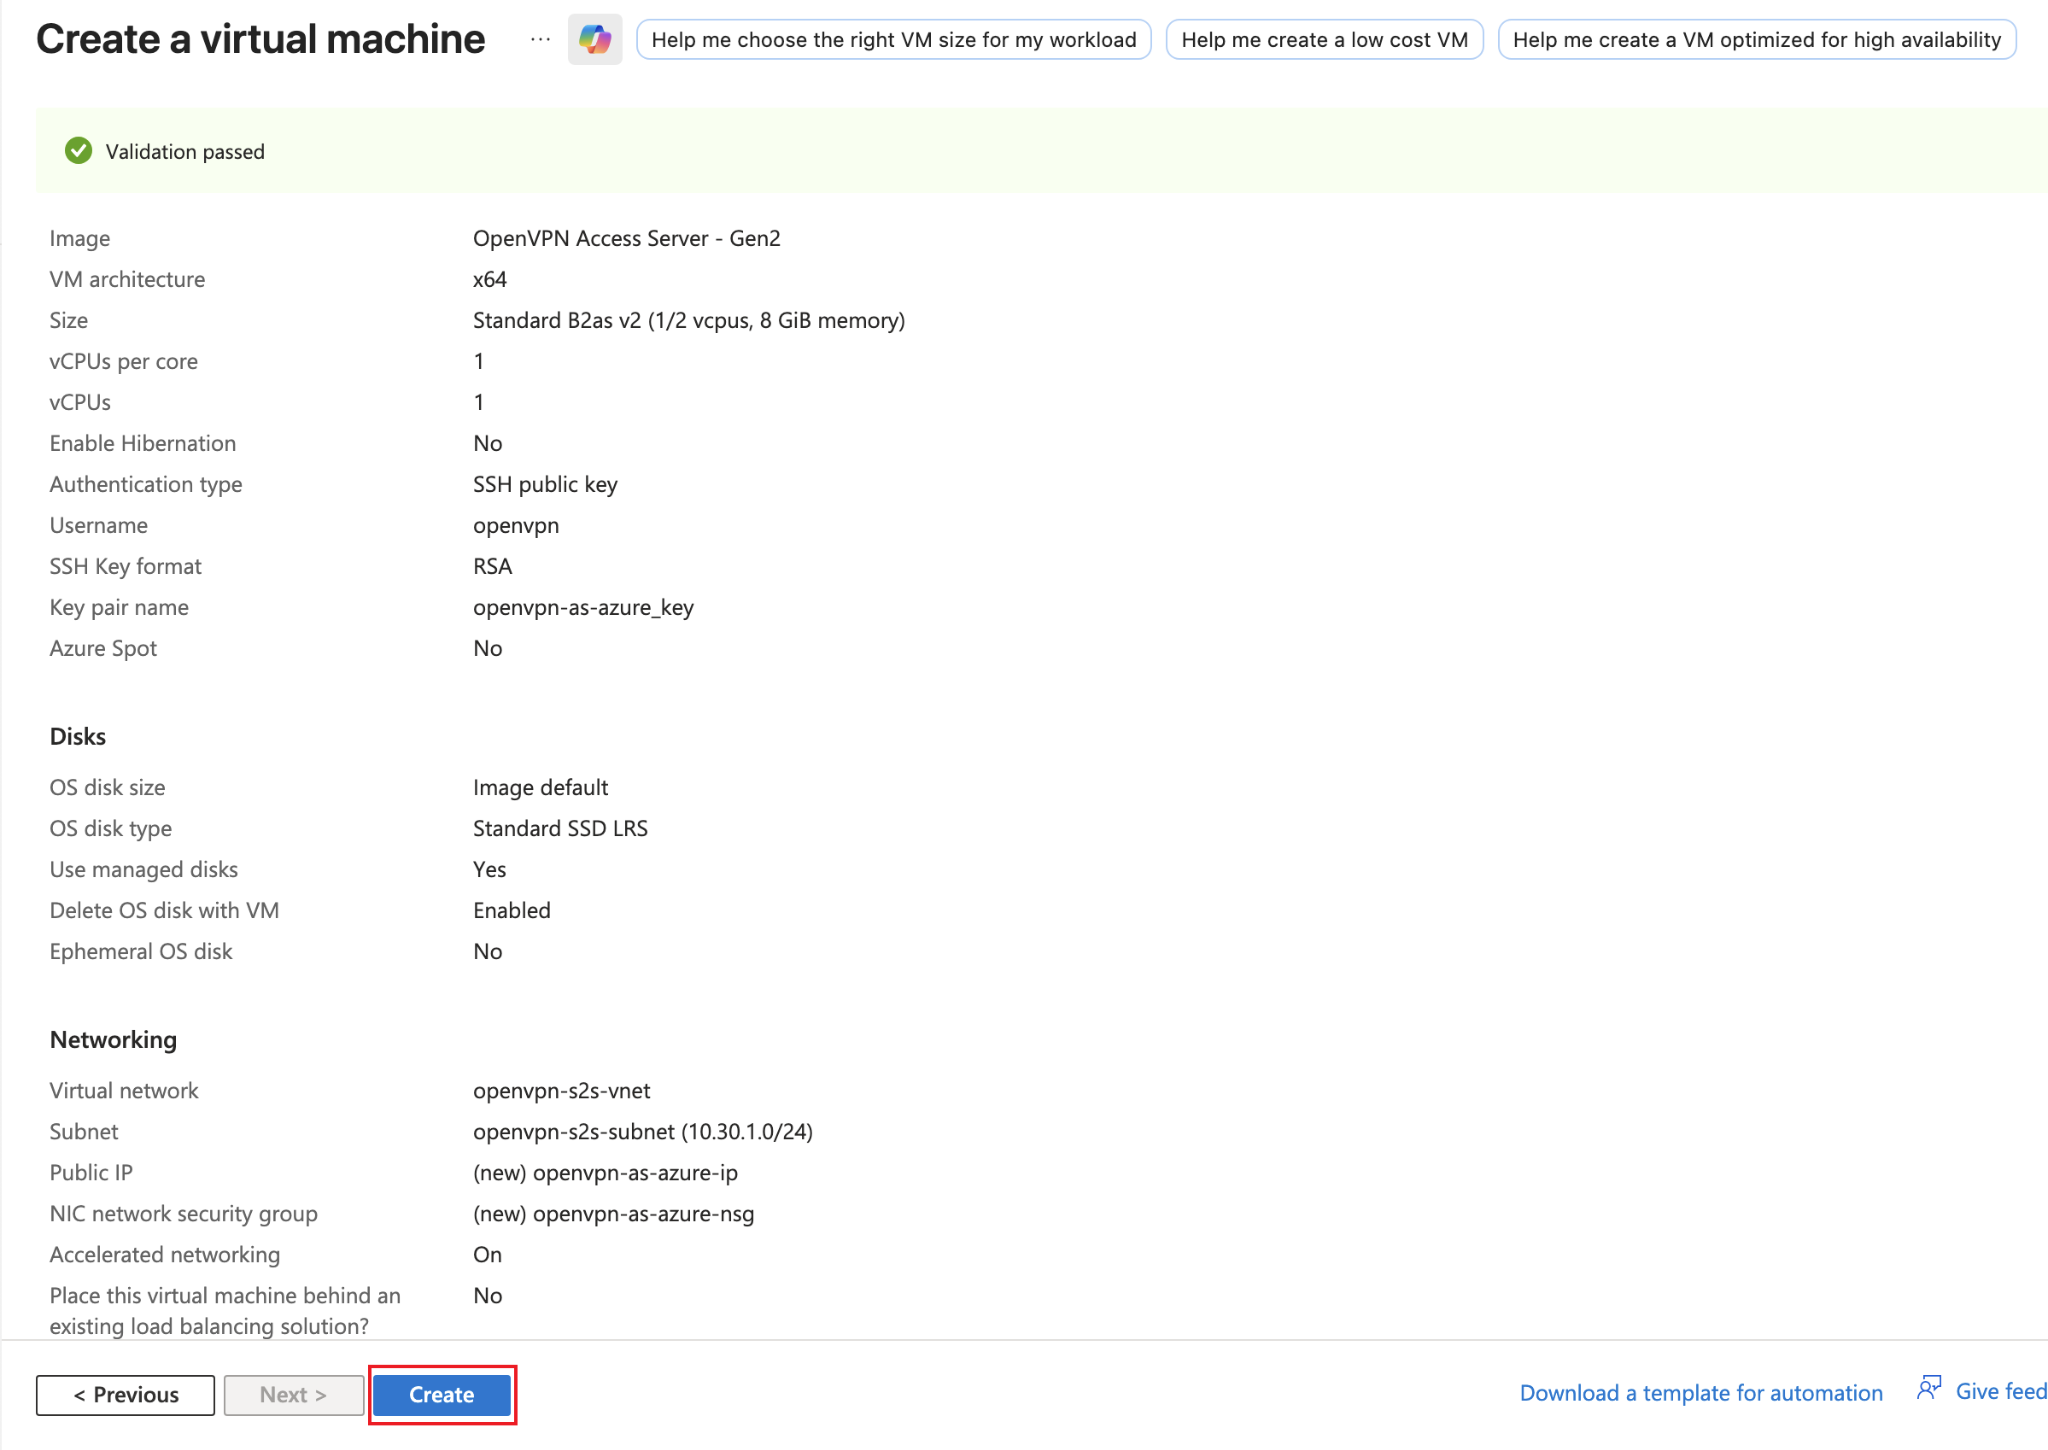
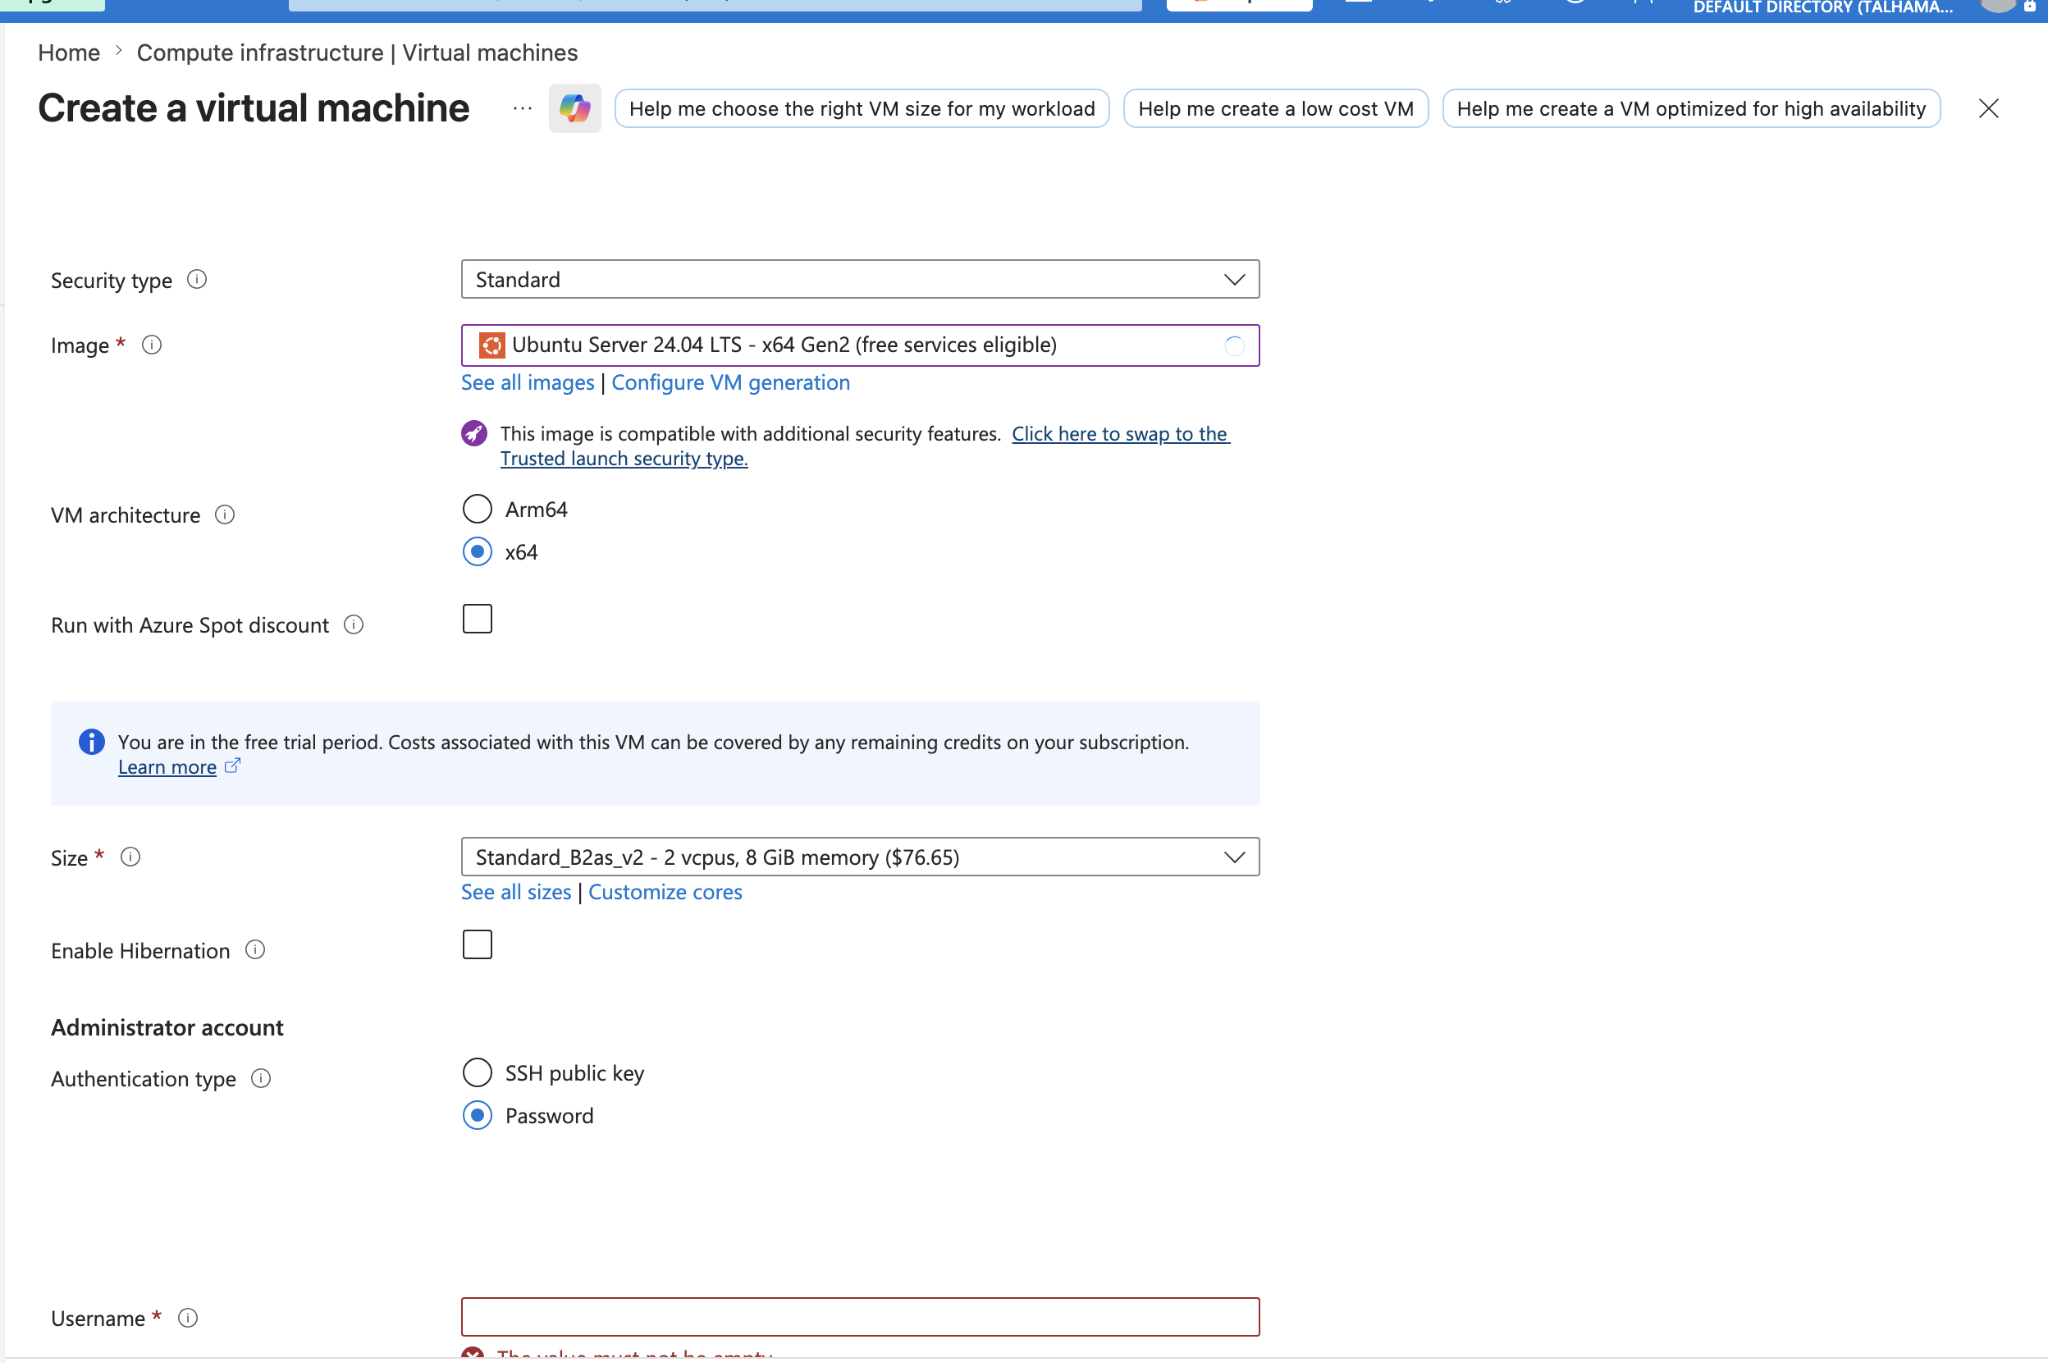
It will open up this form where you will create a virtual machine and deploy OpenVPN Access Server on it. Fill in the details in the Basic tab.
| Field | Value |
|---|---|
| Subscription | Azure Subscription 1 |
| Resource group | openvpn-s2s-rg |
| Virtual machine name | openvpn-as-azure |
| Region | (US) East US |
| Availability options | Availability zone |
| Zone options | Self-selected zone |
| Availability zone | Zone 1 |
| Security type | Standard |
| Image | OpenVPN Access Server |
| VM architecture | x64 |
| Run with Azure Spot discount | Unchecked |
| Size | Any B2 or lower spec available |
| Enable Hibernation | Unchecked |
| Authentication type | Password |
| Username | openvpn |
Type in your password and confirm password and then click on Next : Disks.
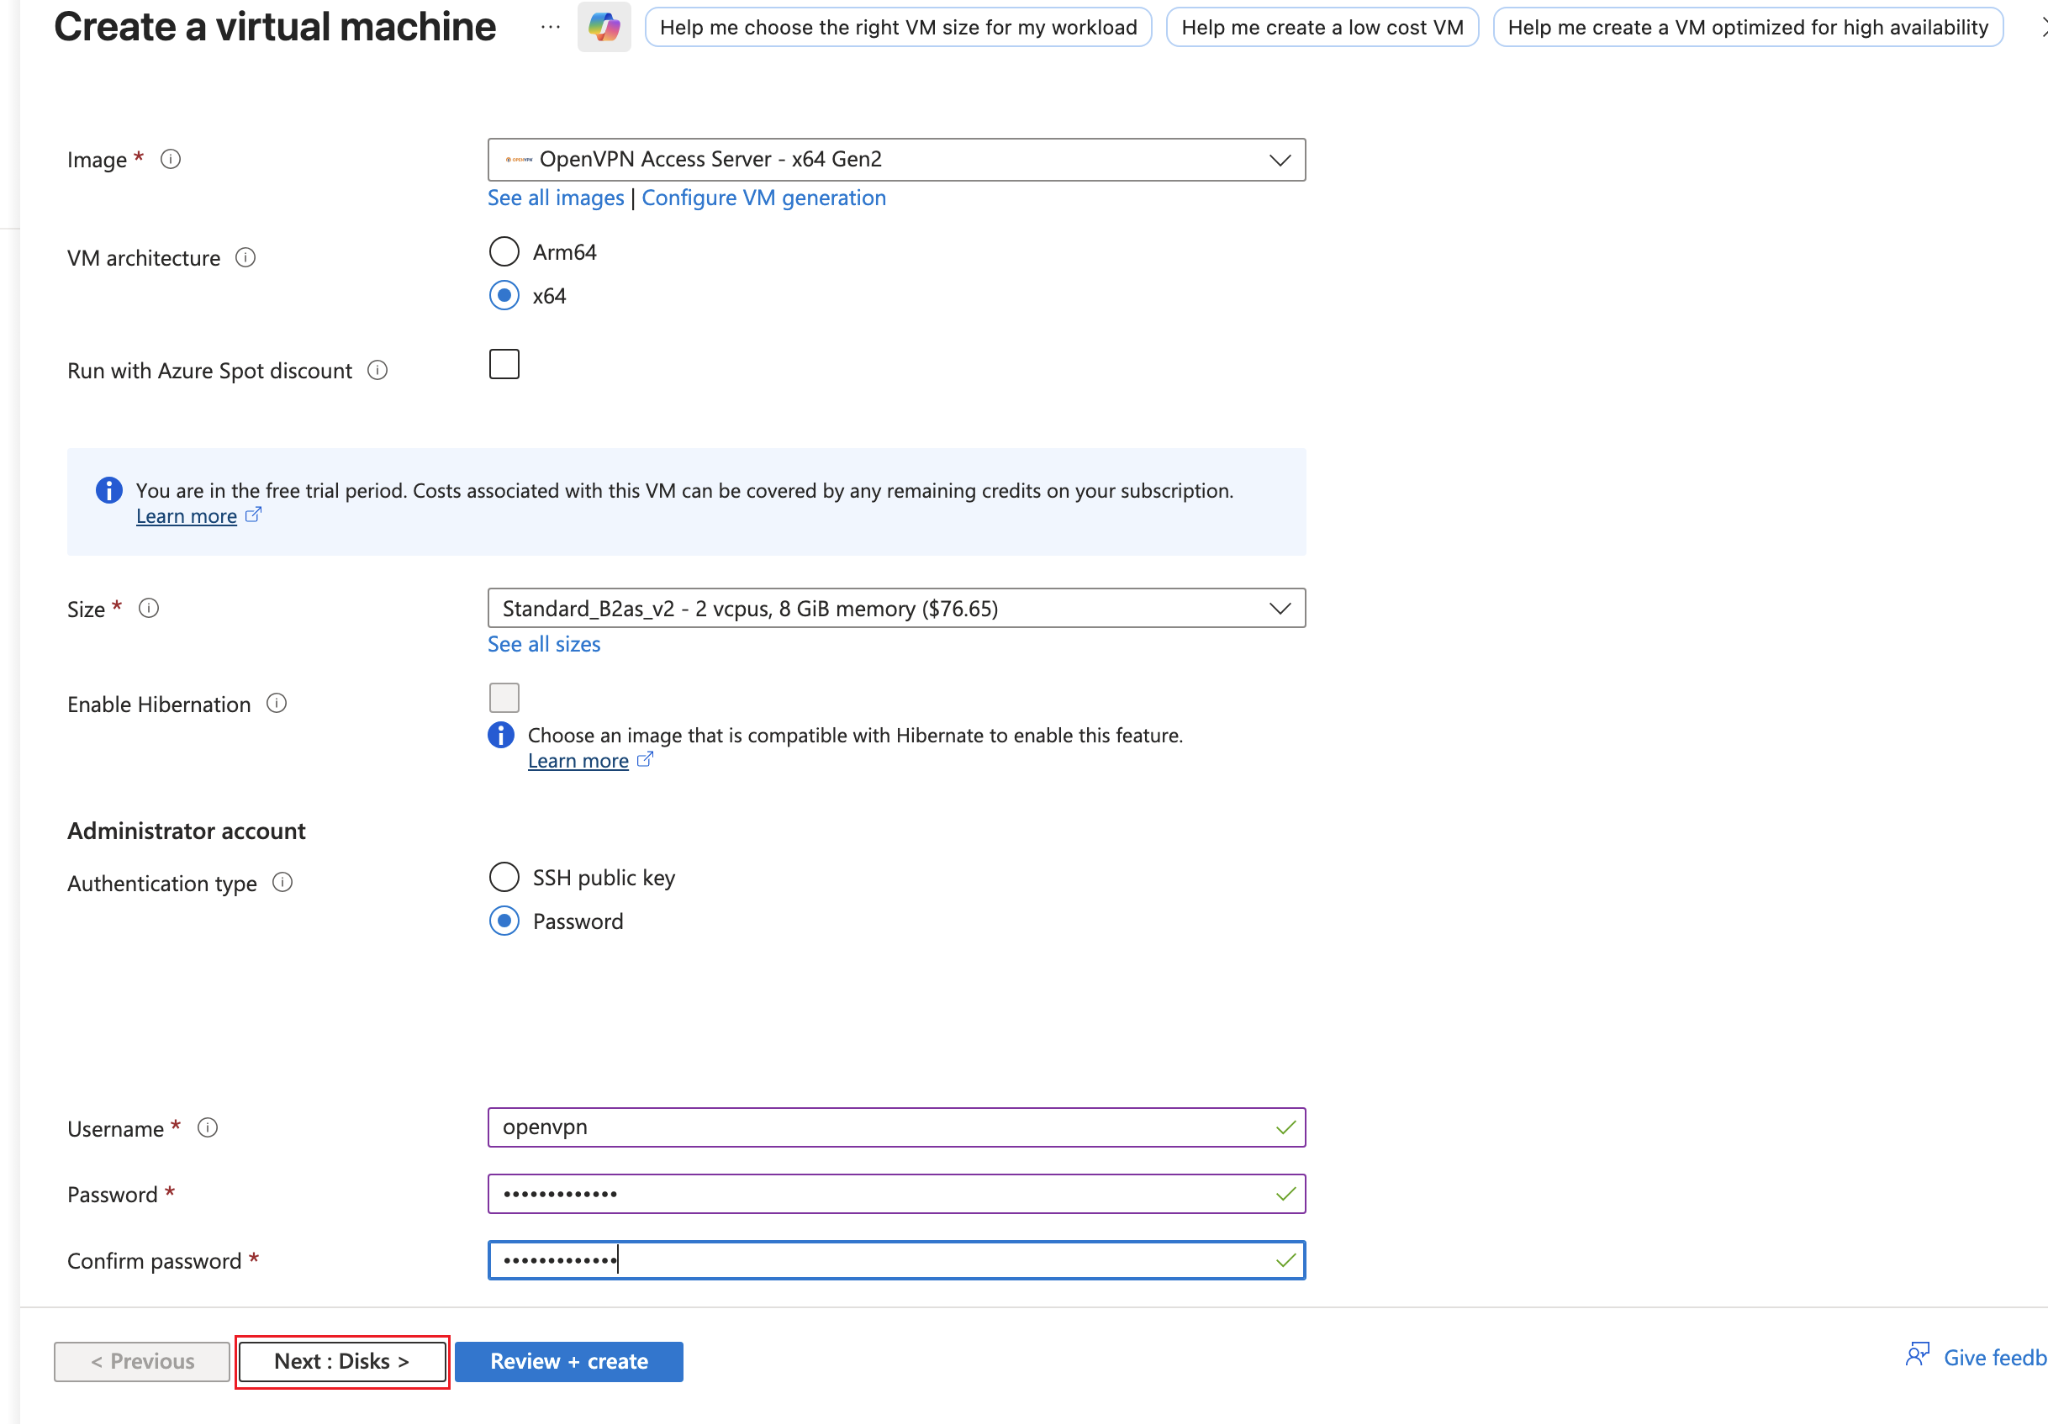
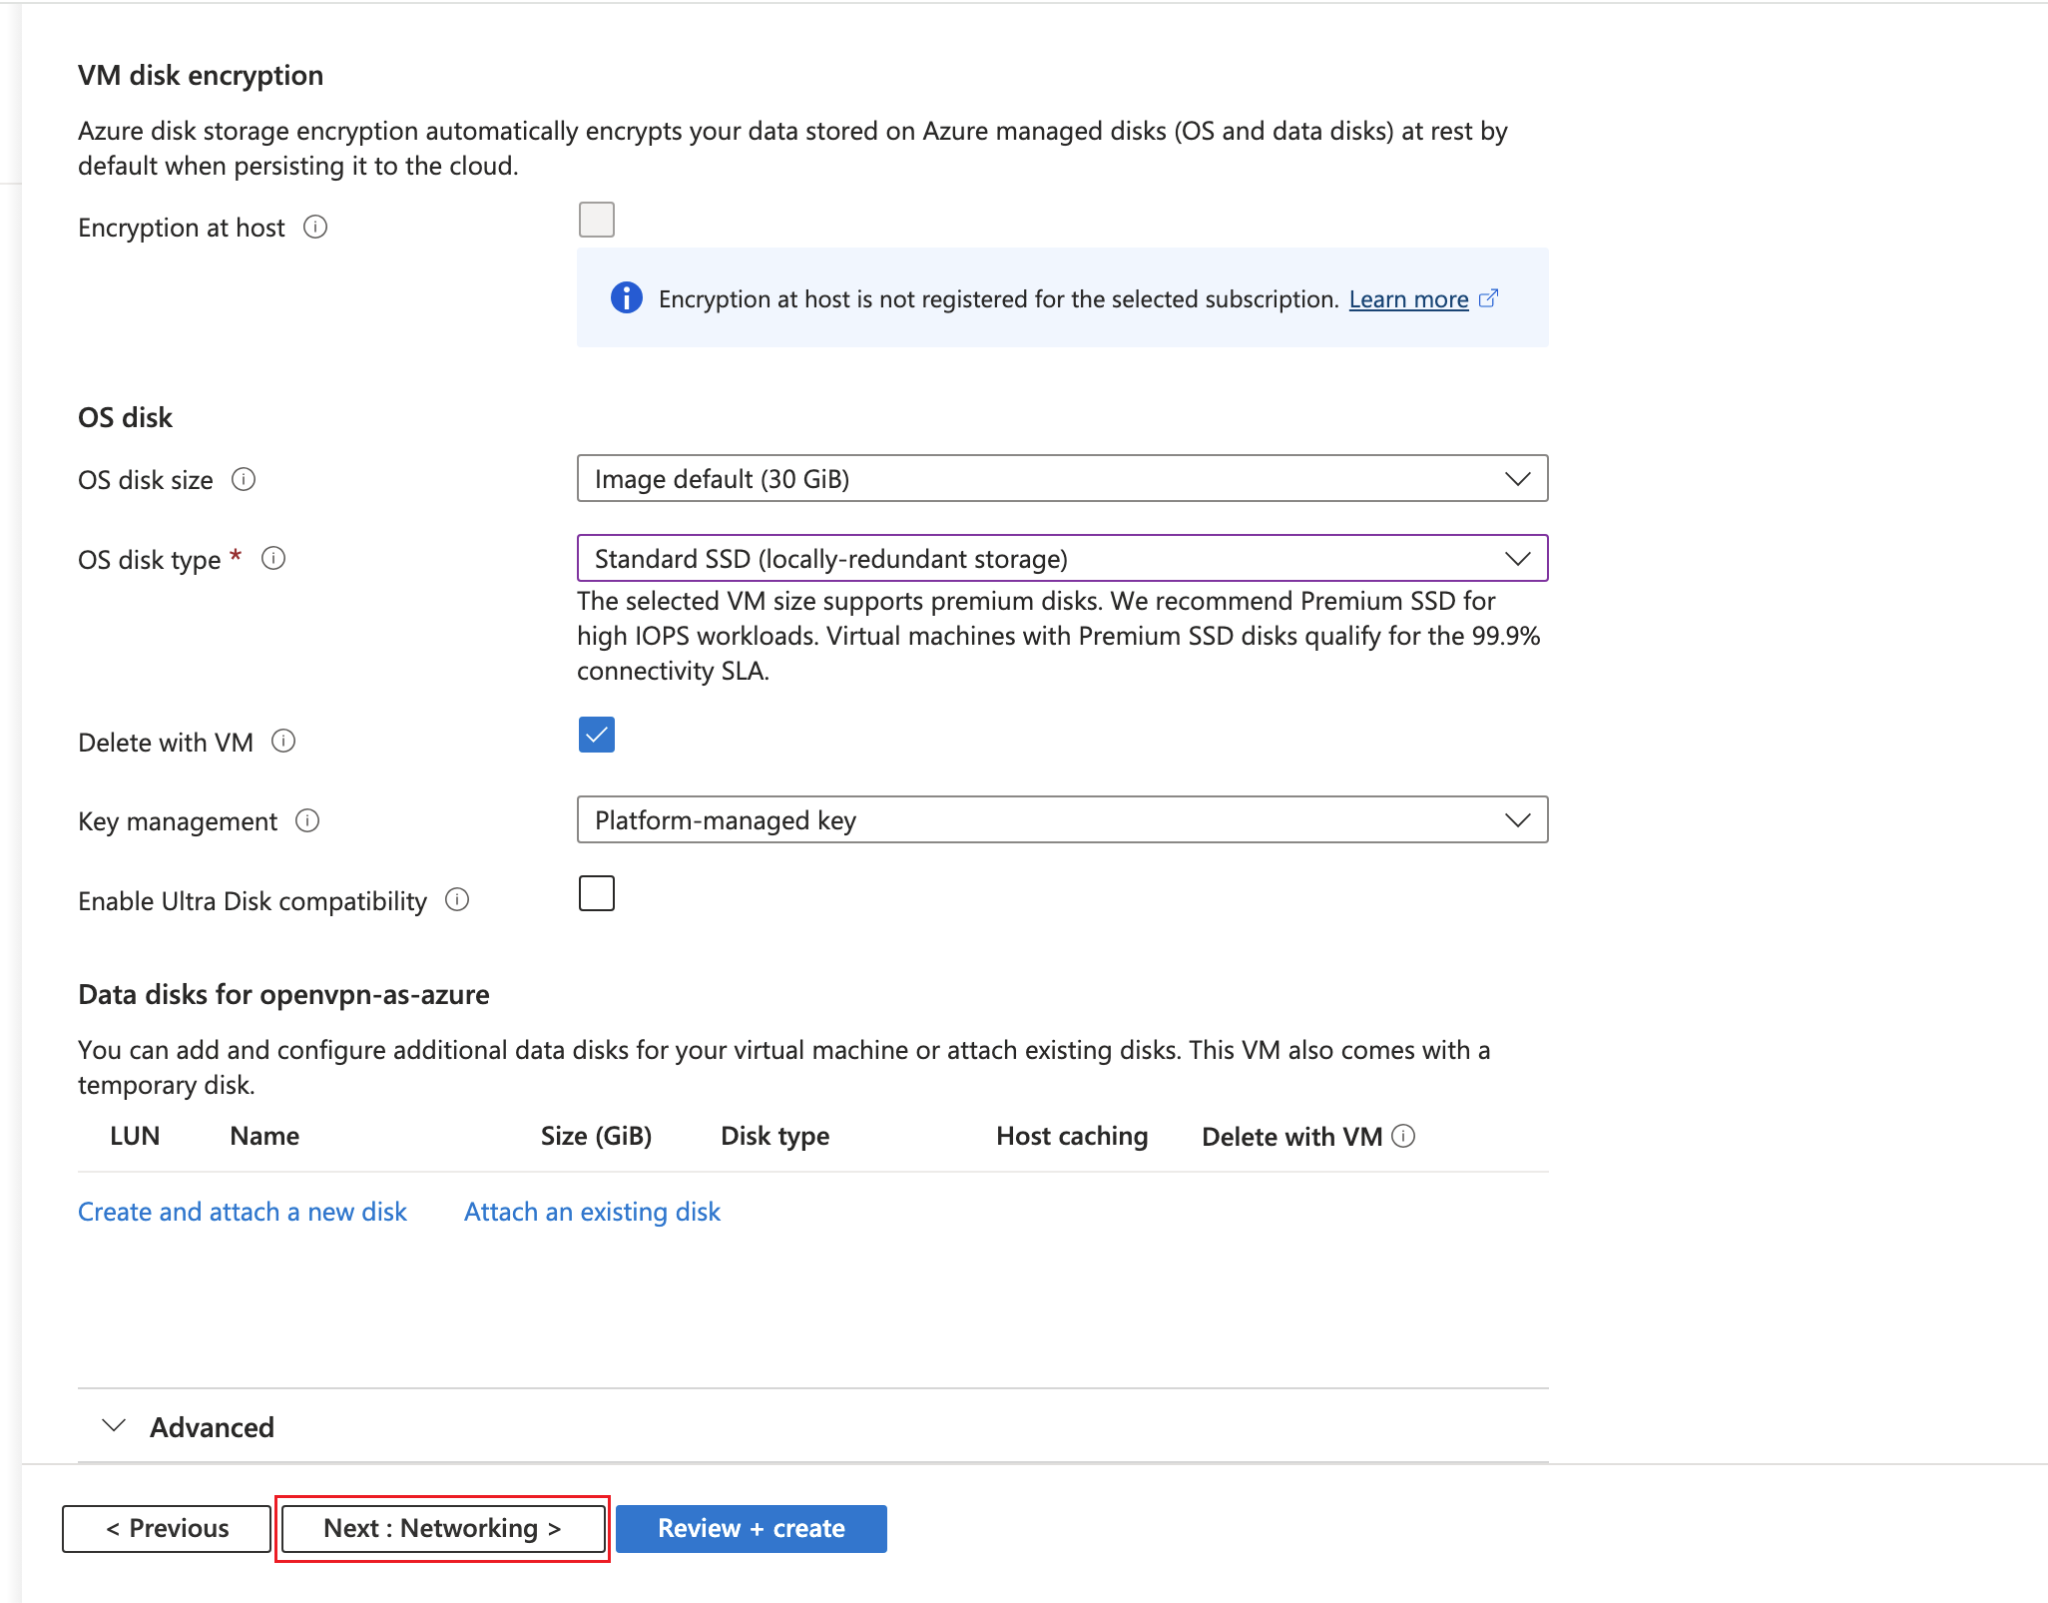
Now in the Disks tab, keep everything as it is, just switch the OS disk type to Standard SSD (locally-redundant storage). After that click on Next : Networking
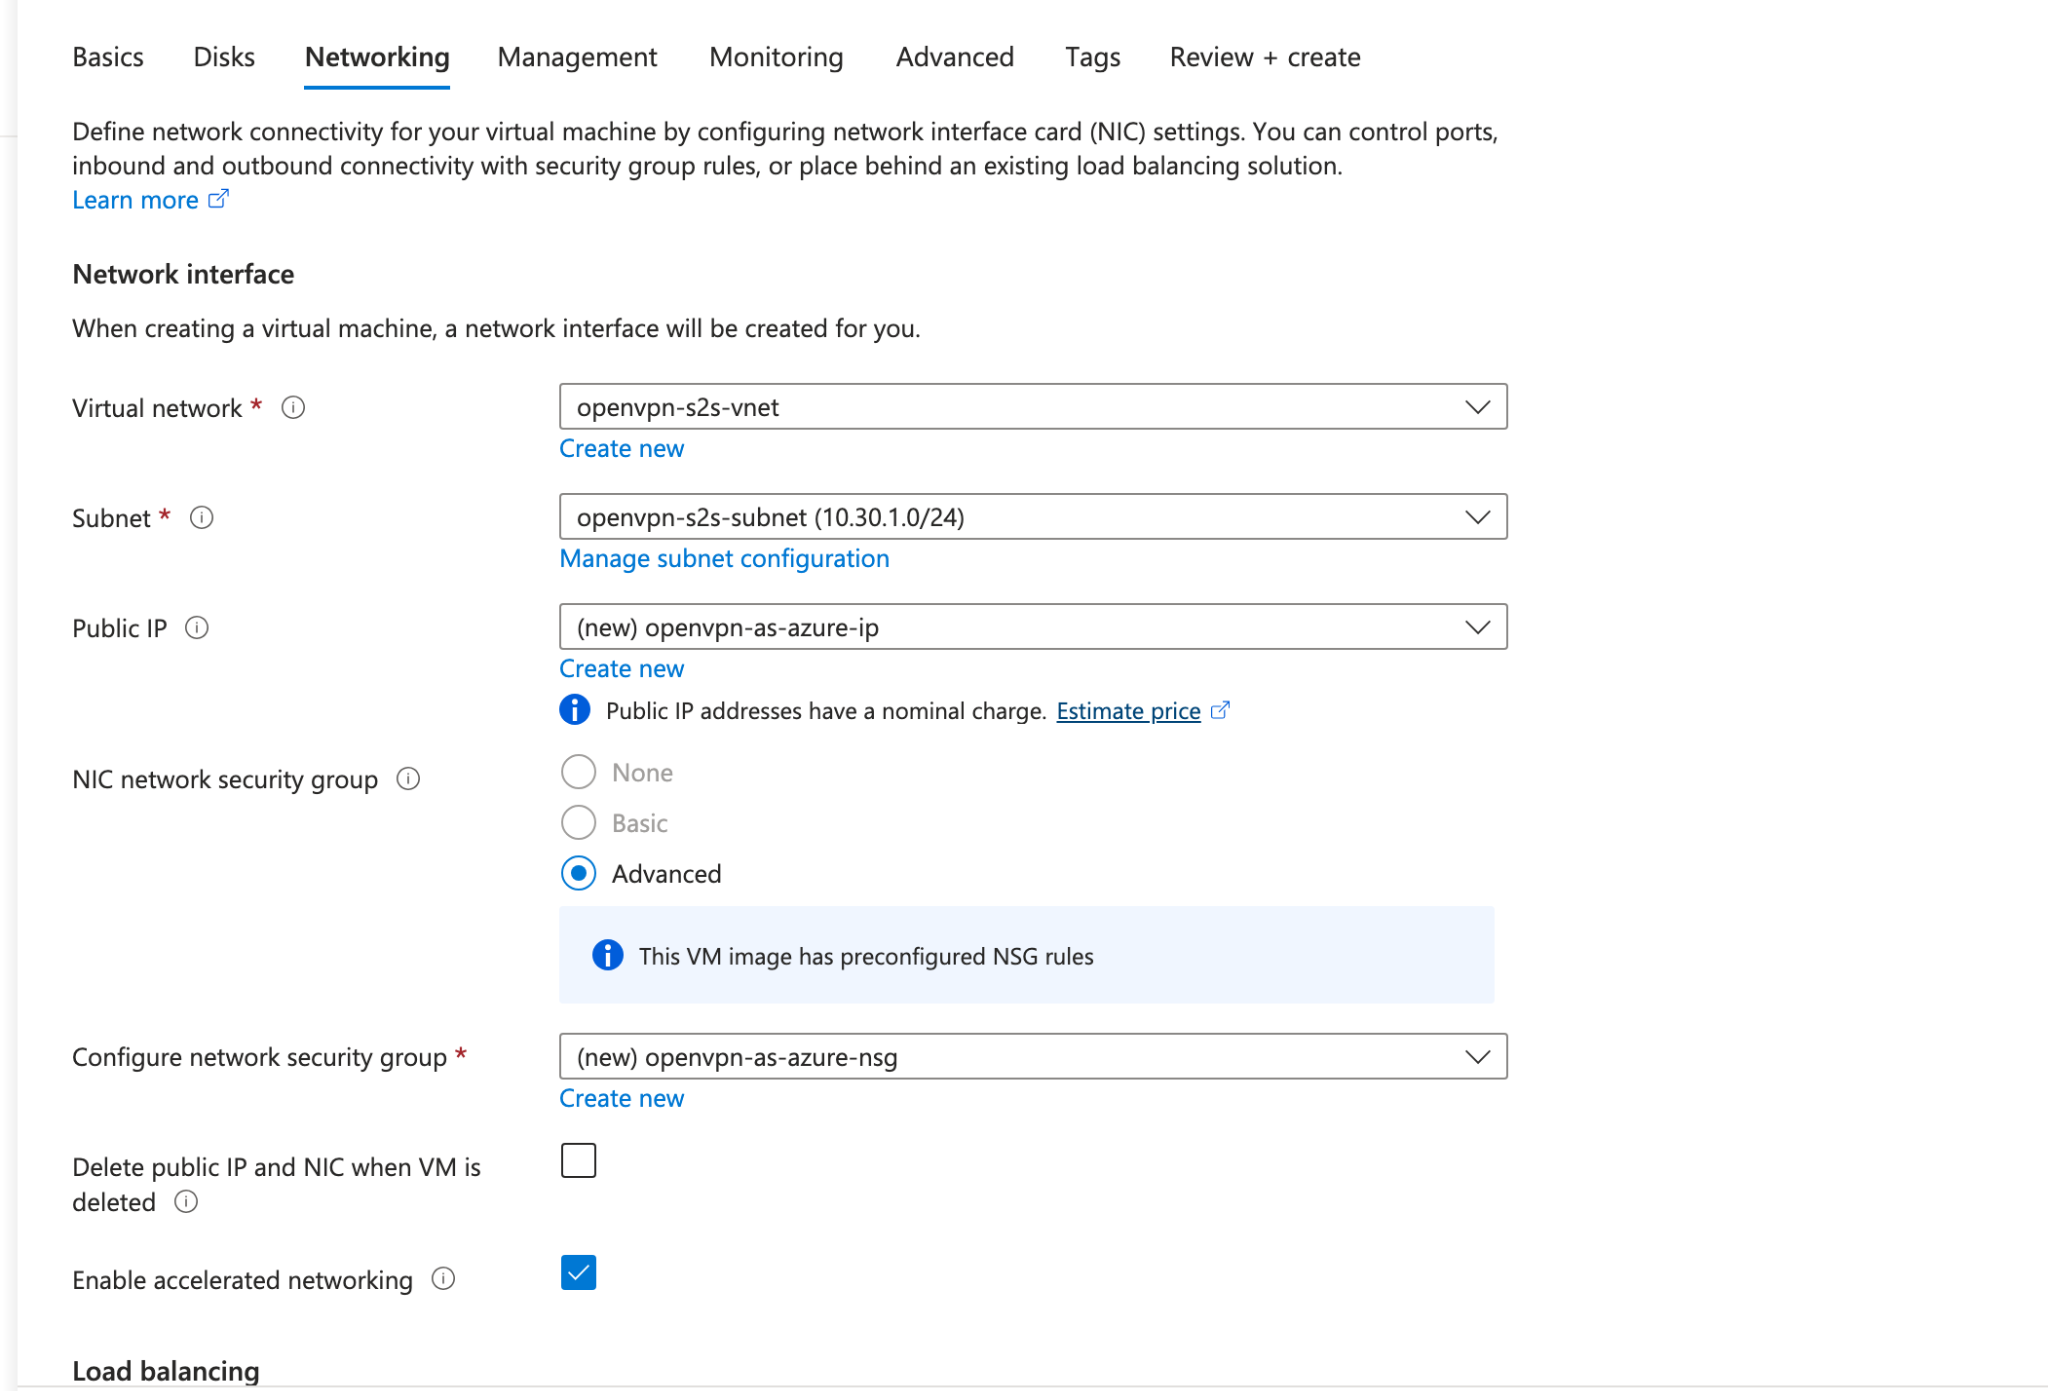
In the networking tab, fill up the details as follows:
| Field | Value |
|---|---|
| Virtual network | openvpn-s2s-vnet |
| Subnet | openvpn-s2s-subnet (10.30.1.0/24) |
| Public IP | (new) openvpn-as-azure-ip |
| NIC network security group | Advanced |
| Configure network security group | (new) openvpn-as-azure-nsg |
| Delete public IP and NIC when VM is deleted | Unchecked |
| Enable accelerated networking | Checked |
| Load balancing options | None |
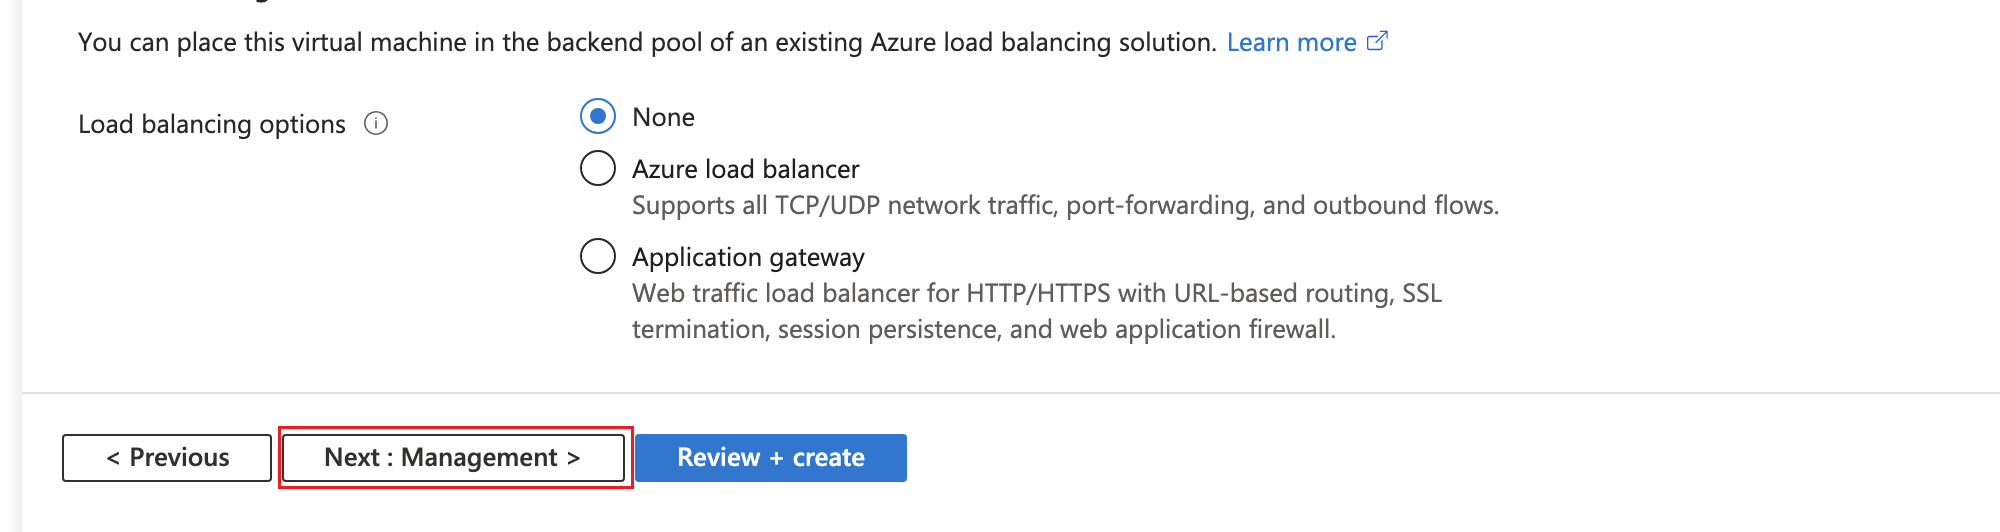
Now click on Next : Management.
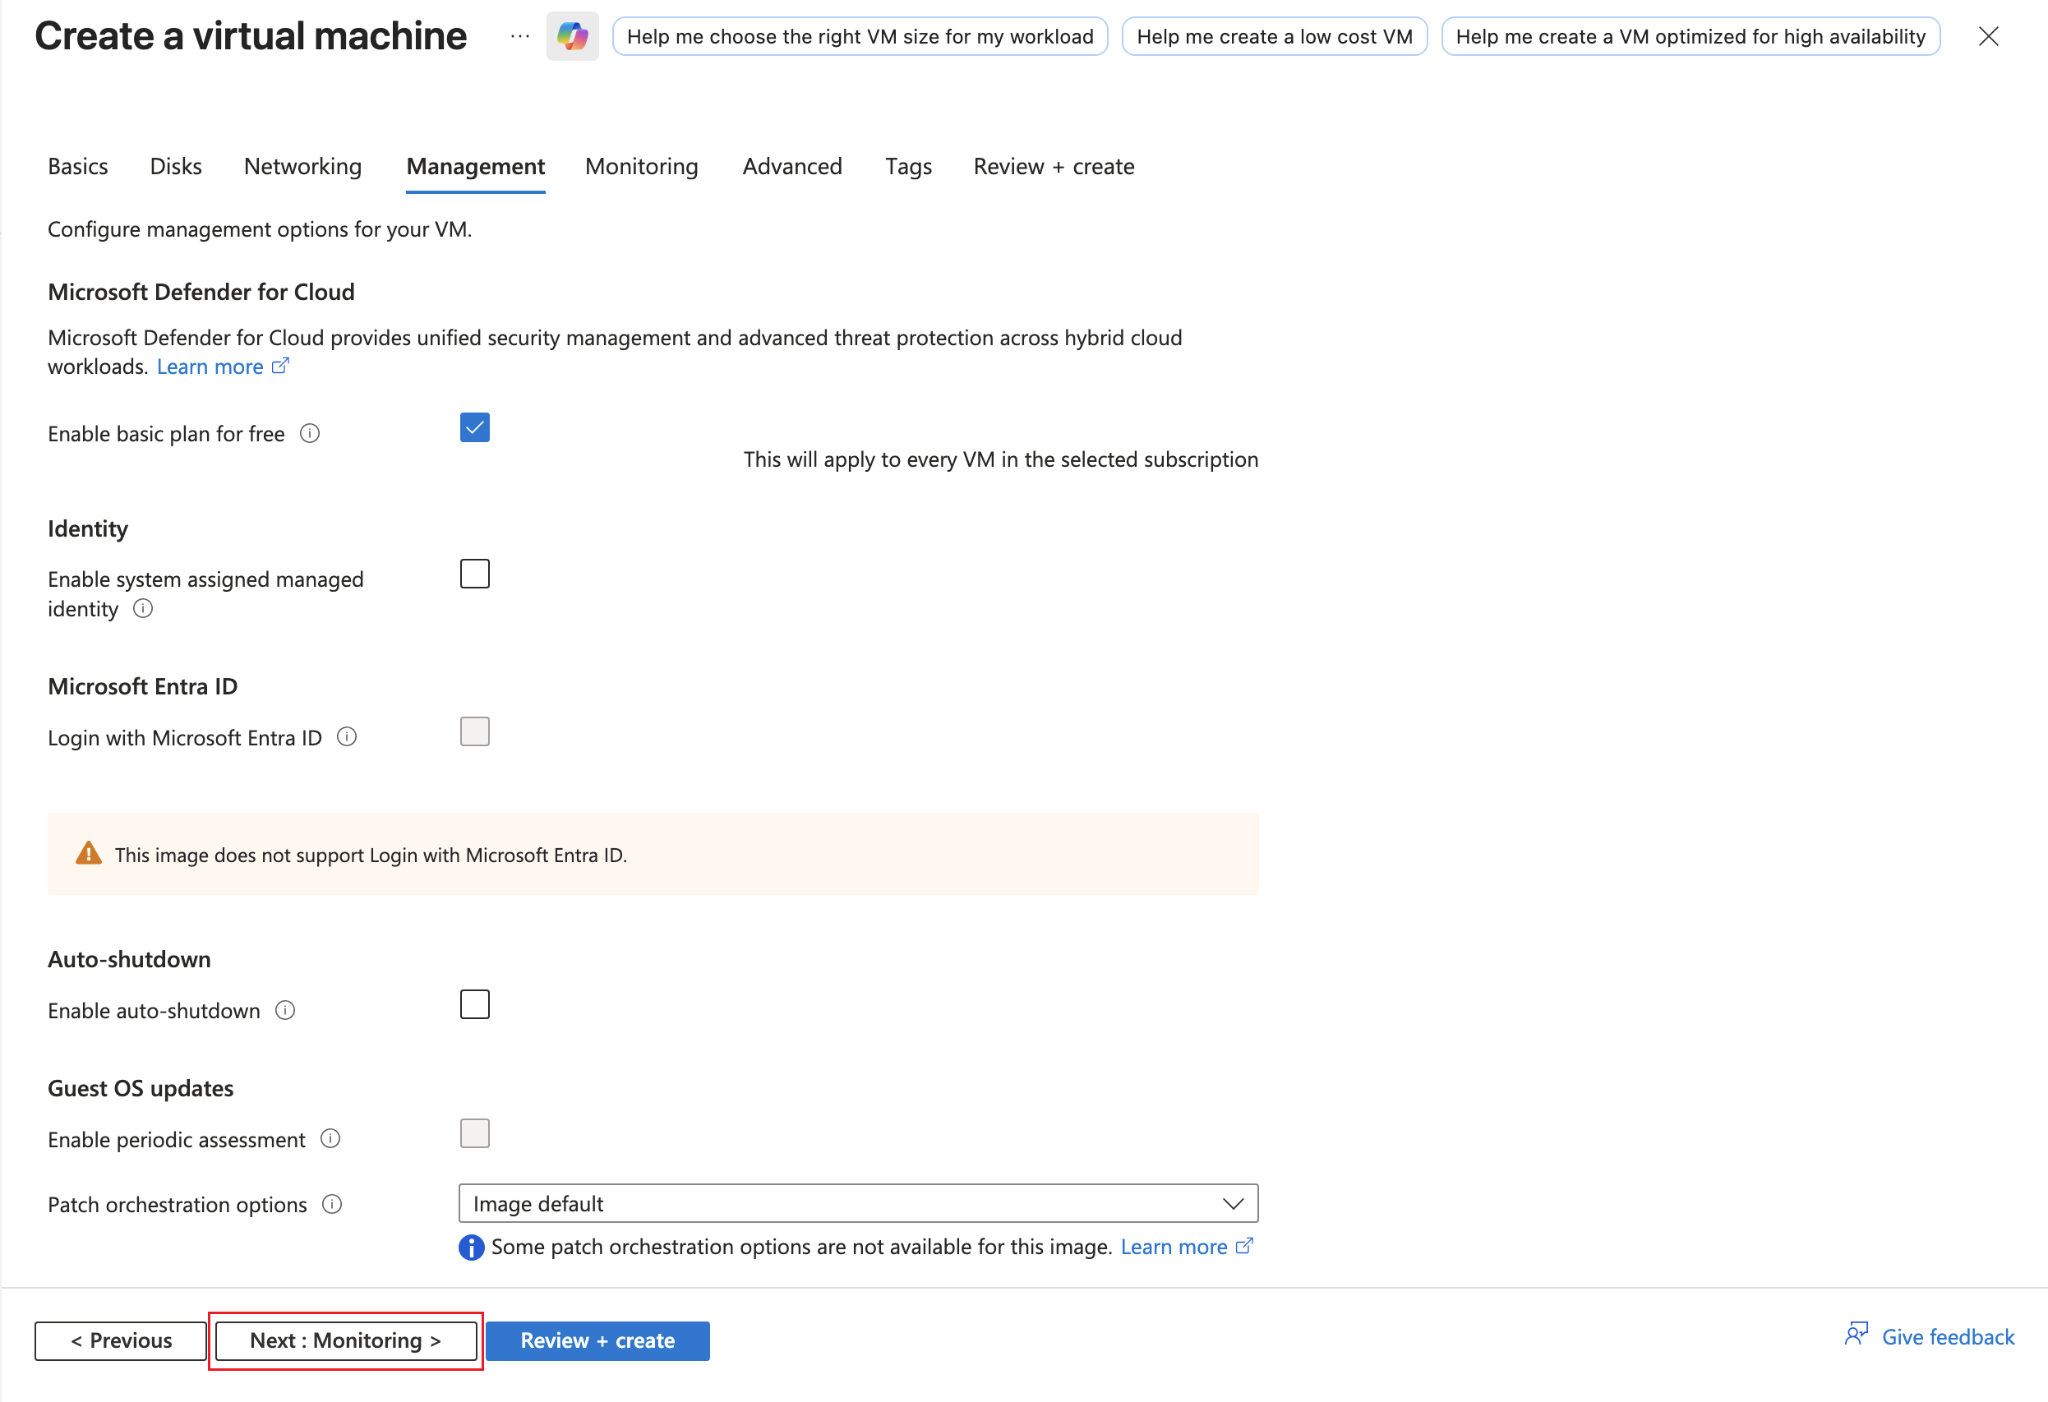
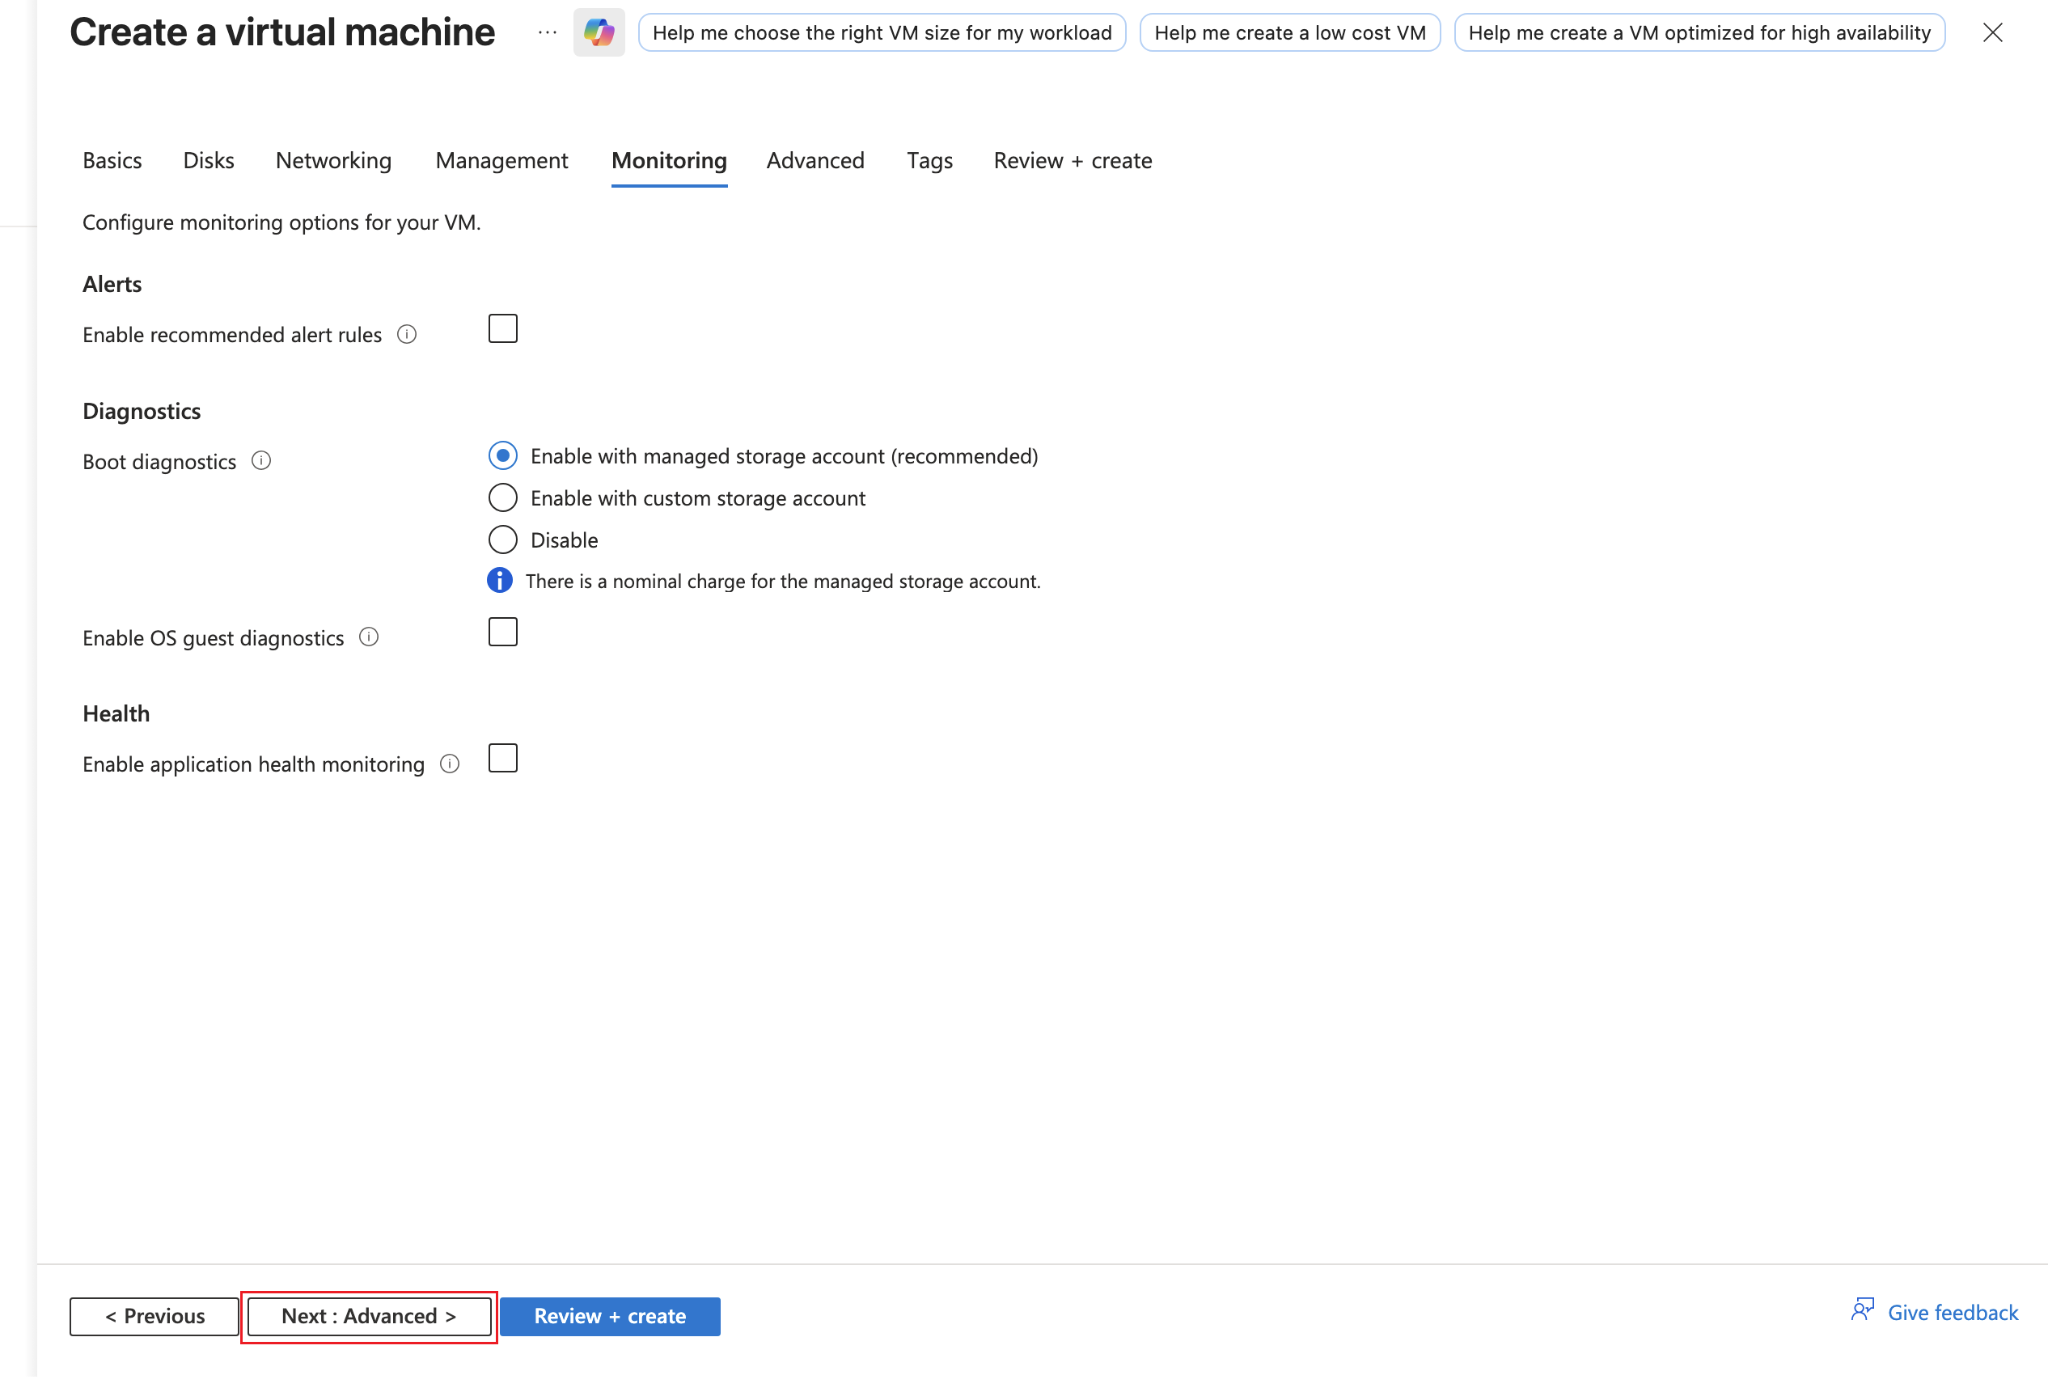
Keep everything as it is in the Management tab. Click on Next : Monitoring button.
In the Monitoring tab, keep everything as it is and click on Next : Advanced.
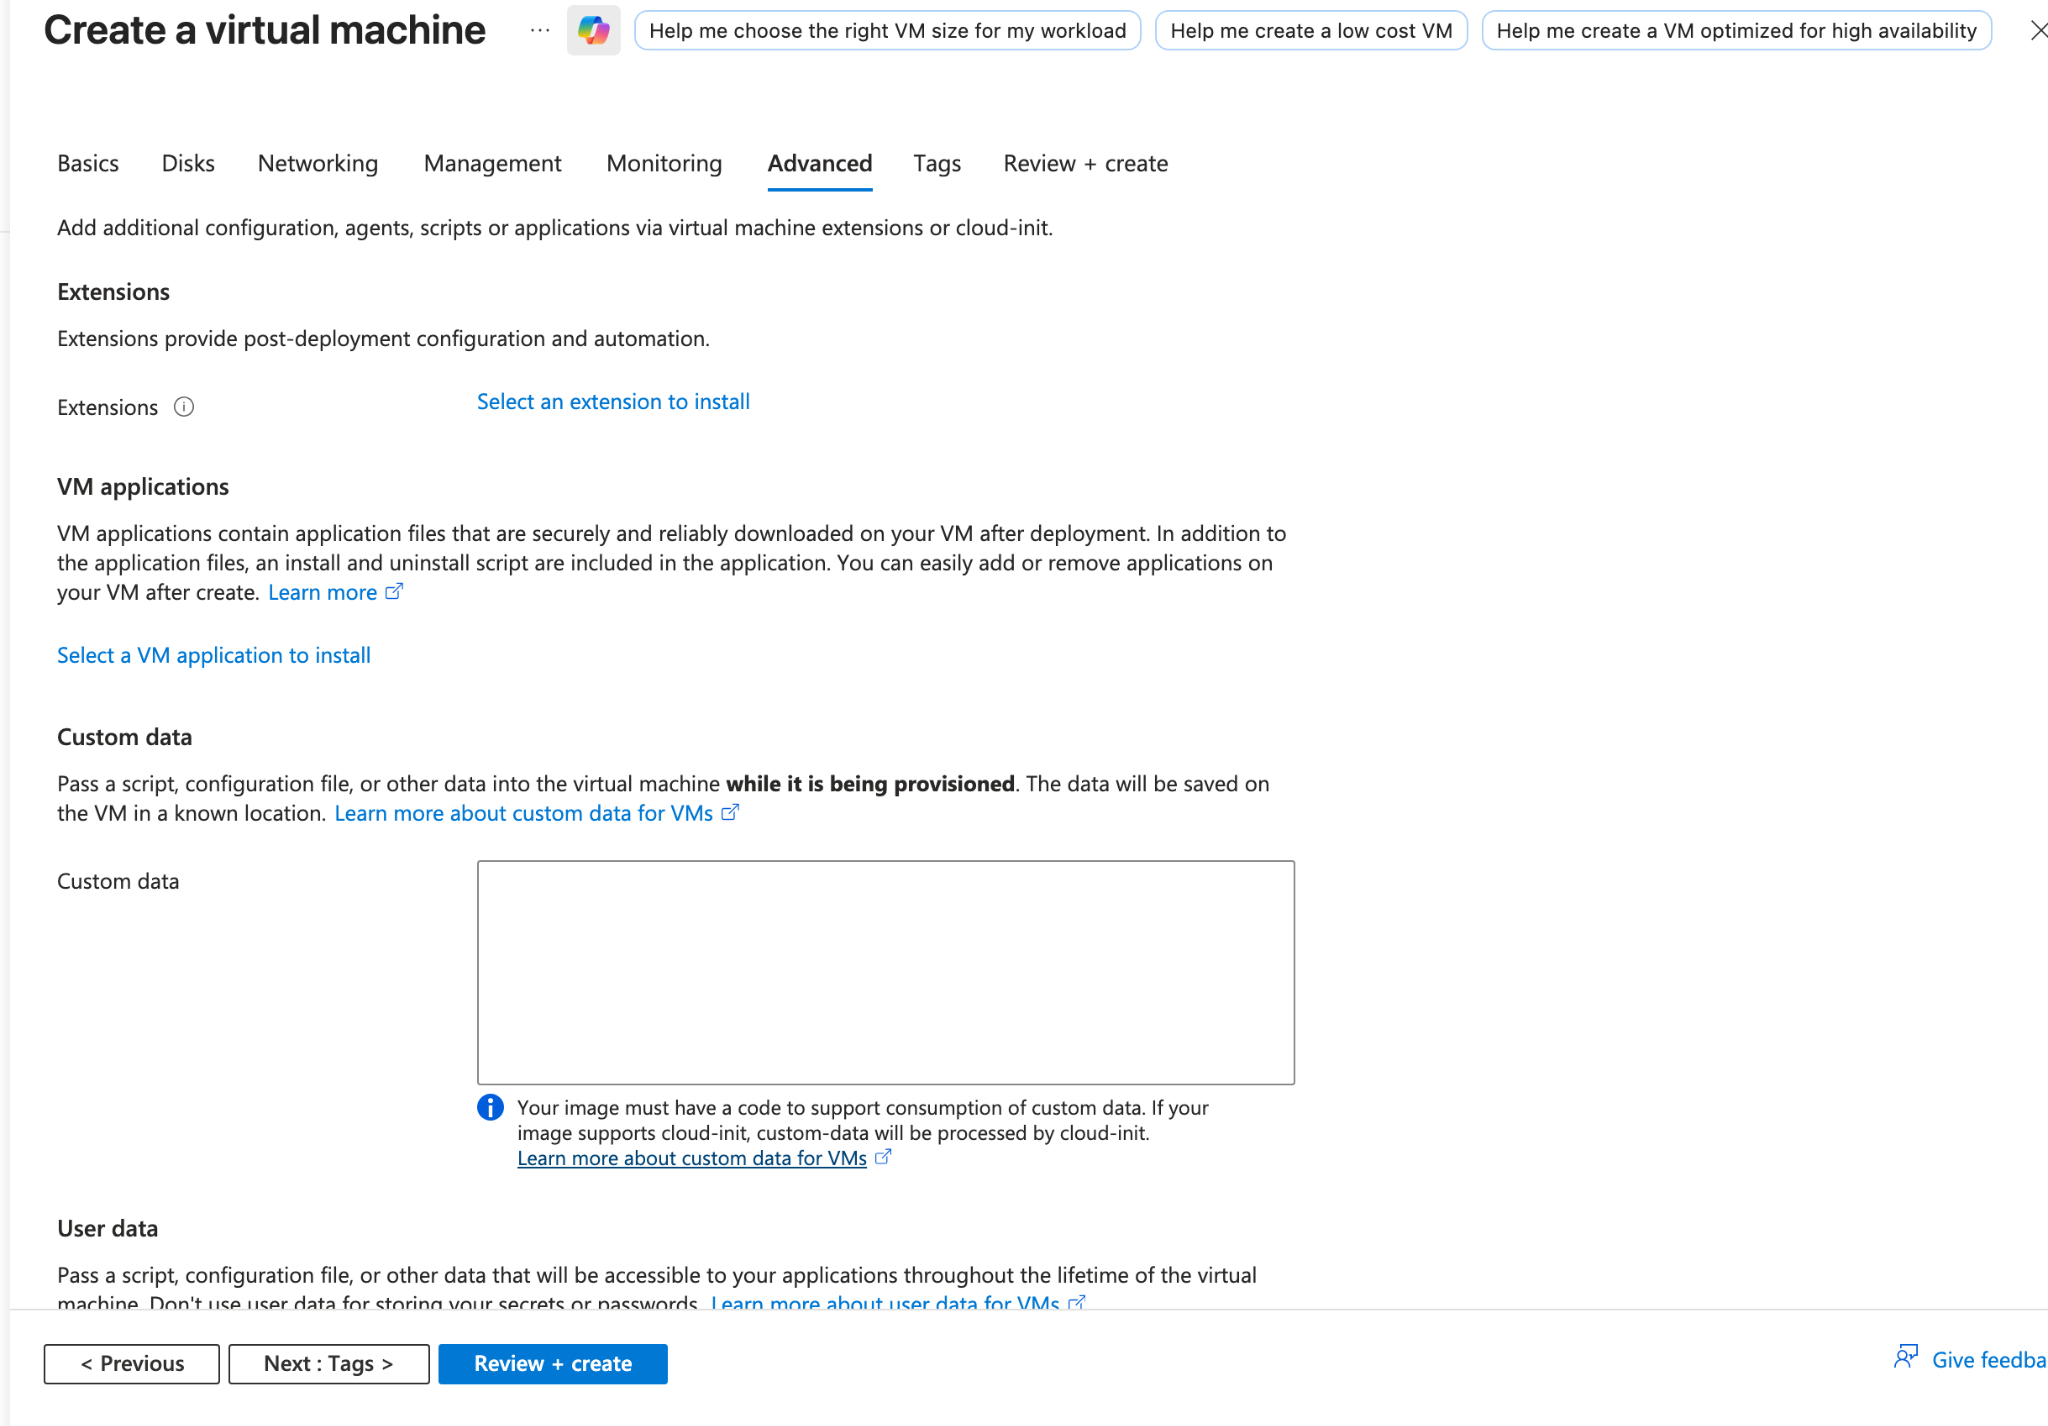
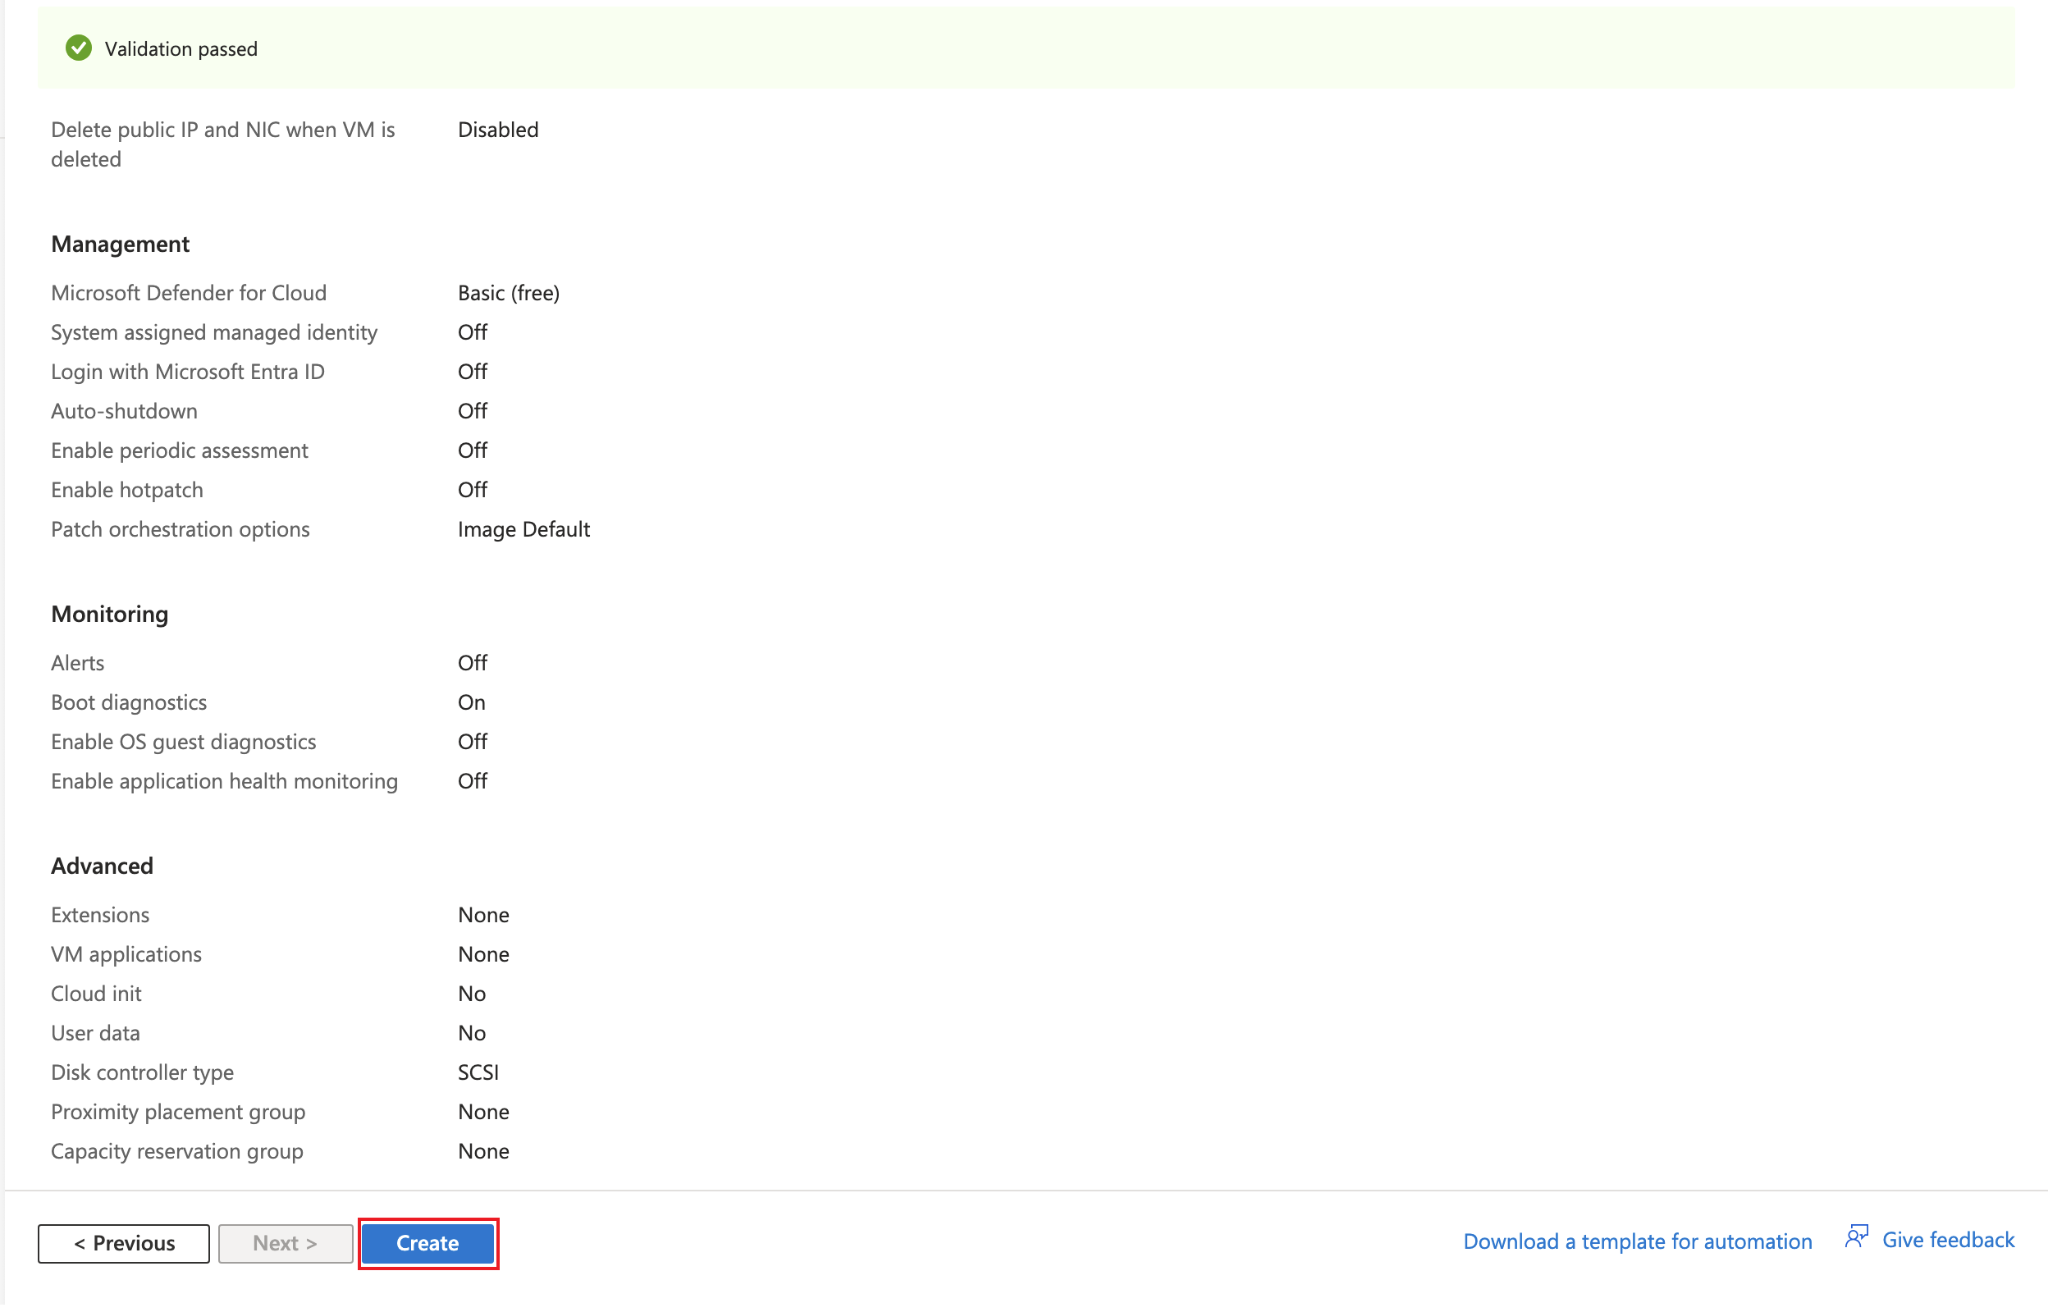
Advanced tab, keep everything as it is and move to Review + create by clicking on that button.
Review everything, make sure everything is correct on this page and then click Create.
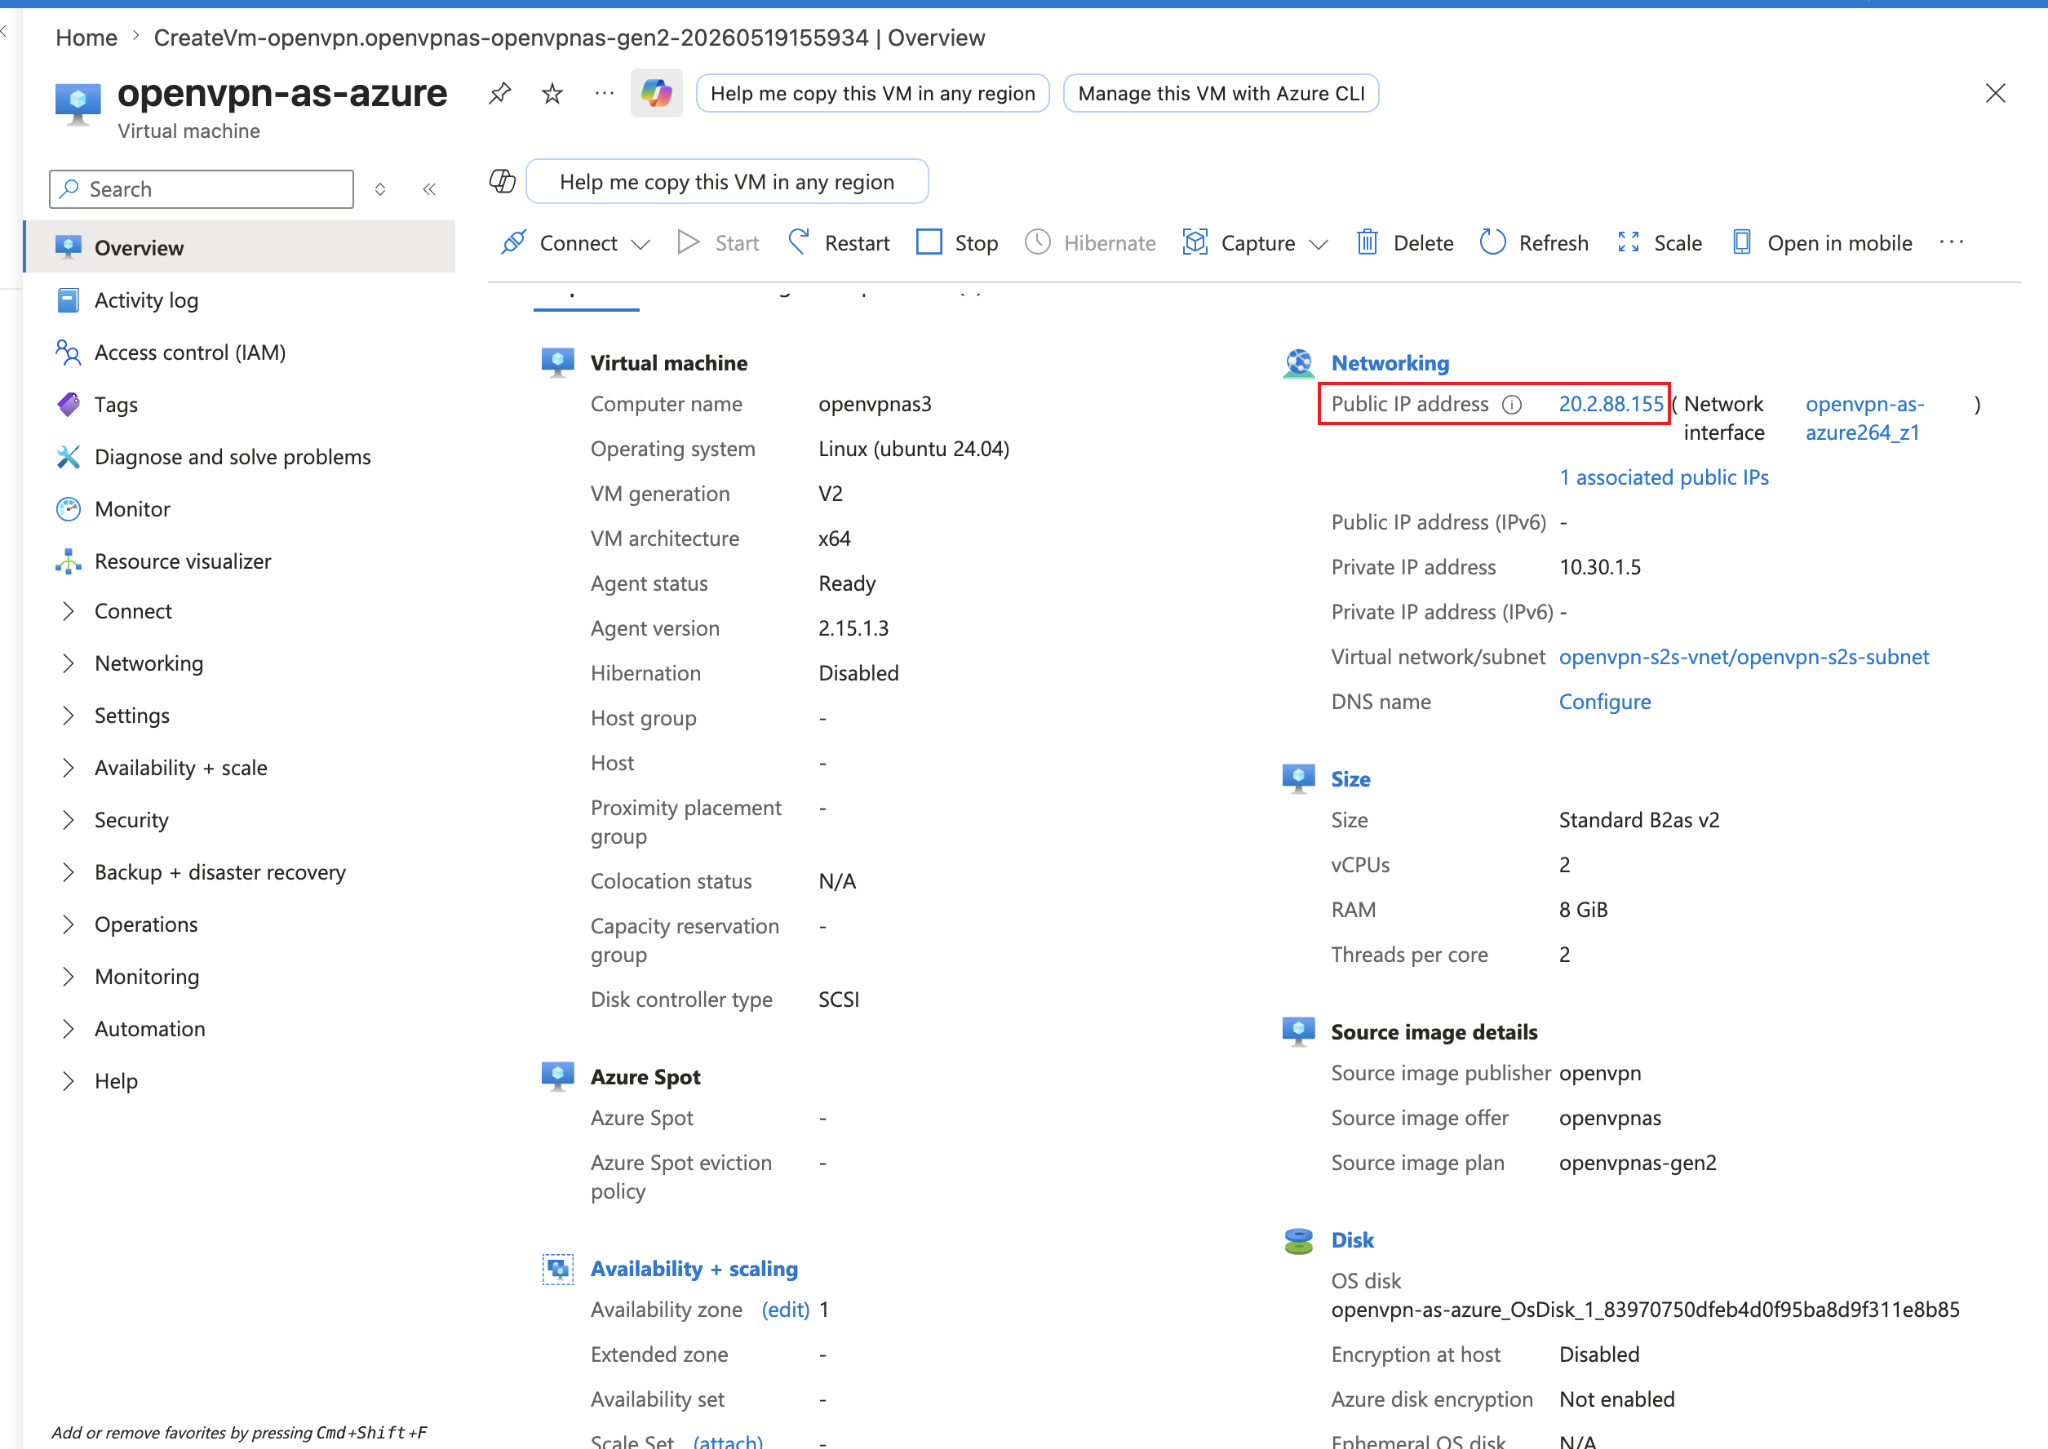
Now it will take a few minutes and then you will see this screen where it’d say deployment has been completed and here you need to click on Go to resource.

From here note down your Public IP address which in my case is 20.2.88.155.
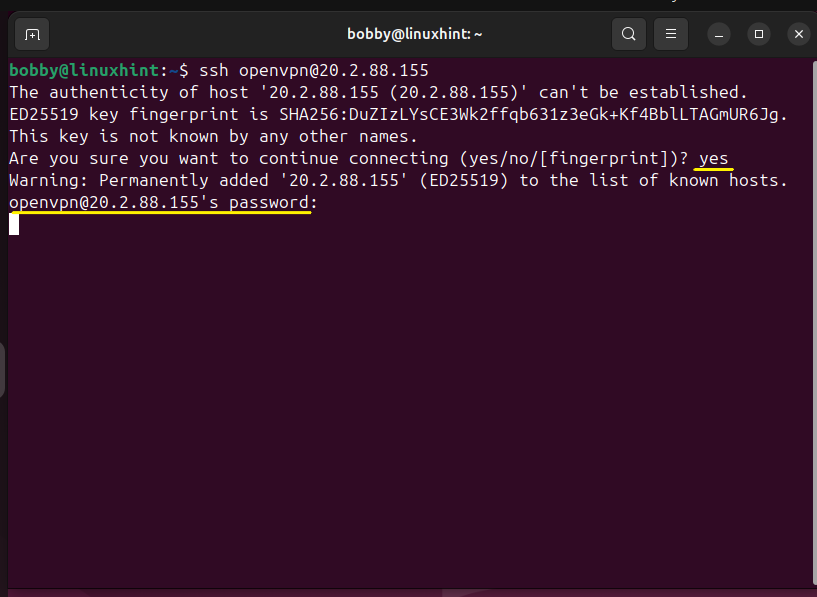
Now go to your terminal and ssh into your openvpn access server VM using its Public IP address.
Type in yes and then enter the password you selected while creating this VM.
Just type in yes or hit Enter on the next few prompts to agree to the terms and then hit Enter to generate a random password for your openvpn access server.
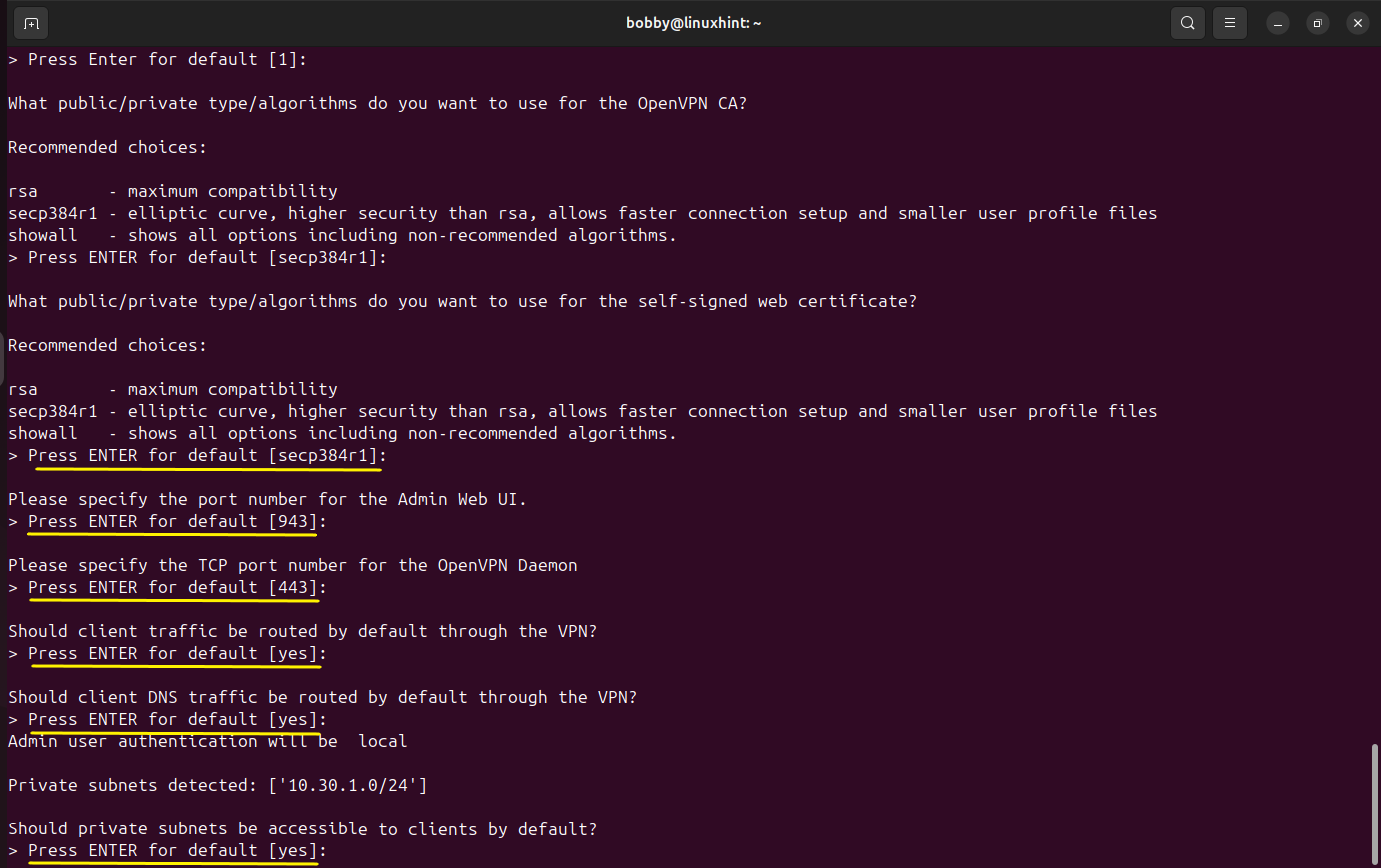
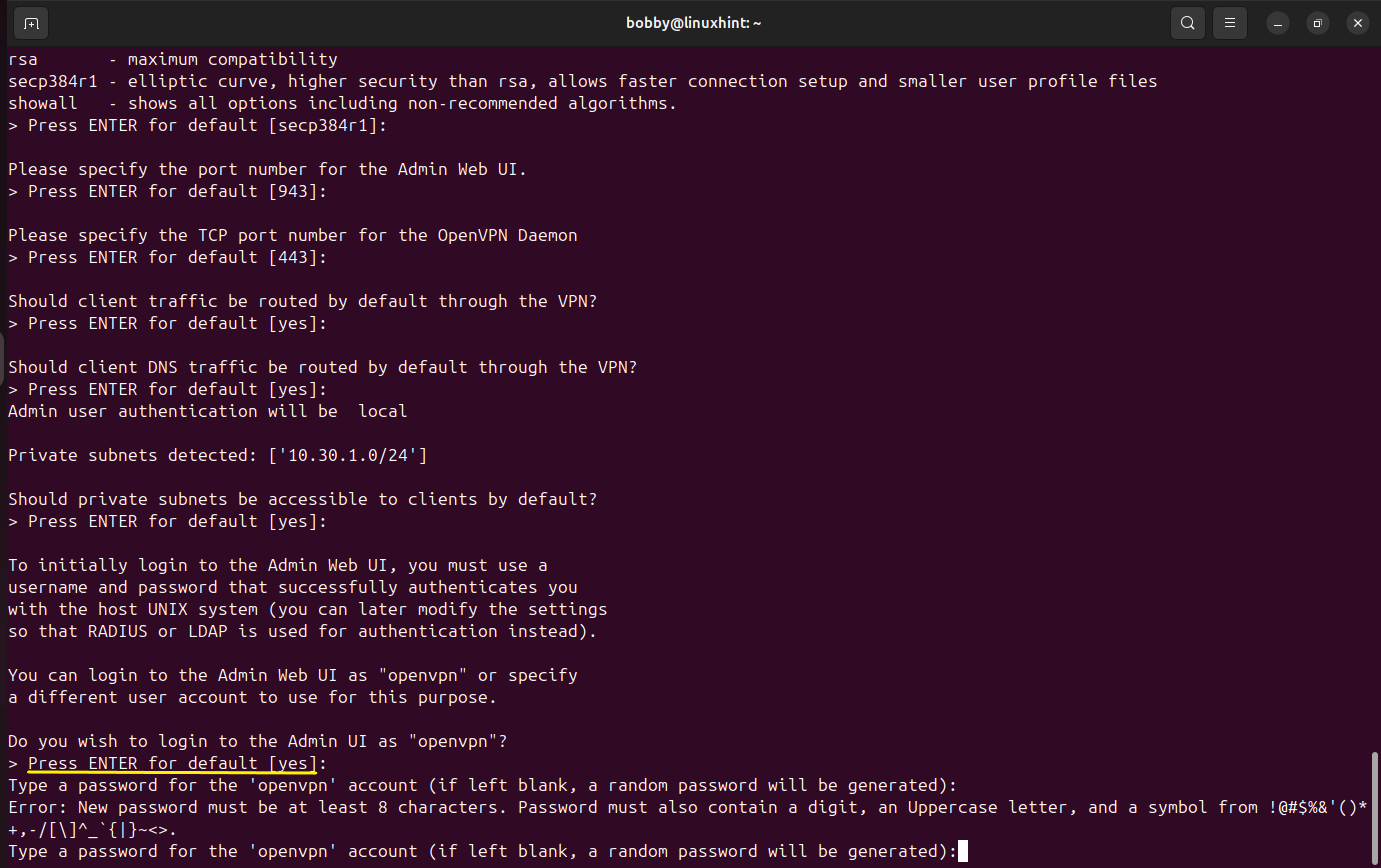
Now add your License Activation key or you can leave it blank to specify this later.
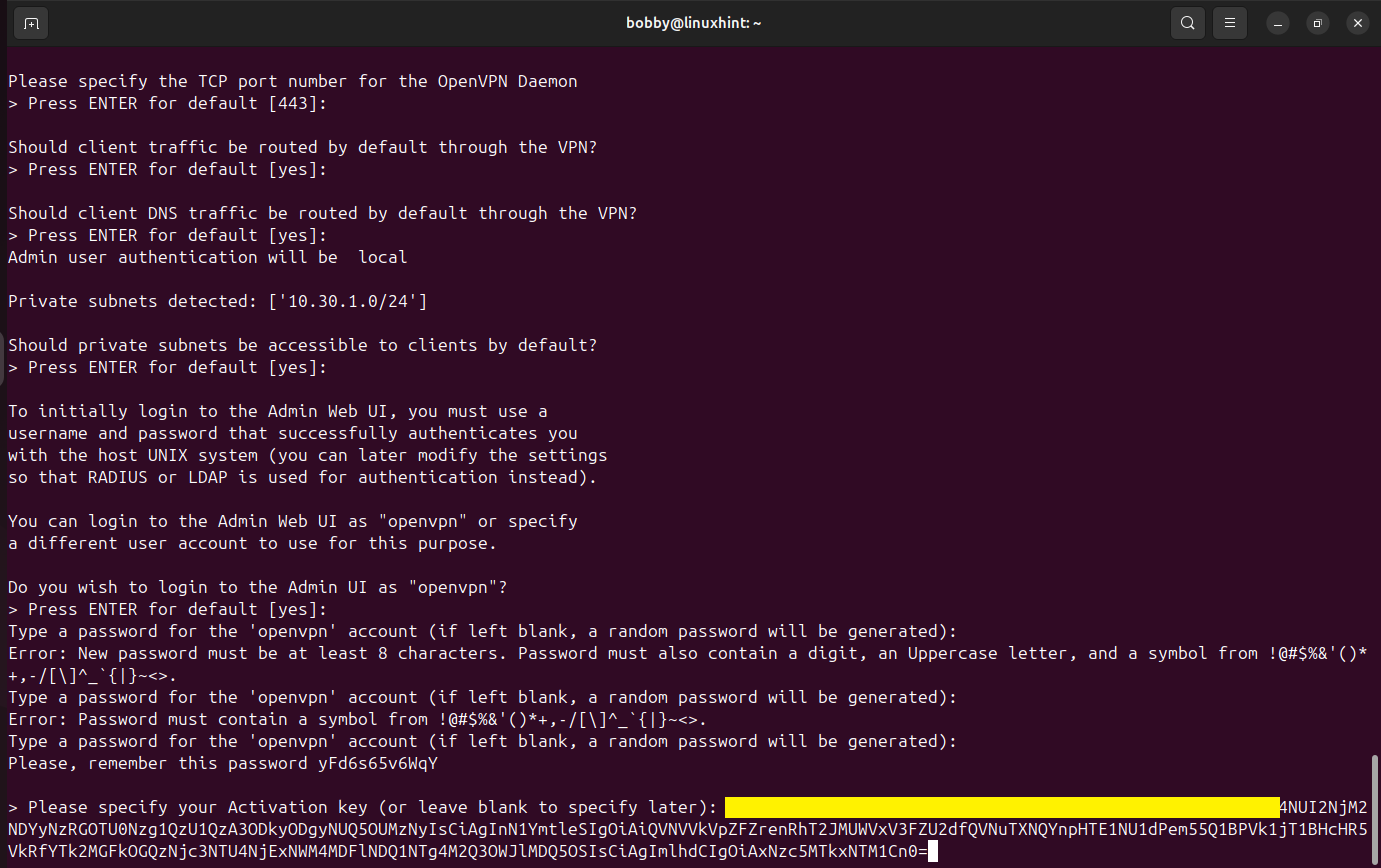
You can get your license activation key after signing up here if you don’t have an account already.
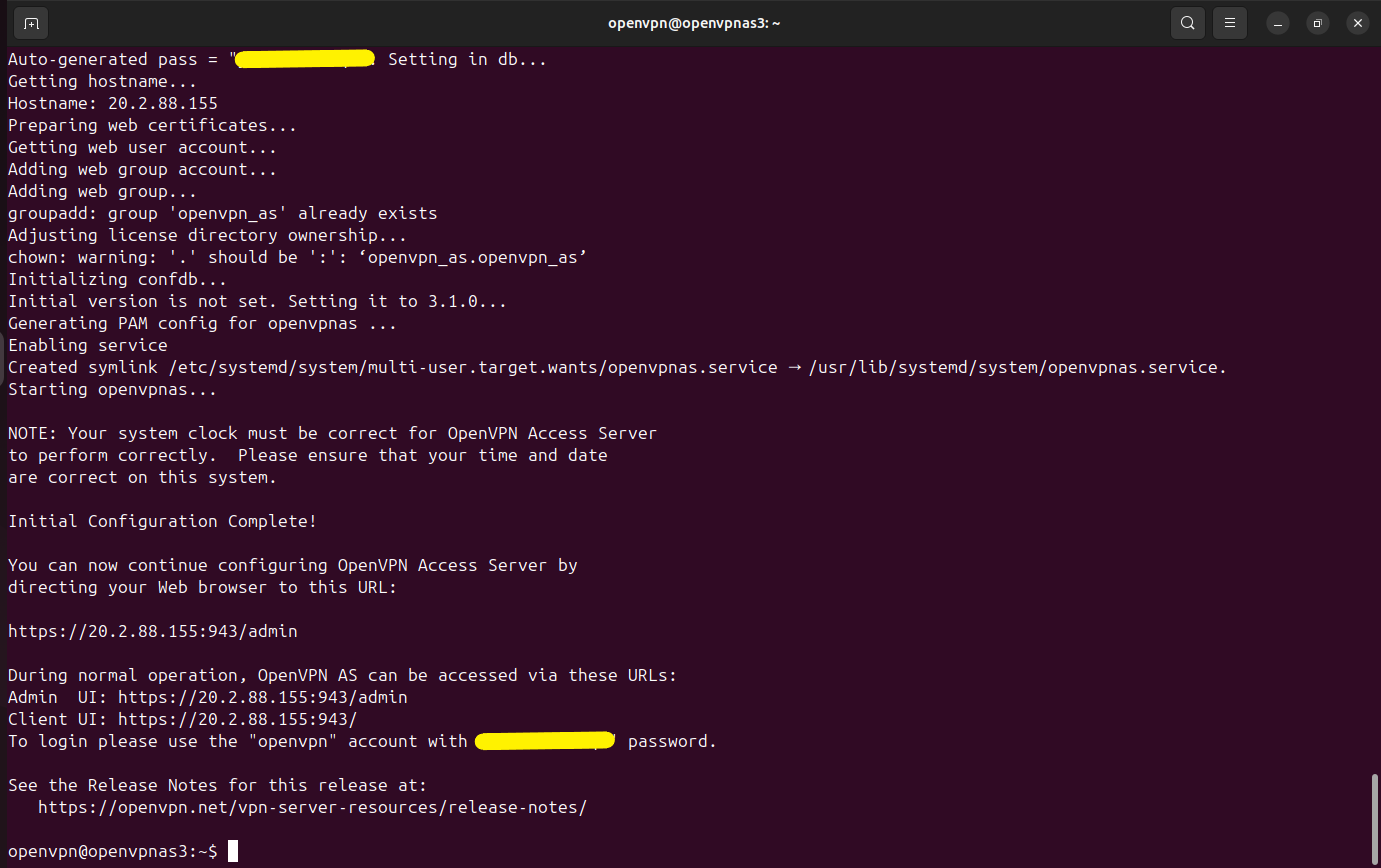
Now you are logged in to your openvpn VM.
Now we don’t need to do anything, you can even close this terminal window. Our OpenVPN Access Server has been deployed successfully.
Step 4: Enable IP Forwarding on the OpenVPN Access Server VM NIC
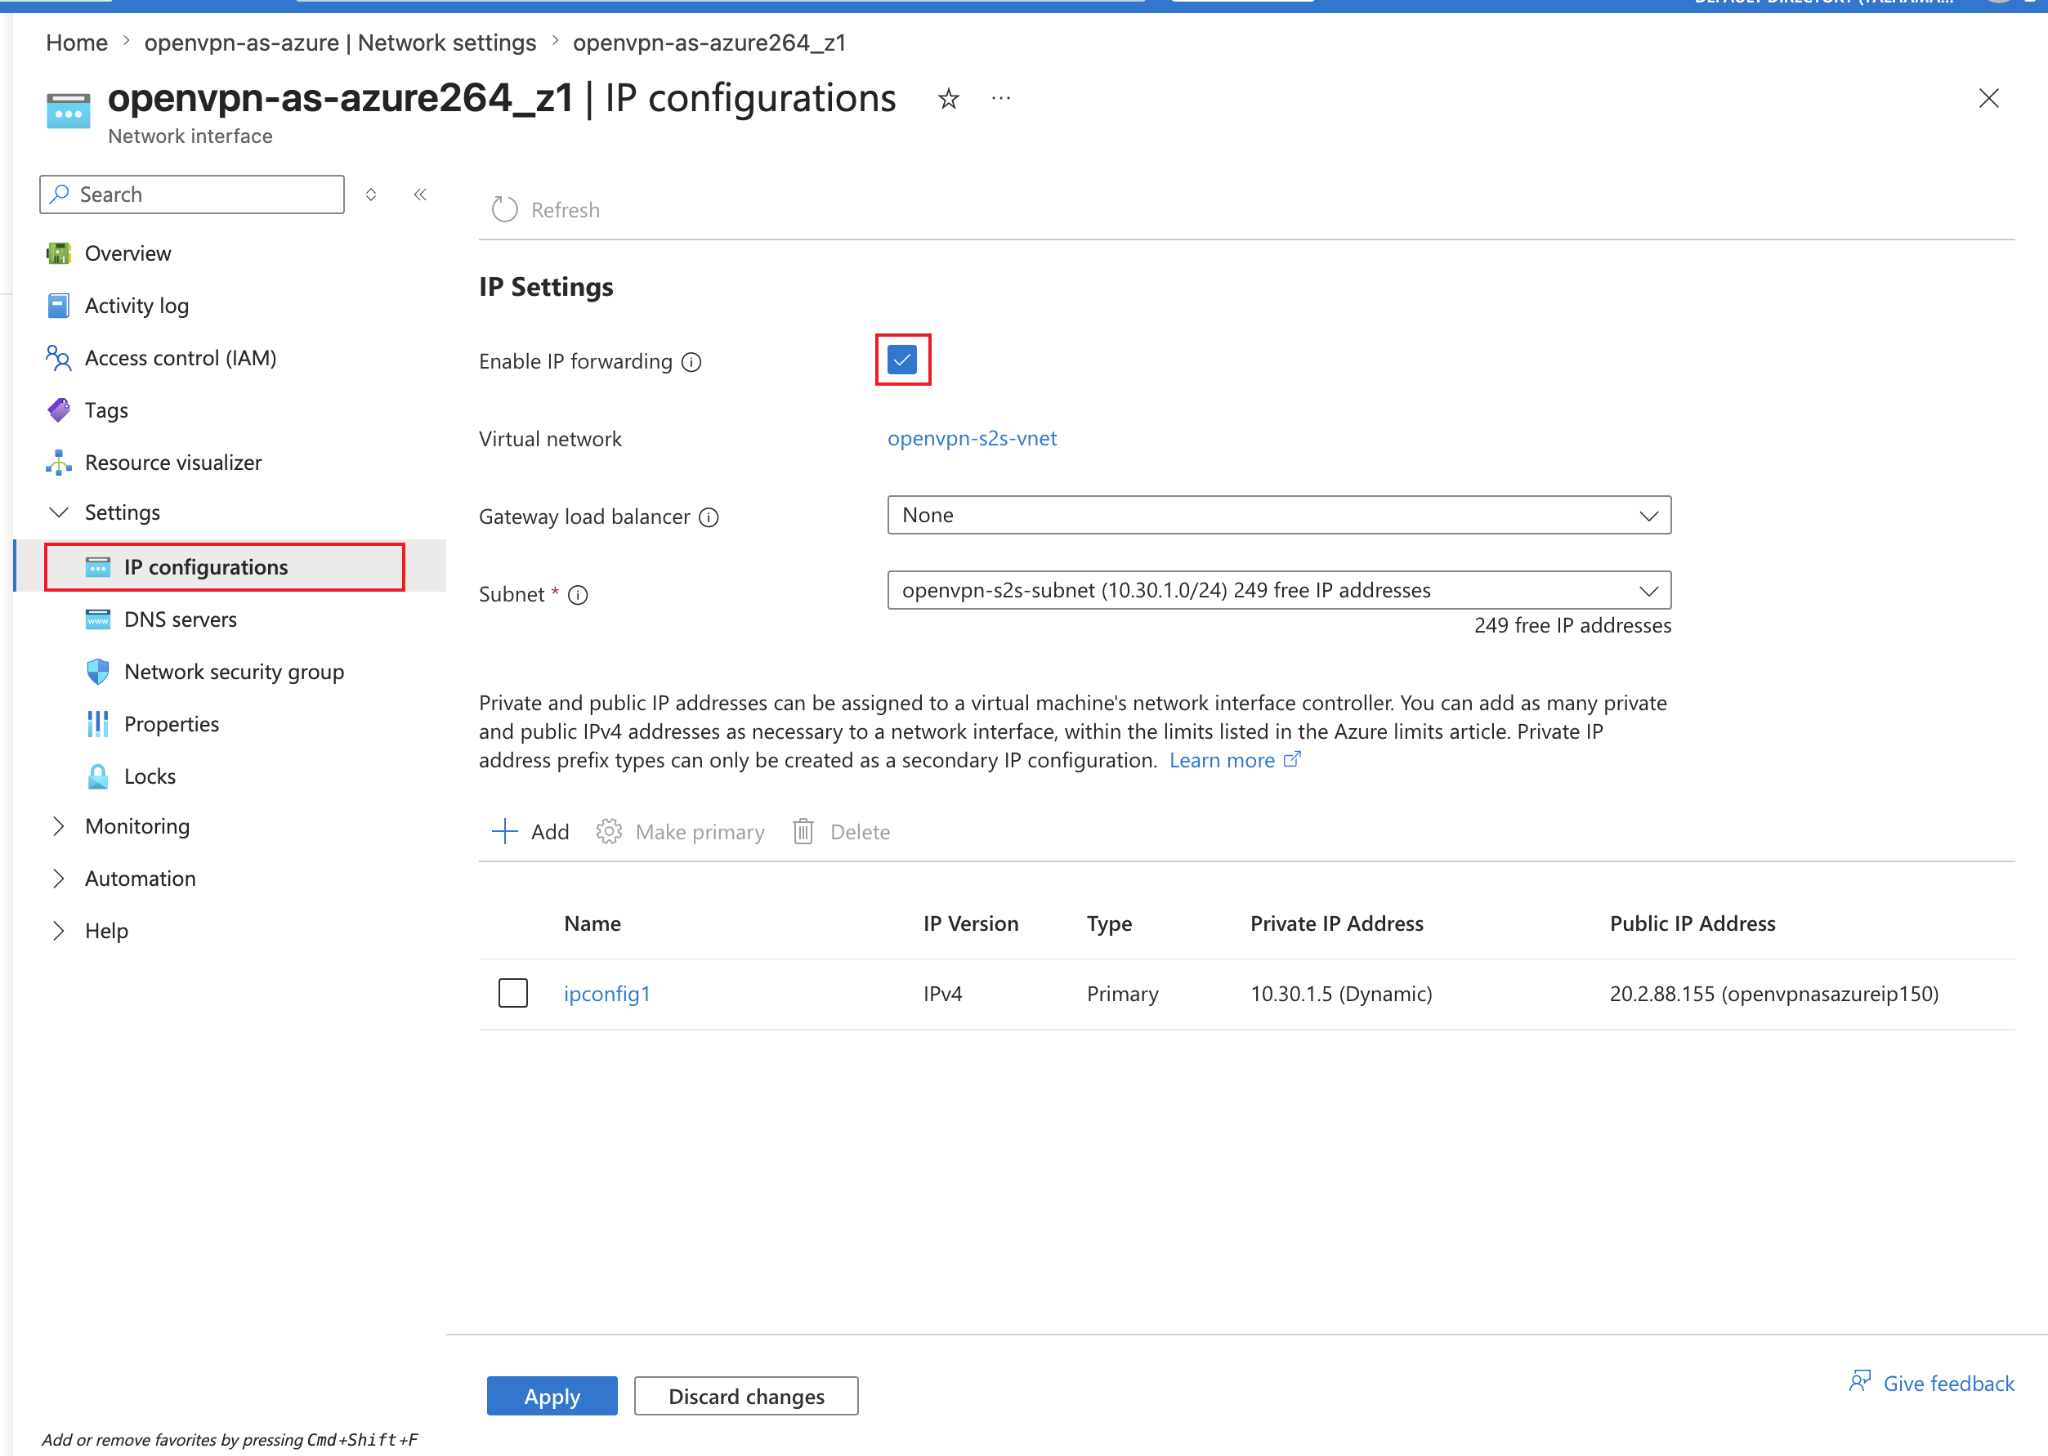
The OpenVPN Access Server VM will act as a router between the Azure subnet and the encrypted OpenVPN tunnel. For this very reason, IP forwarding must be enabled. So for that matter, go to your Virtual Machines tab on your dashboard and then click on openvpn-as-azure virtual machine and in here go to Network settings tab and then click on Network interface openvpn-as-azure264_z1.
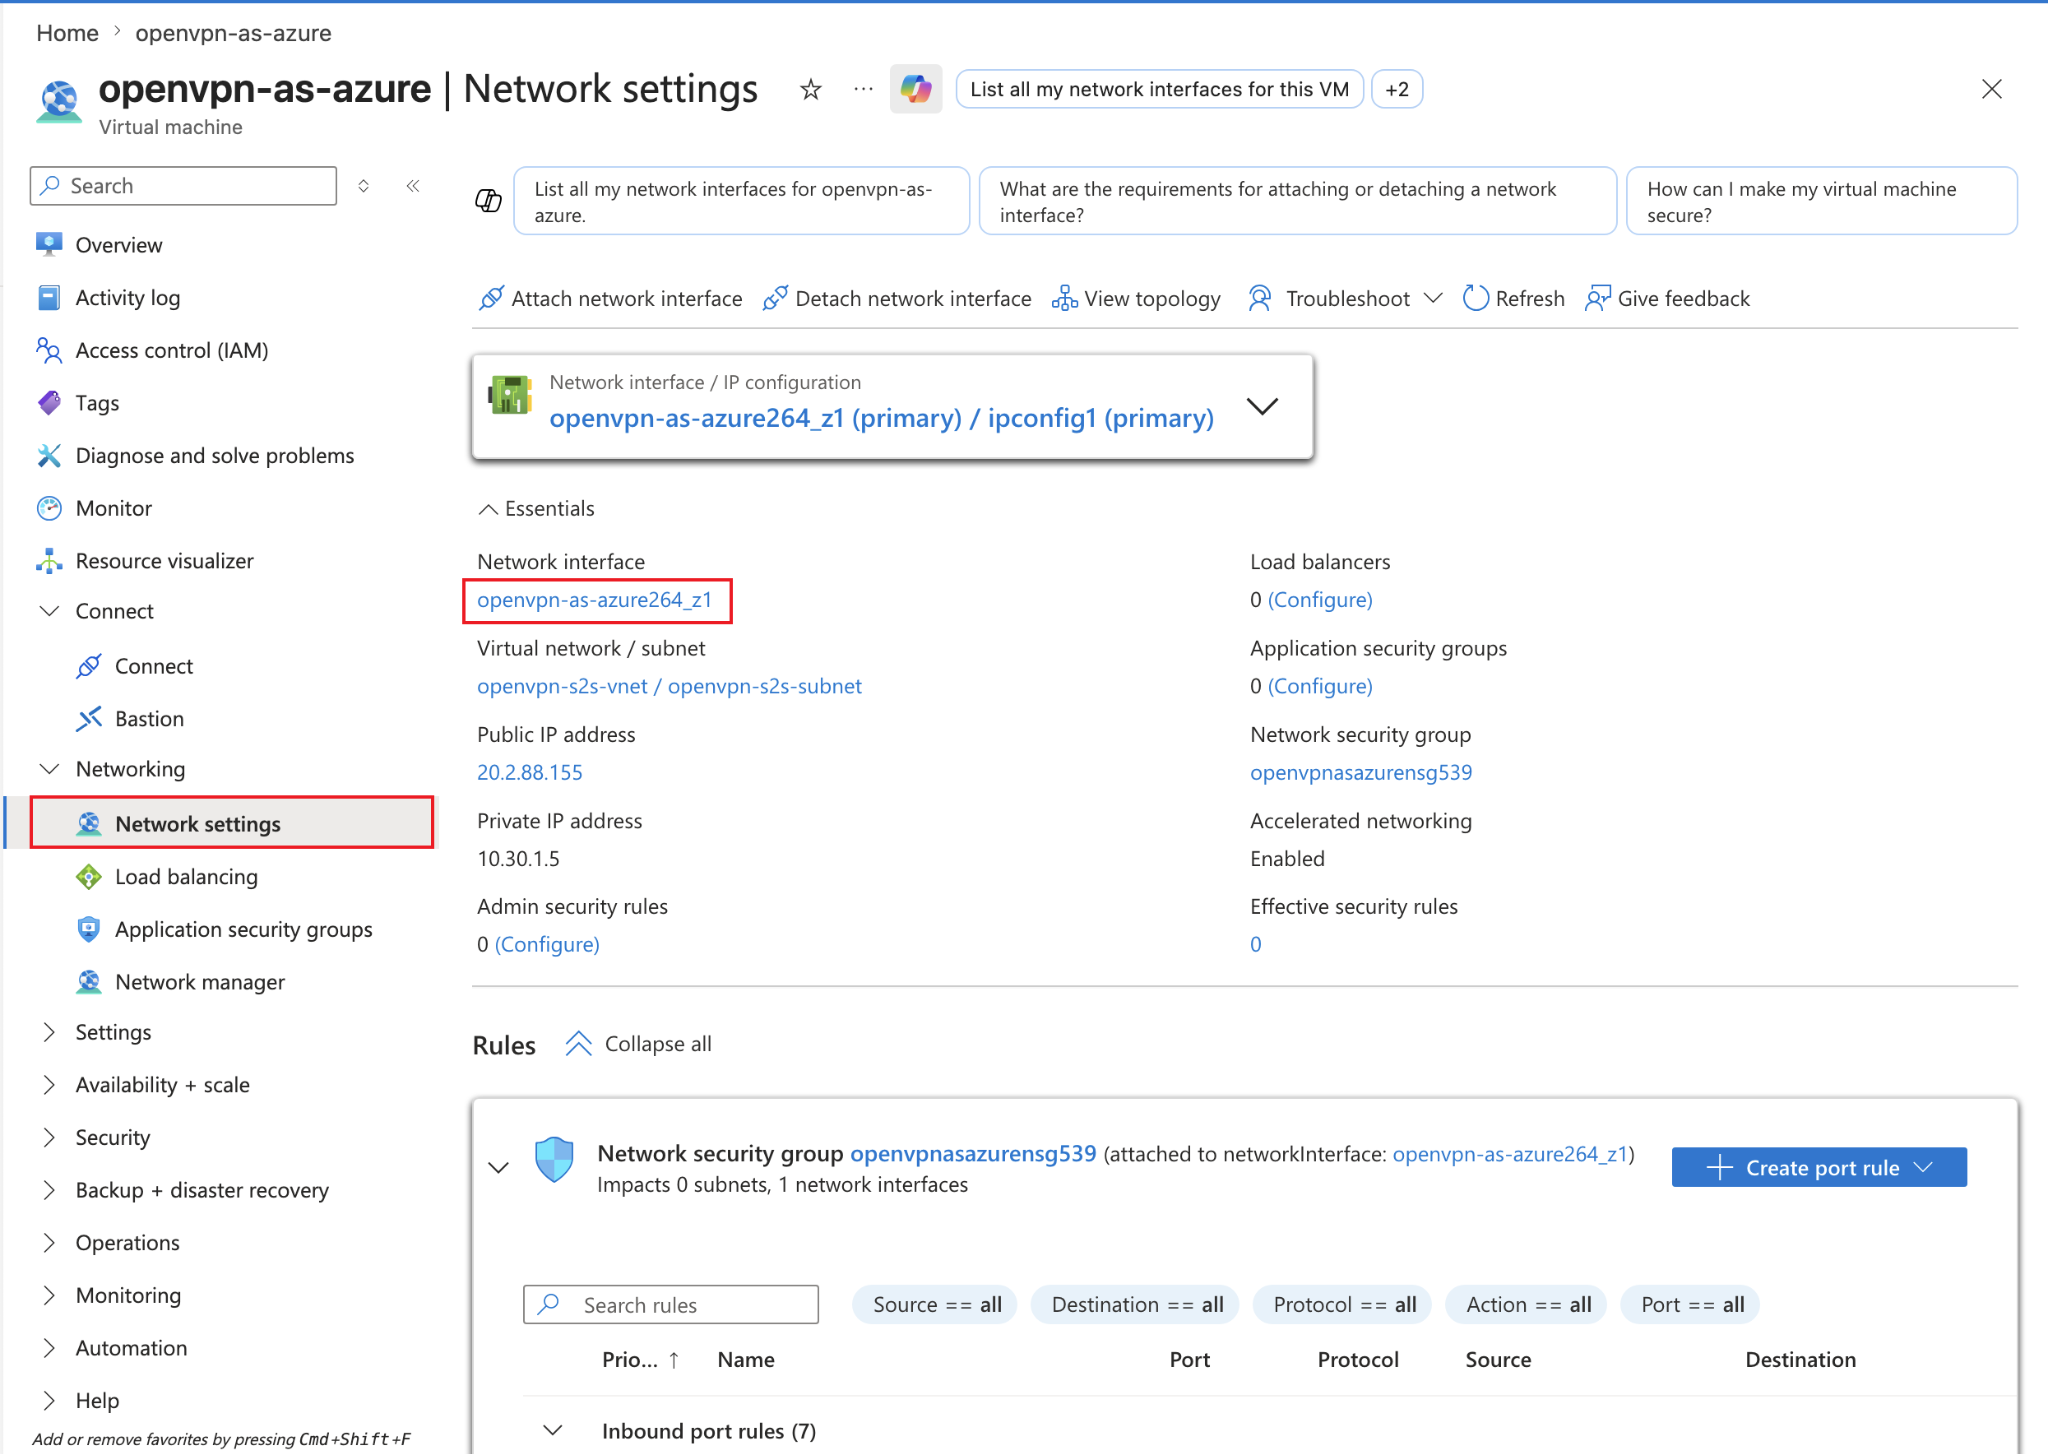
And in here click on Settings and then click on IP configurations and here make sure to check the option Enable IP forwarding.
Step 5: Verify Azure Network Security Group Rules
OpenVPN access server image from the Azure marketplace creates Network Security Group(NSG) rules automatically but still it’s a good idea to verify them.
Make sure these port rules exist:
| Rule Name | Port | Protocol | Purpose |
|---|---|---|---|
| Admin_TCP | 943 | TCP | OpenVPN Admin UI |
| TCP_Connection | 443 | TCP | OpenVPN Client UI |
| UDP_Connection | 1194 | UDP | OpenVPN Tunnel Traffic |
| default-allow-ssh | 22 | TCP | SSH access |
You can go to Network Settings on your virtual machine openvpn-as-azure and see for yourself and verify if these rules match the rules mentioned above.
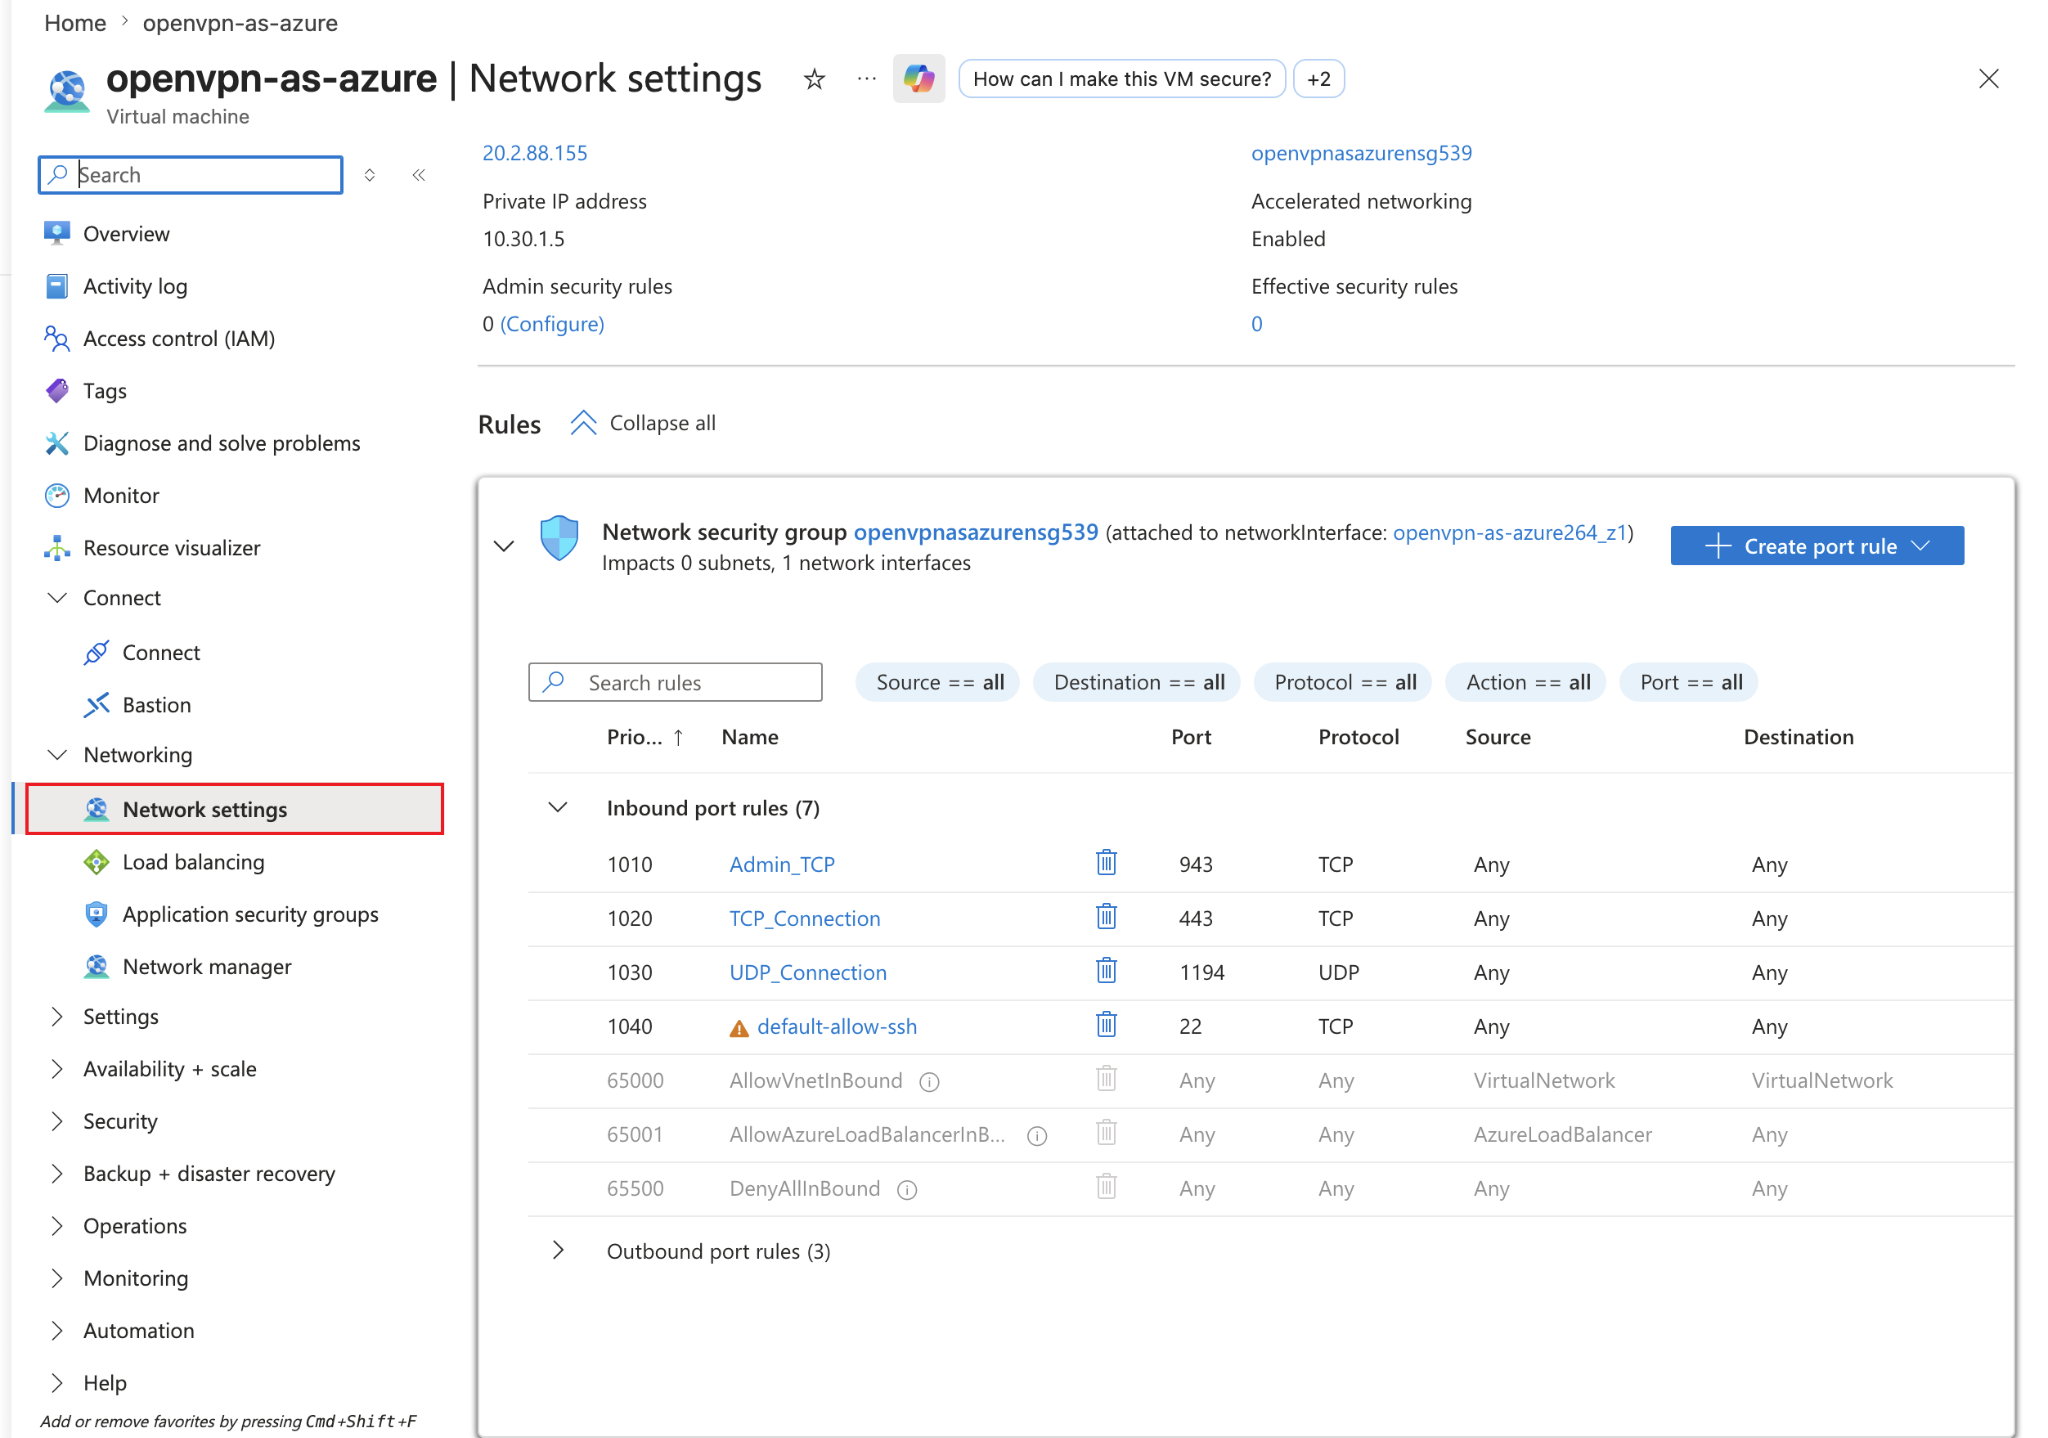
If they are not as it is, then create port rules like in the table or screenshot above.
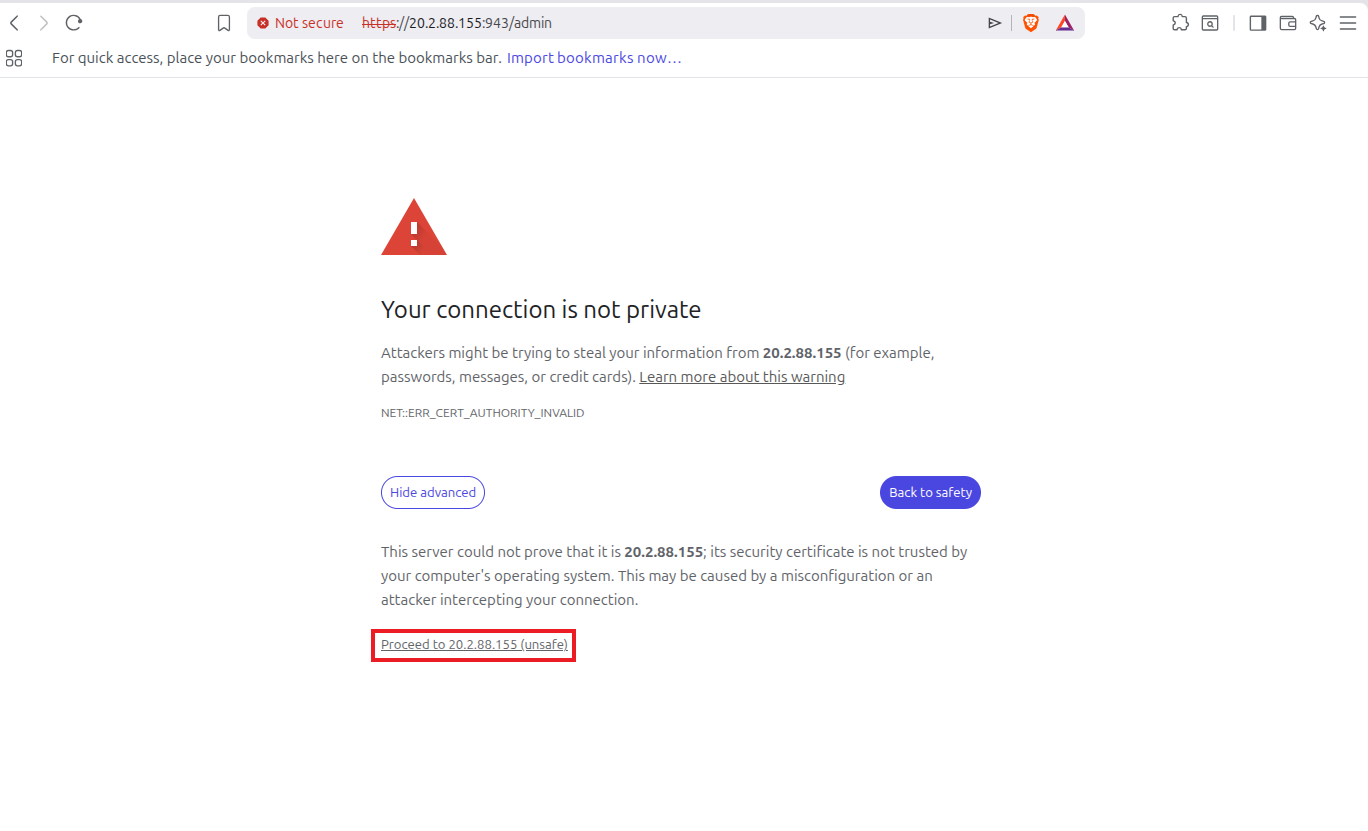
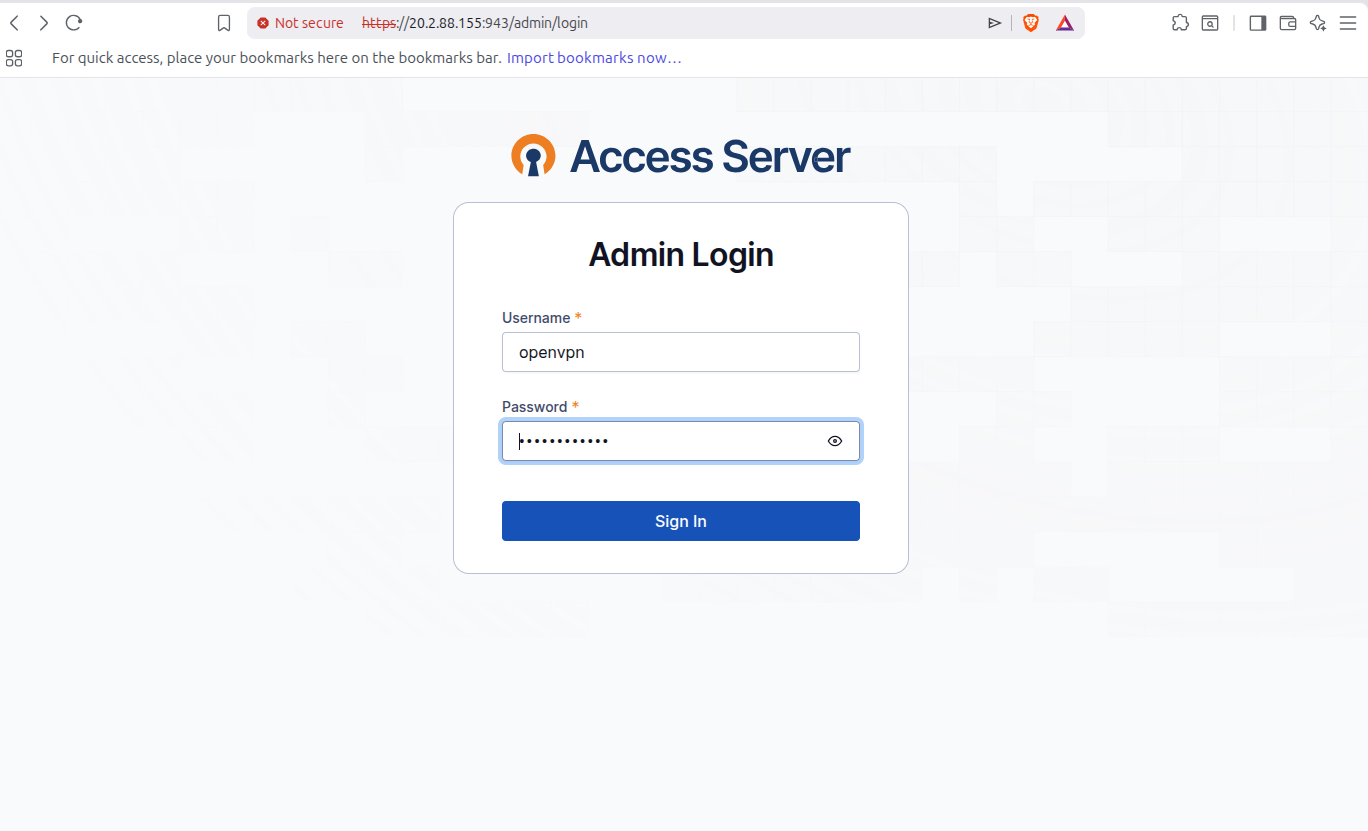
Step 6: Access the OpenVPN Access Server Admin UI
Go to this URL in your browser:
OpenVPN uses a self-signed SSL certificate due to which you will see this warning, just click on Advanced and then click on Proceed to 20.2.88.15 (unsafe). In your case the IP address could be different.
It will next take you to the Access Server login page, enter the username openvpn and then enter the random password generated in the terminal of your machine in step 3.
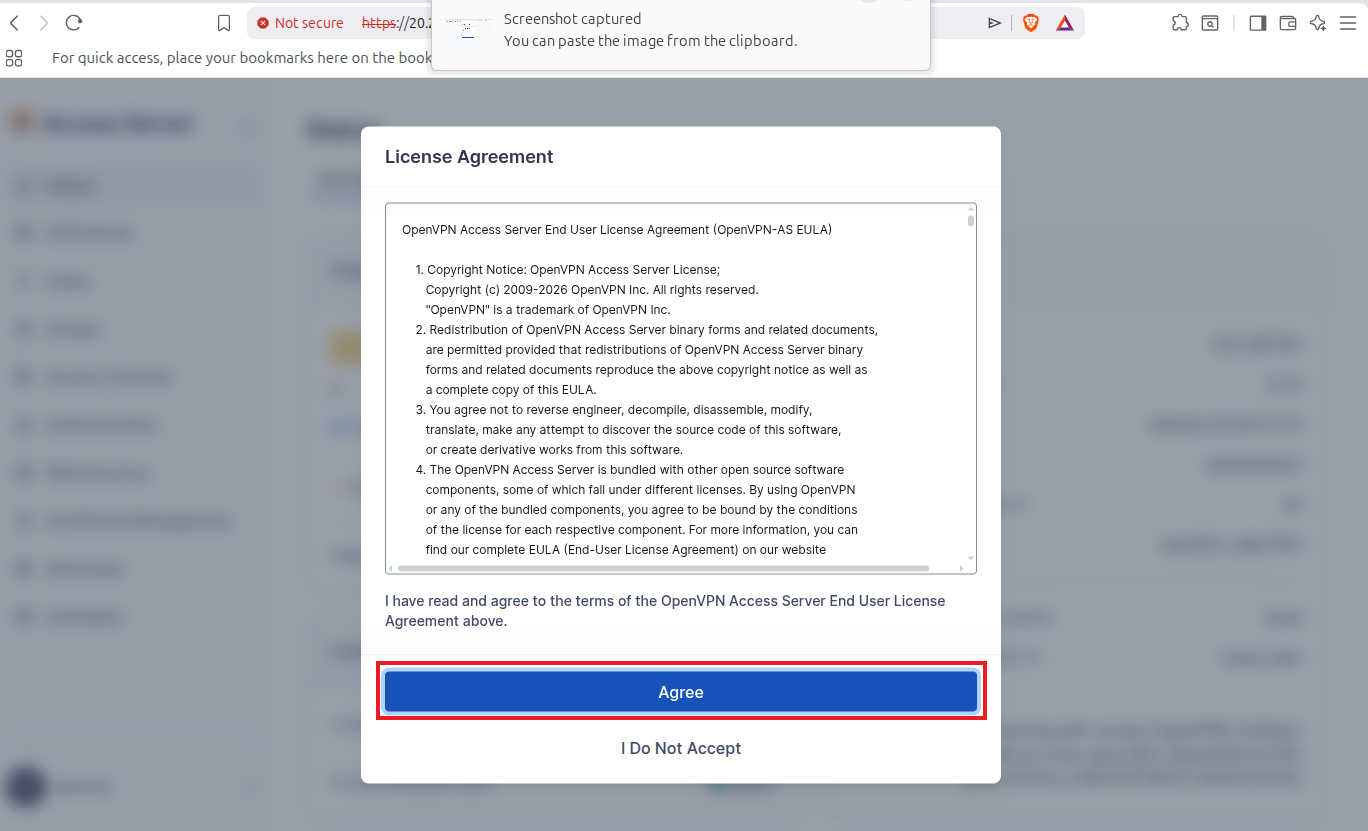
Now a License Agreement will pop up, click on Agree.
And now you will be able to access the OpenVPN Access Server dashboard.
Step 7: Configure OpenVPN Access Server for Site-to-Site Routing
Now configure OpenVPN Access Server to route traffic between the Azure subnet and the local LAN.
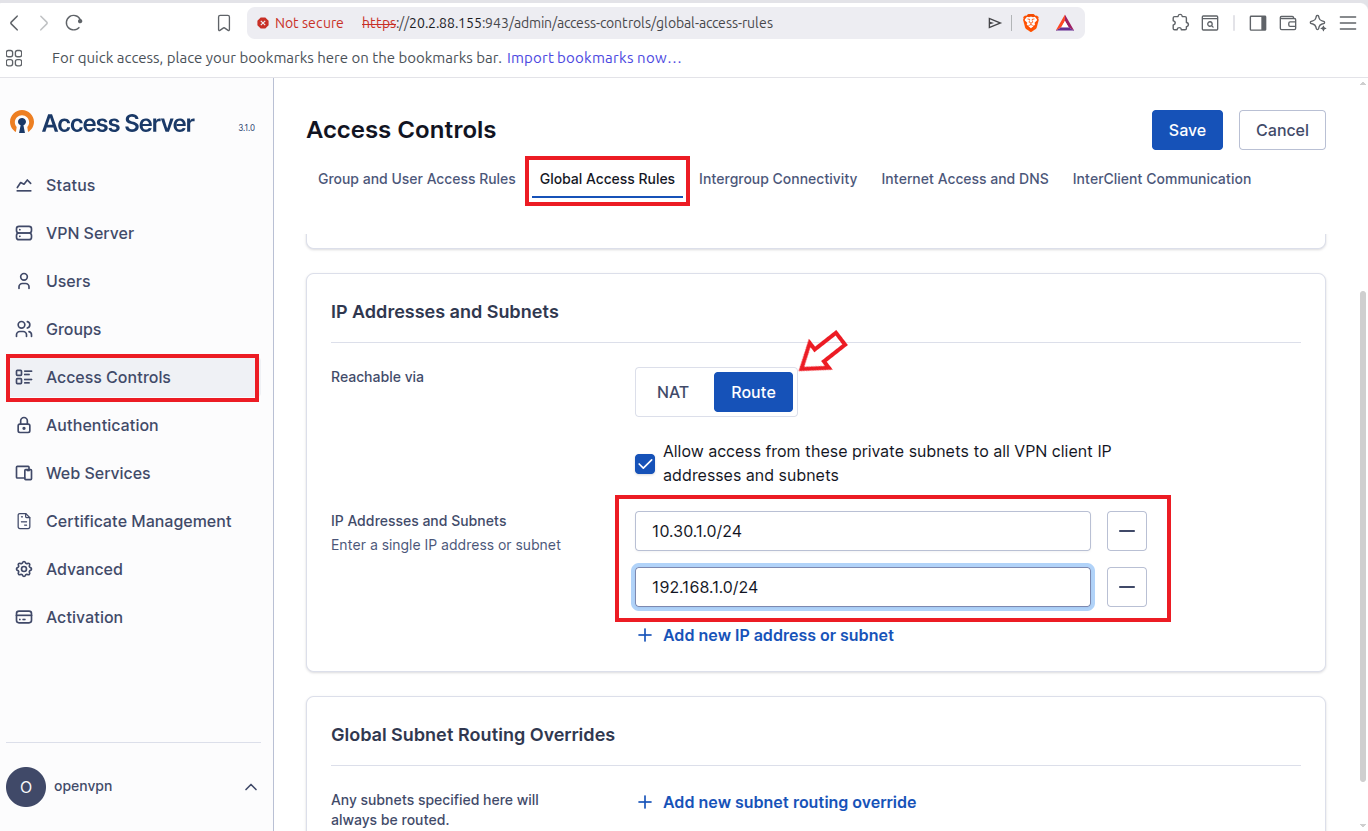
In the OpenVPN Admin UI, go to Access Controls then go to Global Access Rules then select Route check this option Allow access from these private subnets to all VPN clients IP addresses and subnets and add 10.30.1.0/24 and 192.168.1.0/24 in IP Addresses and Subnets and click on Save. Do not restart your server yet, we need to make a few more changes.
Now go to the InterClient Communication tab and select Allow user-to-user connections then click on Save.
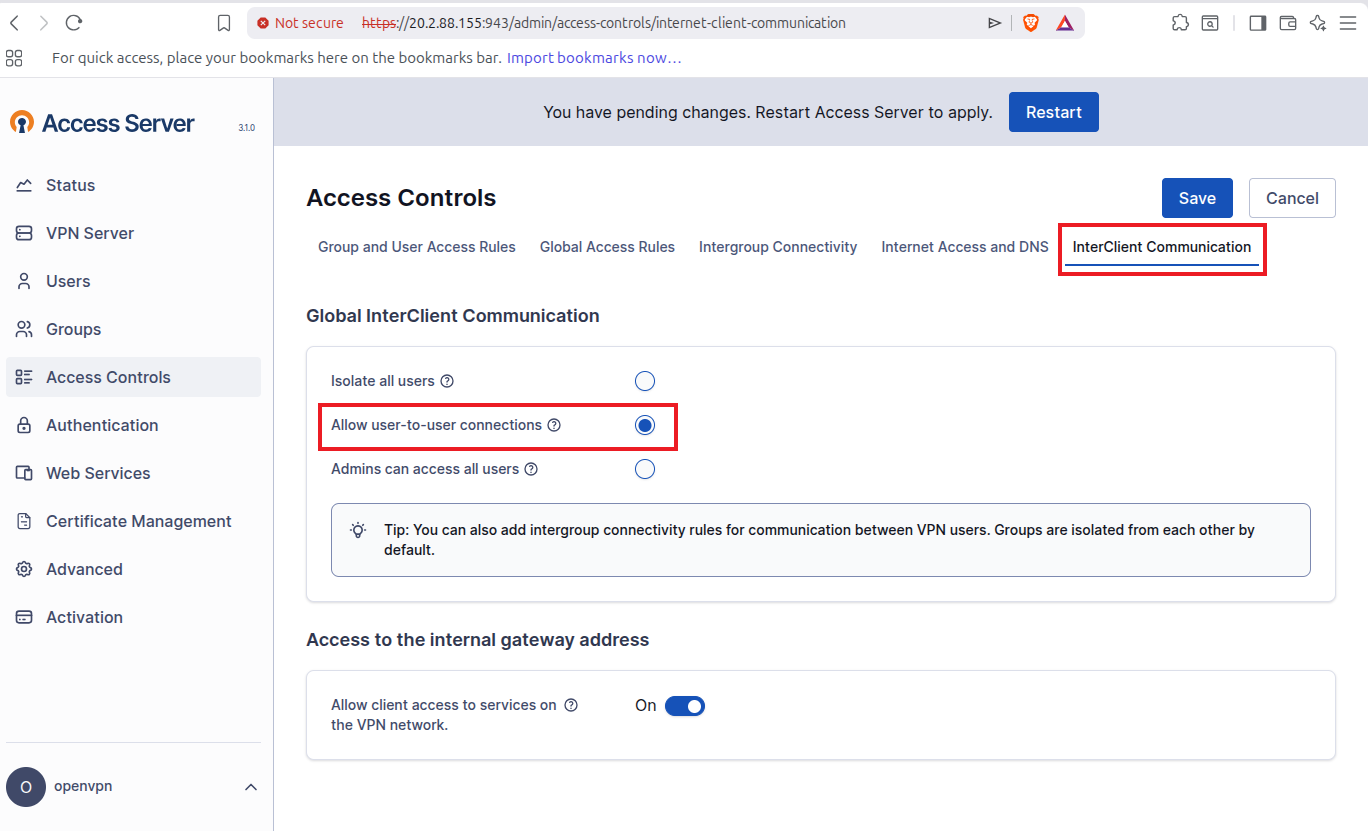
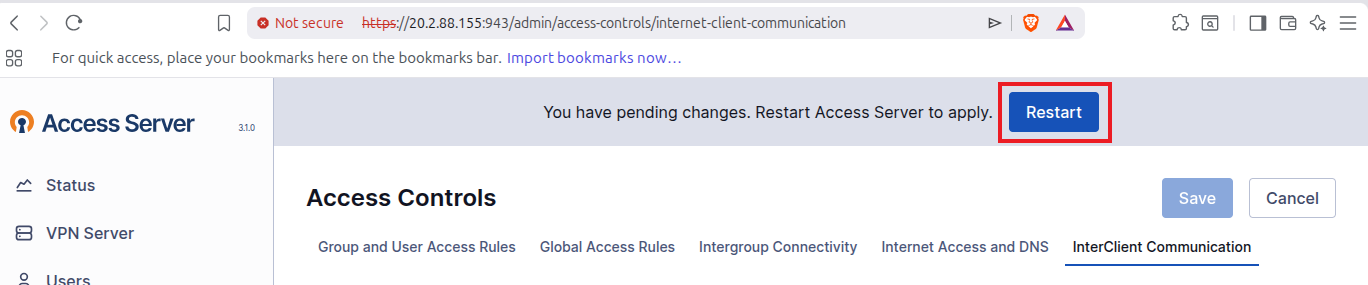
Now click on Restart to restart the access server and apply changes.
Step 8: Download the OpenVPN Connection Profile
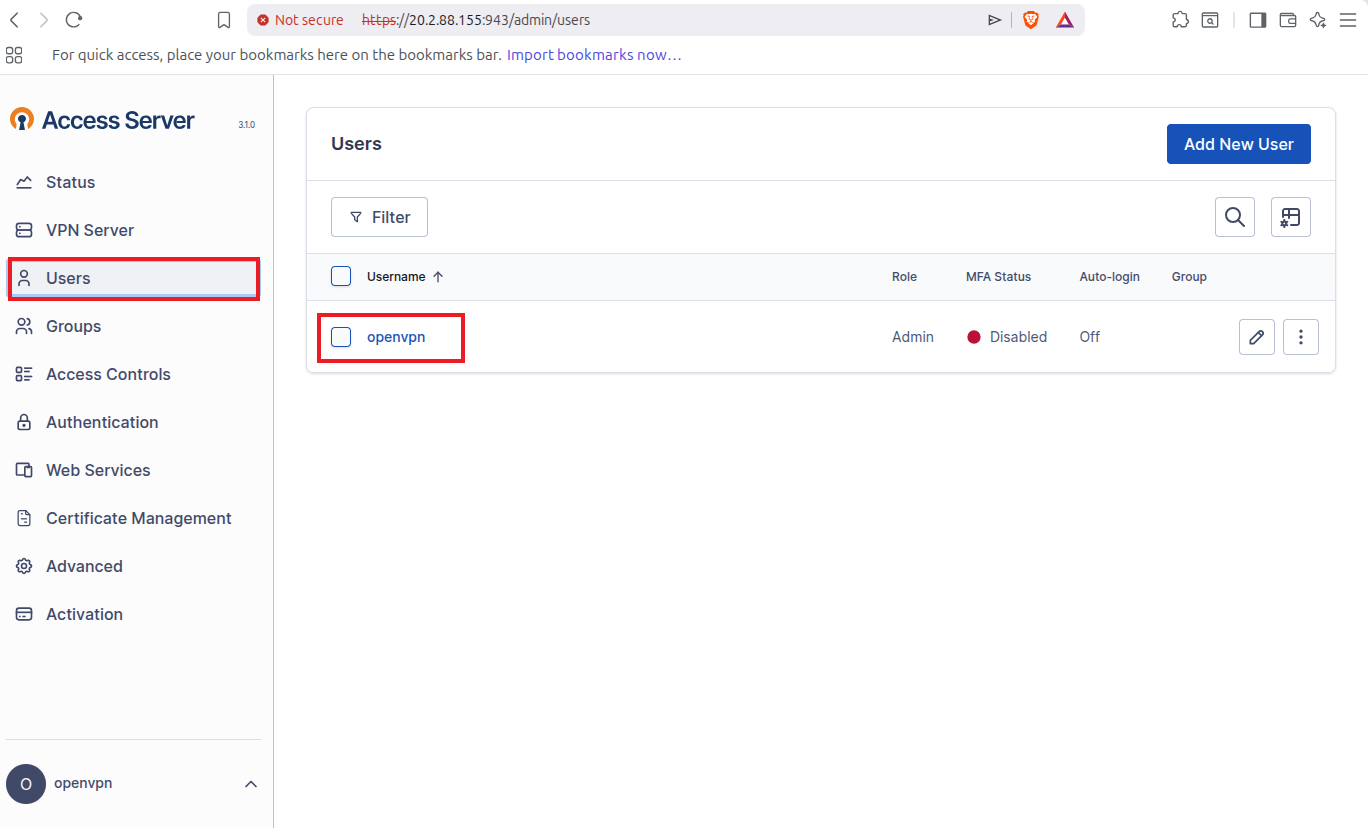
Now go to Users click on one user available which is openvpn.
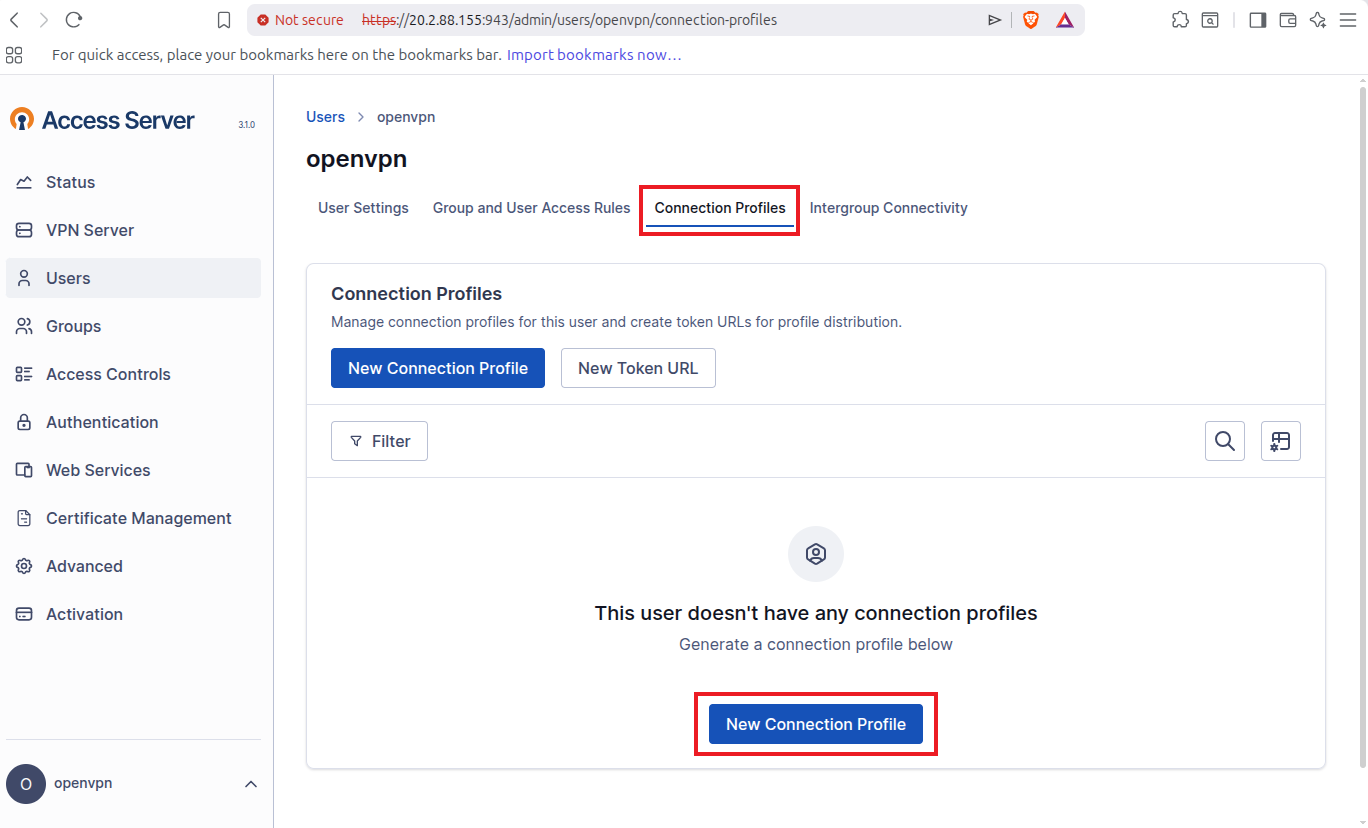
Go to Connection Profiles and then click on New Connection Profile.
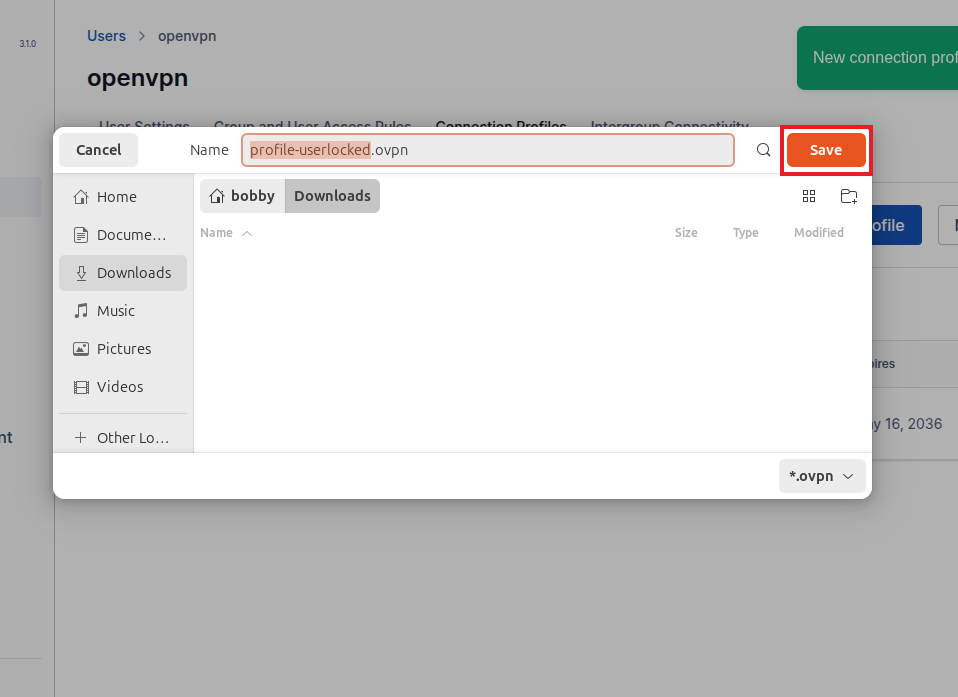
This will open a new pop up from where you can click on Download.

Now save the profile-userlocked.ovpn in your preferred directory, I’ll save it in Downloads/.
Step 9: Connect the Local Linux Gateway to OpenVPN Access Server
Now move to the local Linux machine that will act as the gateway for the local LAN.
Check the network interface and IP with the following command:
Note down your network interface and IP address of the local Linux machine. In my case, my network interface is wlx5091e326480e and my IP address is 192.168.1.11.
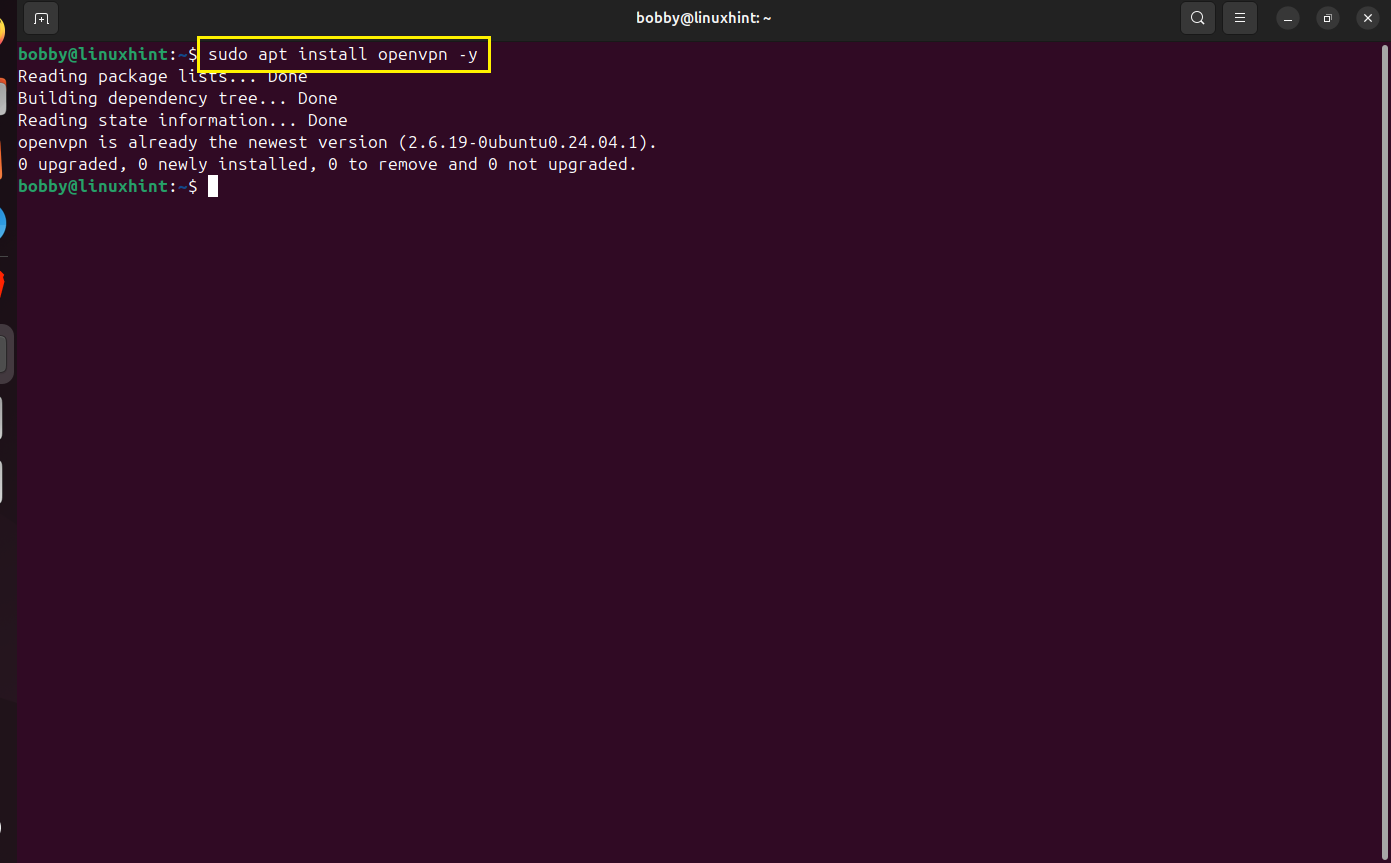
Now install the OpenVPN client on your local gateway machine.
First off, update your machine:
Then write this command:
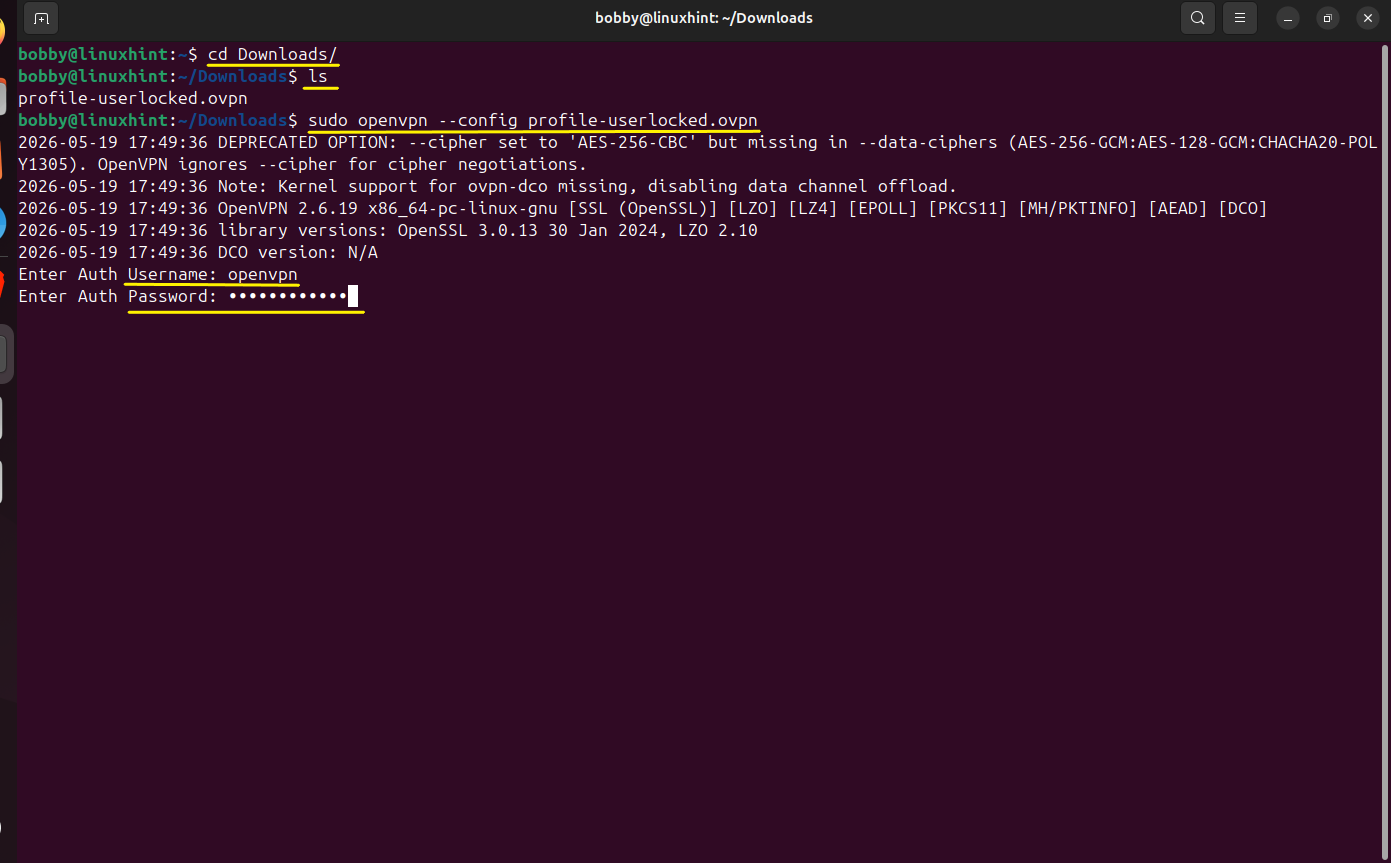
Go to the directory where the profile was downloaded, in my case it was Downloads/.
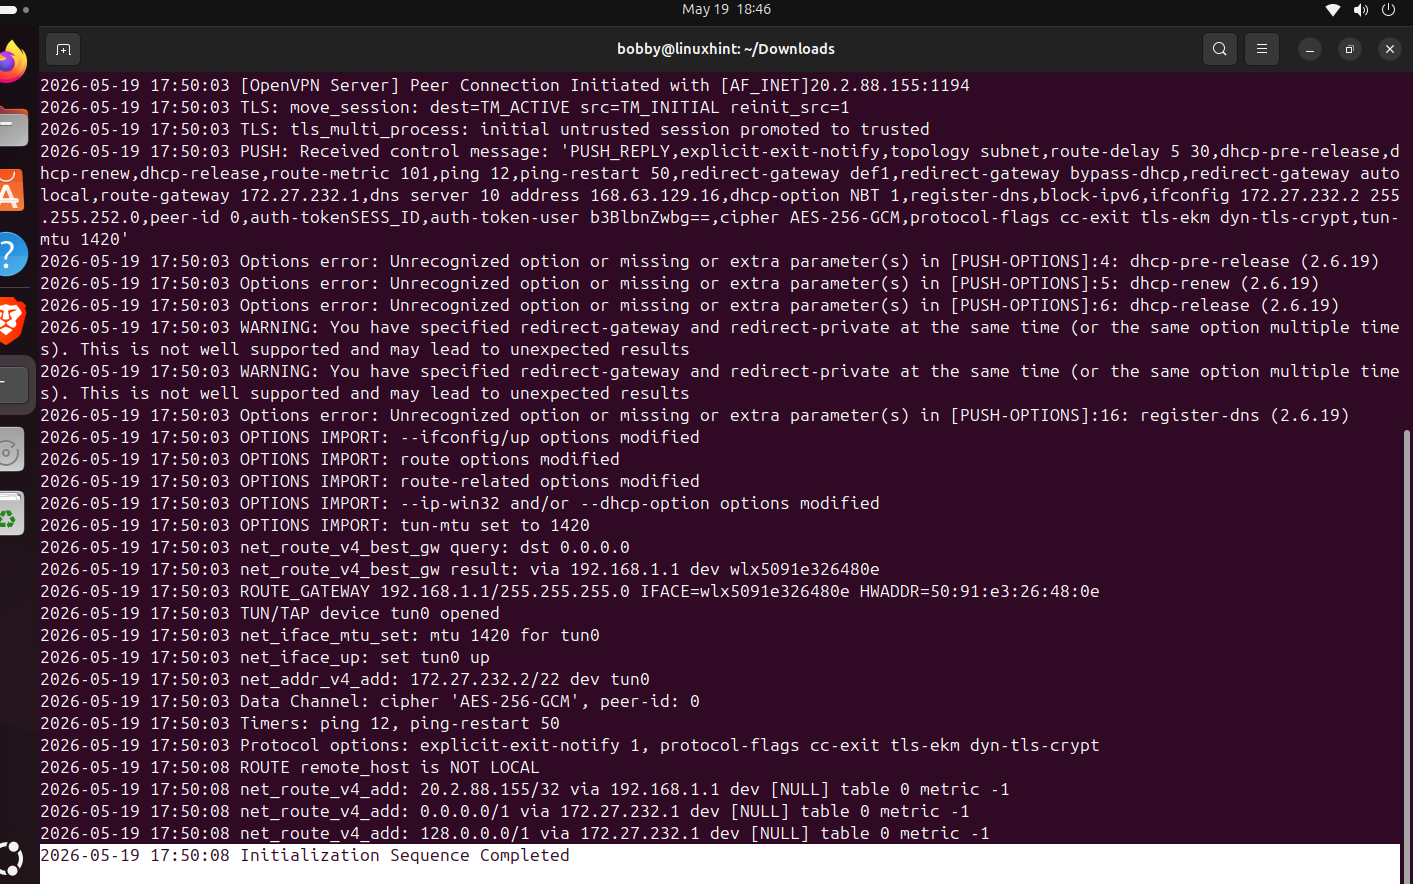
then write the command here to use the connection profile and run the openvpn access server to establish the tunnel:
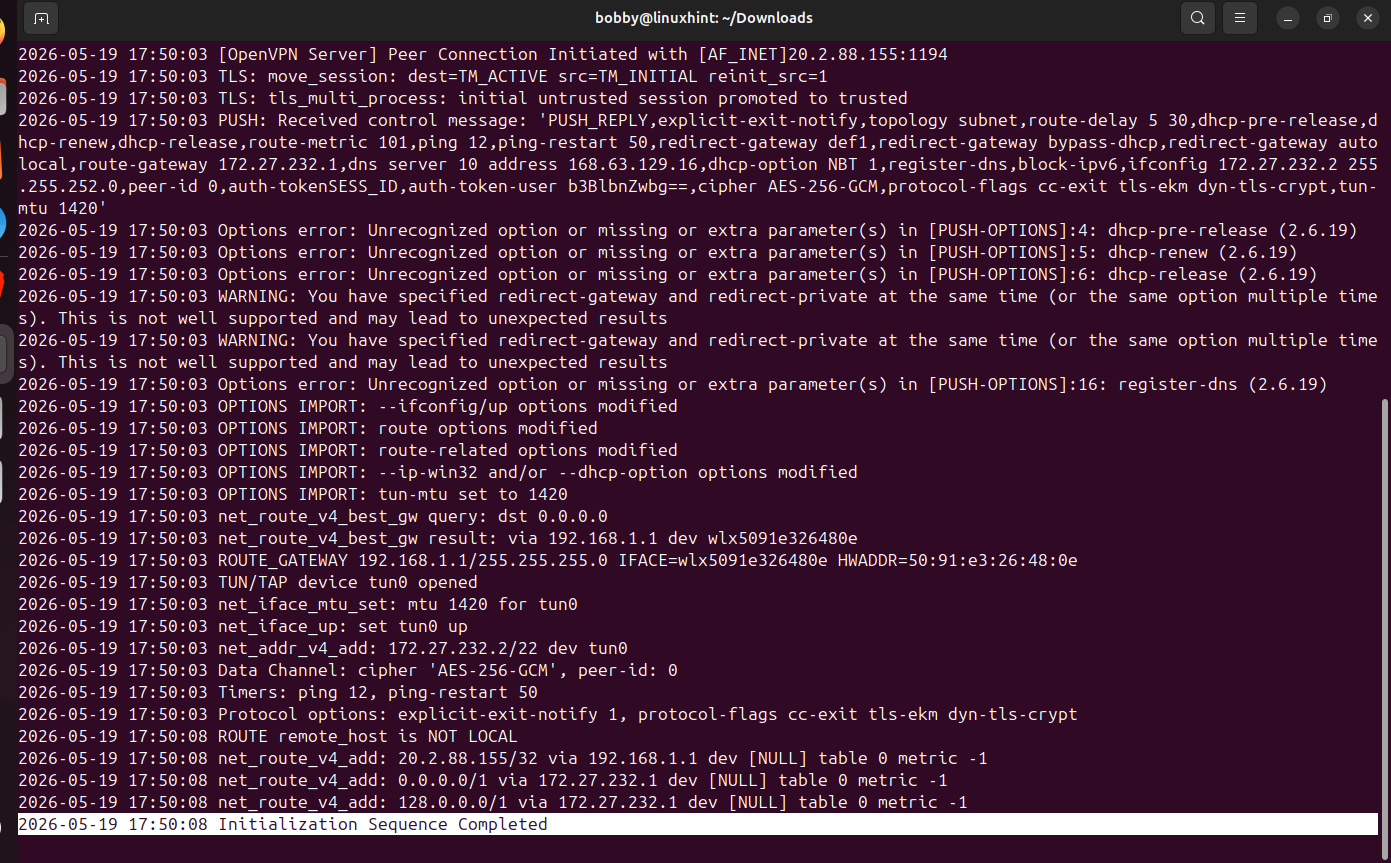
When you are prompted add the username and password for openvpn.
Now notice this line: Initialization Sequence Completed.
Keep this terminal window running and go to another terminal to check this tunnel that has been established. In the new terminal write this command:
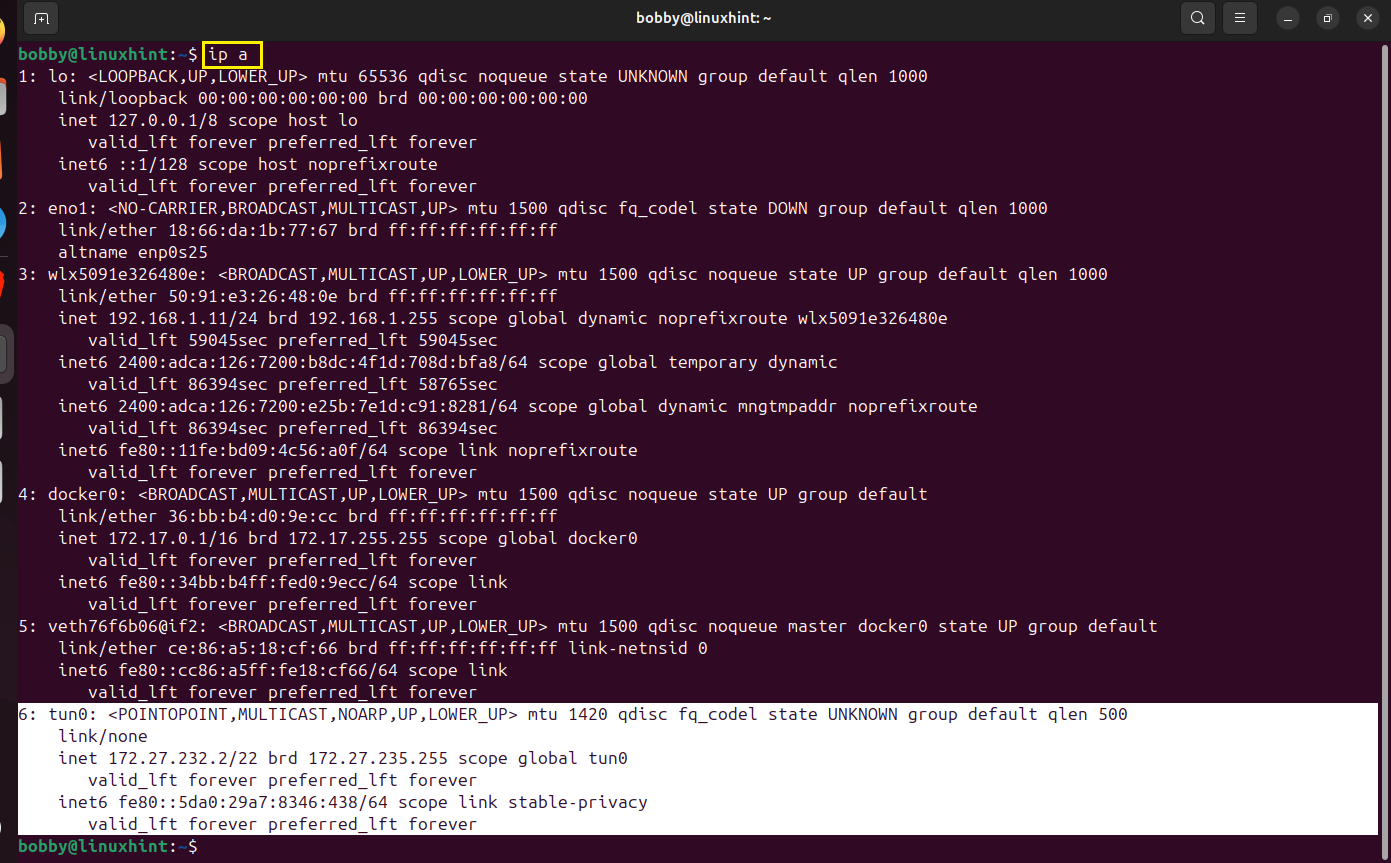
We see the tunnel interface tun0 which has received the address 172.27.232.2/22.
To further verify you can also run:
Step 10: Enable IP Forwarding on the Local Linux Gateway Machine
The local linux machine is connected to the OpenVPN but it is still acting like a VPN client and to make it work as a gateway to the local LAN, we need to enable IP forwarding.
You need to run this command:

Verify it using:

The output should be 1.
IP forwarding has been enabled but that is not permanent, to make it permanent edit the .conf file:
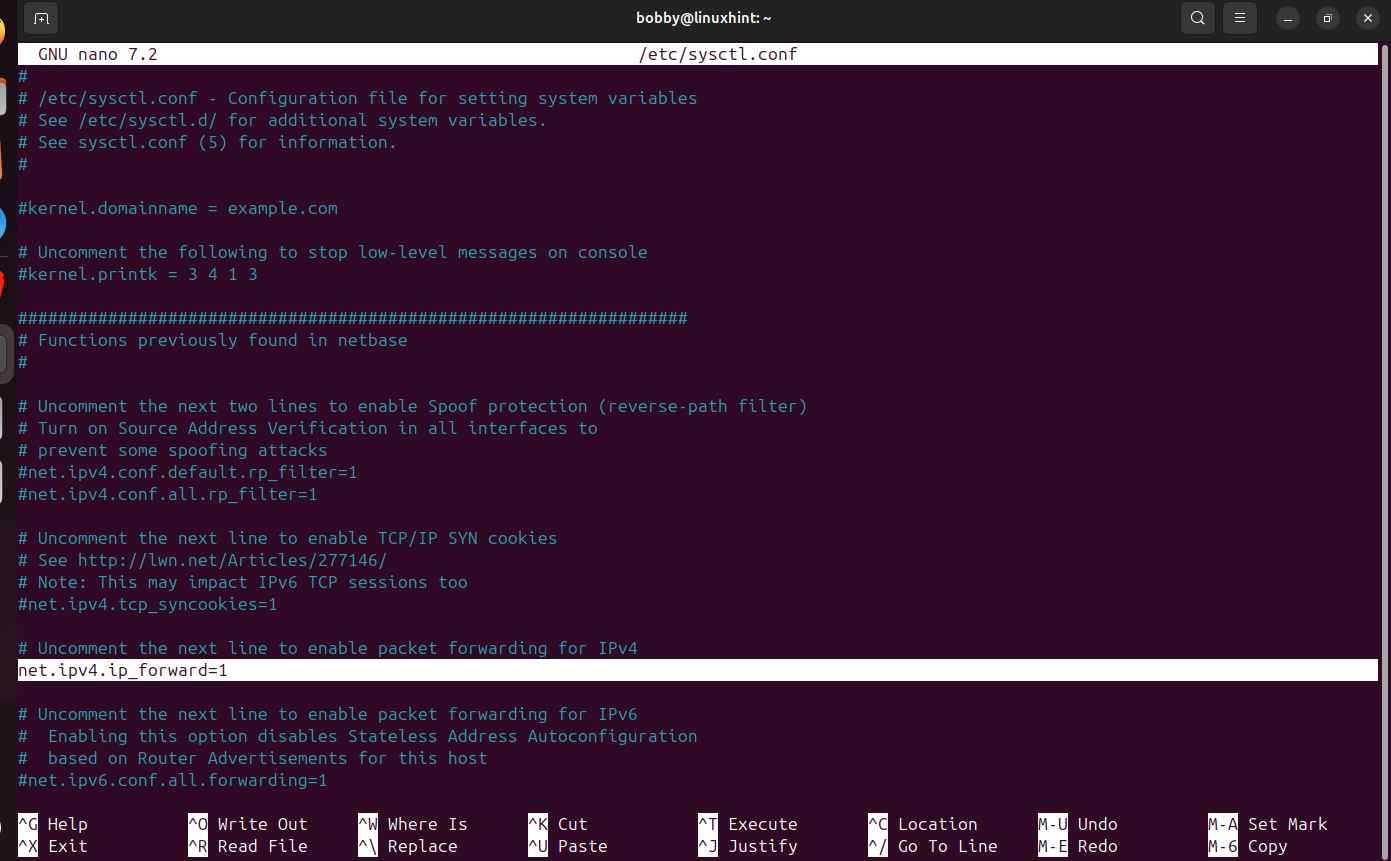
Remove the # from this highlighted line. Now Save with CTRL + O then hit Enter and then CTRL + X.
Now apply this permanently:

Now this local Linux gateway machine can now forward the traffic between the local LAN interface and the encrypted, secure VPN tunnel interface.
Step 11: Configure NAT and Forwarding Rules on Local Linux Gateway
Now we need to configure firewall rules for our local Linux gateway machine.
The values on my machine are as follows, you can replace them with yours wherever they are used in the commands.
| Field | Value |
|---|---|
| Local Subnet | 192.168.1.0/24 |
| Local LAN interface | wlx5091e326480e |
| VPN tunnel interface | tun0 |
| Azure subnet | 10.30.1.0/24 |
Now add a NAT rule for the traffic going from local LAN towards the Azure Network through the tunnel.
Now we need to allow traffic from the local LAN interface to the VPN tunnel:
Also allow the return traffic from the tunnel to local LAN:
Do the verification for the NAT rule:
You need to verify the forwarding rules:
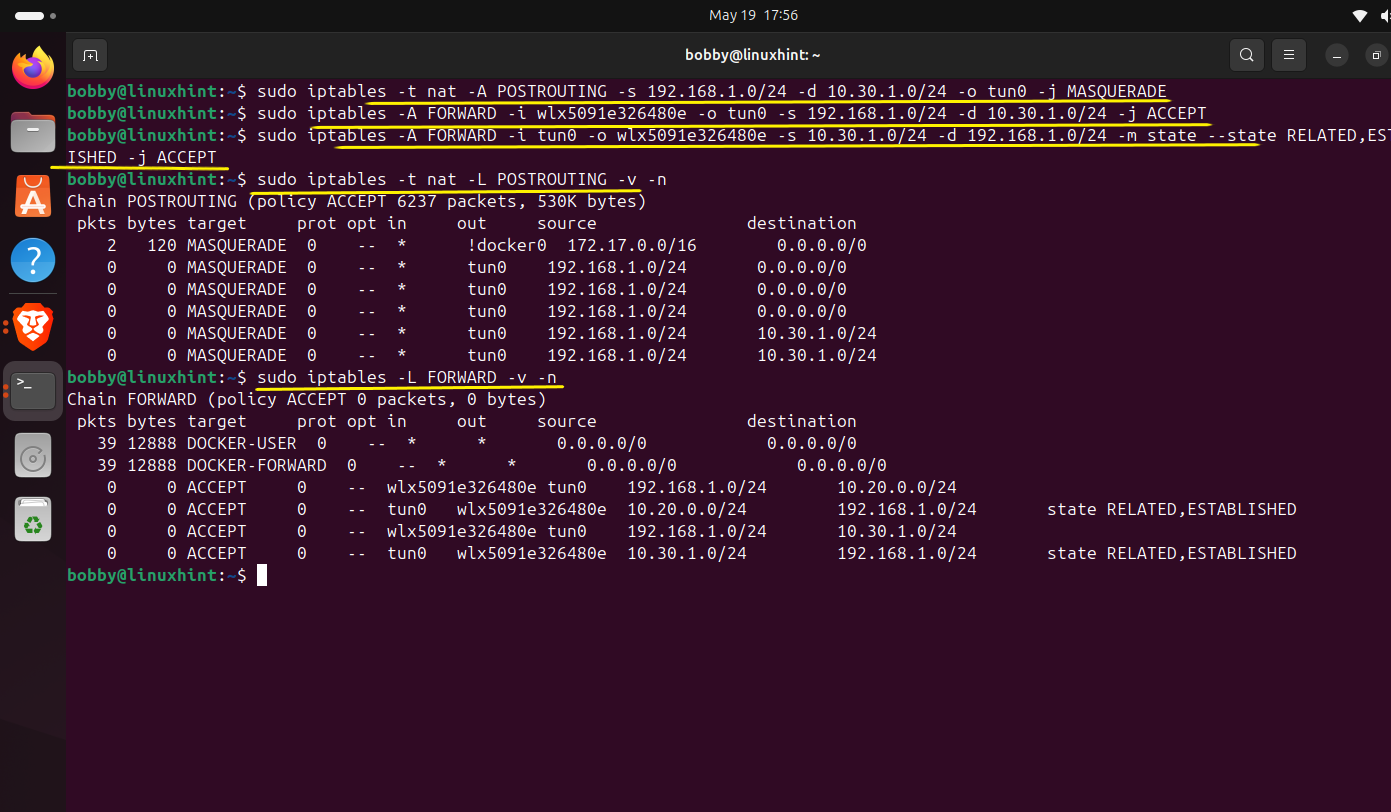
To save these rules permanently run this command:

This finishes the local LAN firewall configuration.
Step 12: Create an Azure Route Table and Routes
Azure also needs to know how to send traffic back to the local LAN and for that matter we need to point it towards the private IP of OpenVPN Access Server VM.
The private IP of OpenVPN Access Server is 10.30.1.5

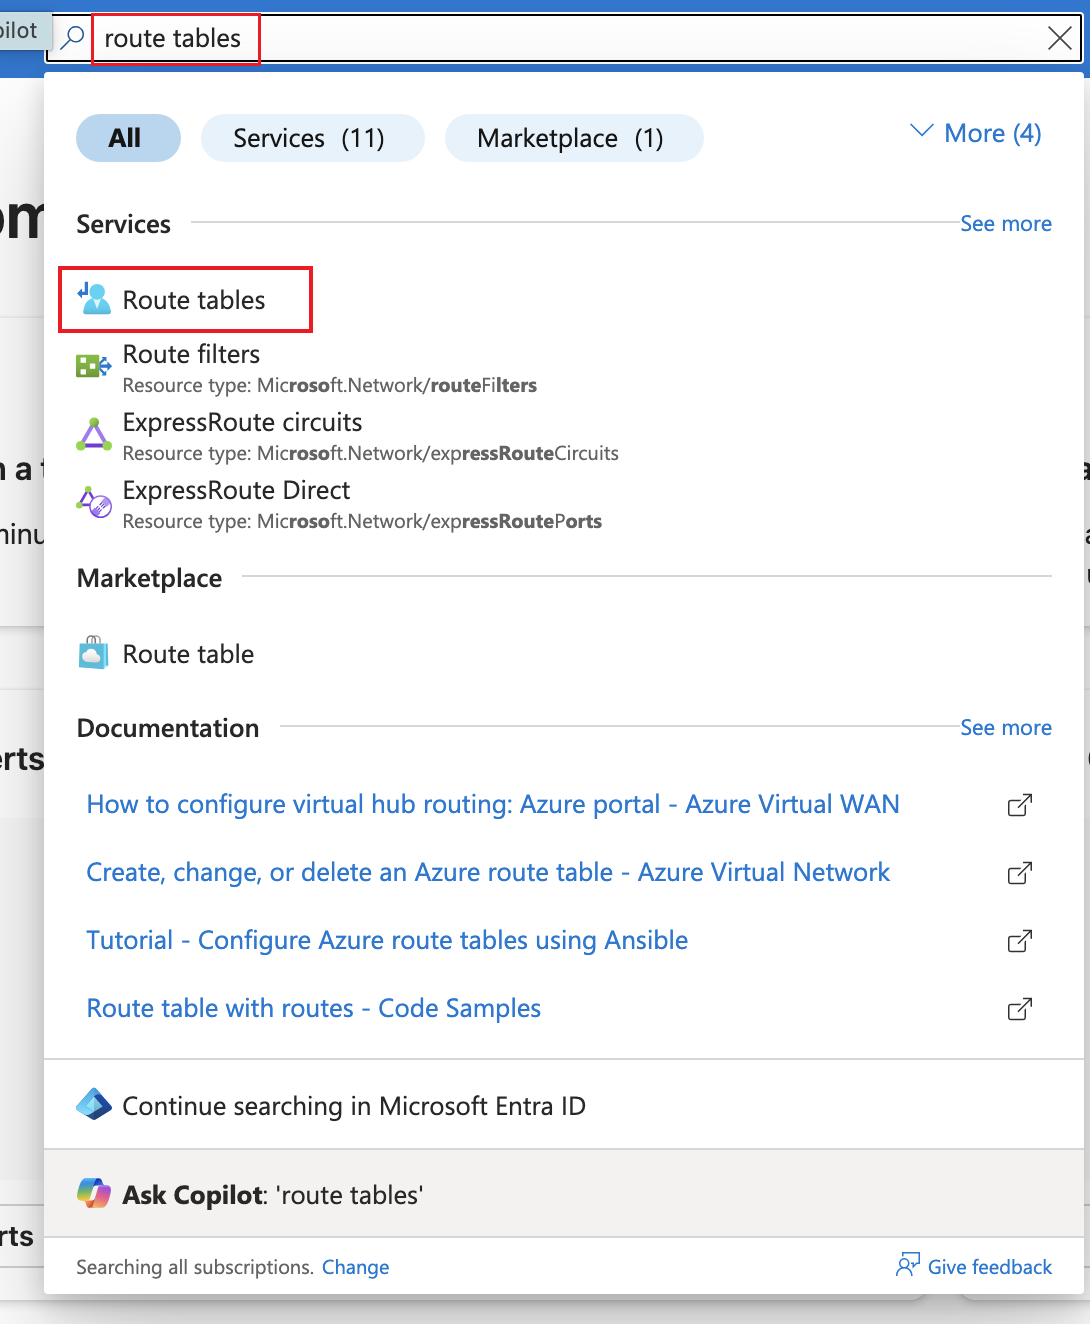
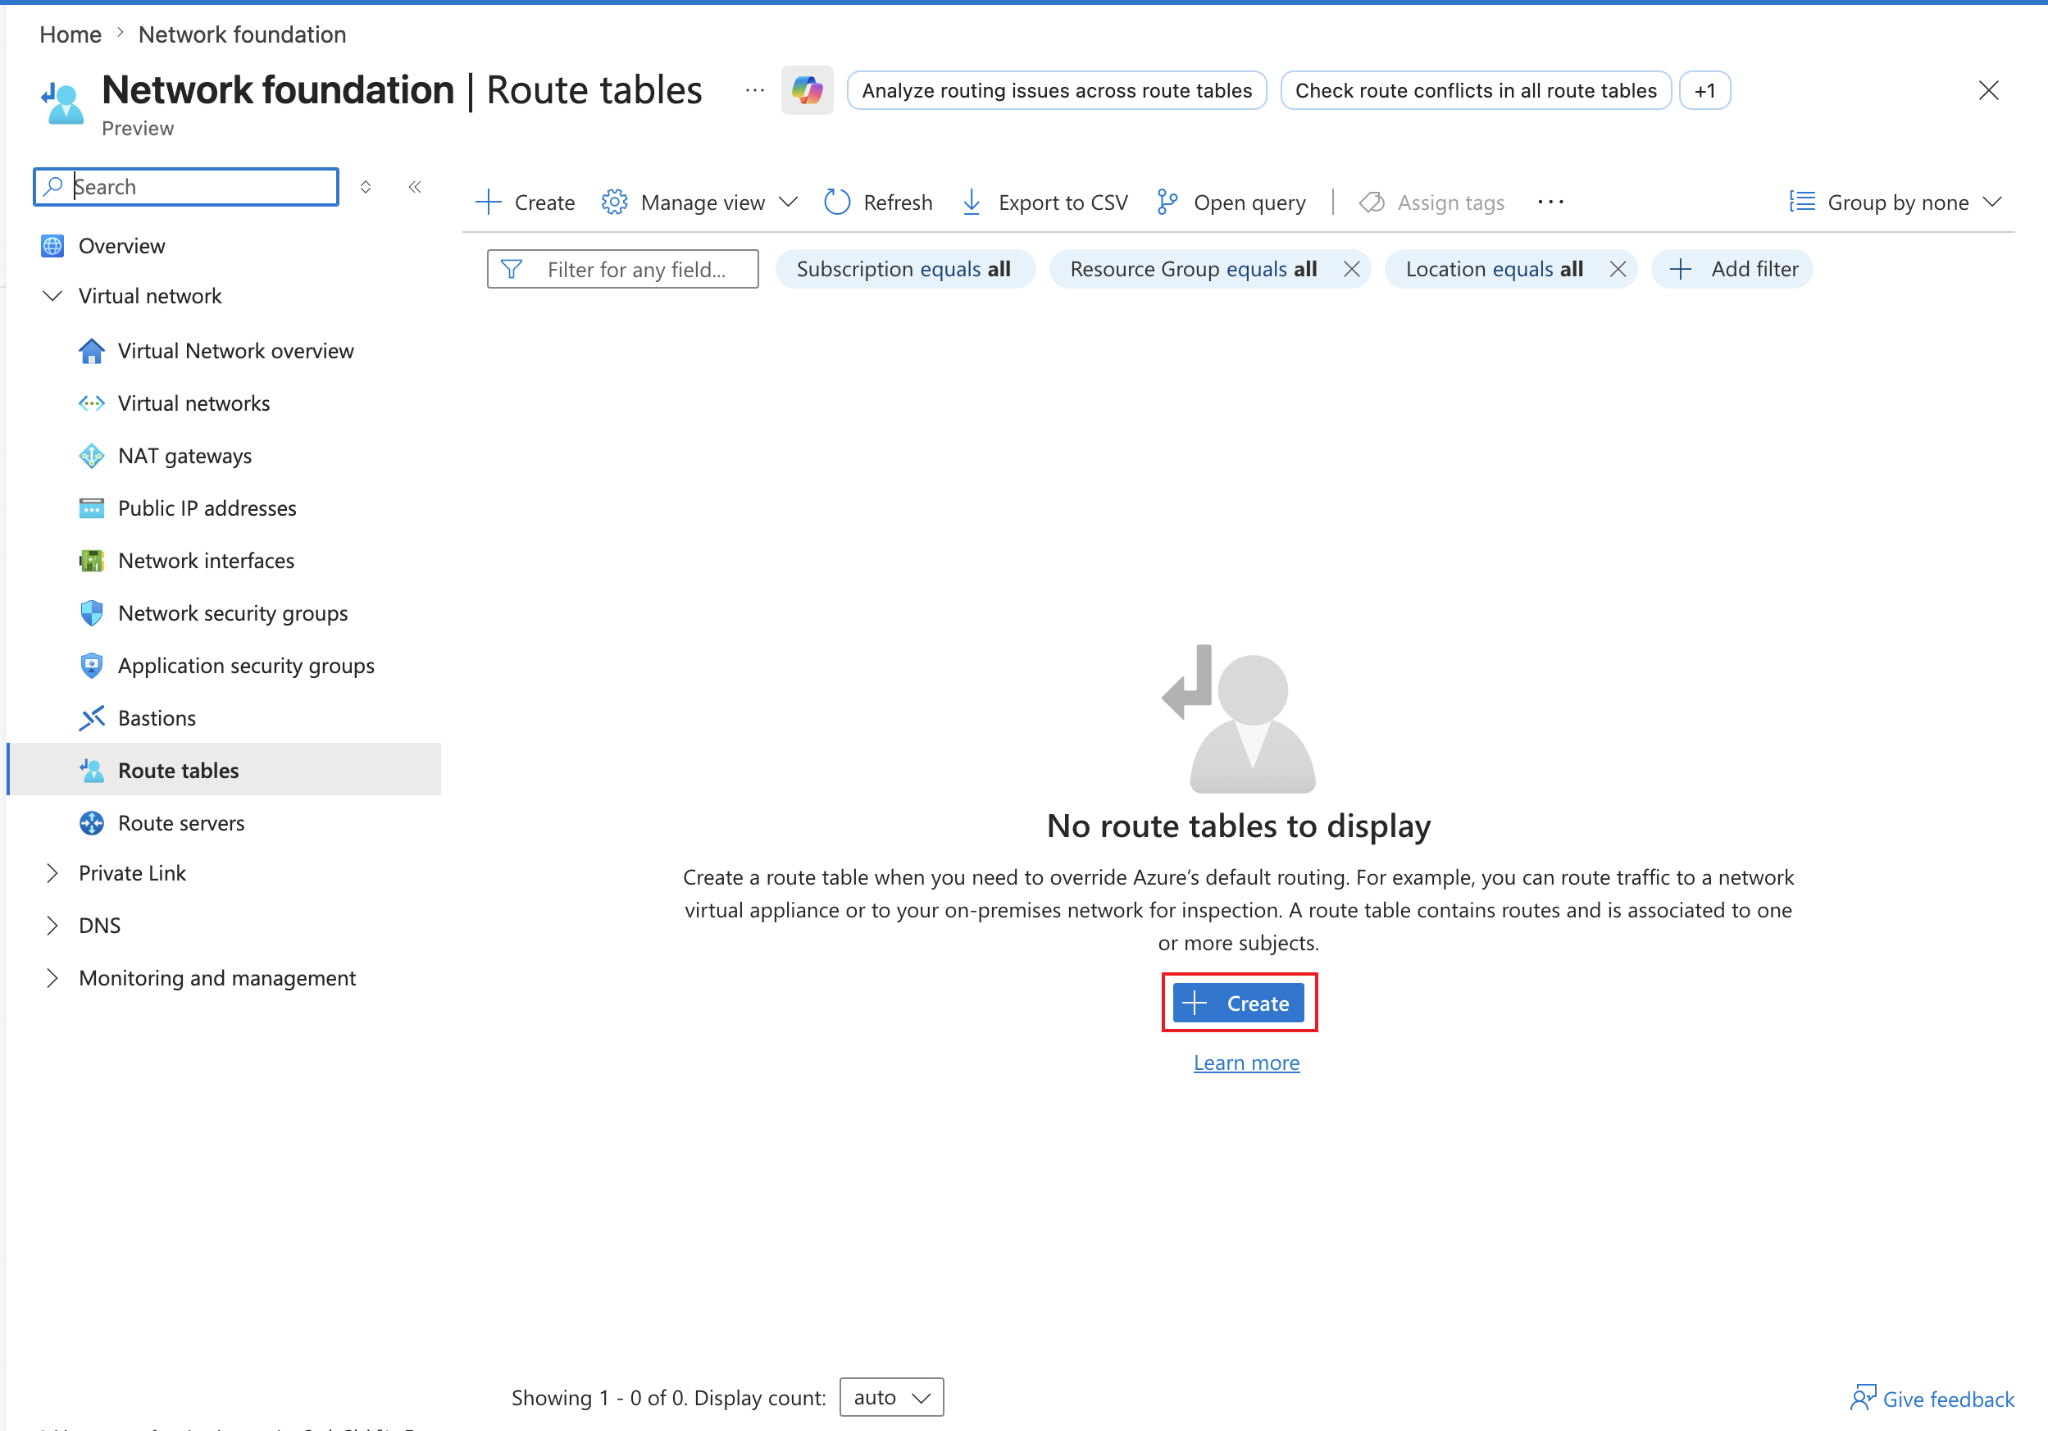
Go to Azure portal and search for route tables and click on Route tables.
Click on Create.
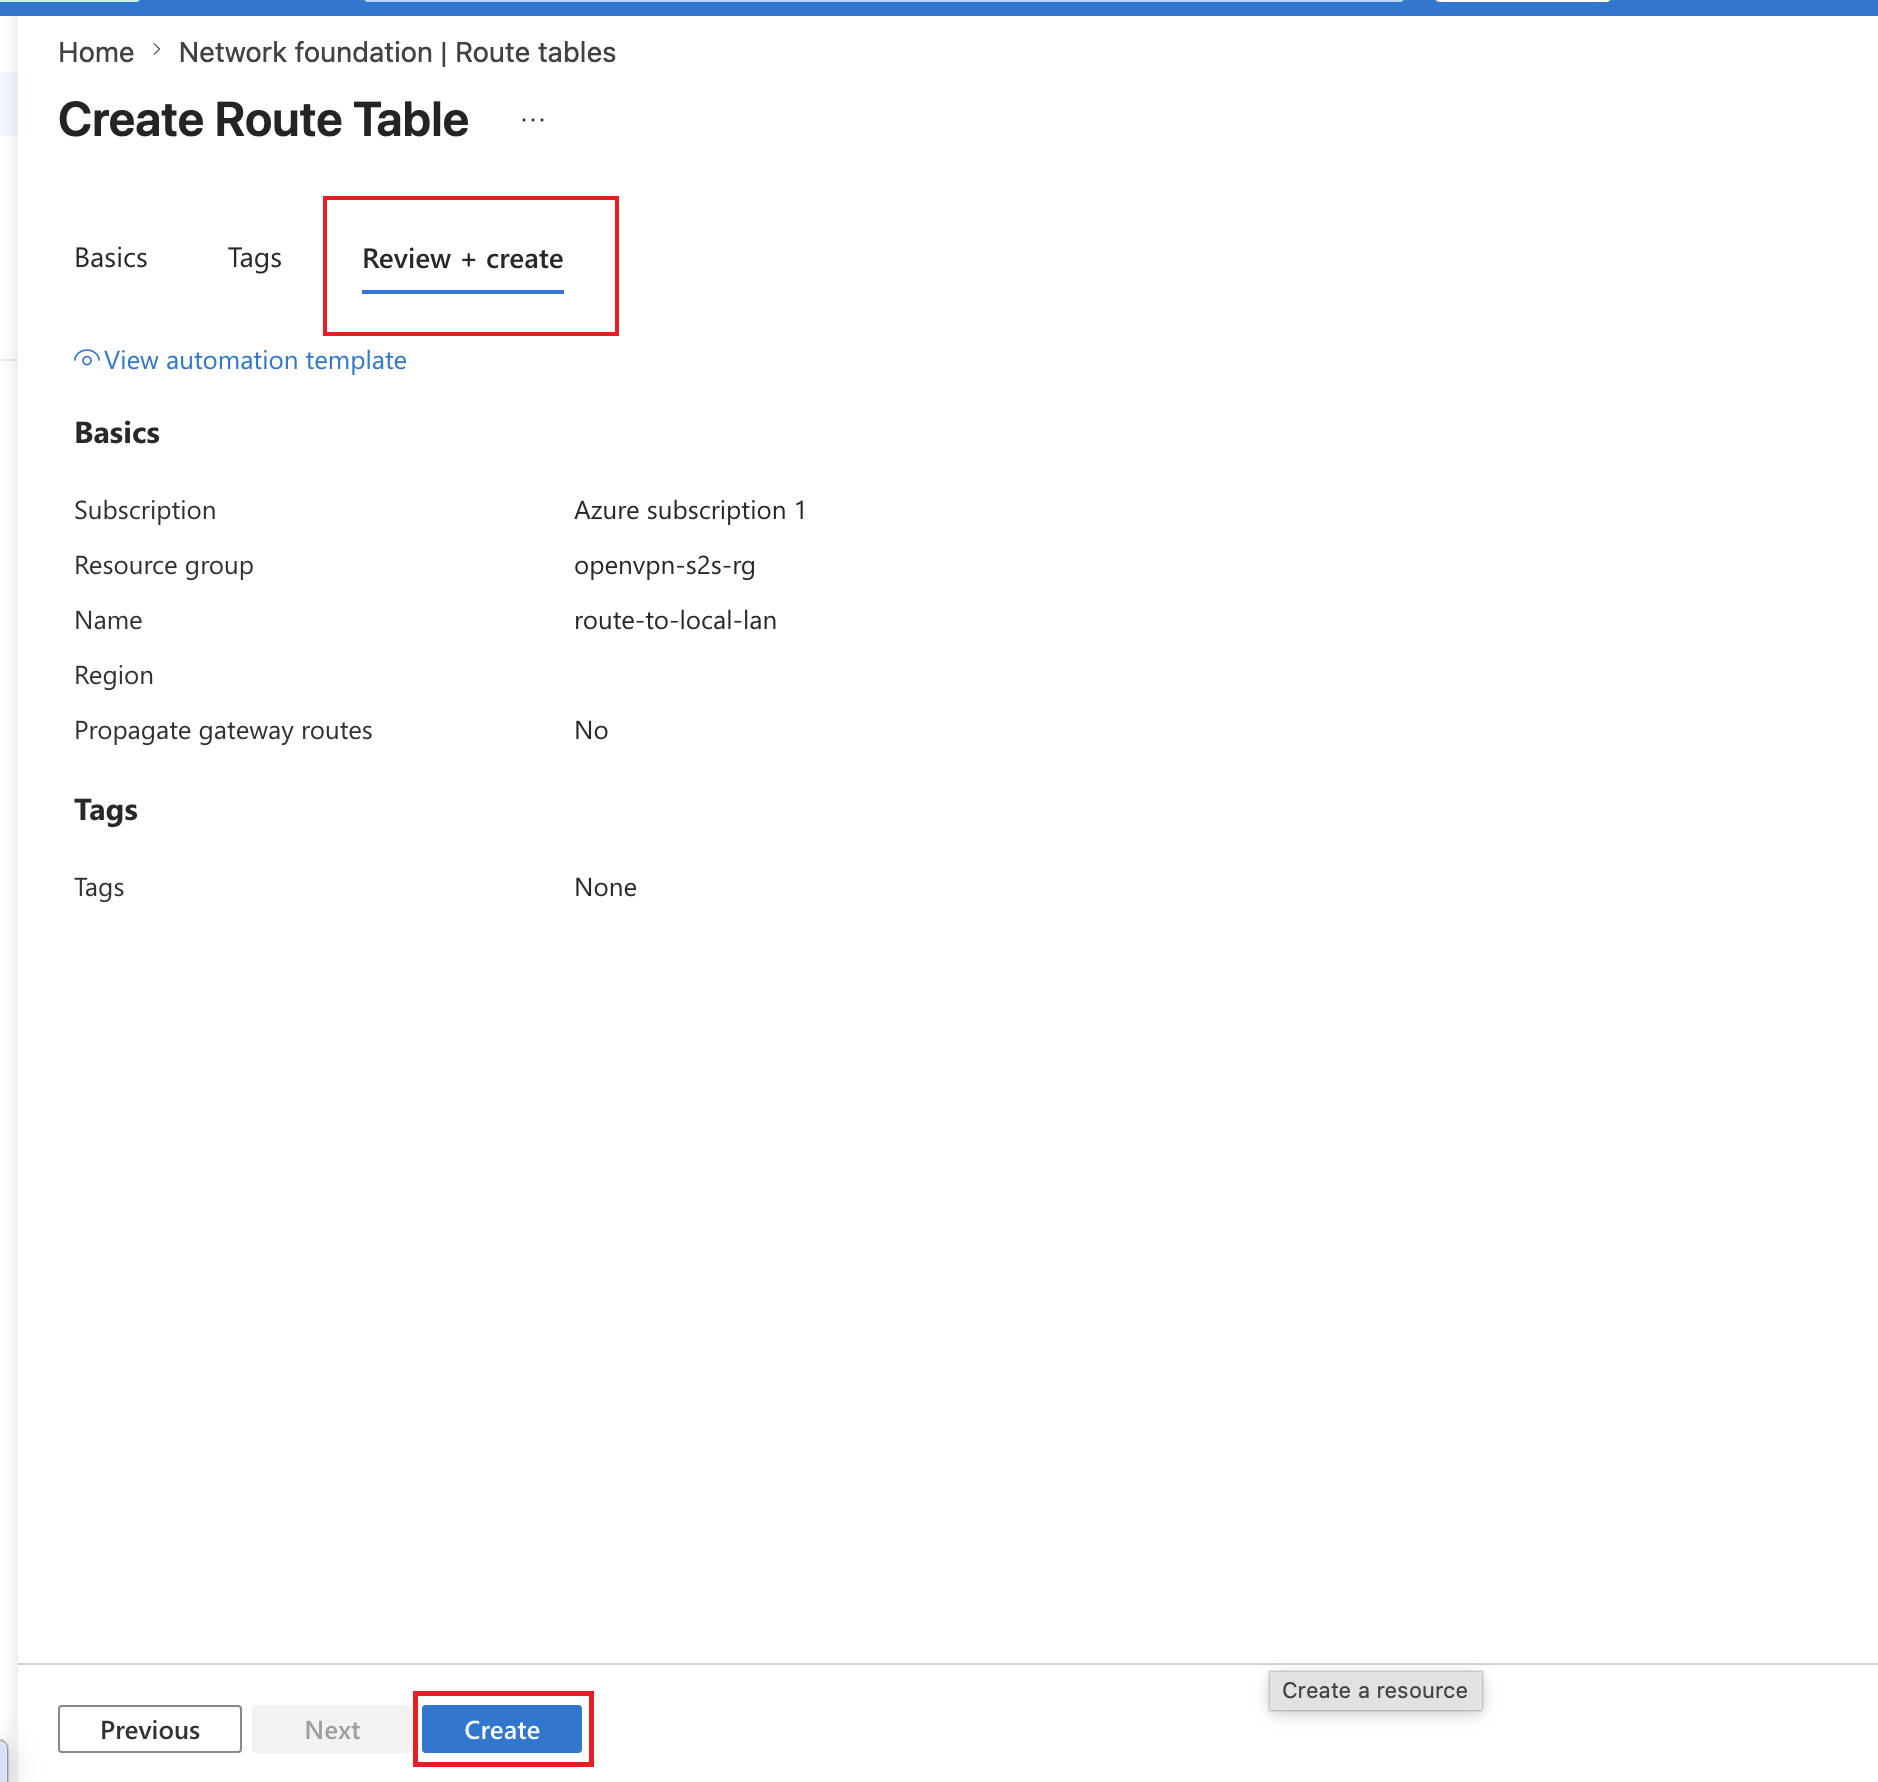
Now fill in the details such as resource group, name the table as route-to-local-lan or you can name it whatever you like such as openvp-route-table.
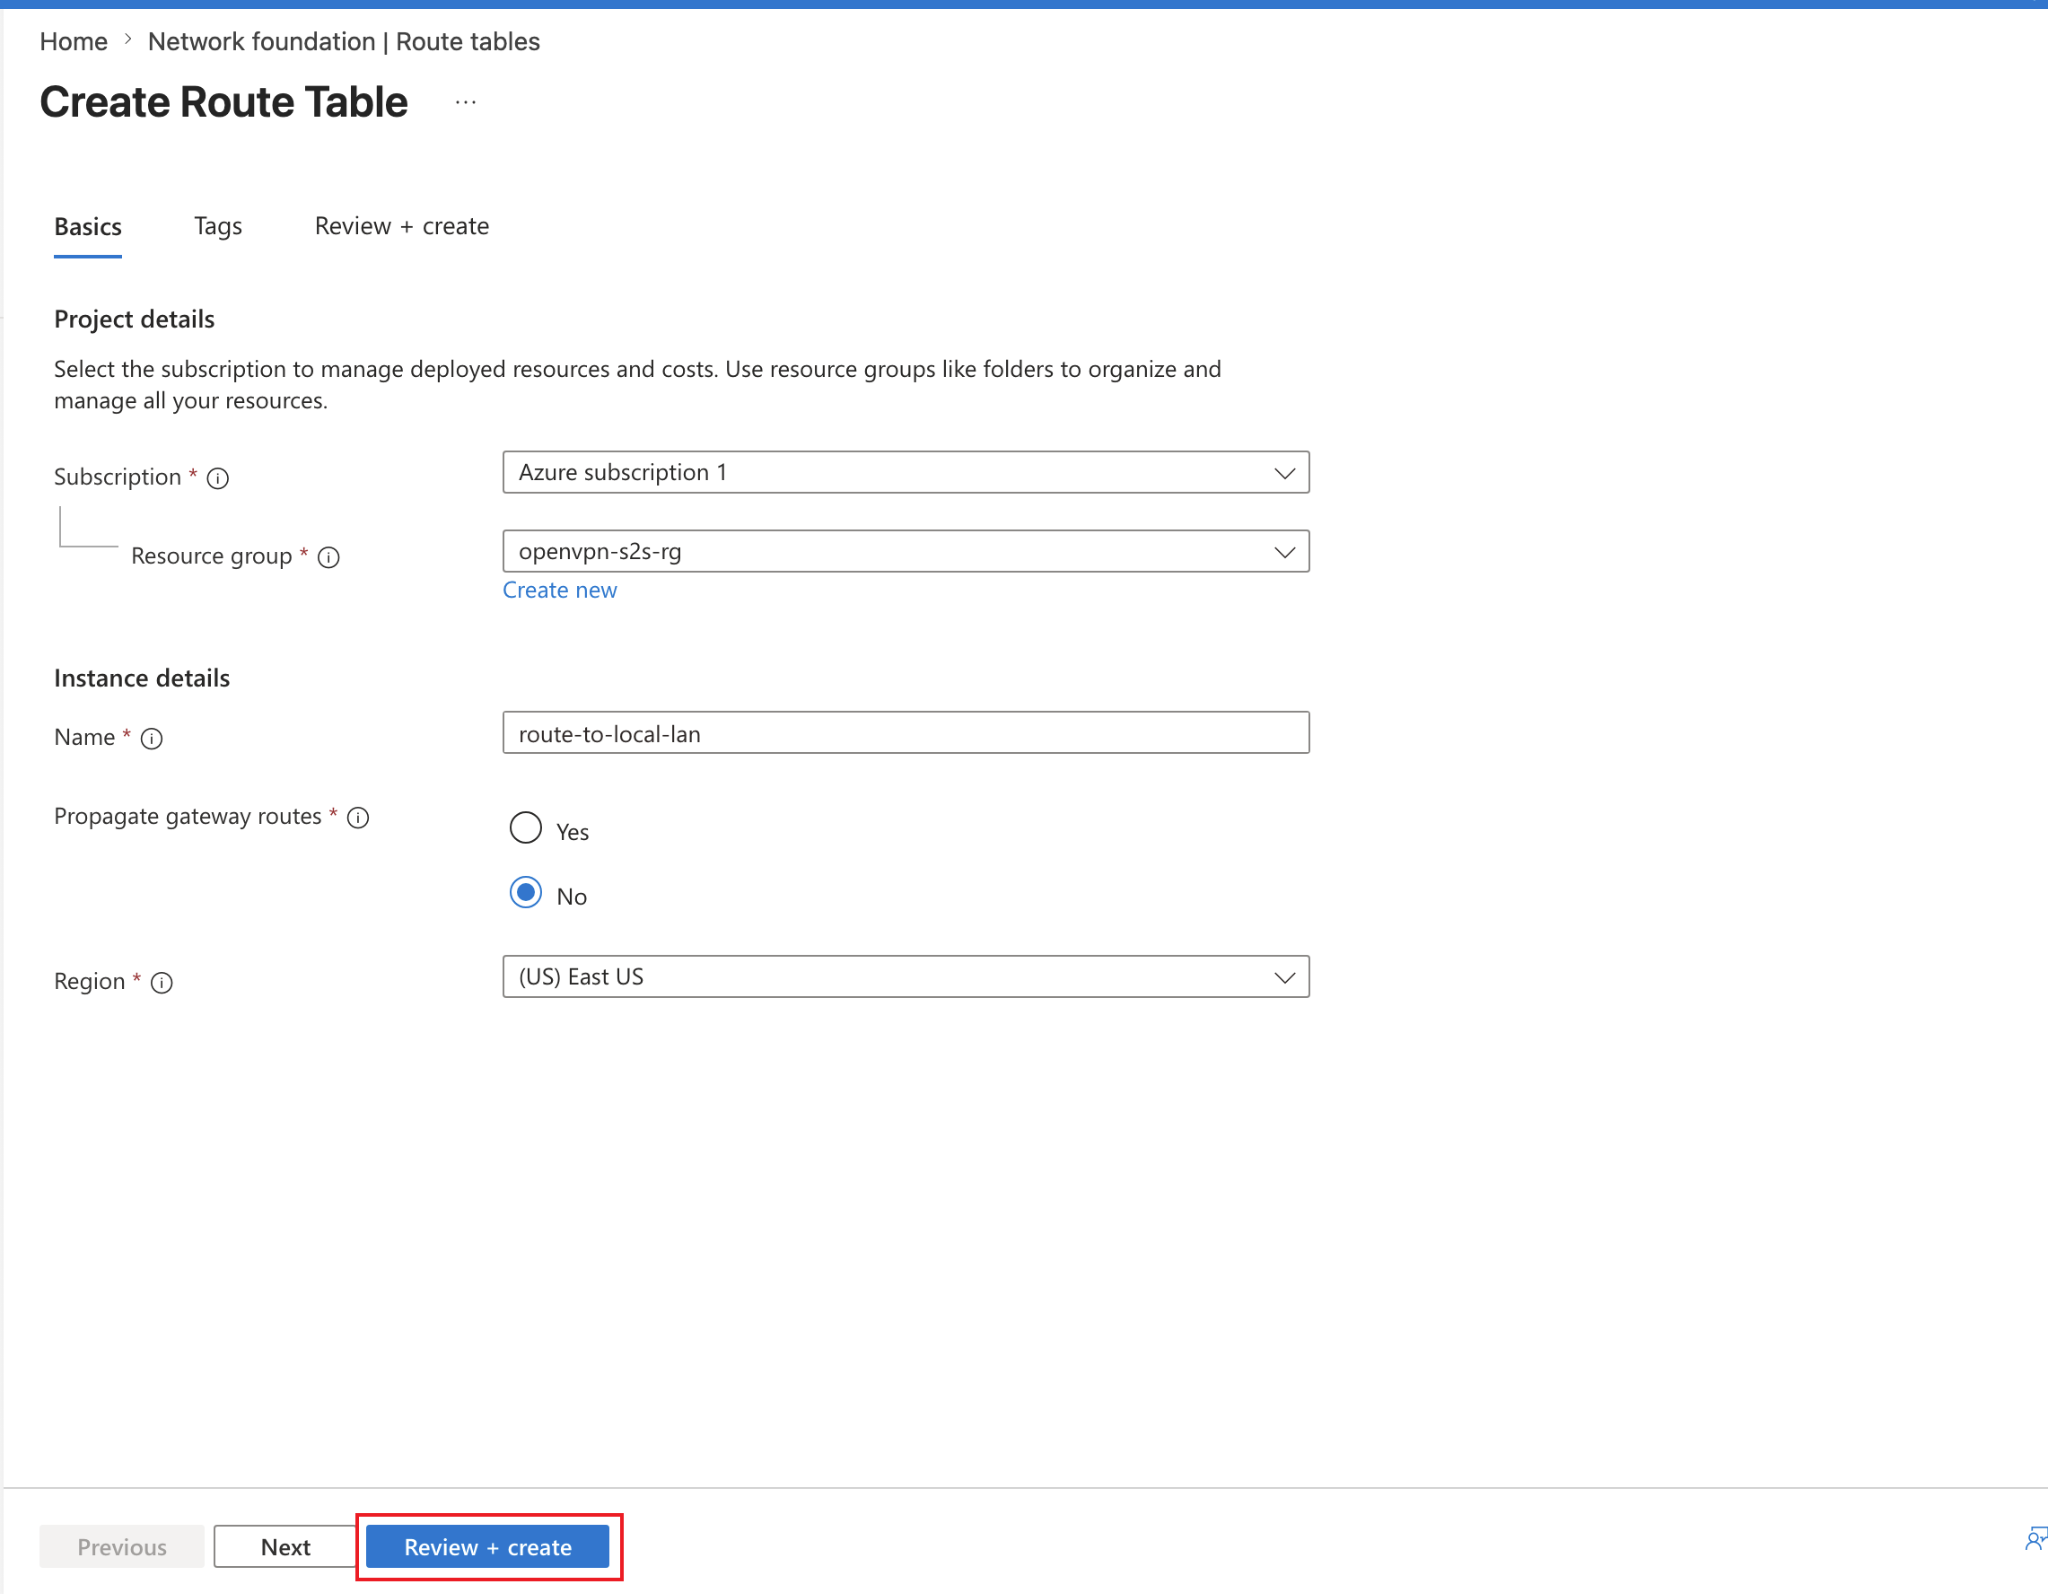
Now click on Review + create. Review your entries and then click on Create.
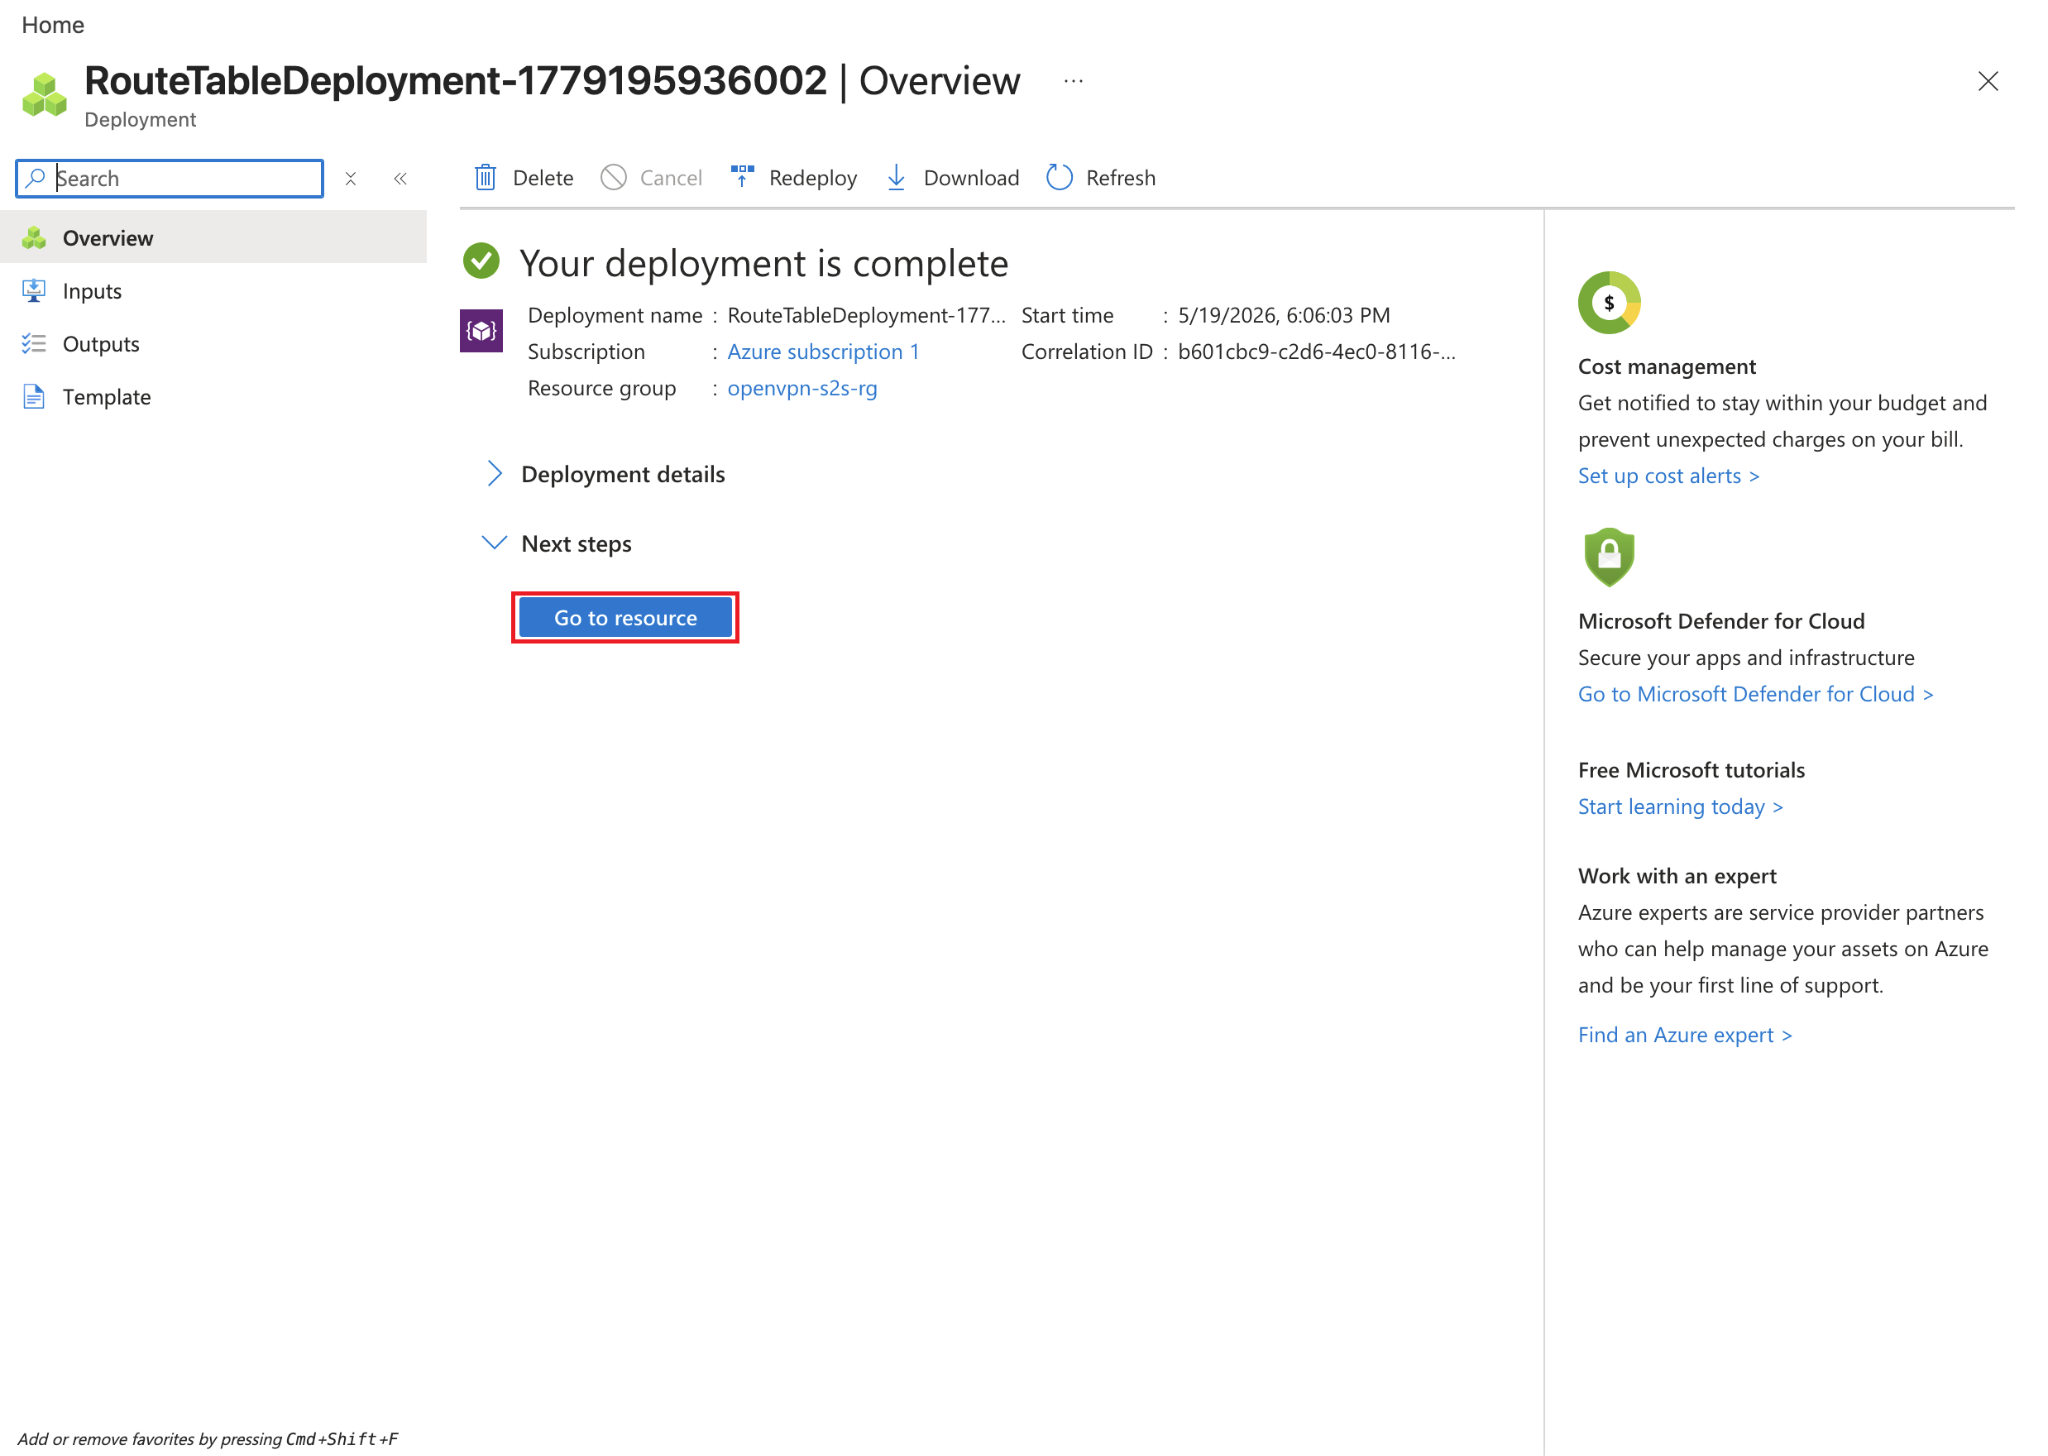
Now finally when the route table is deployed, click on Go to resource.
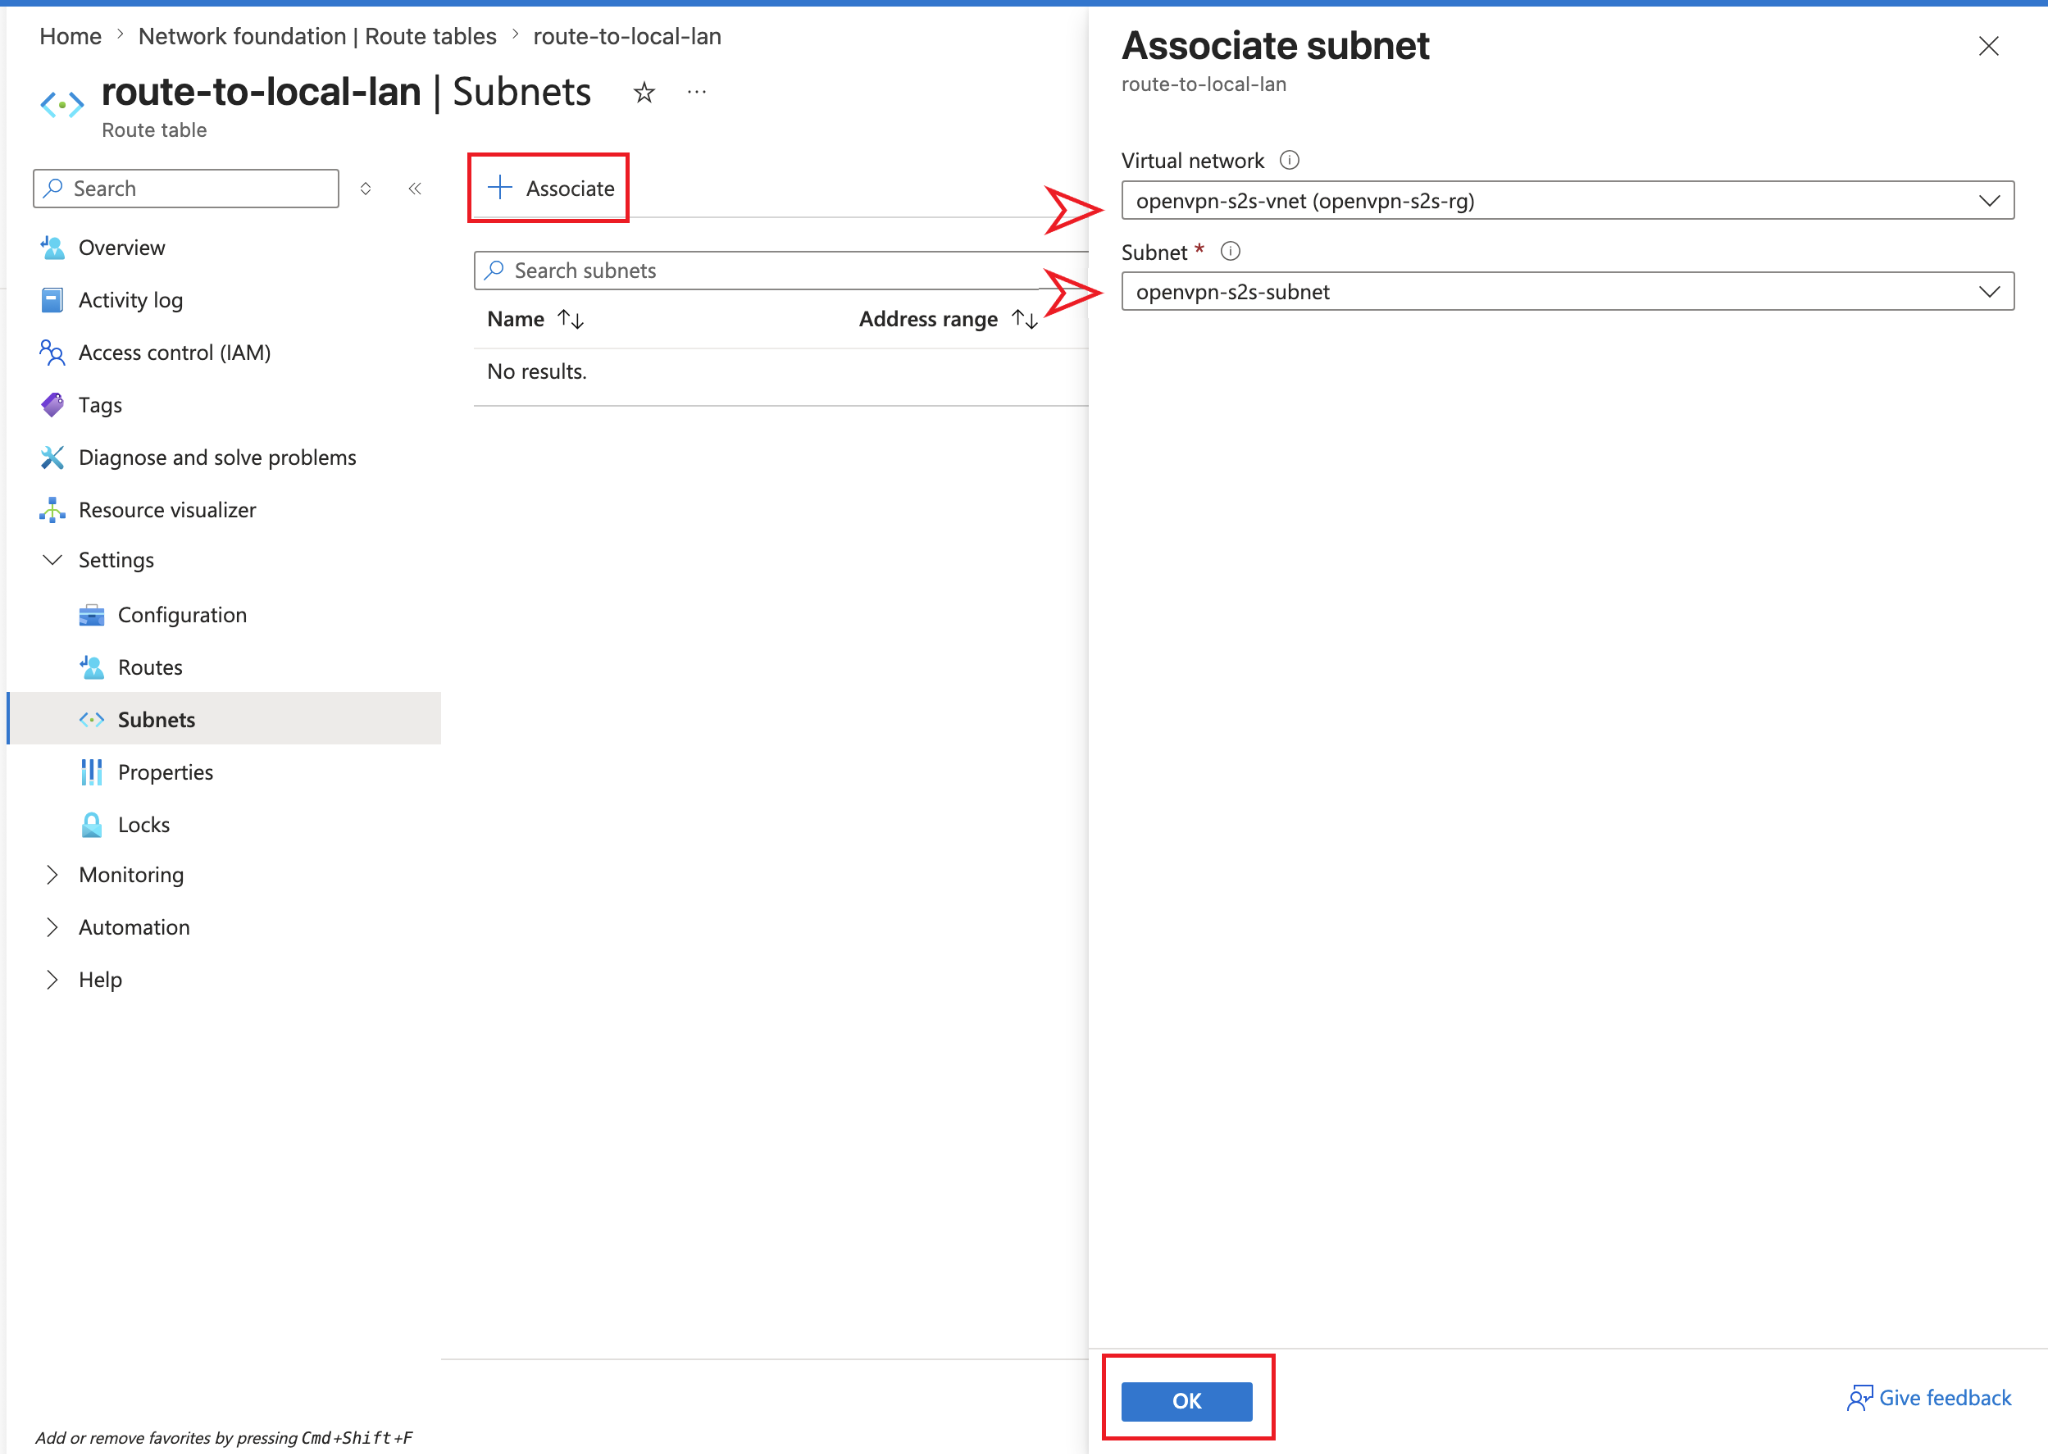
Inside the route table we just created, we will go to Settings and under that we will go to Subnets.
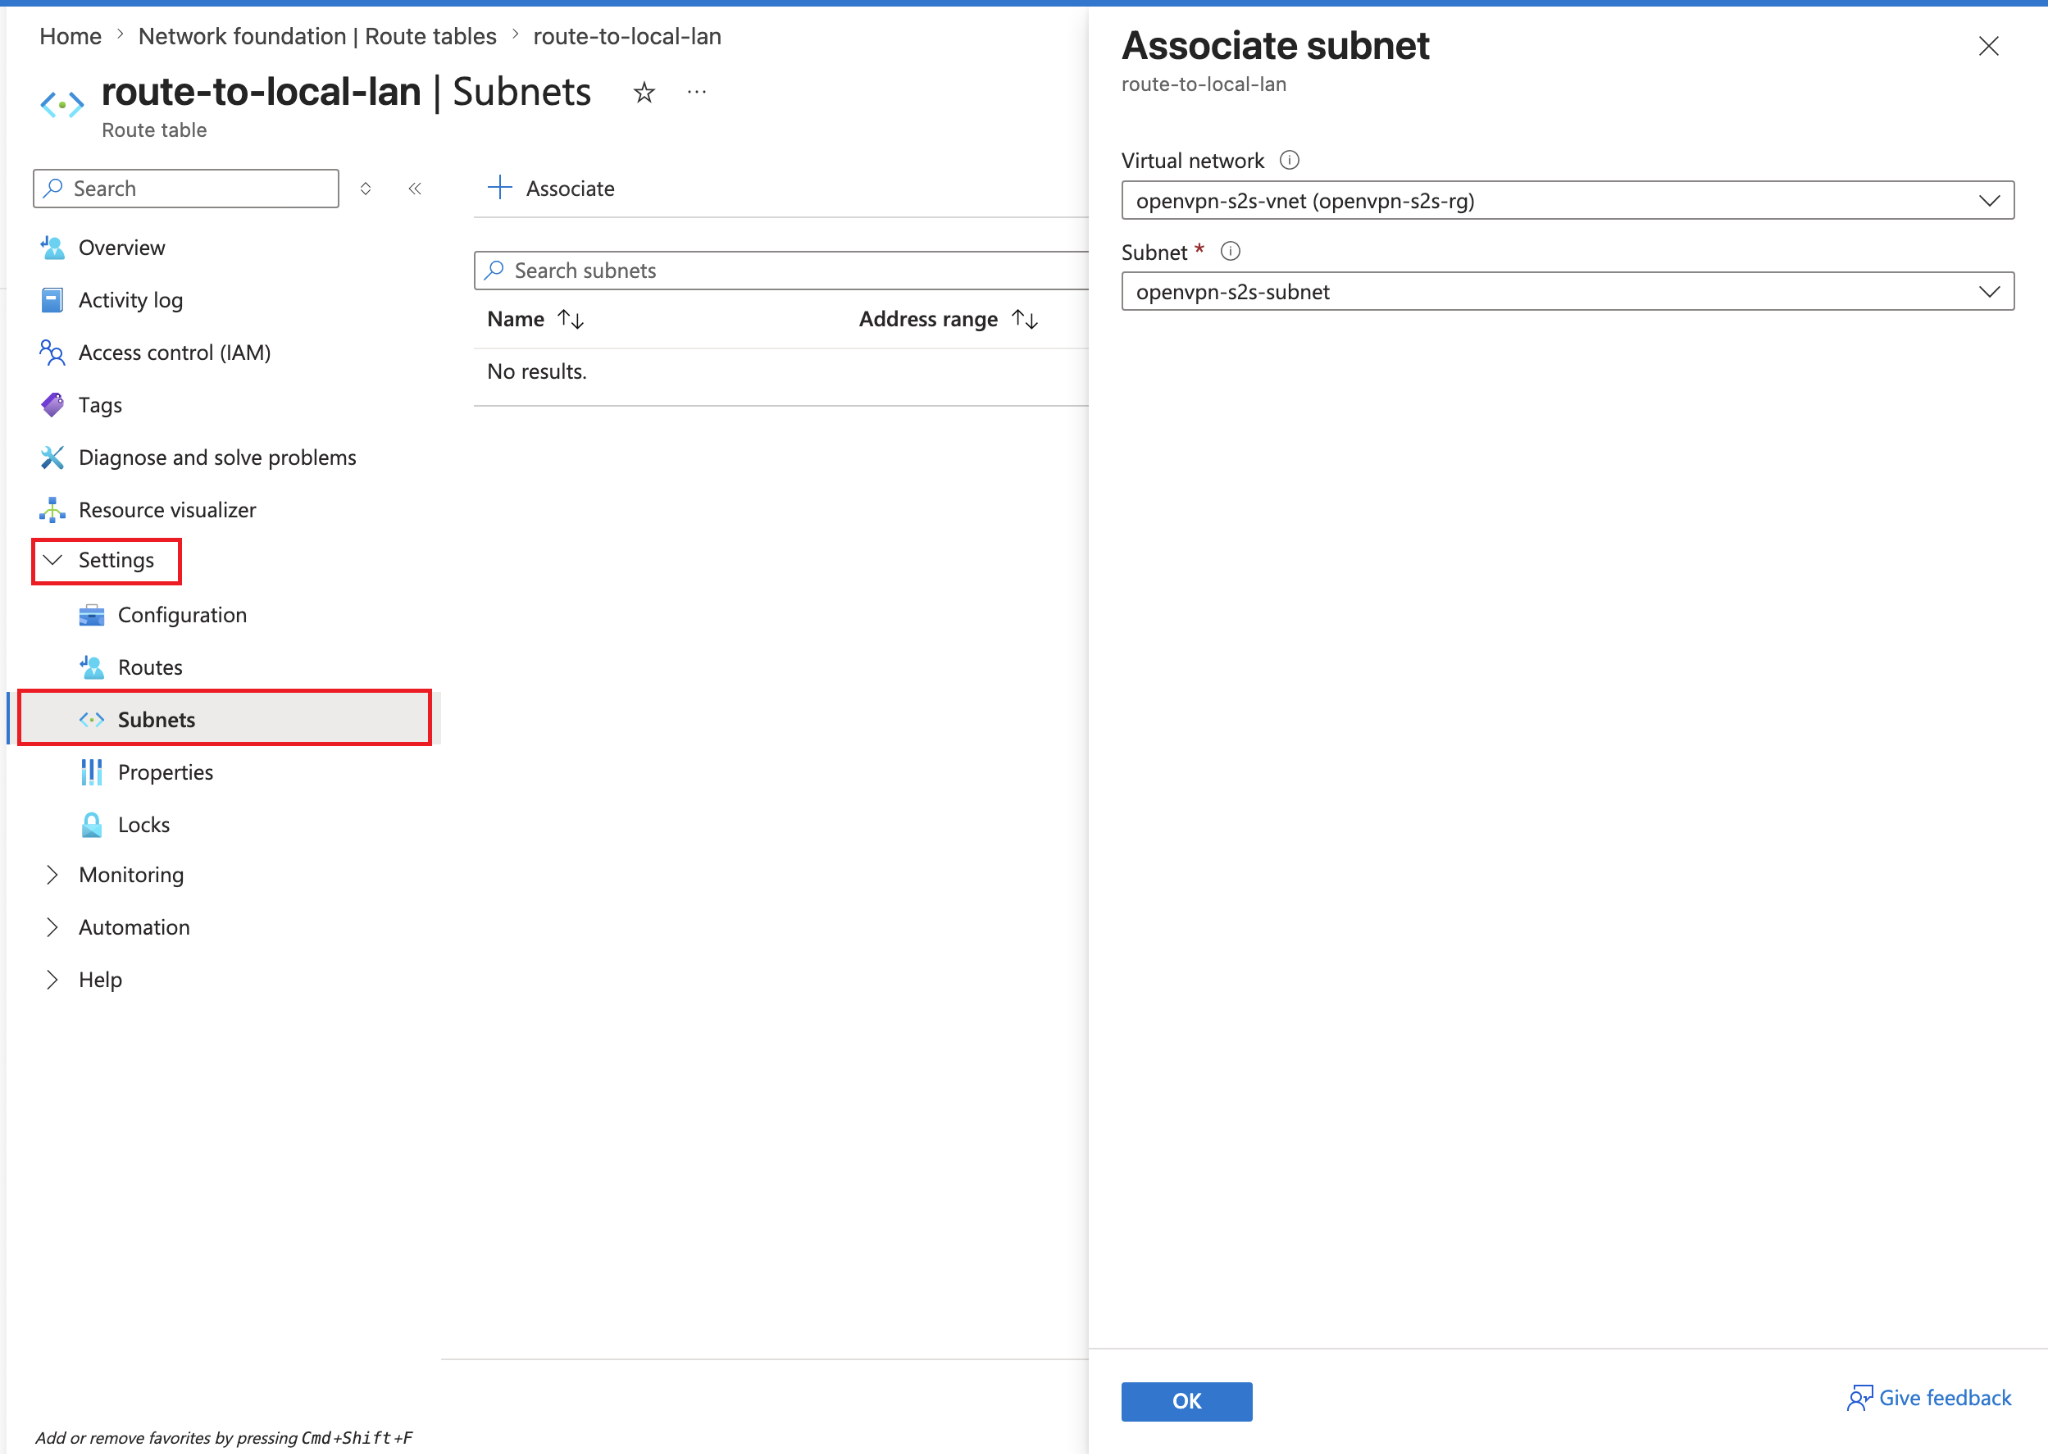
Click on Associate then select the Virtual network and Subnet and then click OK.
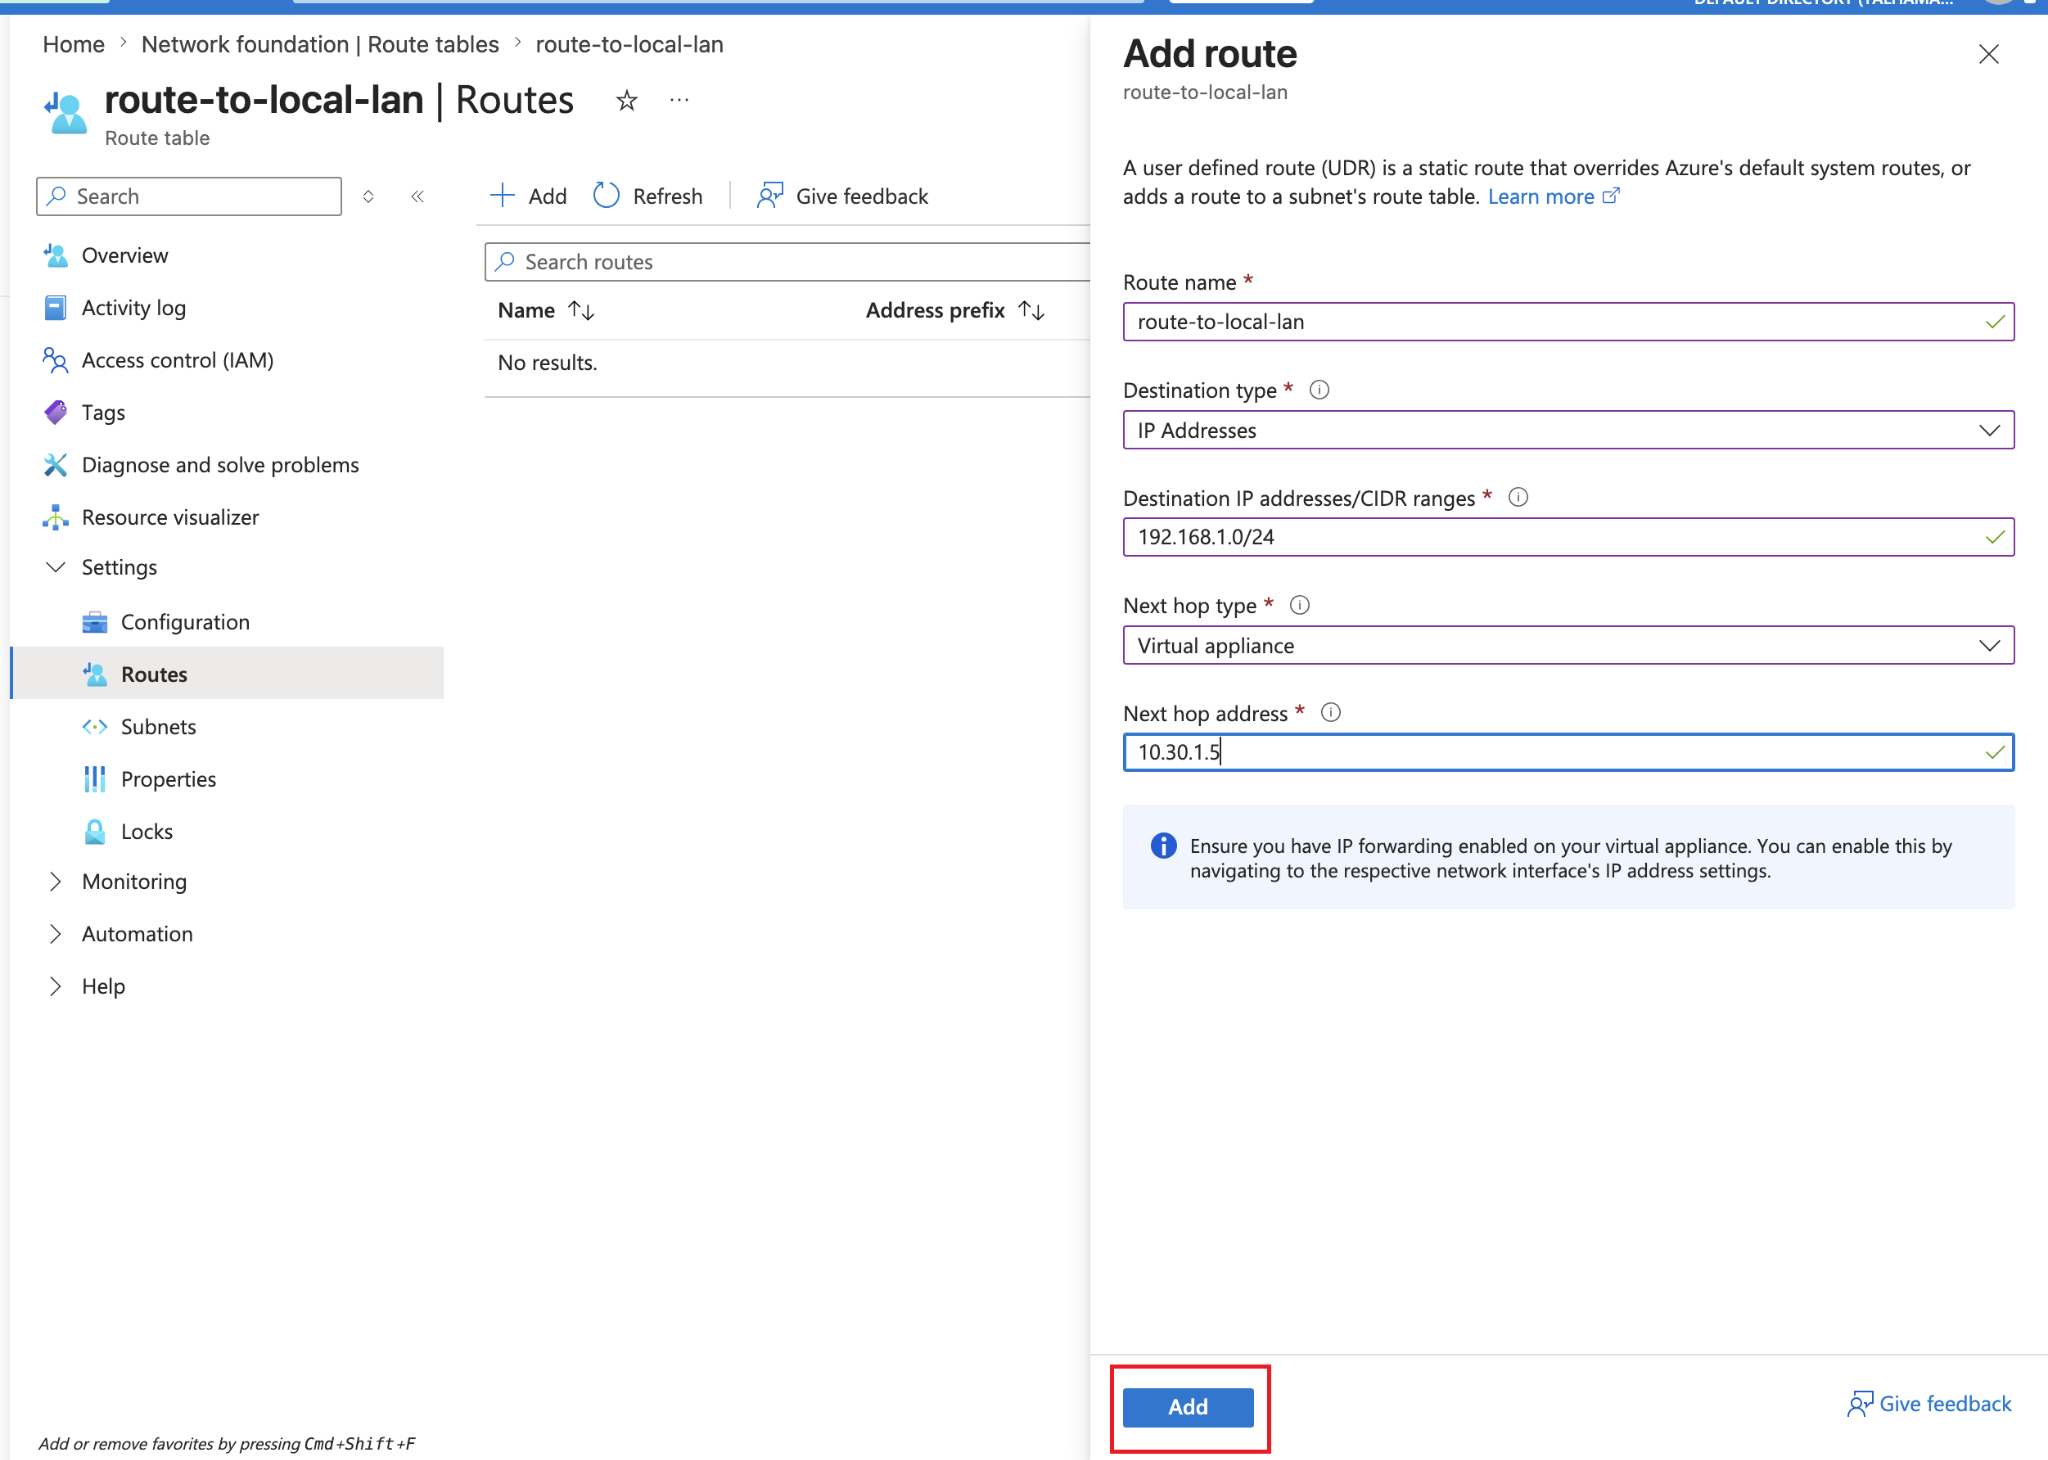
Now fill up the add route form like above in the screenshot, add/select these values:
| Field | Value |
|---|---|
| Route name | route-to-local-lan |
| Destination type | IP Addresses |
| Destination IP addresses/CIDR ranges | 192.168.1.0/24 |
| Next hop type | Virtual appliance |
| Next hop address | 10.30.1.5 |
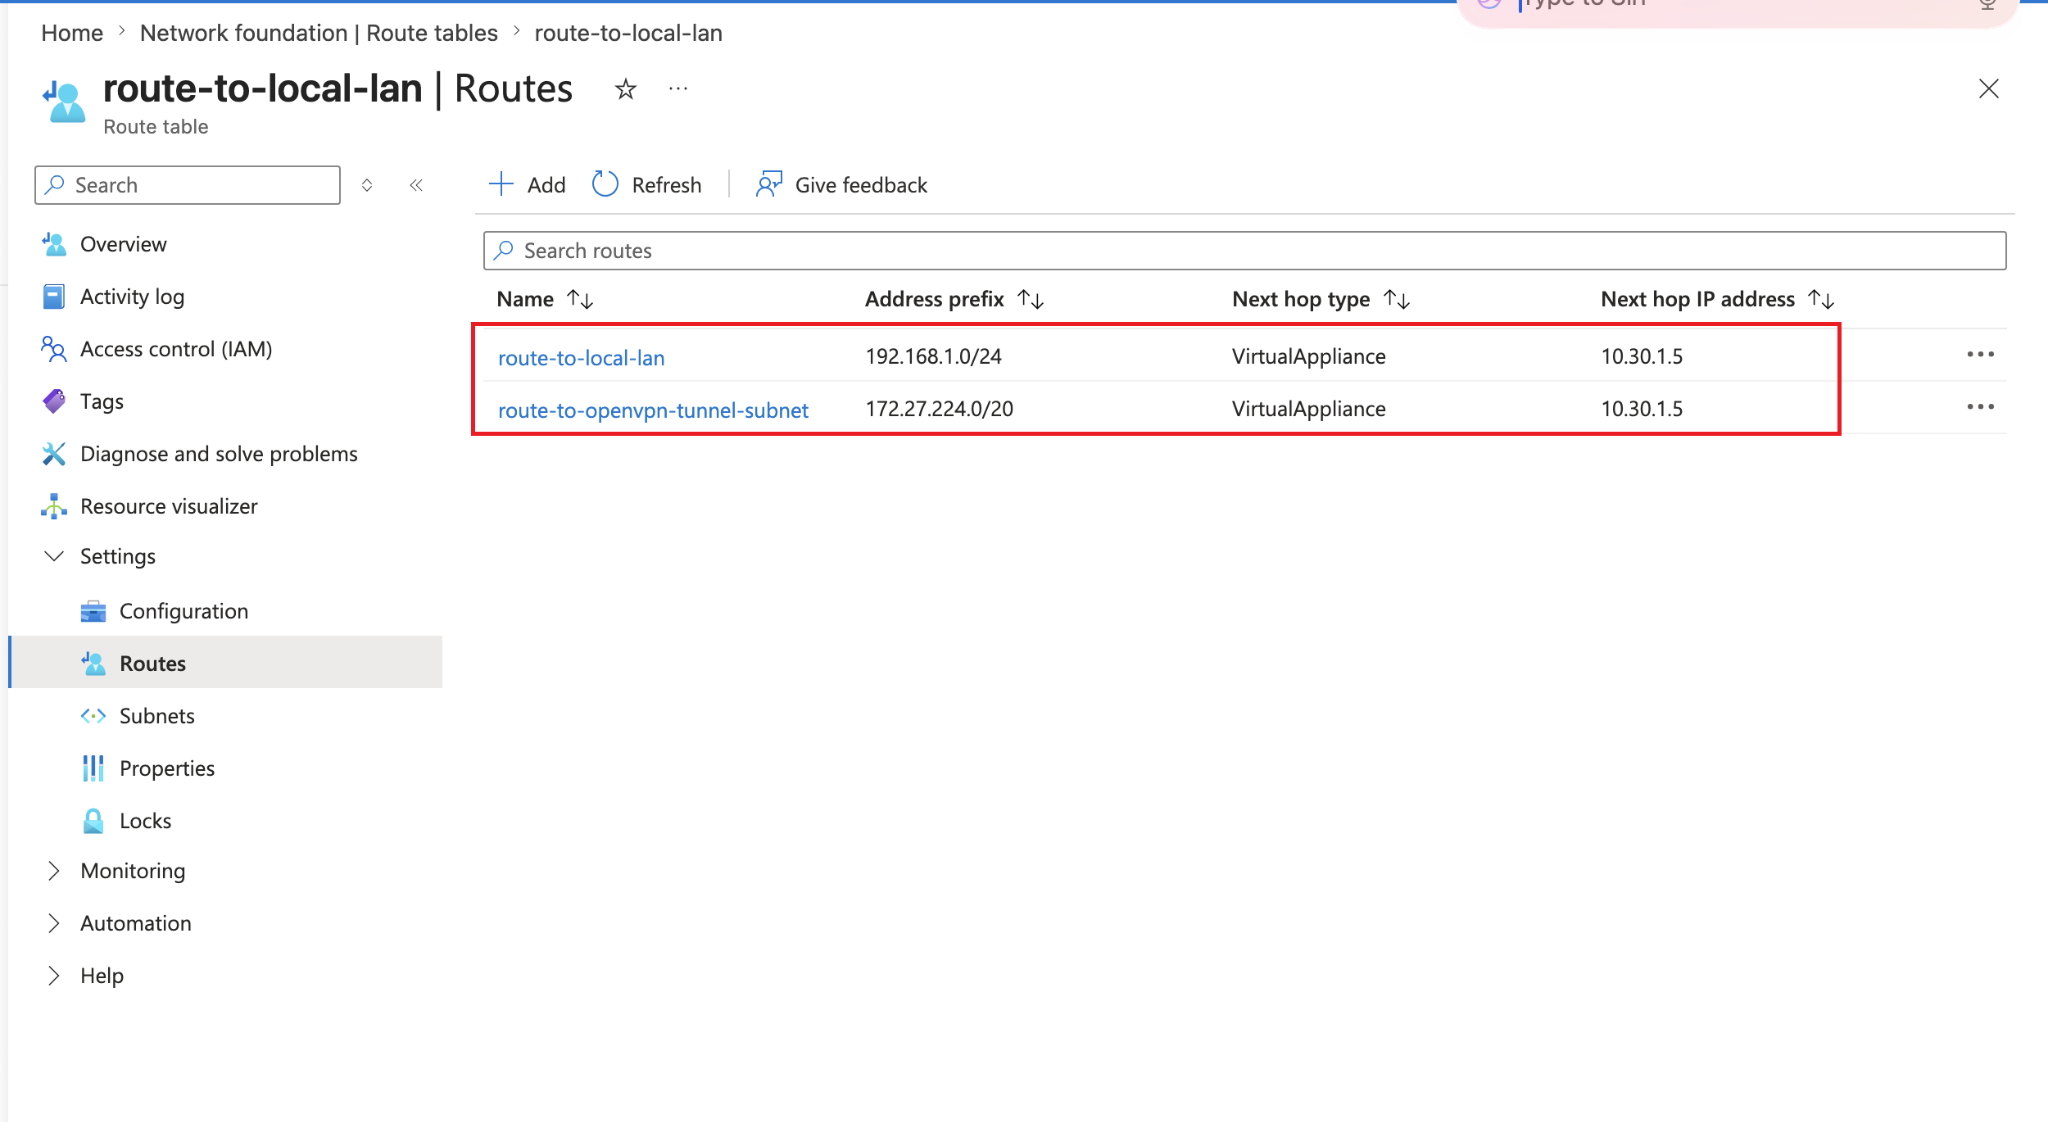
Now click on Add again, and add/select values:
| Field | Value |
|---|---|
| Route name | route-to-openvpn-tunnel-subnet |
| Destination type | IP Addresses |
| Destination IP addresses/CIDR ranges | 172.27.224.0/20 |
| Next hop type | Virtual appliance |
| Next hop address | 10.30.1.5 |

You can see both routes have been added to our route table:
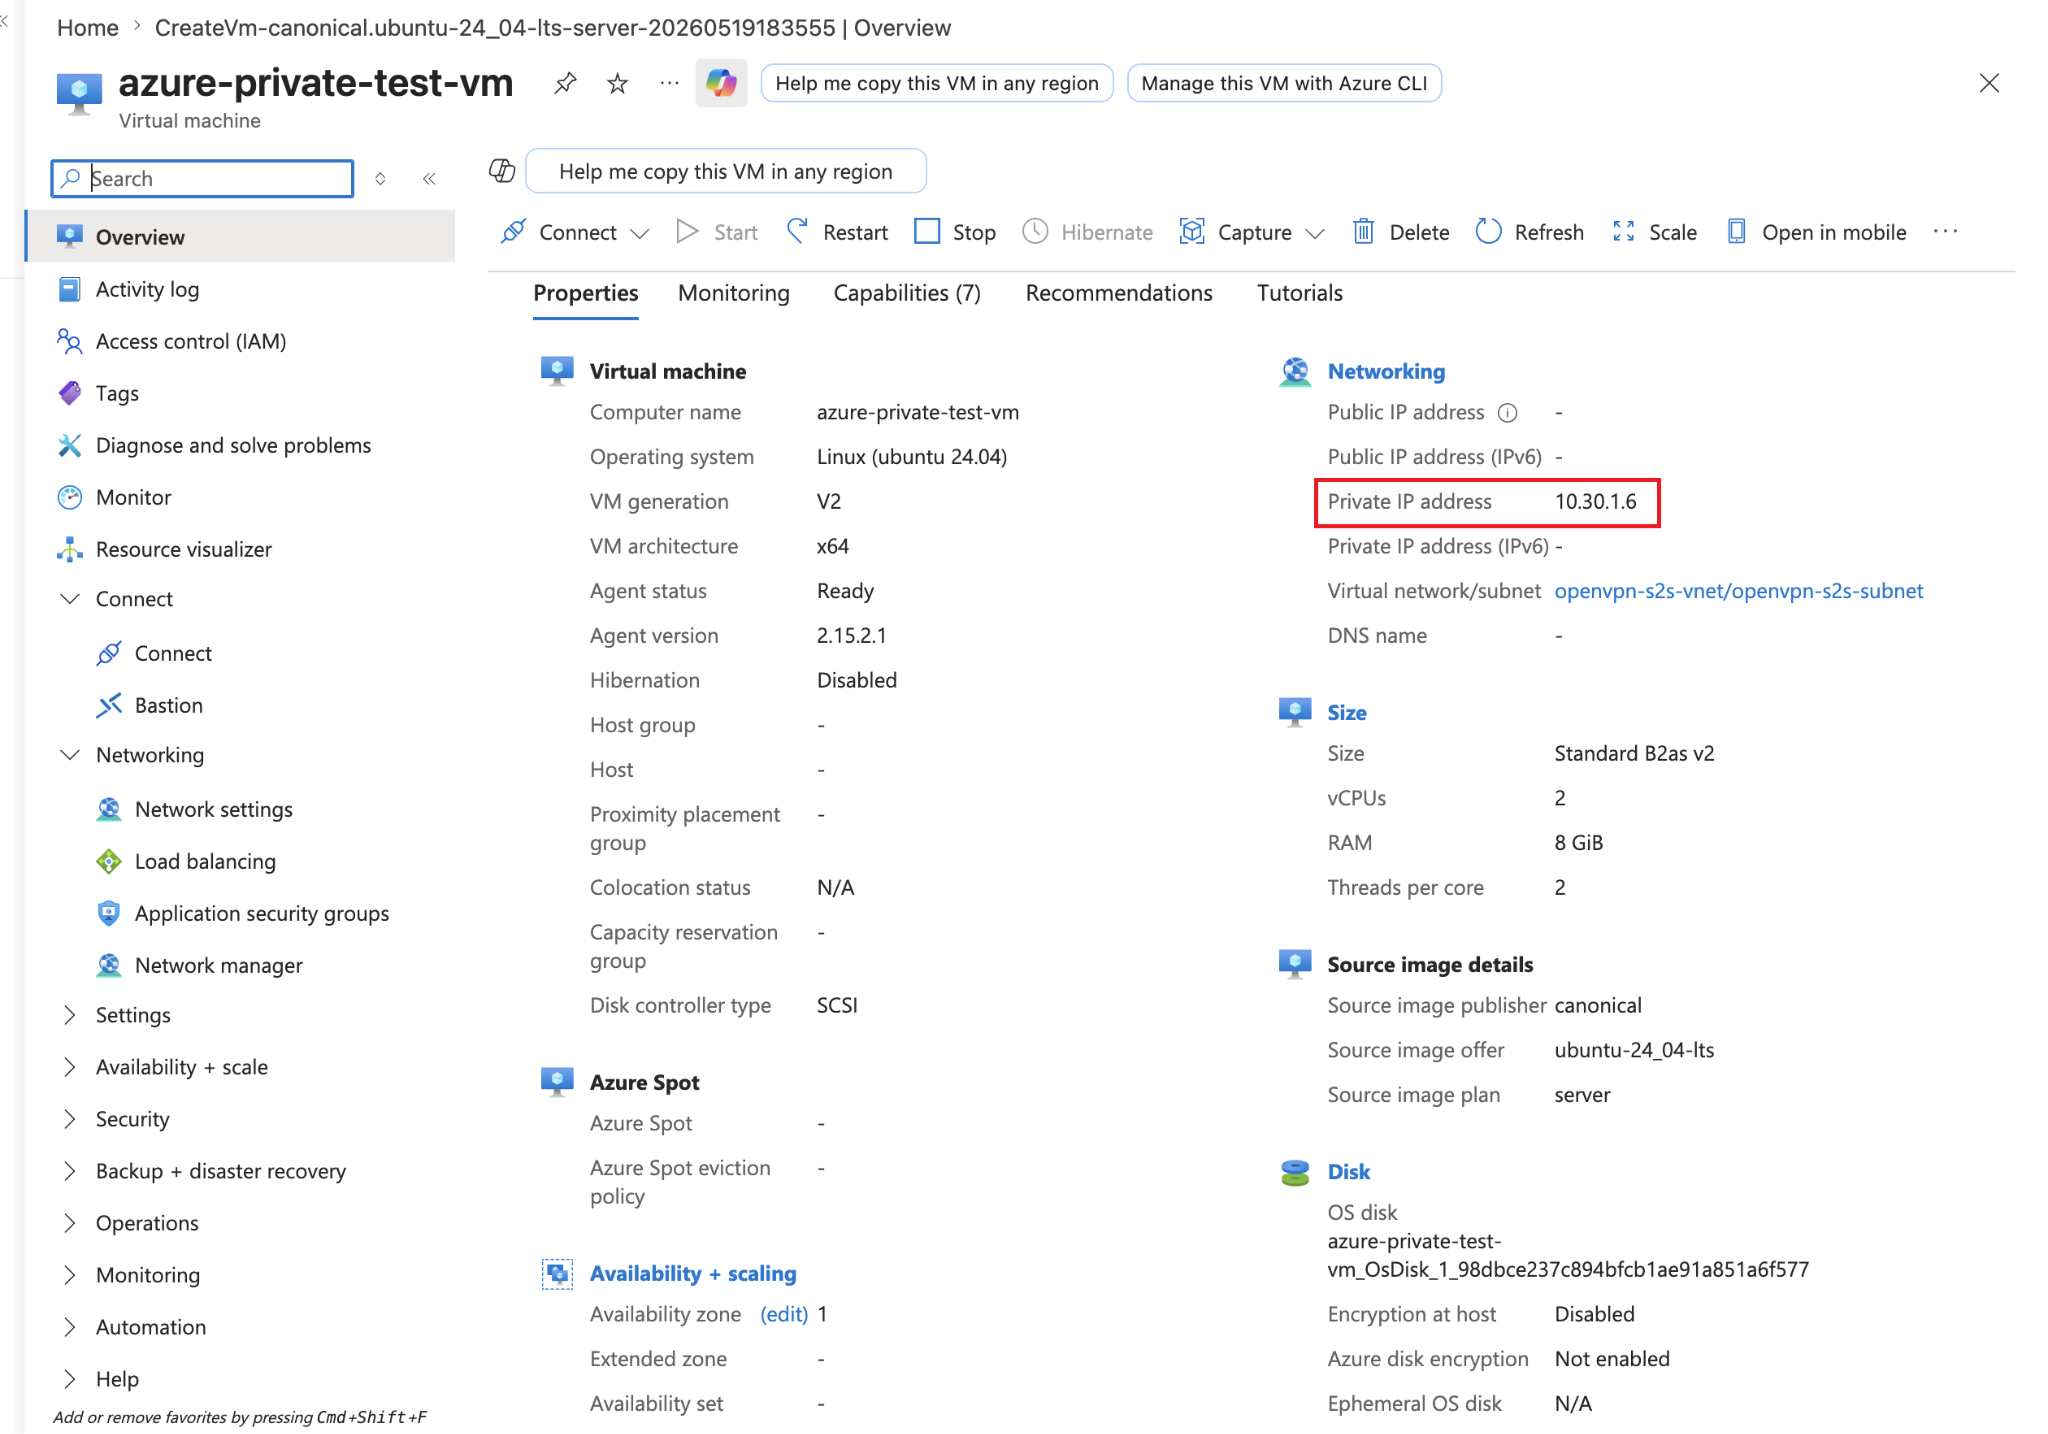
Step 13: Create a Private Test VM in Azure
So the VM we will create now will have no Public IP which means we can easily confirm if the traffic is flowing through VPN tunnel or not.
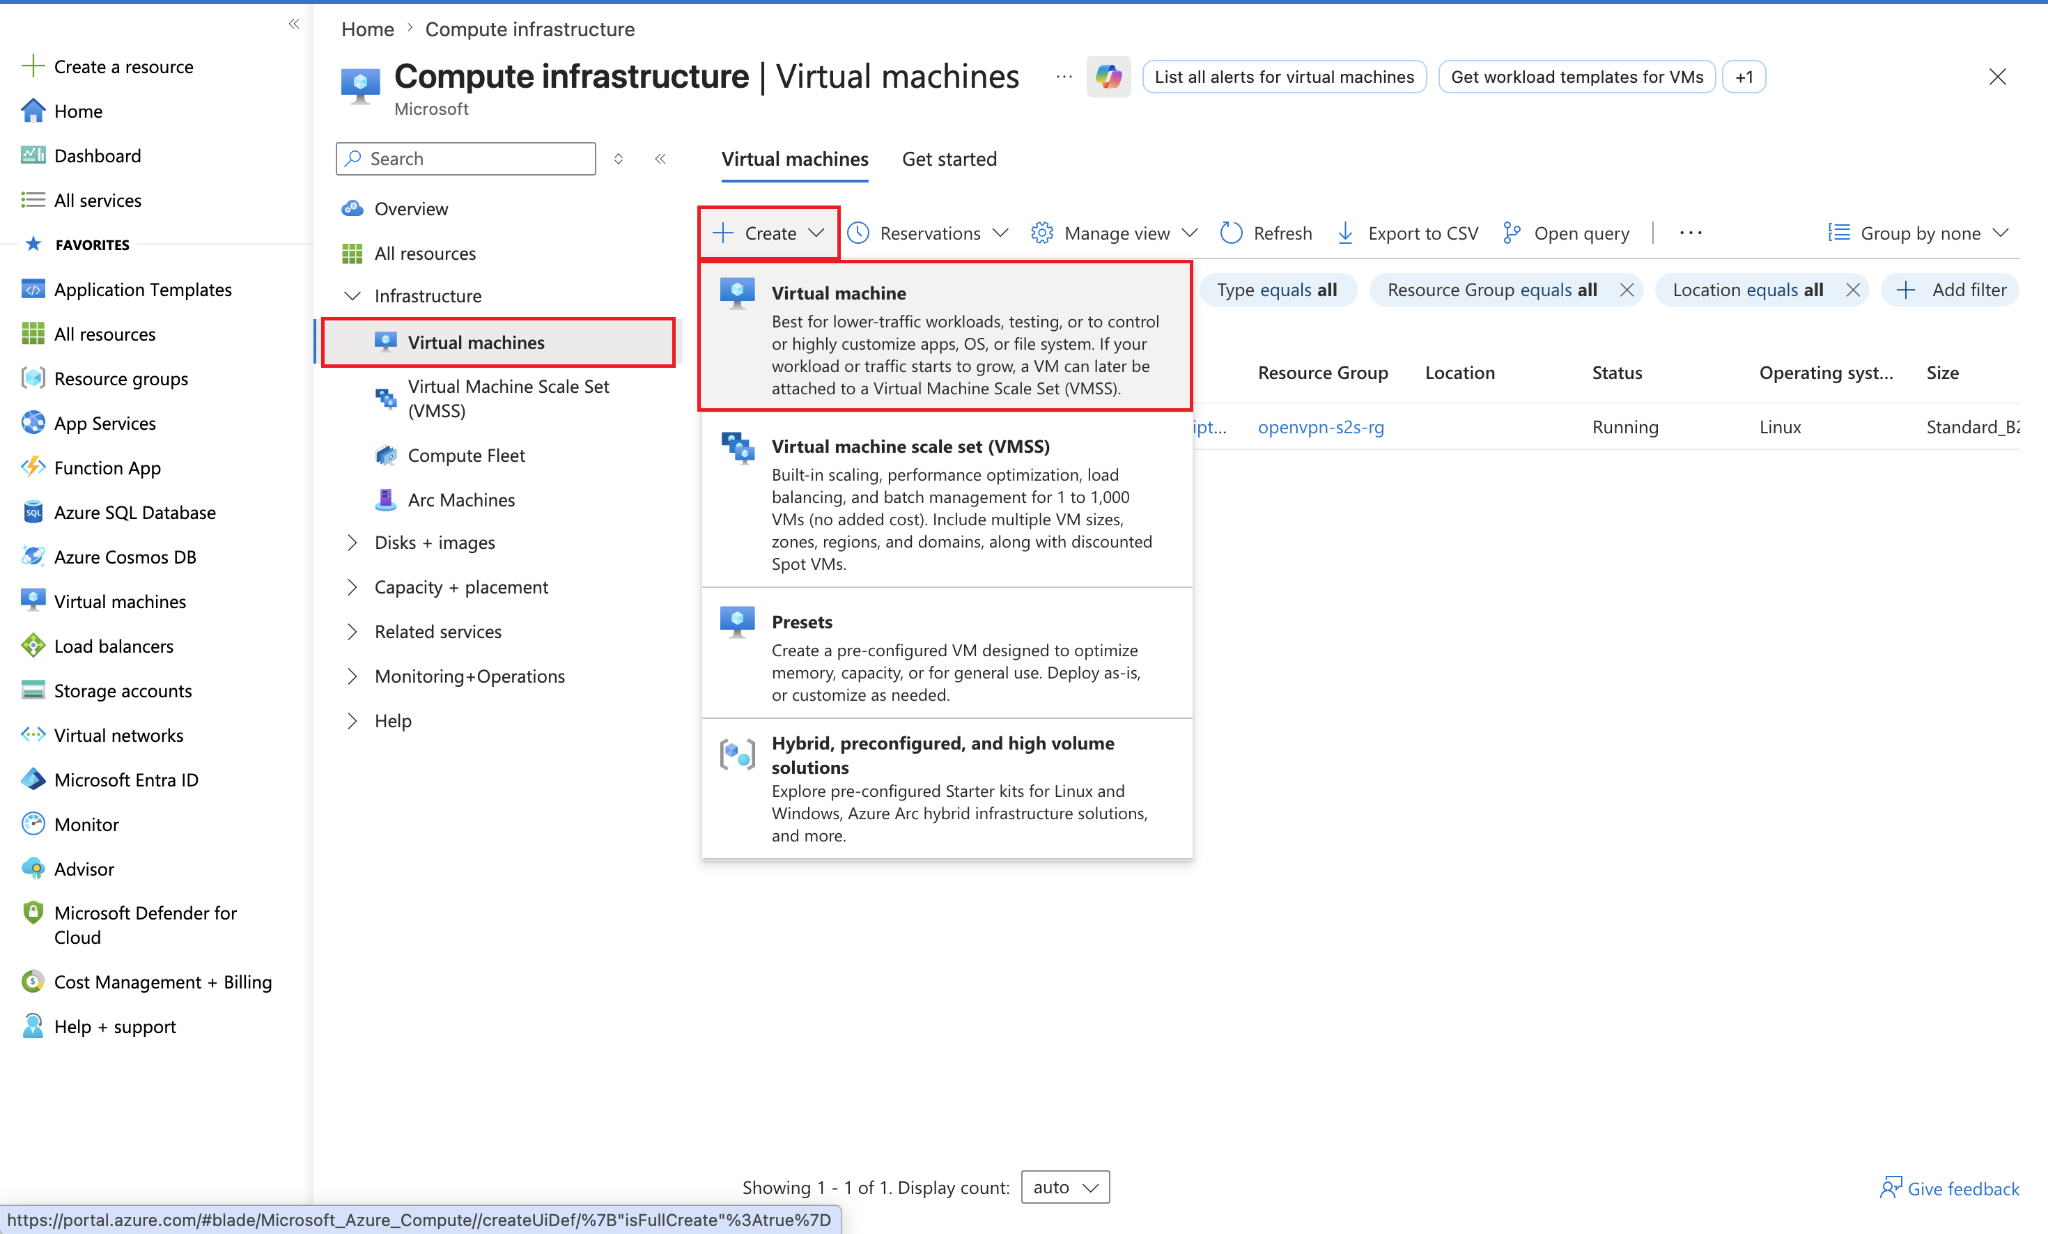
Go to your Azure dashboard and on the left side look for Virtual machines, click on that and then click on Create and then click on Virtual machine.
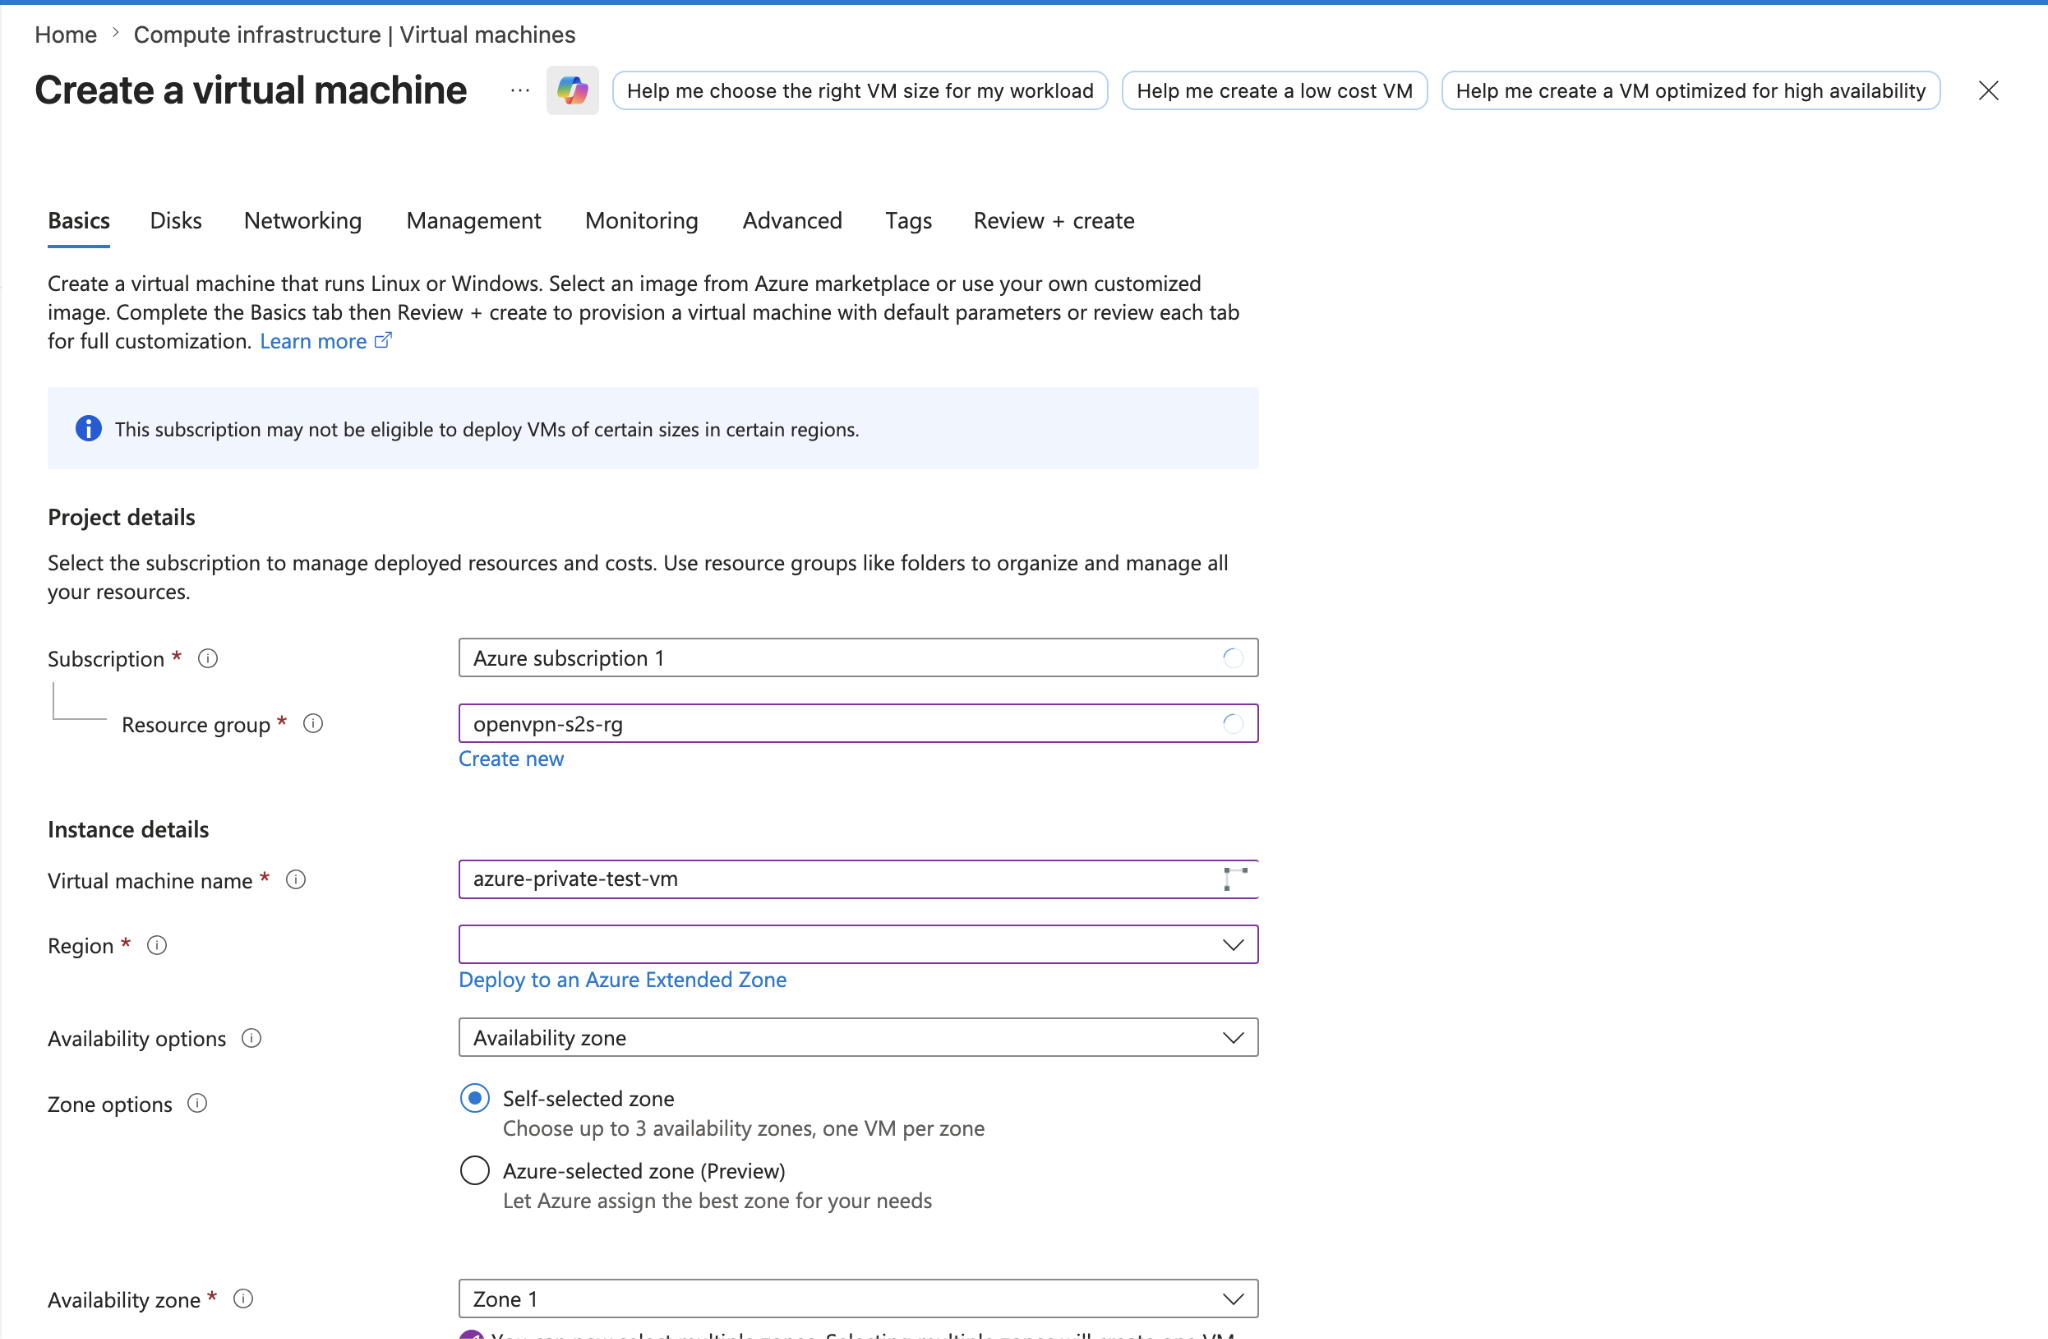
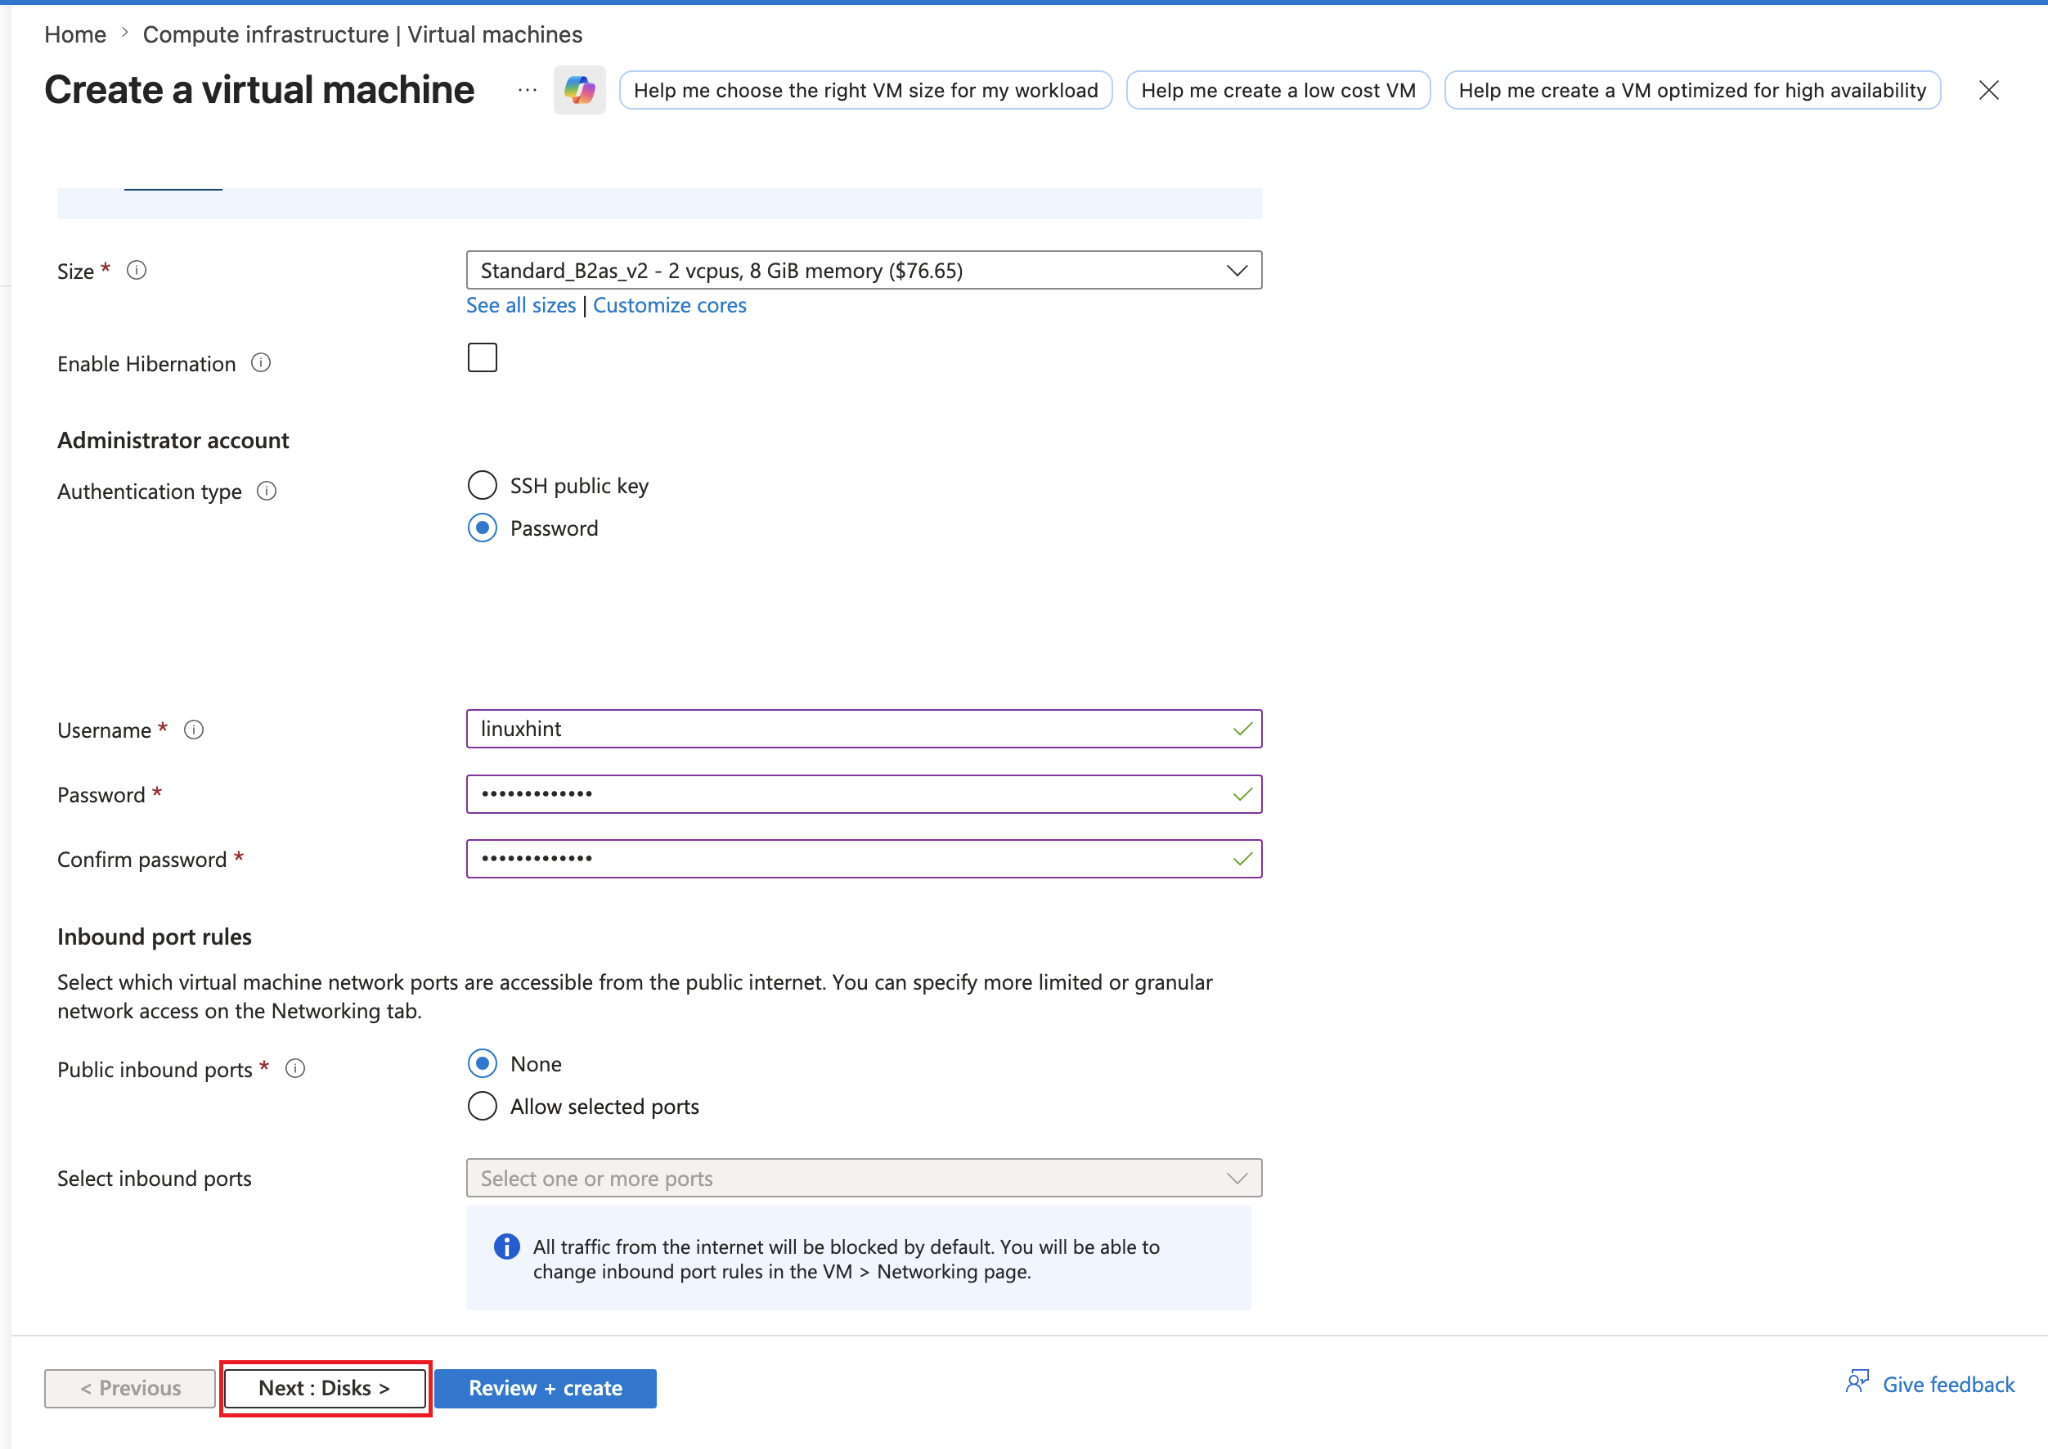
Now fill up the details in Basic tab as follows:
| Field | Value |
|---|---|
| Resource group | openvpn-s2s-rg |
| Virtual machine name | azure-private-test-vm |
| Region | (US) East US |
| Availability options | Availability zone |
| Zone options | Self-selected zone |
| Availability zone | Zone 1 |
| Security type | Standard |
| Image | Ubuntu Server 24.04 LTS |
| VM architecture | x64 |
| Run with Azure Spot discount | Unchecked |
| Size | Any B2 |
| Enable Hibernation | Unchecked |
| Authentication type | Password |
| Username | linuxhint |
| Password | (enter strong password) |
| Confirm Password | (same password again) |
| Public inbound ports | None |
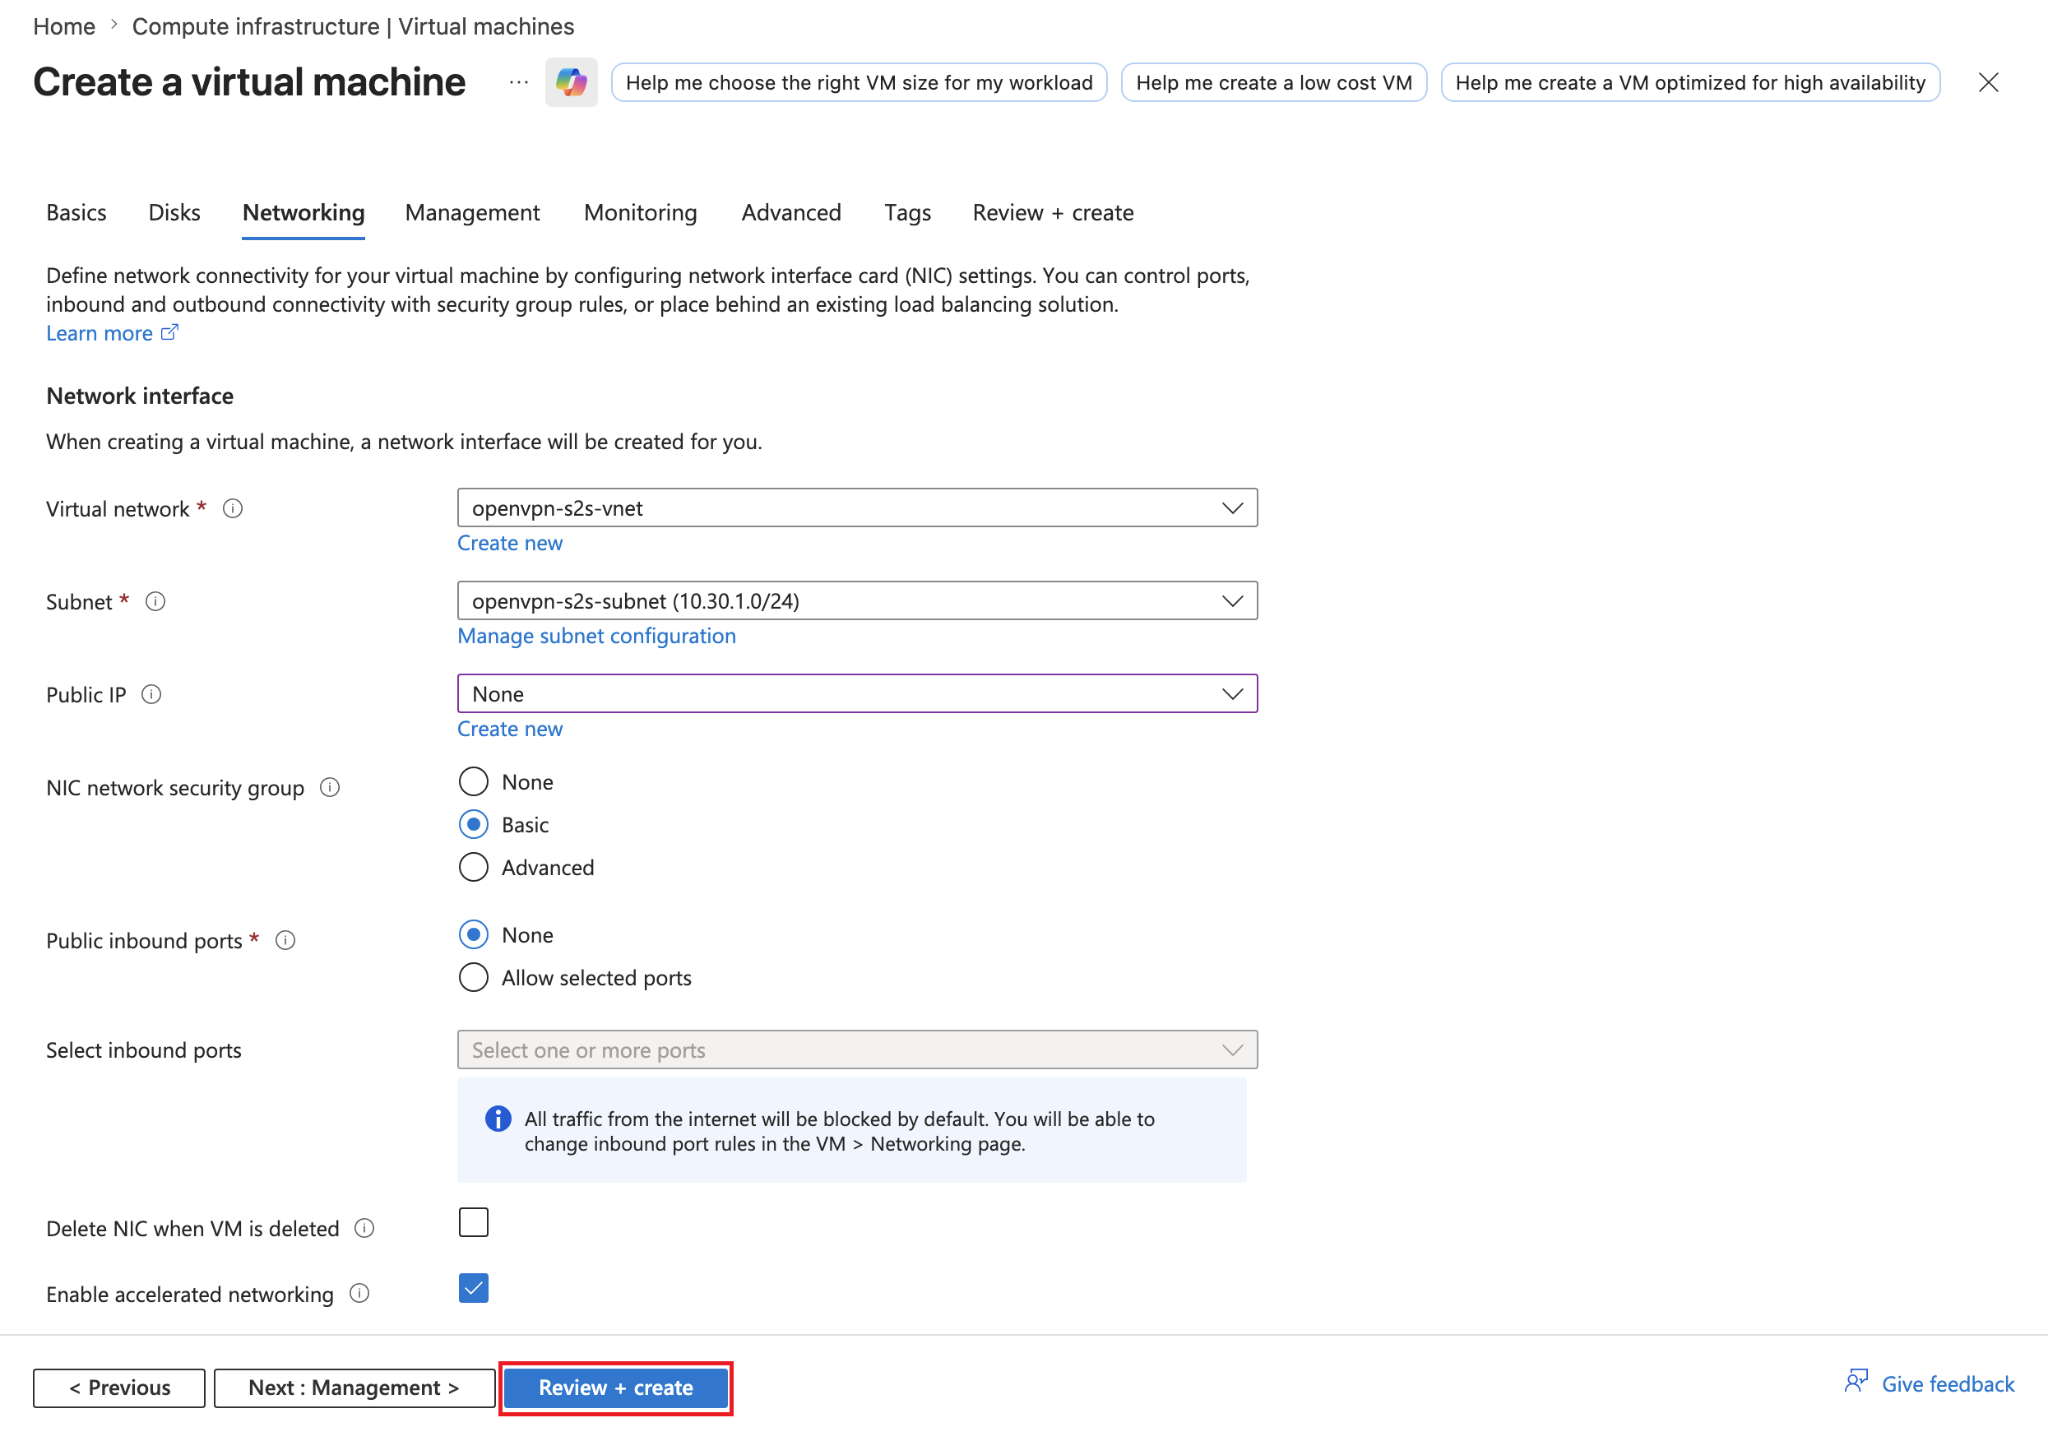
Now next go to the Networking tab. Fill up this form like this below:
| Field | Value |
|---|---|
| Virtual network | openvpn-s2s-vnet |
| Subnet | Openvpn-s2s-subnet (10.30..1.0/24) |
| Public IP | None |
| NIC network security group | Basic |
| Public inbound ports | None |
| Delete NIC when VM is deleted | Unchecked |
| Enable accelerated networking | Checked |
Click on Review + create.
Review everything here and then click on Create.
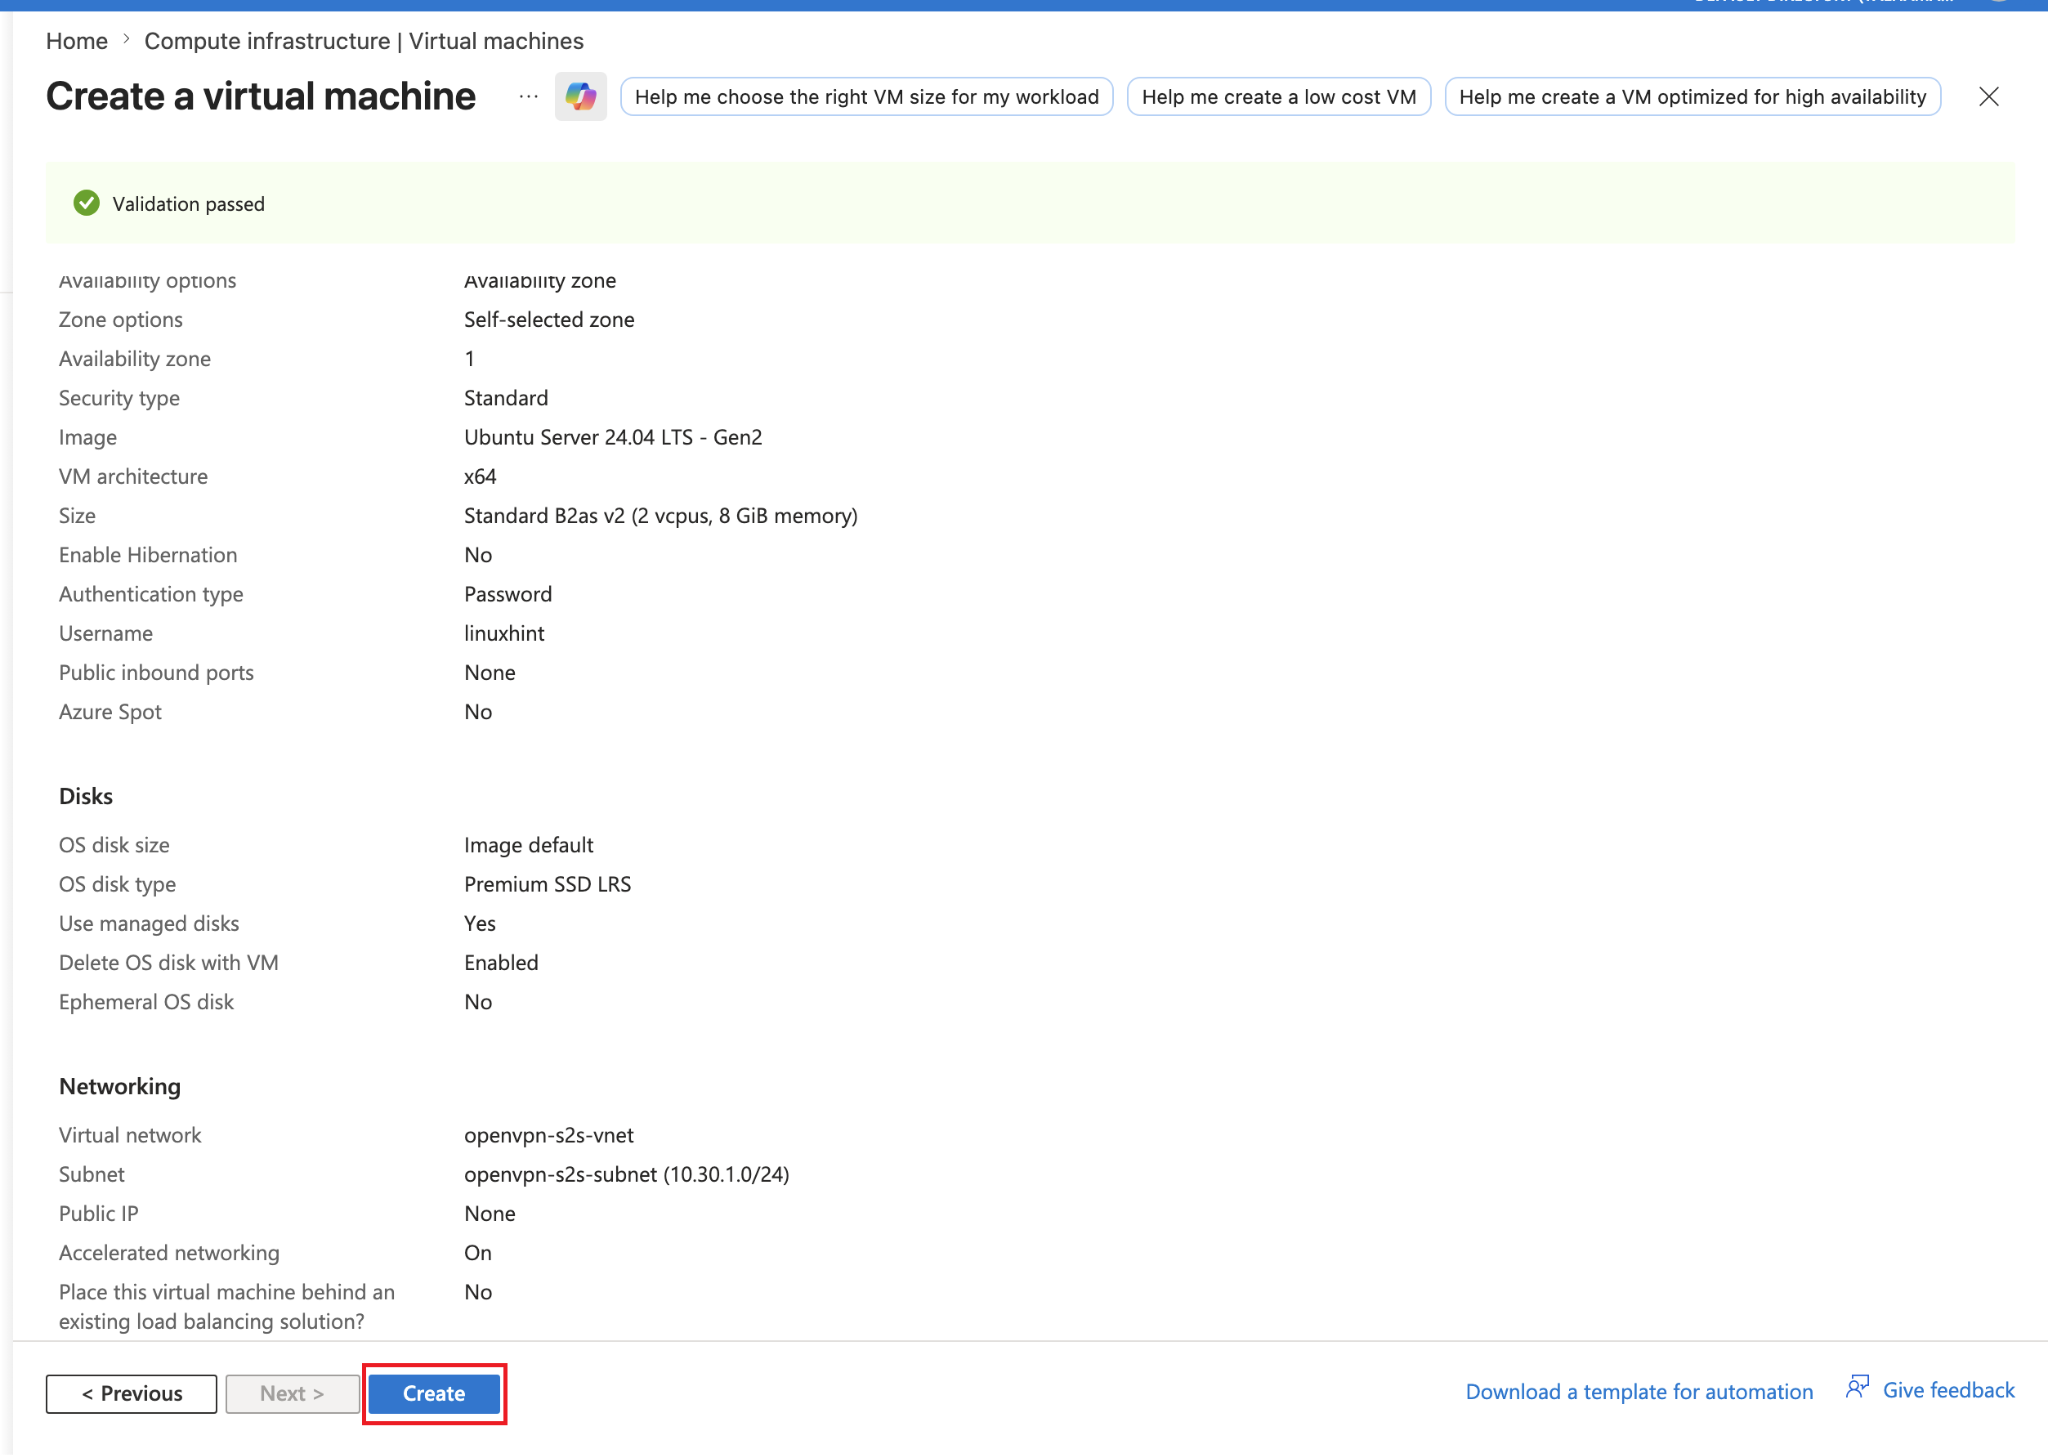
Now it’d be deployed successfully, click on Go to resource.

You can see there is no public IP and now note down the private IP because we are going to use it in our next step. This private IP is 10.30.1.6.
Step 14: Test Site-to-Site VPN Connectivity
Now go to your local Linux machine which is also a gateway, make sure that this terminal window is still running:
Once confirmed then open another terminal window and in here type this ping command:
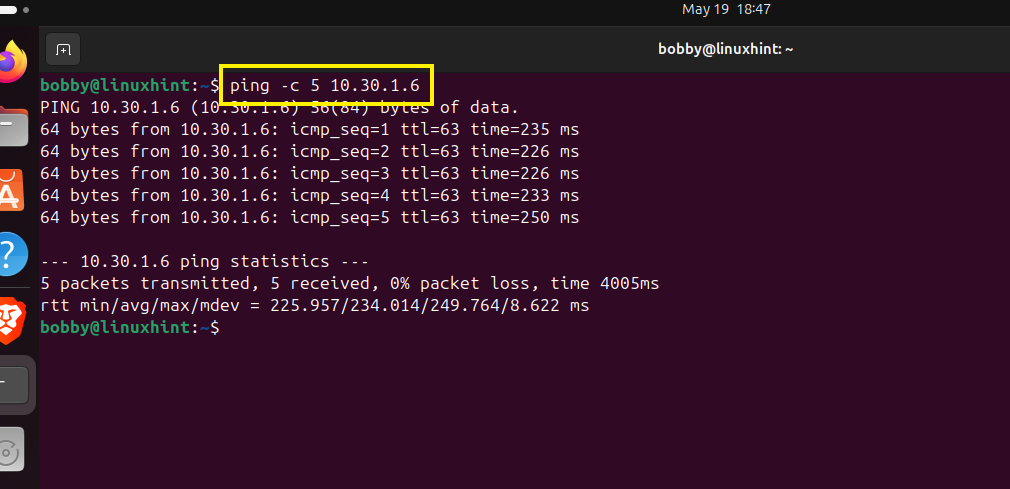
You can see that there is 0% packet loss, all 5 packets have been received successfully. This means our site-to-site VPN is working and the tunnel has been established and is in perfectly working condition.
Production Notes
1. For this setup, we used default user “openvpn” for connection profile. While in production, create a separated dedicated user to keep track of the gateway and tunnel.
2. For the tutorial’s simplicity, SSH and Admin UI access was open for the public, in production do not leave that open for everyone, allow it only for trusted IPs.
3. Ensure that you reserve a static IP for OpenVPN Access Server VM, the reason behind that is if your IP changes your .ovpn file will break and your Admin UI access will be disrupted.
4. For production, to avoid unnecessary warnings due to self-signed certificates, use a TLS certificate by a trusted provider. This improves security and avoids warnings for administrators and users.
5. Use a dedicated gateway device such as a server, router or a firewall instead of a Desktop machine, for tutorial that’s fine but for production, use one of the dedicated devices mentioned.
6. In production, it is always best to use static routes on the local route instead of NAT.
7. For production, configure the OpenVPN client as a systemd service so the tunnel starts automatically after reboot. No more need to keep a terminal window open.
8. To avoid production issues, constantly monitor Azure Monitor, OpenVPN tunnel logs, and local gateway logs. It can all help you troubleshoot issues early on.
9. For tutorial 2 licenses of OpenVPN are fine, but in production before deploying, purchase the no. of licenses you require to avoid issues.
10. Backup all Azure and local gateway configurations and connection profiles, this makes disaster recovery easy.
11. Keep in mind that your subnet ranges for OpenVPN Access Server on Azure and your local gateway subnet ranges must not overlap to avoid routing issues.
12. Harden the Azure OpenVPN access server VM by limiting the admin access, disabling password and enabling SSH, keeping packages uptodate, enabling security updates, and monitoring security with Azure defender or equivalent tools.
Conclusion
In this tutorial, we created a working Microsoft Azure site-to-site business VPN using OpenVPN Access Server. This was not a normal VPN setup; instead we created a routed OpenVPN connection between a local LAN and Azure Virtual Network. We created a resource group in Azure to keep track of all resources within a group, just ensure that you add each resource to one resource group you create throughout. Also, ensure that location/region of Virtual network, virtual machines match. Creating virtual machines in different regions could create conflict and might not sync together when you need them. The final test is super important to confirm the working of site-to-site business VPN. The test VM that you’ll create must not have a public IP, pinging private IP of the test VM from local gateway will confirm that the tunnel has been established and is working and hence the setup is site-to-site. For production, 12 point improvements have been suggested, follow along to get the best out of the setup.