In this article, we will show you how to install the latest version of CUDA (CUDA 12 at the time of this writing) on Debian 12.
Topic of Contents:
- Prerequisites
- Adding the NVIDIA CUDA 12 Official Package Repository to Debian 12
- Enabling the Official Debian Contrib Package Repository on Debian 12
- Installing NVIDIA CUDA 12 on Debian 12
- Adding NVIDIA CUDA to the PATH of Debian 12
- Adding the NVIDIA CUDA Libraries to the Debian 12 Library Search Path
- Running the NVIDIA CUDA Commands (i.e. nvcc) with Superuser/Root Privileges via udo
- Writing, Compiling, and Running a Simple CUDA Program
- Conclusion
Prerequisites:
To install the latest version of CUDA (CUDA 12), compile the CUDA programs, and run the CUDA programs on Debian 12, you need the following:
i) Installed NVIDIA GPU on your computer
ii) Installed NVIDIA GPU drivers on your Debian 12 system
NOTE: If you need any assistance in installing the NVIDIA GPU drivers on your Debian 12 system, read this article.
Adding the NVIDIA CUDA 12 Official Package Repository to Debian 12
Before installing NVIDIA CUDA 12 on Debian 12, you have to add the official NVIDIA CUDA package repository on your Debian 12 system.
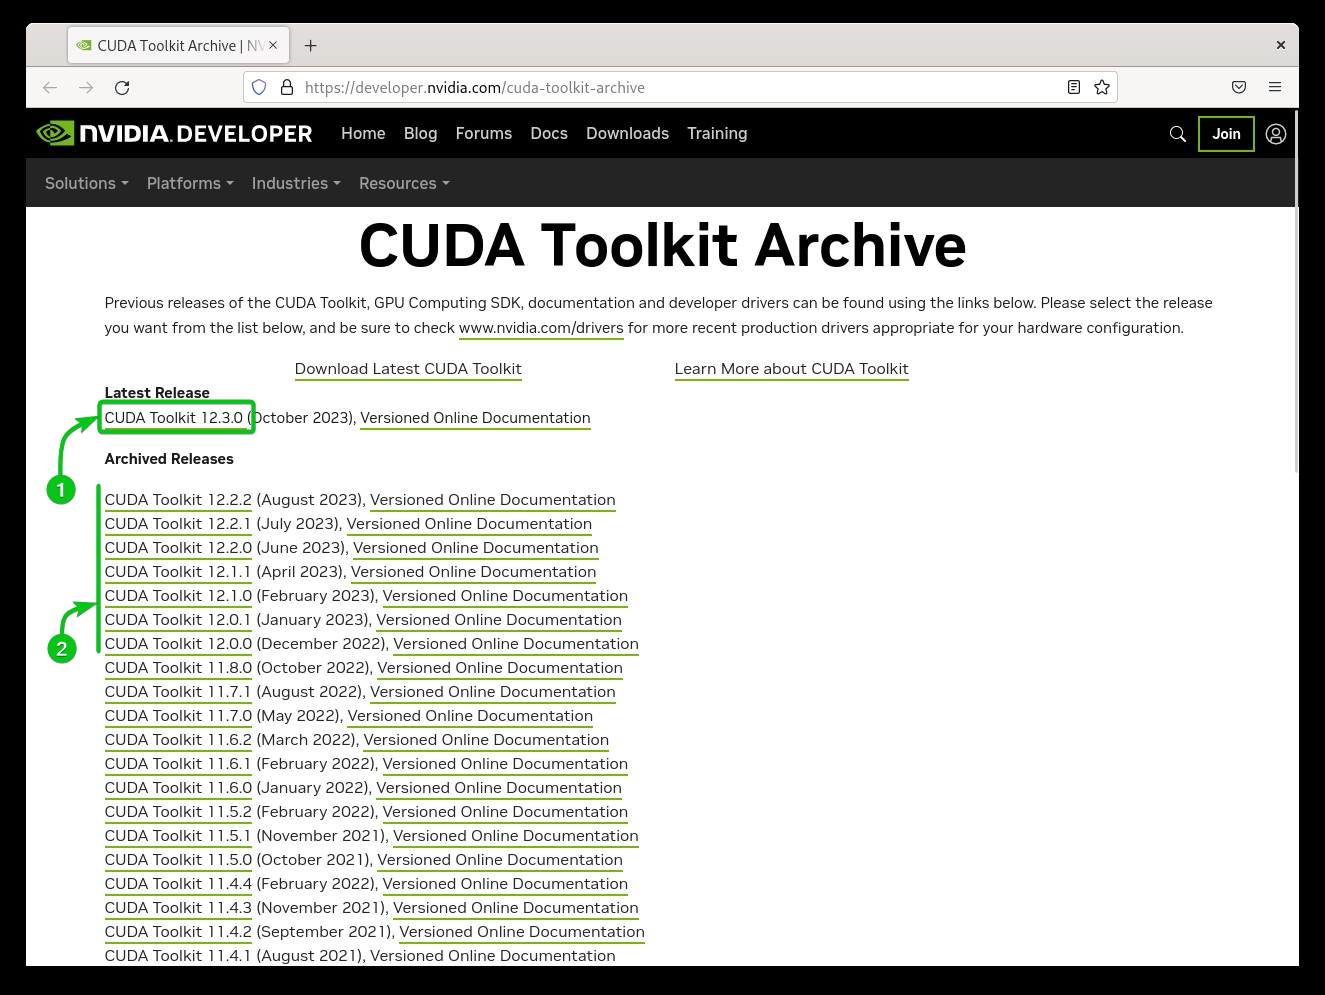
First, visit the official NVIDIA CUDA Toolkit Archive from a web browser.
The latest version of NVIDIA CUDA is 12.3.0 at the time of this writing[1]. You can find other versions of NVIDIA CUDA here as well[2]. Click on the NVIDIA CUDA version that you want to install.
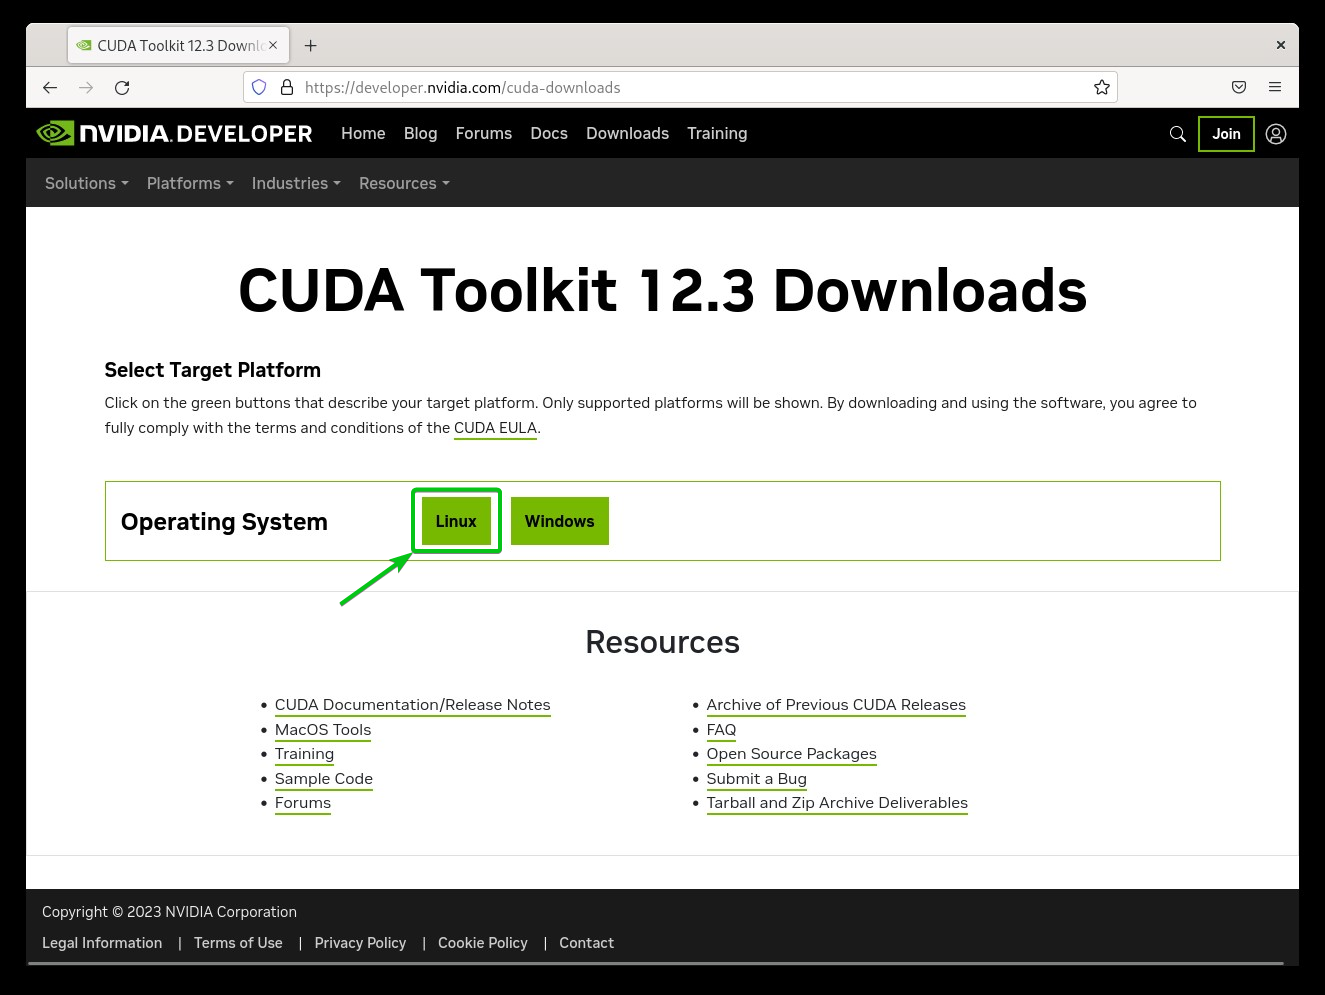
Click on “Linux”.
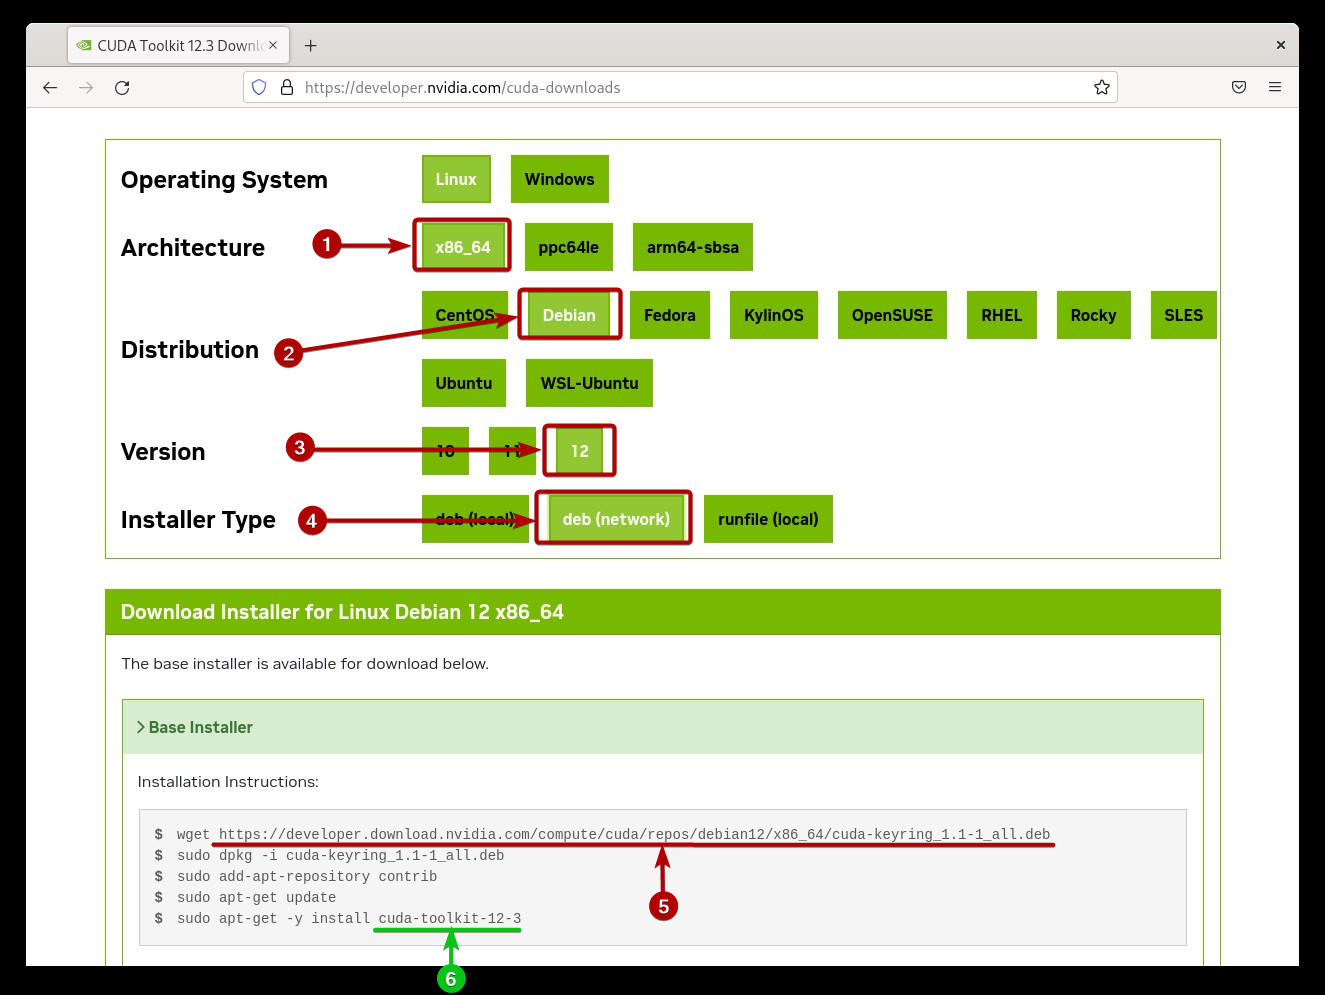
Select “x86_64” as the Architecture[1], “Debian” as the Distribution[2], “12” as the Version[3], and “deb” (network) as the Installer Type[4]. The DEB package URL that you need to download and install on your Debian 12 system to add the official NVIDIA CUDA repository[5] and the package name of the NVIDIA CUDA version that you want to install[6] should be displayed.
Now, navigate to the “/tmp” directory as follows:
To download the “cuda-keyring_1.1-1_all.deb” DEB package file to add the official package repository of NVIDIA CUDA, run the following command:
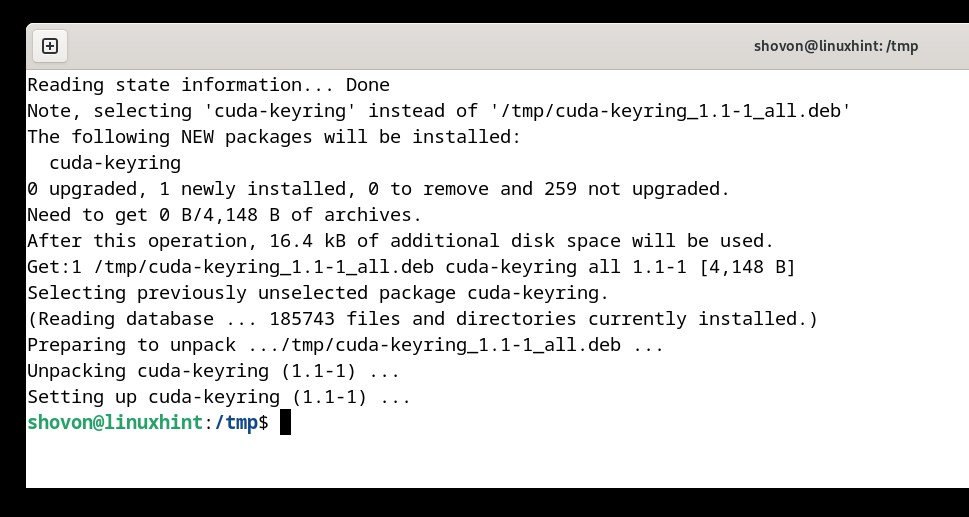
To install the “cuda-keyring_1.1-1_all.deb” DEB package file to add the NVIDIA CUDA repository on Debian 12, run the following command:
The “cuda-keyring_1.1-1_all.deb” DEB package file should be installed and the official NVIDIA CUDA repository should be added to your Debian 12 system.
Enabling the Official Debian Contrib Package Repository on Debian 12
Some of the dependency packages of NVIDIA CUDA are in the official Debian 12 contrib package repository. So, you have to enable it before you can install NVIDIA CUDA on Debian 12.
To enable the official Debian 12 contrib package repository, run the following command and press <Enter> once you’re prompted.
The official Debian 12 contrib package repository should be enabled.
Installing NVIDIA CUDA 12 on Debian 12
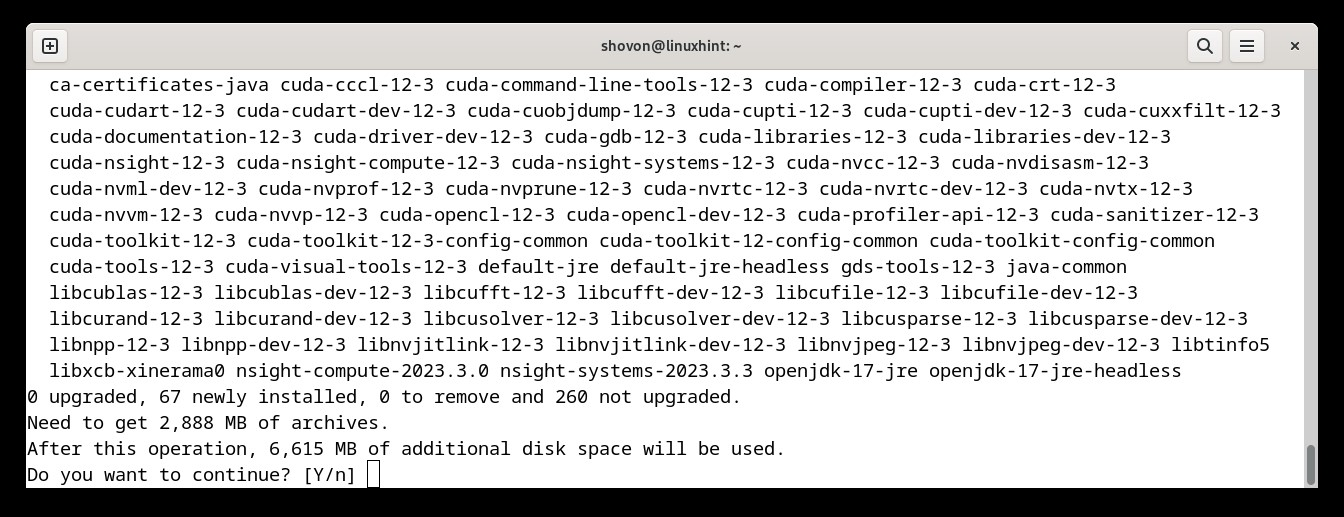
To install your desired version of NVIDIA CUDA (cuda-toolkit-12-3 in this case), run the following command:
To confirm the installation, press “Y” and then press <Enter>.
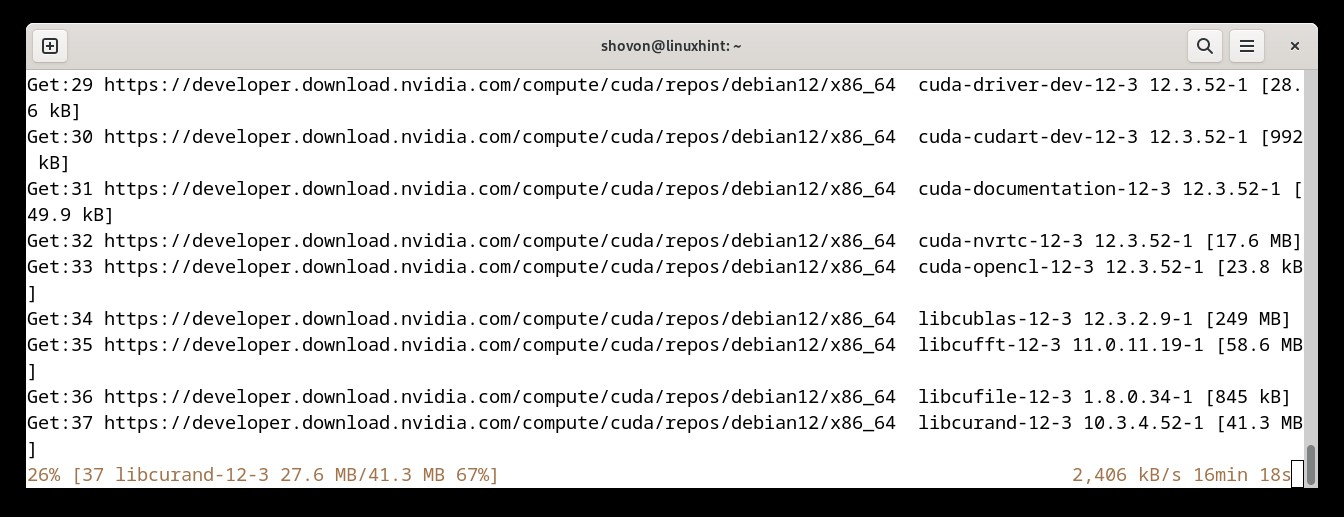
NVIDIA CUDA and all the required dependency packages are being downloaded from the internet. It takes a while to complete.
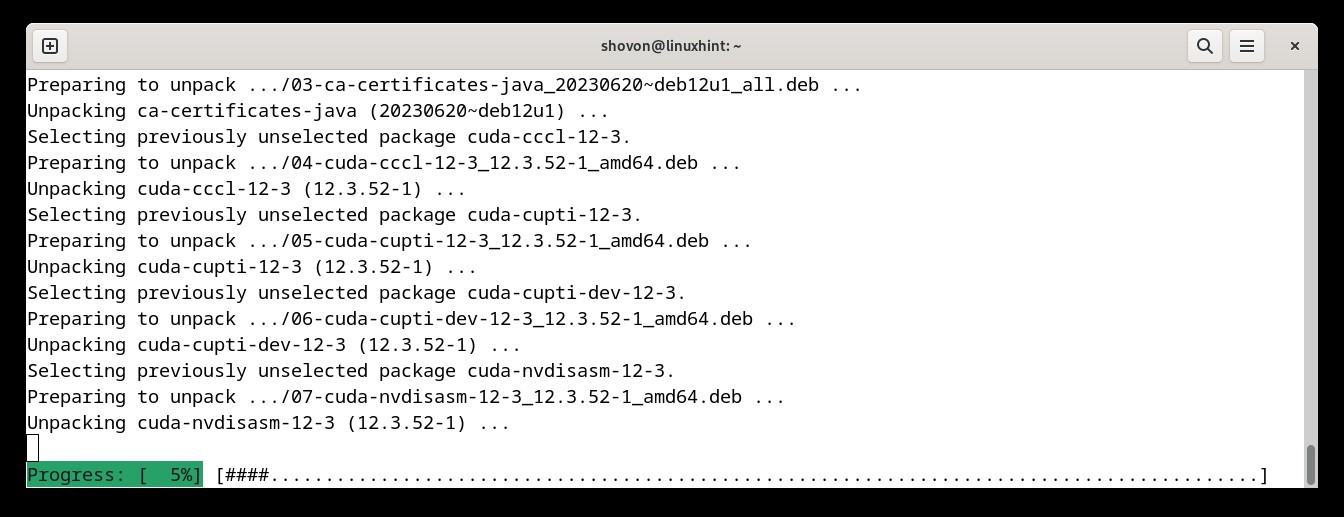
NVIDIA CUDA and all the required dependency packages are being installed. It takes a while to complete.
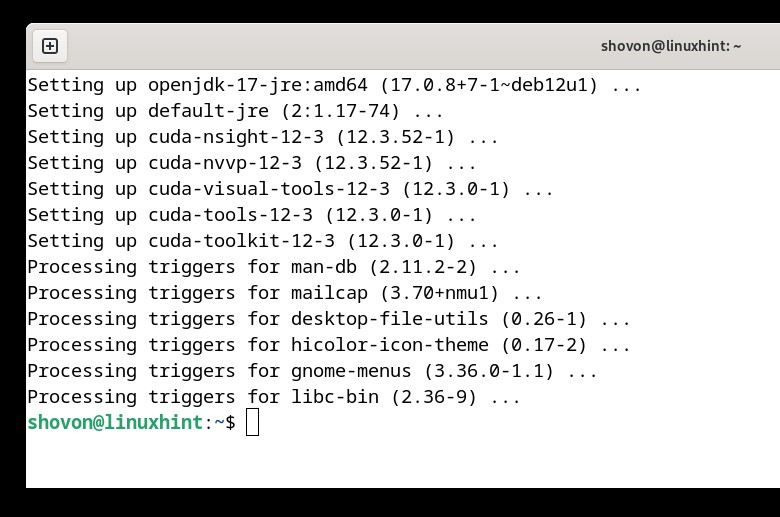
At this point, NVIDIA CUDA should be installed on your Debian 12 system.
Adding NVIDIA CUDA to the PATH of Debian 12
To be able to access the latest version of NVIDIA CUDA from the command line, you have to add the CUDA binary directory to the PATH of your Debian 12 system.
NVIDIA CUDA will be installed in the “/usr/local/” directory of Debian 12. Each version of CUDA has its own directory. As you can see, we have the “/usr/local/cuda-12.3” directory as we installed NVIDIA CUDA 12.3.
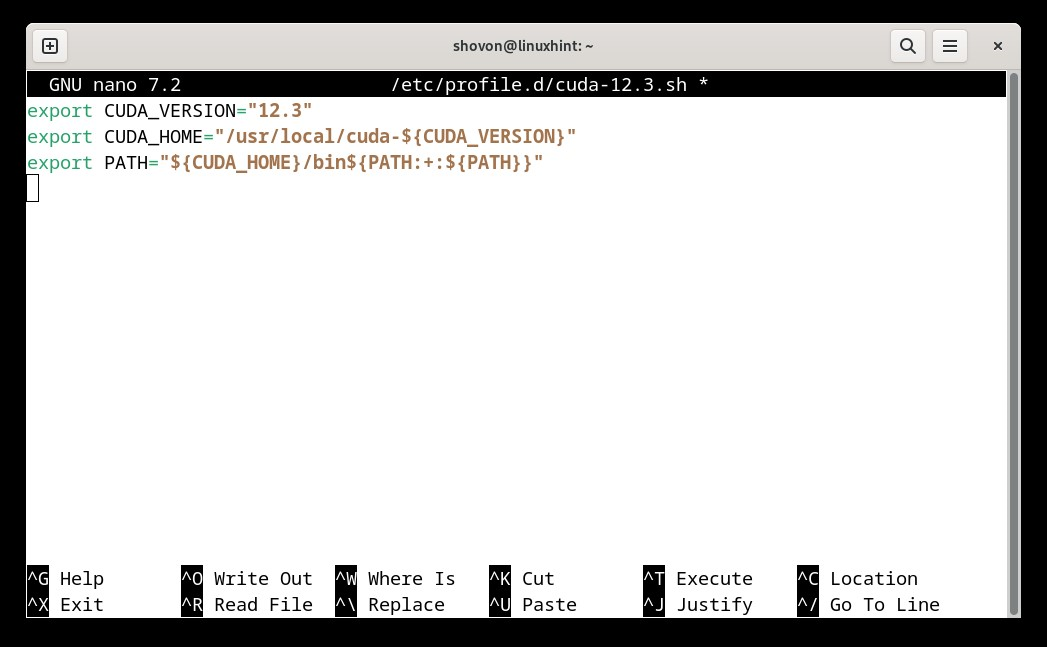
To add the NVIDIA CUDA 12.3 binary directory to the PATH, create a new file which is “cuda-12.3.sh” in the “/etc/profile.d/” directory with the nano text editor as follows:
Type in the following lines of codes in the “/etc/profile.d/cuda-12.3.sh” file:
export CUDA_HOME="/usr/local/cuda-${CUDA_VERSION}"
export PATH="${CUDA_HOME}/bin${PATH:+:${PATH}}"
Once you’re done, save the “cuda-12.3.sh” file by pressing <Ctrl> + X followed by “Y” and <Enter>.
For the changes to take effect, reboot your Debian 12 system:
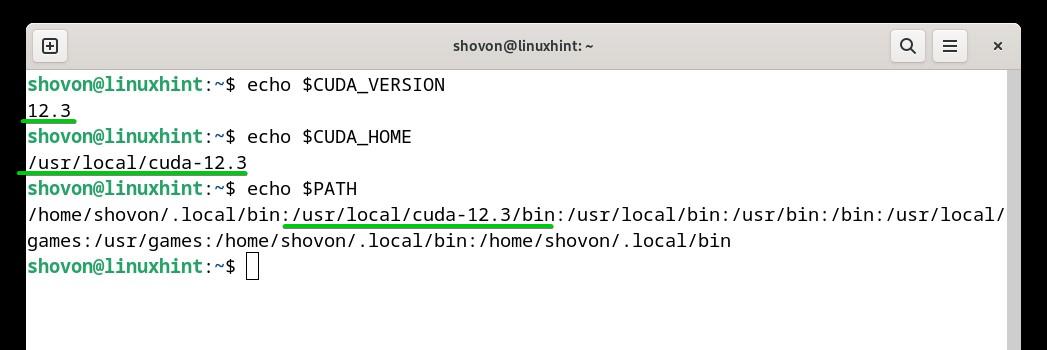
Once your Debian 12 system boots, you should see that NVIDIA CUDA 12 is in the PATH of your Debian 12 system.
$ echo $CUDA_HOME
$ echo $PATH
You should be able to access the NVIDIA CUDA commands like “nvcc” as you can see in the following screenshot:
Adding the NVIDIA CUDA Libraries to the Debian 12 Library Search Path
To compile the NVIDIA CUDA programs, you need to add the NVIDIA CUDA library path to the Debian 12 library search path at times.
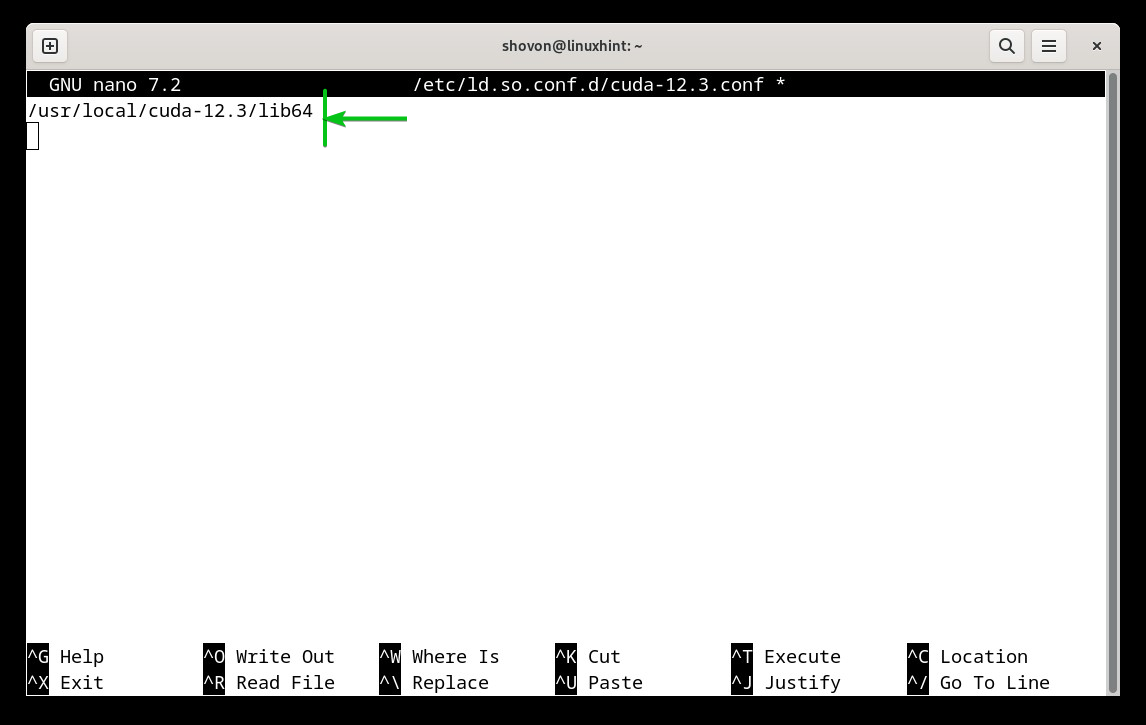
First, create a new file which is “cuda-12.3.conf” (as we installed NVIDIA CUDA 12.3) in the “/etc/ld.so.conf.d/” directory and open it with the nano text editor as follows:
Type in the NVIDIA CUDA library path in the file and press <Ctrl> + X followed by “Y” and <Enter> to save the file.
In our case, the NVIDIA CUDA library path is “/usr/local/cuda-12.3/lib64” (as we installed NVIDIA CUDA 12.3).
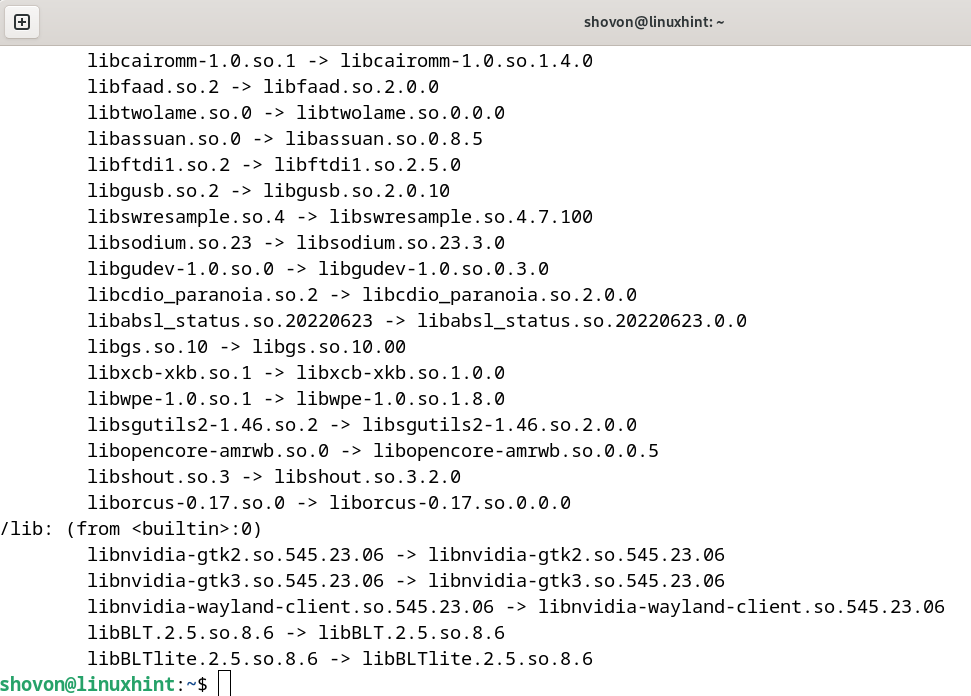
For the changes to take effect, run the following command:
The Debian 12 library database should be updated and your desired version of NVIDIA CUDA libraries should be added to the library path.
Run the NVIDIA CUDA Commands (i.e. nvcc) with Superuser/Root Privileges via Sudo
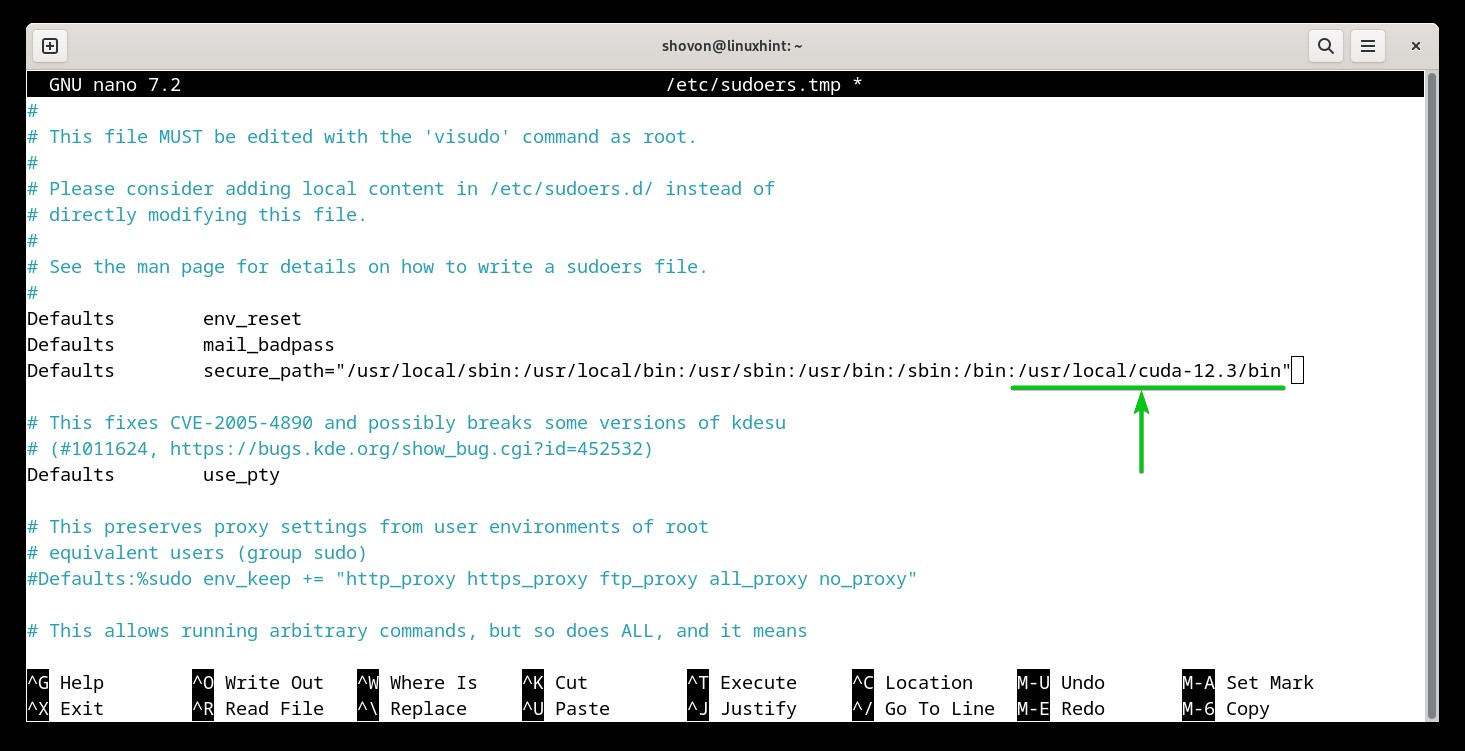
At times, you may need to run some NVIDIA CUDA commands (i.e. nvcc) with superuser privileges. To run the NVIDIA CUDA commands with superuser/root privileges via sudo, you must add the NVIDIA CUDA “/usr/local/cuda-12.3/bin” binary directory (where your desired version of NVIDIA CUDA is installed) to the “/etc/sudoers” file.
First, open the “/etc/sudoers” configuration file with a text editor as follows:
Add the “/usr/local/cuda-12.3/bin” text at the end of the “secure_path” of the “/etc/sudoers” file as marked in the following screenshot:
Once you’re done, press <Ctrl> + X followed by “Y” and <Enter> to save the “/etc/sudoers” file.
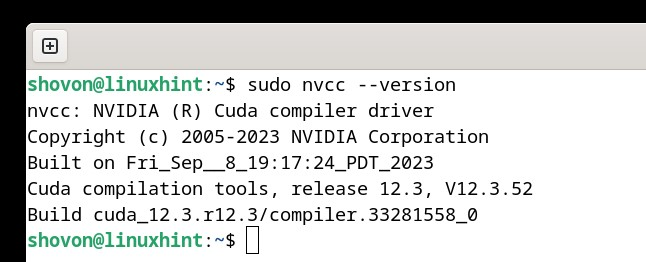
Now, you can run the NVIDIA CUDA commands (i.e. nvcc) with superuser/root privileges via sudo.
Writing, Compiling, and Running a Simple CUDA Program
Since you successfully installed the latest version of NVIDIA CUDA on your Debian 12 system, you can start writing your first CUDA program, compile it with the “nvcc” command, and run it.
Conclusion
In this article, we showed you how to add the official package repository of a specific version of NVIDIA CUDA 12 on Debian 12. We also showed you how to install your desired version of NVIDIA CUDA 12 on Debian 12. We showed you how to add the NVIDIA CUDA binary path to the PATH of Debian 12 as well as add the NVIDIA CUDA libraries to the library path of Debian 12. Finally, we showed you how to run the NVIDIA CUDA commands on Debian 12 with superuser/root privileges via sudo.

