When it comes to developers, Bitmaps are the most fundamental and useful tool to read and process the images in a wide array of programming languages which includes the C#.
In this tutorial, we will learn about the Bitmap class in C#. We will discuss what features it offers and the methods and properties that we can use to perform the image operations. This includes cropping, resizing, pixel manipulation, colour palette extraction, and more.
C# Bitmap Class
The “Bitmap” class in C# encapsulates the GDI+ bitmap which contains the pixel data from the graphics image and associated attributes. Therefore, if you need to work with a pixel driven image, the “Bitmap” class has you covered.
The syntax of the class is as follows:
Let us explore how to use this class to work with images.
Loading an Image
The very first step before working with bitmaps is loading the image into the application. We can use the “Bitmap” class and pass the path to the image as shown in the following example:
using System.Drawing;
class Program
{
static void Main()
{
Bitmap bitmap = new Bitmap("C:\\sample\\linuxhint\\telegram.png");
Console.WriteLine("Image Loaded Successfully!");
}
}
NOTE; This may require you to have the System.Drawing.Common installed on your project. Check the following resource for more details:
https://www.nuget.org/packages/System.Drawing.Common/
In the given example code, we start by creating a “Bitmap” object and pass the file of the image to the constructor. This should load an image into the memory and allow us to work with it.
Accessing the Image Pixels
For us to manipulate the loaded image, we need to work with the pixel data. Take the following code that demonstrates how to get the pixel data of the image:
Console.WriteLine($"Color of pixel at (1,1): {color}");
The “GetPixel” method allows us to retrieve the color of a specific pixel at the specified coordinates.
You can also use the SetPixel() method and specify the “x” and “y” coordinates and the color to the set.
Image Rotation
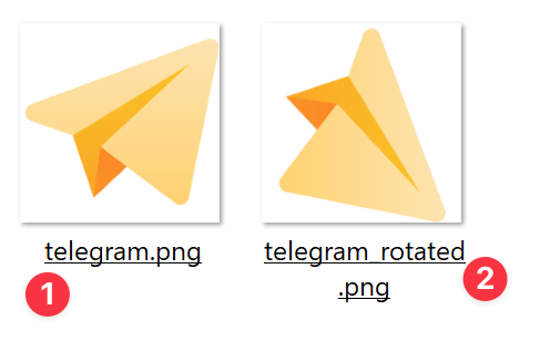
We can use the RotateFlip() method to rotate and flip a given image. For example, to rotate the image to 90 degrees without flipping, we can use the code as follows:
using System.Drawing;
class Program
{
static void Main()
{
Bitmap bitmap = new Bitmap("C:\\sample\\linuxhint\\telegram.png");
bitmap.RotateFlip(RotateFlipType.Rotate90FlipNone);
bitmap.Save("C:\\sample\\linuxhint\\telegram_rotated.png");
}
}
This should rotate the image to 90 degrees without flipping and save the resulting image to the disk as shown in the following preview:
Getting the File Format
Bitmap also provides us with the “RawFormat” property which allows us to get the format of the image file as shown in the following example:
using System.Drawing;
using System.Drawing.Imaging;
class Program
{
static void Main()
{
Bitmap bitmap = new Bitmap("C:\\sample\\linuxhint\\telegram.png");
ImageFormat format = bitmap.RawFormat;
Console.WriteLine($"Image Format: {format}");
}
}
Output:
Getting the Color Palette
We can also fetch the color palette of a given image using the “Palette” property from the “Bitmap” object.
Example:
using System.Drawing;
using System.Drawing.Imaging;
class Program
{
static void Main()
{
Bitmap bitmap = new Bitmap("C:\\sample\\linuxhint\\telegram.png");
ColorPalette palette = bitmap.Palette;
Console.WriteLine("Color Palette:");
foreach (Color color in palette.Entries)
{
Console.WriteLine(color);
}
}
}
The code should extract and return the color palette of the specified image.
Conclusion
In this tutorial, we learned how to work with the “Bitmap” class in C# to read and manipulate the pixel-based images.

