Building graphical applications with C# and the Windows Forms framework is one of the best ways to expand your C# skills. Like all other programming formats, you are eventually going to find yourself building an application that works with files.
In this tutorial, we will show you the basics of working with Windows Graphical application by learning how to build an app that can read the files on the click of a button.
We will mainly focus on the OpenFileDialog which allows us to browse and select the files from a filesystem. It is part of the System.Windows.Forms namespace. Hence, you will be required to have the WFP tools installed.
Creating a Project
Before we can use the OpenFileDialog Component, we need to create a project that supports the Windows Forms. You can follow the steps as outlined in the following using the Visual Studio 2022 and above.
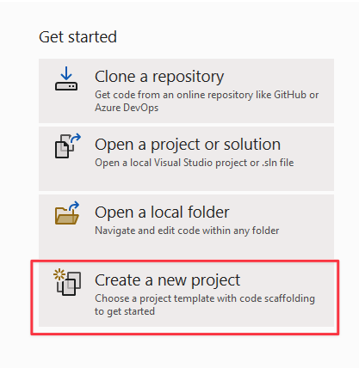
Launch the Visual Studio 2022 and select the “Create a new project” option.
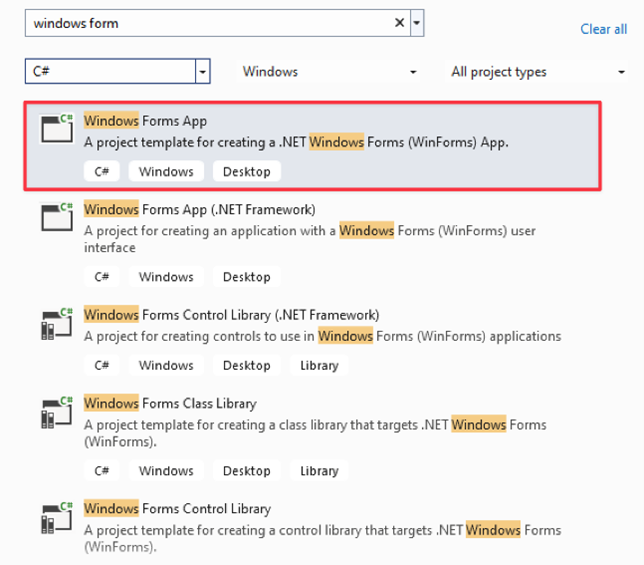
In the next step, choose a project template that you wish to use. In our case, we wish to create a Windows Forms App. Select this template.
In the next step, select your NET version and provide a name for your project.
Adding a Button
Once you create the project, the Visual Studio will take you to a drag and drop editor where you can drag the components that you need.
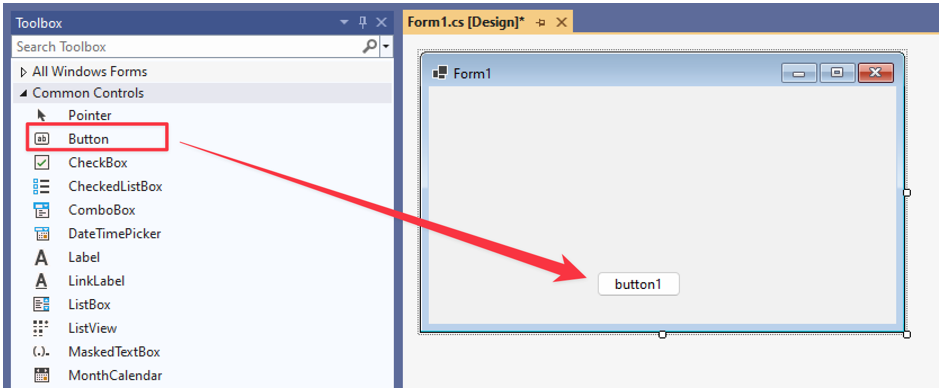
For our case, the first thing that we need is a button that trigger the OpenFileDialog. From the toolbox menu, drag and drop the button on to the canvas.
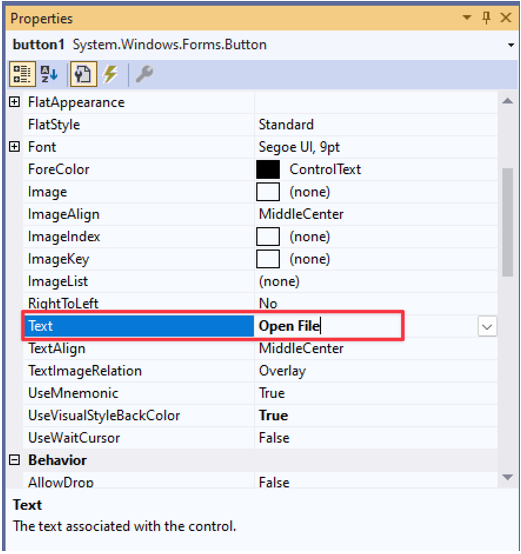
Change the text property of the button to “Open File”.
Button Click Event Handler
At this moment, the button does nothing upon a click. To ensure that the button opens the OpenFileDialog, we need to add an event handler.
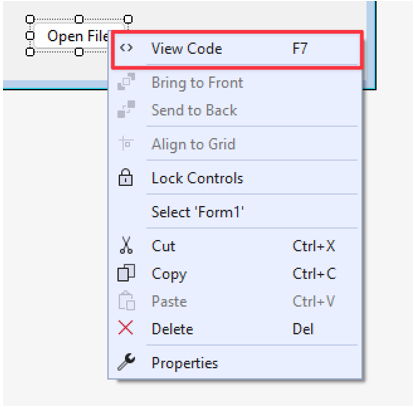
Double click on the button or press F7 to open the code editor.
In the button event handler, add the following code to initialize and open the OpenFileDialog:
{
using (OpenFileDialog openFileDialog = new OpenFileDialog())
{
if (openFileDialog.ShowDialog() == DialogResult.OK)
{
string selectedFile = openFileDialog.FileName;
MessageBox.Show("Selected file: " + selectedFile);
}
}
}
In the given example, we start by creating an instance of the OpenFileDialog class. We also use the “using” statement to ensure that it is disposed properly once the operation is done to avoid wasting the resources.
We then check if the user has confirmed the file selection by clicking on the “OK” button.
Finally, we fetch the full path of the selected path and display it inside a MessageBox component.
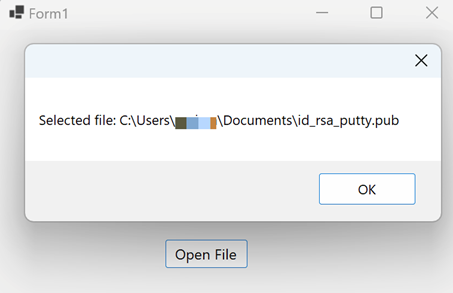
Try running the code and see what it does. In our case, the code allows us to open the file selector based upon a button click and display the path to the selected file as follows:
Selecting Specific File Types
Depending on your application usage, you may only want to read specific files. This is where the file filtering comes into play. Suppose we only want to select the image files, we can implement a file filter functionality for image files by setting the “Filter” property of the OpenFileDialog.
Take a look at the following code:
{
using (OpenFileDialog openFileDialog = new OpenFileDialog())
{
openFileDialog.Filter = "Images|*.jpg,*.jpeg,*.png,*.gif,*.bmp,*.tiff,*.webp,*.heif,*.ico,*.raw";
if (openFileDialog.ShowDialog() == DialogResult.OK)
{
string selectedFile = openFileDialog.FileName;
MessageBox.Show("Selected file: " + selectedFile);
}
}
}
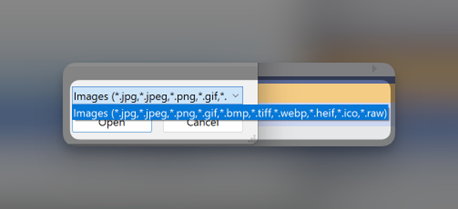
Once we run the code and click the button, we should see the file types that we are allowed to select as shown in the following example:
Displaying the File Contents
To add more functionality to our app, we can display the contents of the file using a message box as follows:
{
using (OpenFileDialog openFileDialog = new OpenFileDialog())
{
openFileDialog.Filter = "Text Files|*.txt";
if (openFileDialog.ShowDialog() == DialogResult.OK)
{
string selectedFile = openFileDialog.FileName;
string content = File.ReadAllText(selectedFile);
MessageBox.Show("File Content: " + content);
}
}
}
In this case, we are filtering for text files since they are simple to read. Upon selecting the file, we use the File.ReadAllText() and save the contents of the file to a variable.
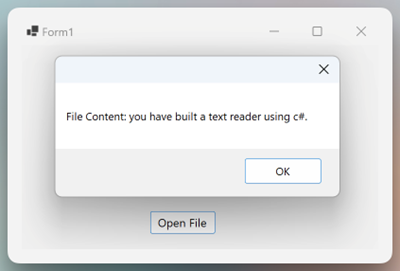
We then display the file contents using the MessageBox as shown in the resulting file functionality:
There you have it!
Conclusion
In this awesome tutorial, you learned how to build a basic GUI application in C# that can read the file and display the contents using the OpenFileDialog. You also learned the features such as filtering for specific files, etc.

