What Is the Kubectl Scale Command?
One of Kubernetes’ many useful qualities is its ability to scale an application. Scaling the containerized application is easy with the “kubectl scale” command. Using the scale command helps to add the replica in the Kubernetes cluster to control the increased traffic.
Using this approach, users can provide one or more prerequisites that must be met before scaling takes place such as the current replicas or resource versions. By evenly distributing the workload among the pods in the Kubernetes cluster, scaling enables Kubernetes to control the increasing traffic load. The multiple replicas in the Kubernetes cluster help to perform the application updates on each replica.
Here, you can find all the steps using the “kubectl scale” command.
Step 1: Run the Kubernetes Cluster
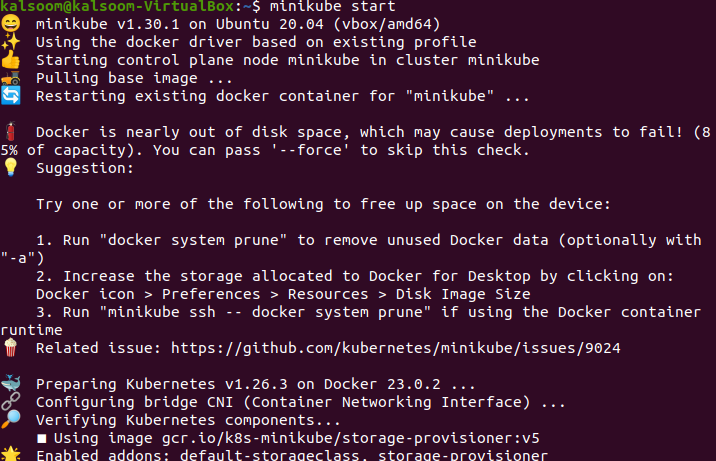
Let’s run the minikube kubernetes cluster so that the kubectl command can access, add, and control the replicas in the pods in the cluster. In this example, we start a Minikube cluster using the following script:
When you execute this command, it shows the following output:
Step 2: Check the Deployments
In this step, we will learn how to check the available deployments in our Kubernetes cluster. The following script is executed by running the following command in your minikube cluster:
After executing the previous script, the following screenshot shows the output:

We observed from the previous output that two containers named “Nginx1-deployment1” and “php” are running. “Ready” shows the number of replicas available for deployment. “Up-to-Date” indicates the number of replicas updated. “Available” shows the replicas that are not updated yet. “Age” indicates the lifeline of replicas since it was created.
Step 3: Scale the Deployments
In this step, we use the “kubectl scale –replicas deployment” command to set the number of replicas that are used for deployment. In this example, scale up the replica named “php”, and add one to three replicas. The following script is executed:
After executing the script, the following screenshot shows the result:

Step 4: Check the Replicasets
In this step, we use the “kubectl get rs” command to check the available replicasets. The following script is executed:
After executing the previous script, the following attached screenshot shows the output:

Step 5: Scale Up the Replica Set
In this step, we use the “kubectl” command with the scale resources for deployment. Here, we take the “php” replicas from one to three. The following command is executed:
After executing the mentioned command, the following output is generated:

Step 6: Create a YAML File
Here, we will learn to create the YAML file in the Kubernetes cluster. When using the Kubernetes API to construct an object, the information is supplied by a “.yaml” file to the “kubectl” command. Kubectl transforms the data to JSON before sending an API call. The YAML file is useful for deployment and application testing. There are various types in Kubernetes to create and edit the file. In this article, we use the nano command to create the YAML file because it is the easiest way and best choice for beginners.
To generate a YAML file with nano, follow all the steps that are listed in the following. You must first navigate to the directory location where you wish to create or change the desired file. The file’s name should then be typed after nano.
Execute the following script to create the “.yaml” file:
Step 7: YAML File Information
Here is the “deploye.yaml” file that shows the required fields of a Kubernetes object that contain the object spec information such as (name) for a Kubernetes deployment. The following is the deployment “.yaml” file information:
GNU nano 4.8 deploye.yaml
apiVersion: apps/v1
kind: Deployment
metadata:
name: kalsoom-deployment
spec:
replicas: 5
selector:
matchLabels:
app: demo-app
template:
metadata:
labels:
app: demo-app
spec:
containers:
- name: nginx
image: nginx:latest
Step 8: Create the Deployment
In this step, let’s create the YAML file named “deploye.yaml”. The following script is executed in the minikube cluster:
The following is the output screenshot of the executed command which shows that the yaml file has been created:
![]()
Step 9: Get the Pods Details
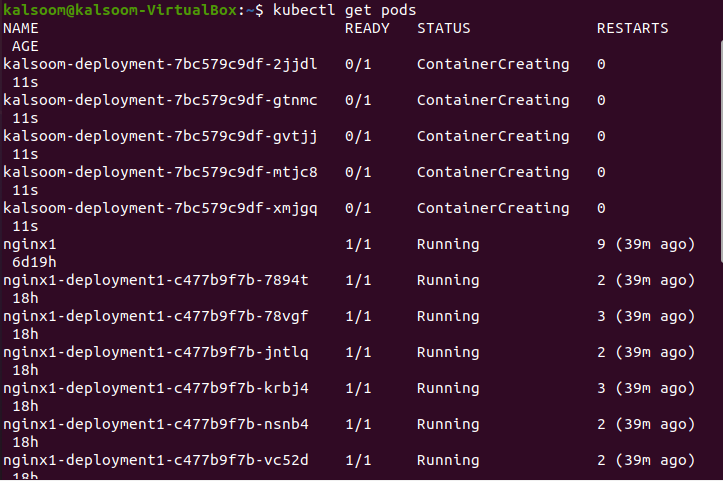
In this step, we use the “kubectl get pods” command to list down all the pods details in the cluster. The pod in the Kubernetes is the collection of units that share the resources. The following script is executed by running inside the Kubernetes cluster:
The following script is executed to check that the pod instances are scaled:
Step 10: Scale the Deployments
In this step, we use the “scale” command to set the number of replicas that are used for deployment. In this example, scale up the replica named “kalsoom-deployment”, and add one to fifteen replicas. The following script is executed:
After executing the command, the following screenshot shows the result:

Step 11: Get the Pods Details
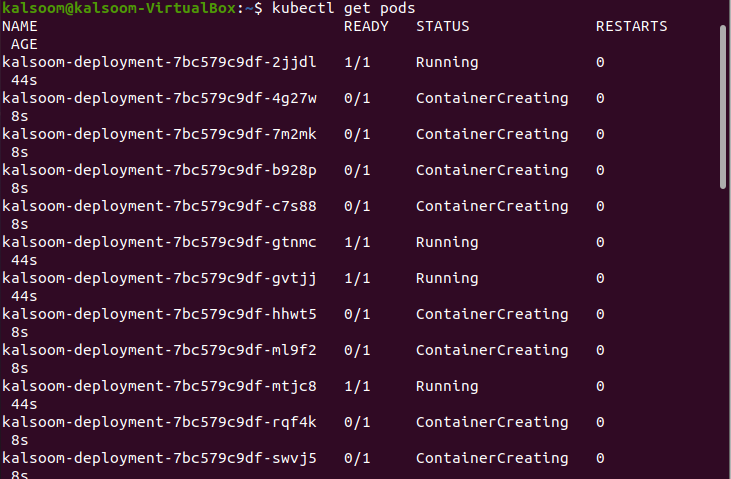
Step 9 is repeated here. This command lists down the currently available pod instances that are scaled in the Kubernetes cluster. The following script is executed:
The following is the output:
Step 12: Scale the Deployments
Step 10 is repeated here. We use the “scale” command to set the number of replicas that are used for deployment. In this example, we add one to seven replicas. The following script is executed:
After executing the script, the following screenshot shows the output:

Step 13: Get the Pods Details
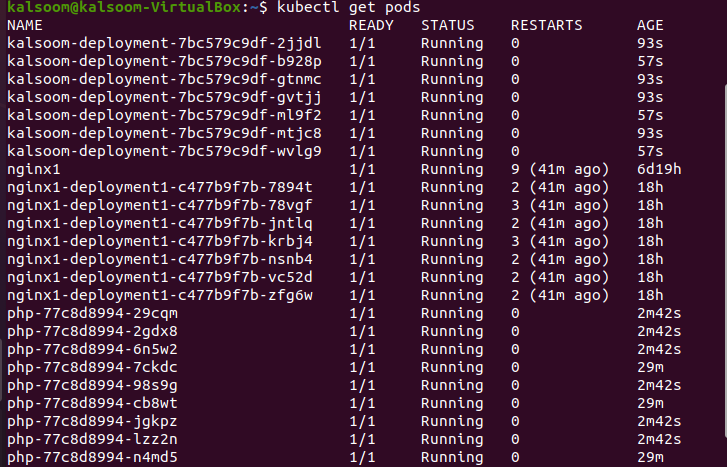
Step 11 is repeated here. The following script is executed to check that the pod instances are scaled:
The following is the output of the executed code:
Step 14: Scale the Deployments
In this step, we learn to scale the replicas that are used for deployment. In this example, we can see that the current replicas of kalsoom-deployment are seven, and we scale the kalsoom-deployment to five. The following script is executed:
The following is the screenshot that shows the output:

Conclusion
One of the most powerful features of Kubernetes is the “kubectl scale” which helps handle the increased traffic and provide the equal resources to each pod. To manage the the increasing traffic, an administrator can create the replicas of that pods by preconditioning the resources. This way, the applications can also be updated. In this article, we learned the two methods: one for upscale replicas and another for downscale replicas. Here, the “scale” command is used to create the replicas. This article focused on the detailed steps of adding, controlling, and deploying the “scale” command.