What Is a Taint in Kubernetes?
Before we dive into the “kubectl remove taint” guide, let’s first understand what a taint is in Kubernetes. To stop the pods from being slated on a certain node, a taint is utilized. When a taint is added to a node, it indicates that the node is incompatible with operating certain pods. Nodes with taints can only run the pods that have tolerations for the taints. Taints are useful when you want to keep certain nodes free from pods to be scheduled on them or when you want to ensure that certain pods are spread across different nodes.
In Kubernetes, nodes can be tainted with special labels that affect how the pods are scheduled. Taints are used to indicate that a node should not be used to schedule the pods on them, or that the pods can only be loaded on nodes that have a specific toleration. This is useful in situations where you need to ensure that pods are distributed across nodes in a specific way, or when you need to ensure that a node is reserved for specific pods.
While taints can be useful in certain scenarios, there are times when you may need to remove them. Perhaps you need to make a node available for all pods, or you need to change the effect of a taint. In these cases, you can remove the taints from the node using the kubectl commands.
The kubectl commands are part of the Kubernetes command-line interface (CLI) which manages the Kubernetes clusters. Multiple kubectl commands allow you to remove a taint from a node, making it available for all pods. Let us discuss how to use the kubectl commands to manage the taints in a Kubernetes cluster. Follow this step-by-step guide and learn to remove the taint from a node.
Step 1: Start the Minikube
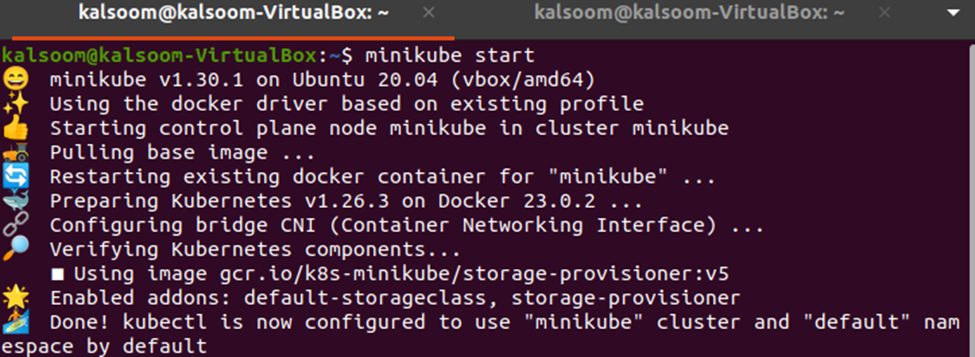
Before we can begin to work on nodes, we have to set up a Kubernetes cluster. For this, we use Minikube. A minikube cluster is used to run the single-node Kubernetes cluster on the user’s local machine. To get started, open a command line interface terminal in your Linux/Unix environment and run the following command:
This command starts a local Kubernetes cluster using Minikube just like in the following image. Once you enter this command on the terminal and press enter, you get the following output:
Step 2: Define a YAML File to Create a Node
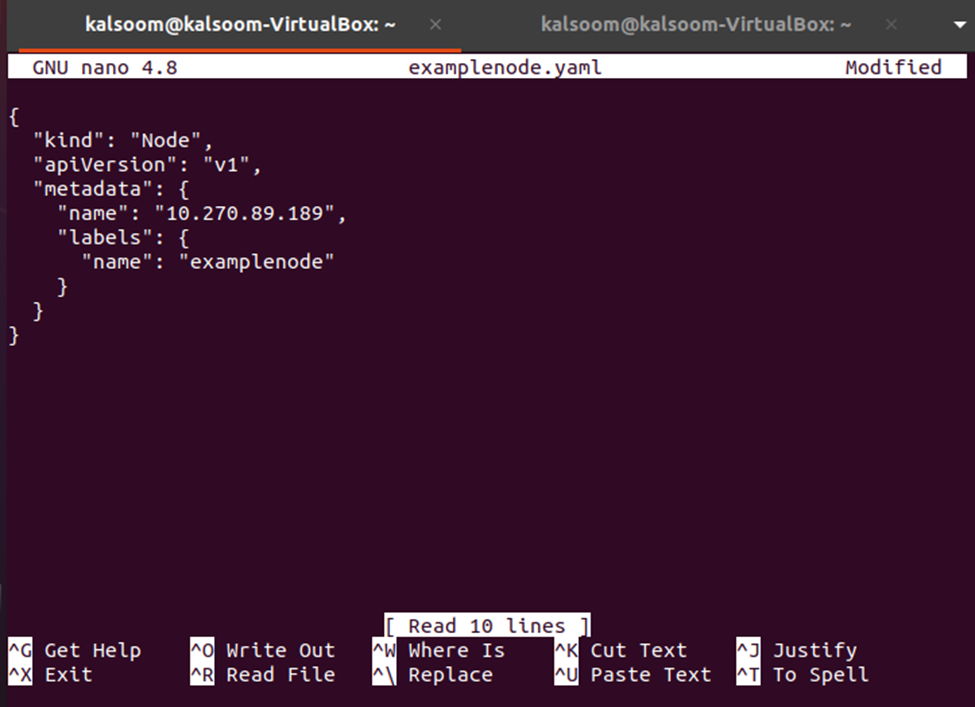
Next, we create a node using a YAML file. A node is a worker machine in Kubernetes, and it is where the containers are deployed and run. To create a node, we use a YAML file that defines the node’s attributes. Create an “examplenode.yaml” YAML file with the following command:
Now, add the following data to your “examplenode.yaml” file to create a node:
"kind": "Node",
"apiVersion": "v1",
"metadata": {
"name": "10.270.89.189",
"labels": {
"name": "examplenode"
}
}
}
This YAML file creates a node with the name 10.270.89.189 and the label name “examplenode”. The label is important because it allows us to target this node when we want to apply a taint.
Step 3: Execute the Code in the YAML File
Once we define our node, we need to apply the YAML file to create it in our Kubernetes cluster. And for that, we use the “kubectl apply” command. Copy the following command and execute it in your minikube terminal:
This command creates a node in the Kubernetes cluster.
Step 4: Add a Taint to the Node
Now that we have a node to work with, we can add a taint to it using the “kubectl taint nodes” command. A taint is a label that is applied to a node to imply that certain workloads should not be programmed on that node. Run the following command to add a taint to the recently defined node:
This command adds a taint to the node with the name 10.270.89.189. The taint has a key of “key1”, a value of “value1”, and an effect of “NoSchedule”. This indicates that no pod is scheduled on this node if they cannot tolerate the taint.
Step 5: Remove a Taint
If we need to remove the taint that we just added, we can use the “kubectl taint nodes” command again, but with a “-“ at the end of the command. This eliminates the taint from the node. Run the following command to remove the taint:
This command removes the taint with the key of “key1”, value of “value1”, and effect of “NoSchedule” from the node with the name 10.270.89.189.
Step 6: Verify the Taints
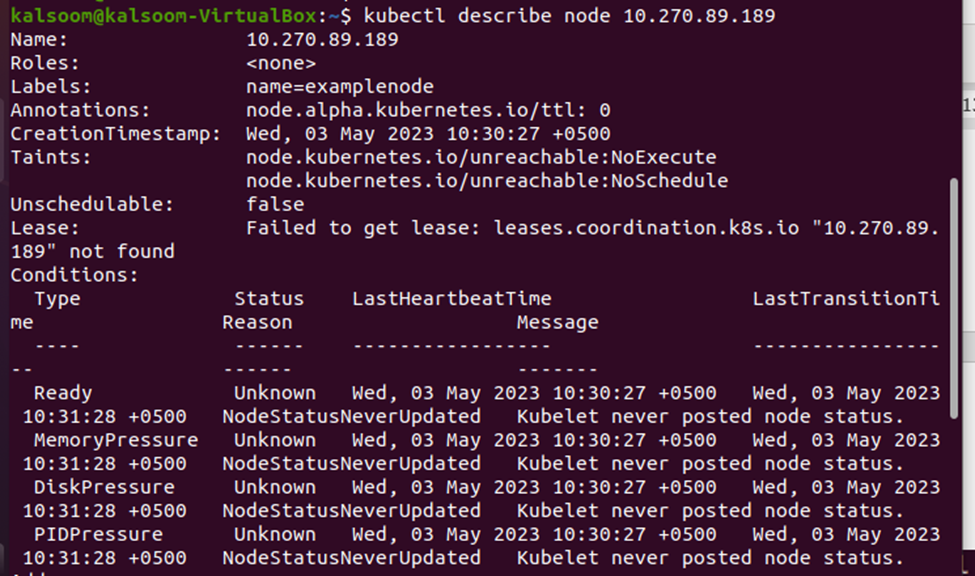
To verify that our taint is added or removed, we can use the “kubectl describe” command. This command provides a detailed information about a node, including any taints that are added. Run the following command to describe the node:
This command displays a detailed information about the node with the name 10.270.89.189, including any taints that are added or removed.
Conclusion
We discussed how to remove the taints from the nodes using the kubectl commands to manage the taints in a Kubernetes cluster. We started by setting up a local Kubernetes cluster using Minikube and creating a node using a YAML file. We then added a taint to the node using the “kubectl taint” command and removed the taint using the same command with a “-“ at the end.
Finally, we verified the taints using the “kubectl describe” command. Taints are a powerful tool to manage the workloads in Kubernetes, but they can also be complex to manage. Using the “kubectl taint” command, we can easily remove the taints from the nodes and make them available for all workloads. This can be especially useful when we need to make a node available for a specific workload or when we need to change the effect of a taint.


