This guide is all about installing this screensaver application on Linux Mint and discusses the basics of using it.
Installing XScreenSaver on Linux Mint 21
XScreenSaver can run multiple screensavers simultaneously in a slideshow mode. This allows users to have a different screensaver displayed each time their computer goes into screensaver mode, so to install it on Linux Mint 21 follow the method mentioned below:
To get this application on Linux Mint is by installing it through its default package manager and for that execute:
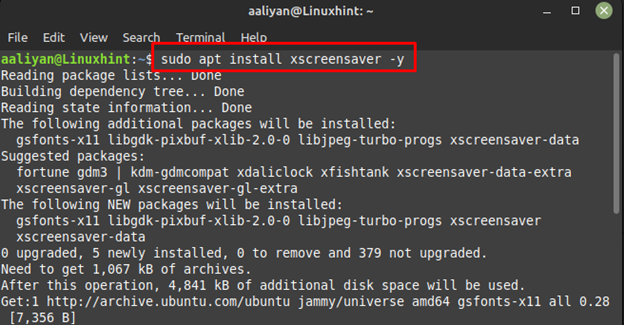
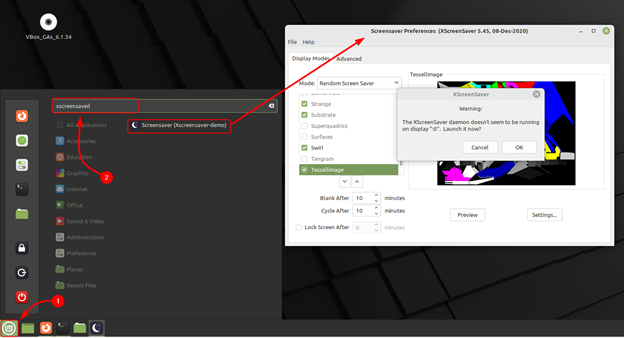
Once the installation is complete, you can launch it either from the command line or from your system’s application launcher:
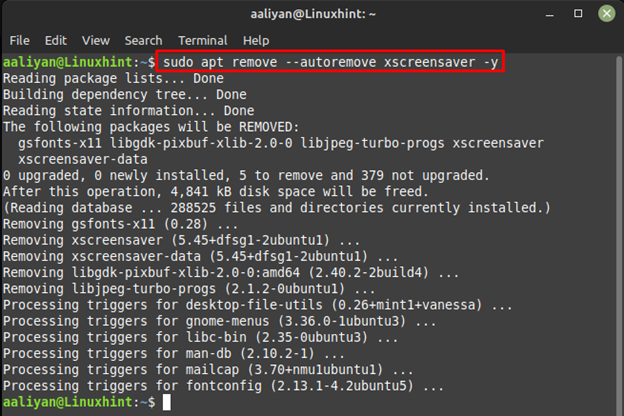
Now to remove this application from Linux Mint 21 then execute the below-mentioned command in case you installed it through apt:
Using XScreenSaver on Linux Mint 21
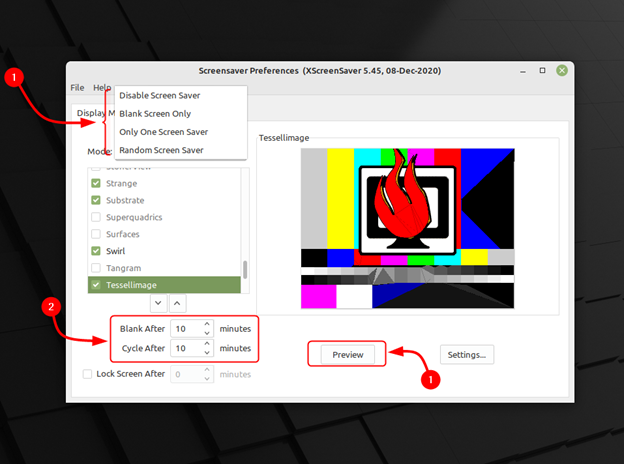
Once you have opened the settings of the screensaver select the Display Modes tab and then under the modes there are different types of images which you can select as your screensaver. Next you can set the timings for displaying the screensaver by entering the desired time in Blank After and Cycle After, also you can preview the settings on full screen by clicking on Preview:
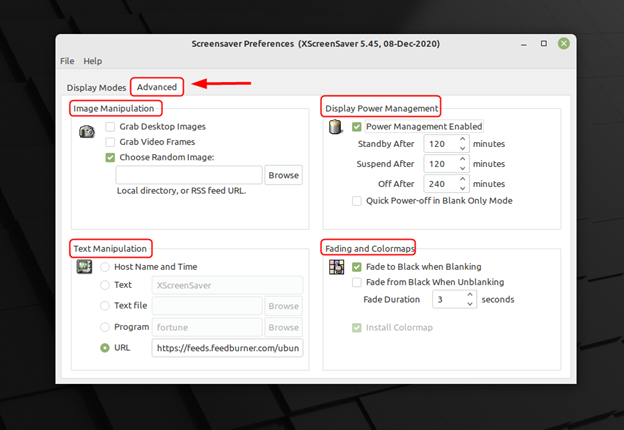
If you want to add any text or want to choose custom image or manage the power of the display then just Click on the Advanced tab and make the necessary changes according to your preferences:
Conclusion
XScreenSaver is a great way to add some visual interest to your desktop when you’re not using your computer with a wide variety of screensavers to choose from, there’s something for everyone. Plus, it’s open source and easy to install, making it a great choice for Linux users. To install it on Linux Mint one can, use either apt or aptitude package manager as both these ways are discussed in this guide.

