Once the controller receives a request to the build jobs from the users or other parts of the system, it assigns the specified jobs to the worker nodes for execution. The controller is also responsible to monitor the progress of the builds and provide the status updates to the users or other parts of the system.
Although you can use one system as the controller and the agent for testing purposes, its production environment, you need to set up a single host as the controller and the other nodes to run the build jobs.
This post discusses about how to configurea Jenkins instance to be the controller. We will work using a Windows instance as the controller and a Debian 11 instance as the Agent.
Installing Jenkins
This tutorial demonstrates how to install Jenkins on Debian 11. You can check our tutorial on how to install Jenkins on Windows.
The first step is to install the Java JDK. For this tutorial, we use the OpenJDK.
Install the required dependencies:
Once ready, we can install the Java JDK with the following command:
Once setup, we can go ahead and install Jenkins with the following command:
This should fetch the latest version of Jenkins and install it on your system. If the Jenkins package is unavailable on your system, you can manually install it by downloading the Jenkins binary on the official page.
Next, start the Jenkins service as follows:
Configure the Jenkins Controller
Login into Jenkins for the server that you wish to use as the controller. In our case, the controller runs on port 8080.
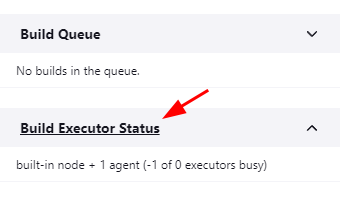
Once logged in, select the “Build Executor Status” from the left pane.
This should list the available nodes.
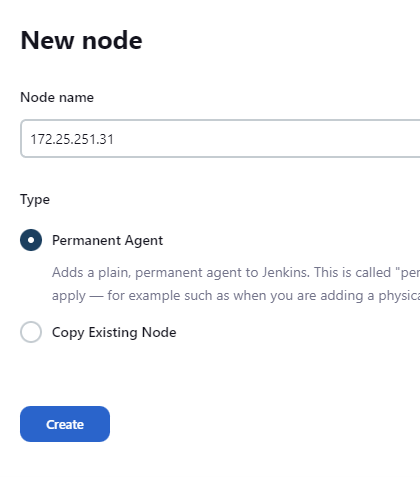
Select “New Node” on the top-right to create a new Jenkins Agent. First, give the node a name. For simplicity, we use the IP address of the target agent as the Node Name.
Next, choose the Node type as permanent Agent and click create.
In the next Window, provide all the details for your Agent including the remote directory that you wish to use as the Jenkins workspace.
NOTE: Ensure to select the Launch method as “Launch Agent via SSH” and the Host as the IP address of your target agent.
Finally, select the credentials that you use to log in to the server. You can check our tutorial on setting up the SSH credentials in Jenkins to learn more.
Once done, click on Save to apply the new Agent.
Disabling the Executors
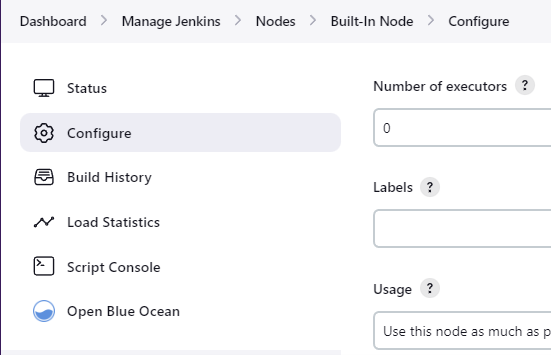
Once configured, you need to disable the executors on the controller machine. Then, in the “Build Executor Status” page, select the “Built-In Node” and choose the “Configure” option on the left-hand pane.
Next, set the “Number of Executors” to zero as shown in the following example:
Once configured, click save to apply the changes.
This allows Jenkins to use this as the controller and delegate all the build tasks to the available nodes. You can add more Agents by following the given process.
Conclusion
You learned how to set up a Jenkins instance as the controller by adding new agents and disabling the number of executors.


