Apache Maven, commonly known as Maven, is a software project management and comprehension tool. Maven uses the project object model (POM) in which a project is described in terms of its dependencies on other external modules and components.
Maven configuration files use a declarative syntax where the project structure and contents are described in a pom.xml file. Hence, instead of you as the developer specifying the steps that need to be taken to build the project, Maven takes care of that as defined in the config file.
Maven also provides many built-in plugins to support the testing, documentation, and code quality checks, making it an incredible tool to build and manage the Java-based projects.
You will often find yourself configuring the Maven projects with Jenkins for automatic testing, building, and deploying the Java applications.
This post discusses how we can install and use the Maven plugin in Jenkins.
Installing Maven
The first step is to ensure that Maven is installed on the controller on which you wish to run your Maven jobs. This depends on your target system; you can check the documentation to learn more.
NOTE: Installing Maven is not required on the agents since we can configure the Jenkins to install Maven automatically before running a specific build.
On Debian, however, we can install Maven by running the apt command:
Once installed, you can use the mvn command as follows:
This should return the installed Maven version as follows:
Maven home: /usr/share/maven
Java version: 11.0.17, vendor: Ubuntu, runtime: /usr/lib/jvm/java-11-openjdk-amd64
Default locale: en, platform encoding: UTF-8
OS name: "linux", version: "5.19.0-23-generic", arch: "amd64", family: "unix"
Configure Maven in Jenkins
The next step is to configure the Maven environment in Jenkins. Head to the Jenkins dashboard on your controller -> Manage Jenkins -> Global Tool Configuration and scroll down to the Maven section.
Click on “Add Maven” to add a new Maven installation.
Provide a name for your Maven installation. For simplicity, you can set the name as the version of Maven that you wish to install. In our case, this is version 3.8.7 (as of writing this tutorial).
Choose “Install Automatically” to allow Jenkins to download and install the specified Maven version during the build, and choose your target Maven version. Once satisfied, click save to apply the changes and return to the Jenkins dashboard.
You can repeat this process for various Maven versions. Just ensure to remember the target name during the build process.
Using Maven
Once we define the Maven installation, we can use it by specifying it in the tools block in a Jenkinsfile.
An example is as follows:
agent {
label 'maven'
}
tools {
maven '3.8.7'
}
stages {
stage('Build') {
steps {
sh 'mvn --version'
}
}
}
}
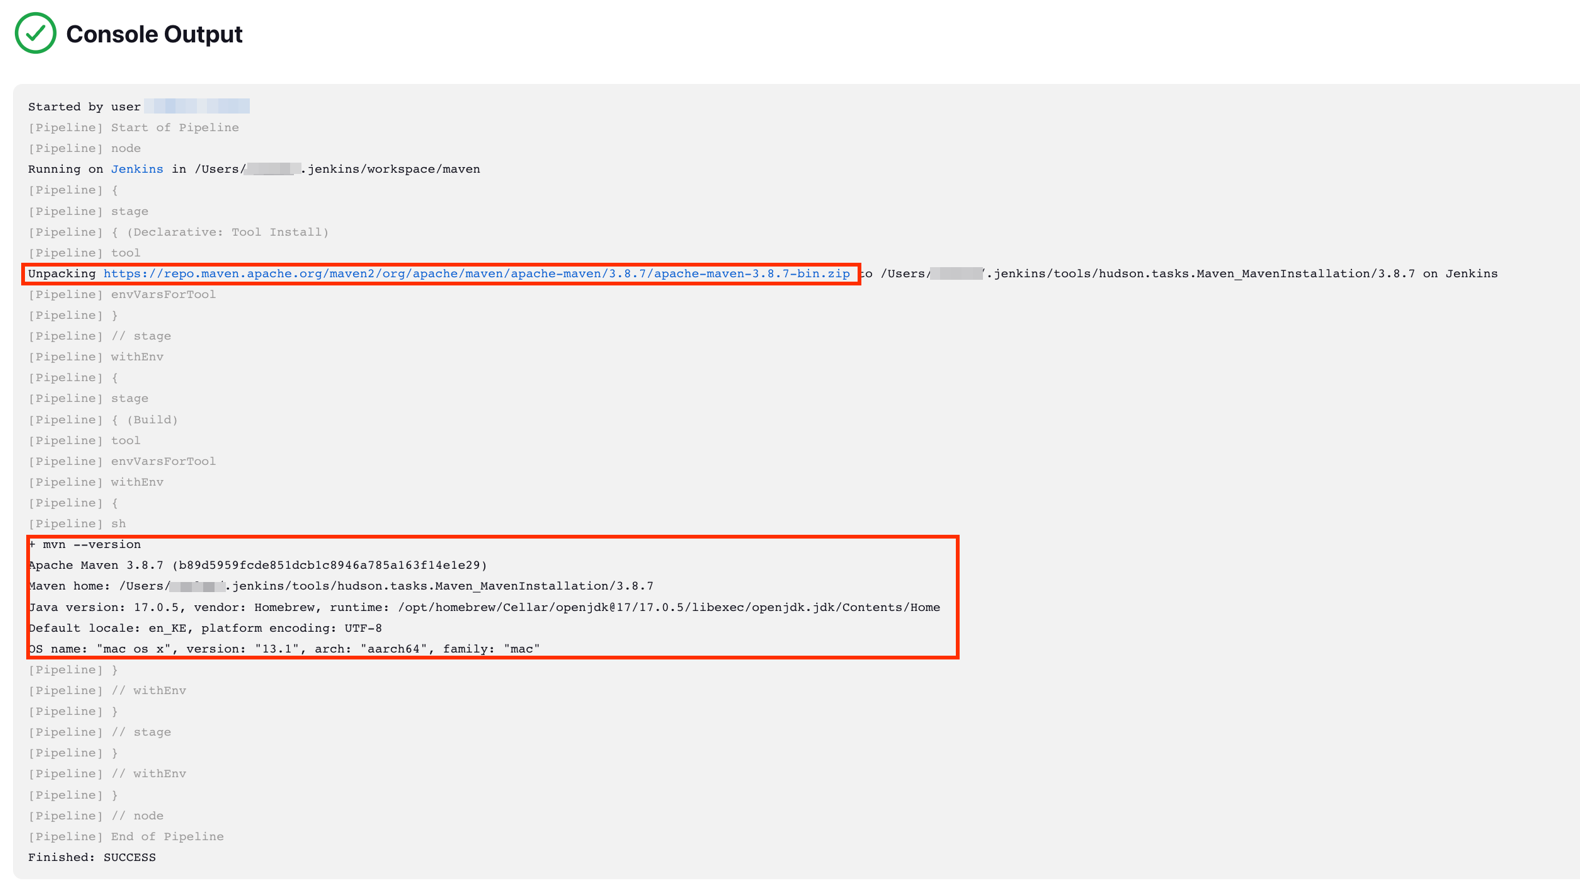
By specifying the tools block, Jenkins ensures that Maven with the specified name is installed on the agent before running the mvn command.
As we can see, Jenkins installs the Maven version before running the command on the target agent.
Conclusion
This post covers how to configure Maven on Jenkins using the Jenkins Configuration tool. We also covered how you can use Maven in a Jenkins pipeline using the tools block.


