Swap space is free physical memory in Linux systems that comes in handy when the system RAM is full and unable to store the data for current programs and needs storage temporarily. Swap space can be increased or decreased depending upon the user preferences. So, if you are planning to increase the swap space on Linux Mint to get rid of storage full errors then read this guide.
Adding swap space on Linux Mint 21
There are few steps that are compulsory to follow to add some swap space to Linux Mint 21 and those are:
Step 1: First check if the swap system is already configured on your Linux Mint or not by executing:

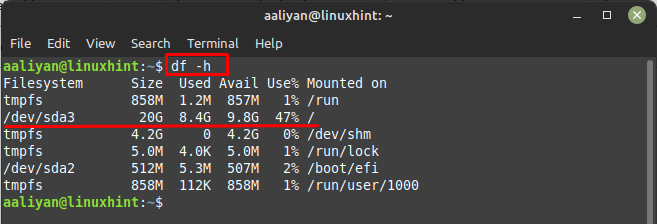
Step 2: Next, check the available space on your system to get an idea of how much swap space can be allocated and for that execute:

Step 3: Next, check the status of memory on hard disk of your Linux Mint by executing:

Step 4: Now allocate the swap space according to your preference and free space available on hard disk, for that use the below syntax:
Here, I have allocated 1GB of the space as a swap space by using the above-mentioned syntax:
Step 5: Now, check if the swap space is created or not along with the permissions of the space by executing:
Step 6: Now, give the permissions to the created swap space using the chmod commands, here I have given the permission only to the owner of the system other can’t access it, for permissions execute:
Now verify the permissions by executing:
Step 7: Once the swap space is created then it’s time to mark its as swap space and for that execute:
Step 8: Next, enable the swap space to start its functioning and for that use:
Next, check the availability of the swap space we created to be sure that the swap space is created and working correctly by executing:
There is another way of doing it and for that use below given command:
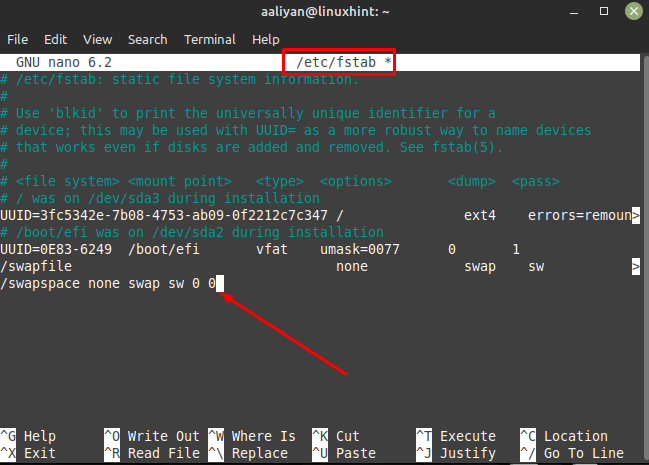
Step 9: Now to make the changes permanent add “/swapspace none swap sw 0 0” in the fstab file, for that first copy the file as a backup using:
Next, write the fstab file with the line that is stated above buy using:
Step 10: Now swap space is all set and it’s time to make some minor tweaks to soup-up the performance of Linux Mint 21. First adjust the value of swappiness which shows how often your system will use the swap space and for that first read the value using cat command:
Here the value for it is 60 so let’s change it to 30 by using:
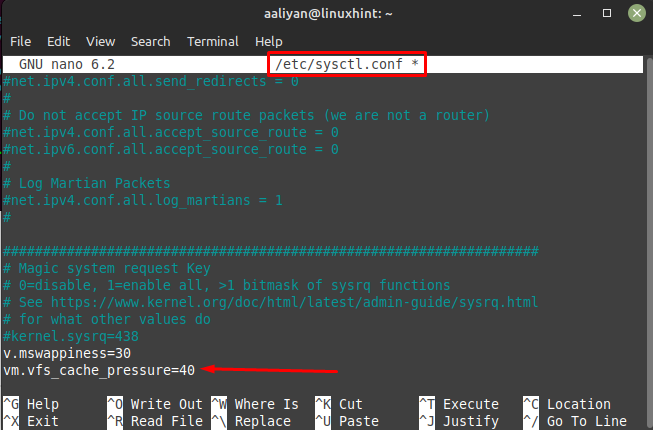
Next add the same value to the configuration file of swap space to make the changes permanent using:
Once the file is open write:
Step 11: Next, first read the default value of the cache pressure using the cat command:
Here the value is 100 by default so change it to 40 by using:
Next to keep the change permanent add the same value in the configuration file, so open the configuration file using:
Next give the value of 40 to cache_pressure by writing the given below line in the configuration file:
Now save the configuration file and close it, so this way one can add swap space in Linux Mint.
Removing Swap Space Linux Mint 21
To completely remove the swap space from Linux Mint there are some steps given below that one should follow:
Step 1: First you need to deactivate the swap space and for that execute:
Step 2: Now remove the line we added for swap space in the fstab file and to do that open the file using nano like this:
Now simply remove the entry we did that was “/swapspace none swap sw 0 0” from the file:
Step 3: Now lastly remove the swap space file from Linux Mint 21 by executing:
Conclusion
Adding swap space is one of the best ways to get rid of memory full errors as the system RAM can use it to store data temporarily. Adding swap space in Linux Mint 21 is quite just following the steps mentioned in this guide.


