How to Install LightZone on Linux Mint 21
This application is a non-destructive photo editor, which means that it does not modify the original image file. However, it creates a separate set of instructions for how the image should be modified, allowing the user to undo or change any edits that have been made. Below are some steps that one should follow to install it on Linux Mint successfully:
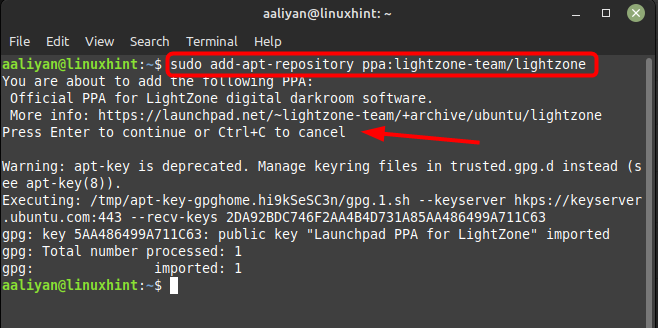
Step 1: The only way to install LightZone on Linux Mint is by adding PPA repository to its default package manager and for that execute:
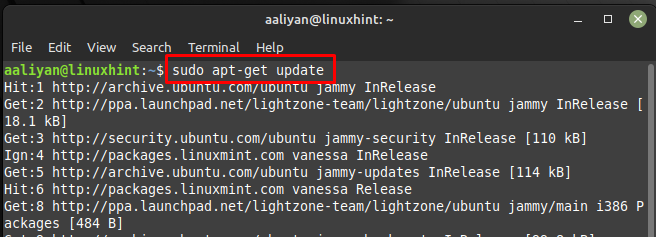
Step 2: Next to save the changes or in short update the packages list to add the repository execute:
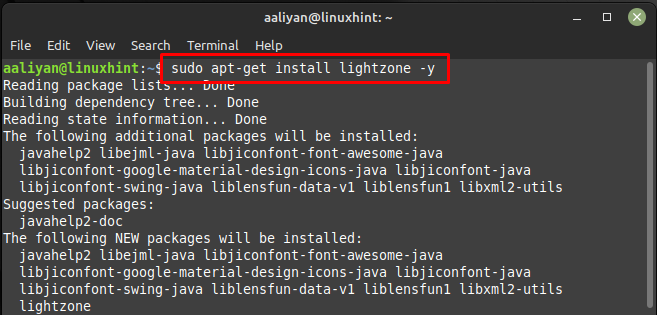
Step 3: Once the repository is added successfully now it’s time to install the LightZone image viewer on Linux Mint and for that run:
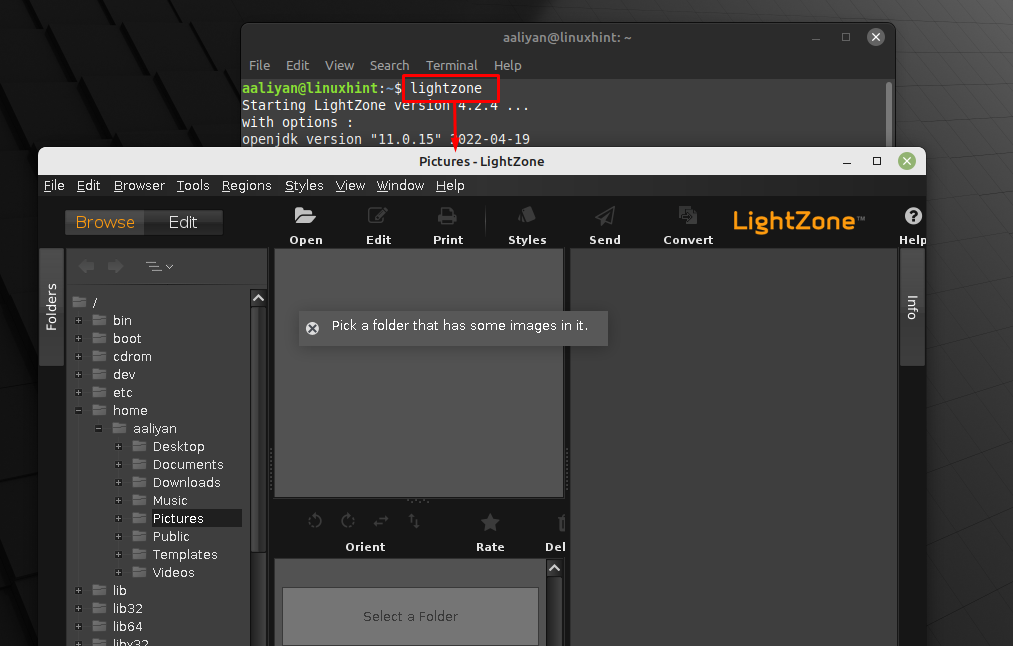
Now run this image viewer and editor application through the terminal by using:
Getting Started with LightZone on Linux Mint 21
LightZone includes tools for selective editing, allowing users to apply adjustments to specific areas of an image rather than to the entire image as a whole. So here is the getting started guide that you need to know in order to use this application effectively:
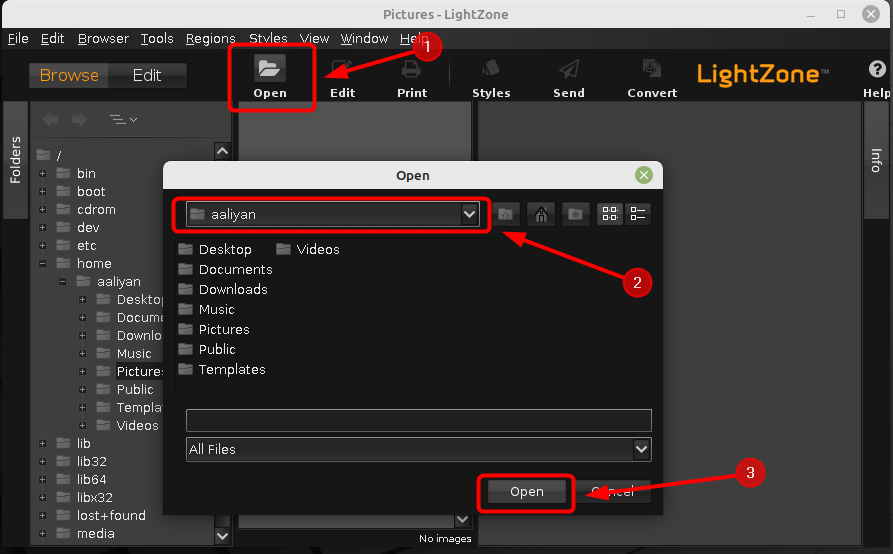
i: First you must know that you can load an image into the tool by clicking on the Open icon at the top menu bar and from the popup go the image directory and click on Open button after selecting it:
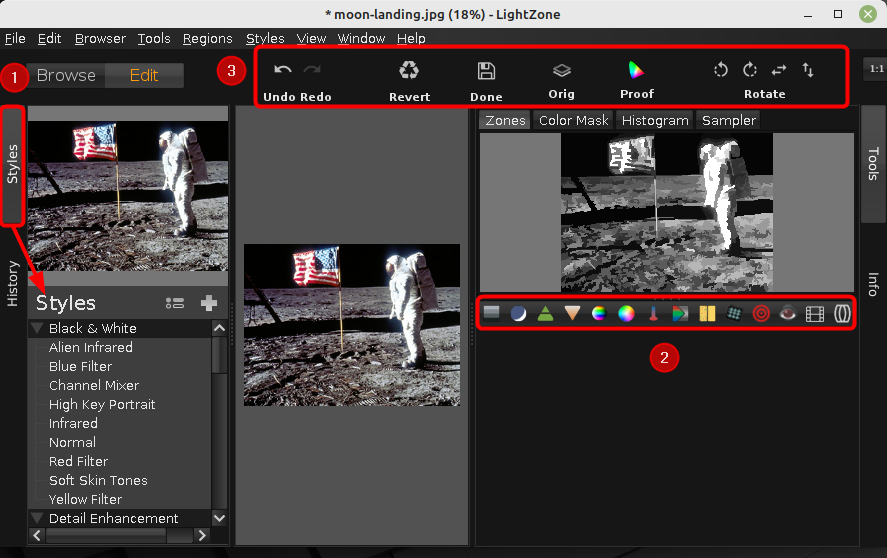
ii: Next once the image is loaded you will come across three main bars, first one is the Styles through which you can add different kinds of filters to the image. The second one can be used to change the colors or adjust the contrast to the image and the third one has option regarding the image rotation, undoing any changes and save button:
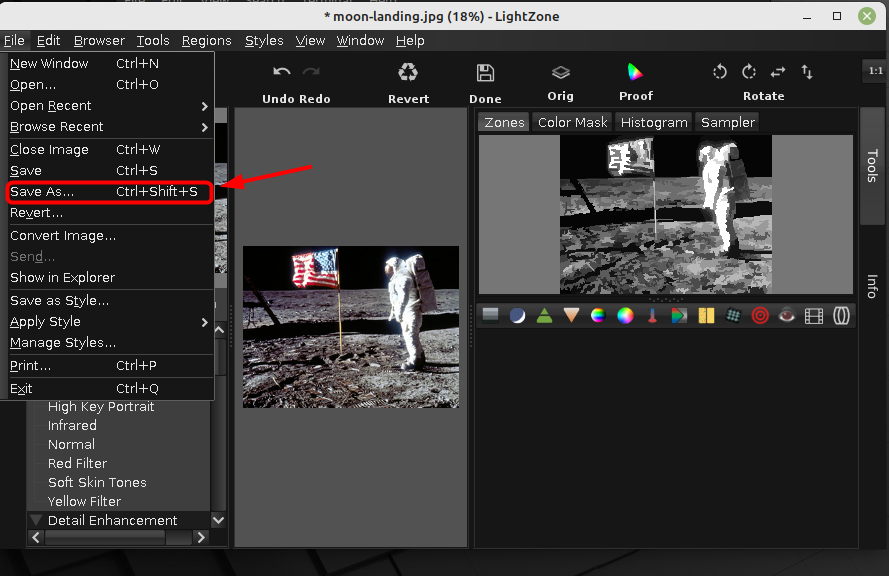
iii: After you have done all the desired changes click on Save As under the File menu to get your edited image saved:
So, these were some basics that one should be aware of to use this tool effectively, but if one no longer needs to use this application then follow the below two steps to complete remove it from Linux Mint:
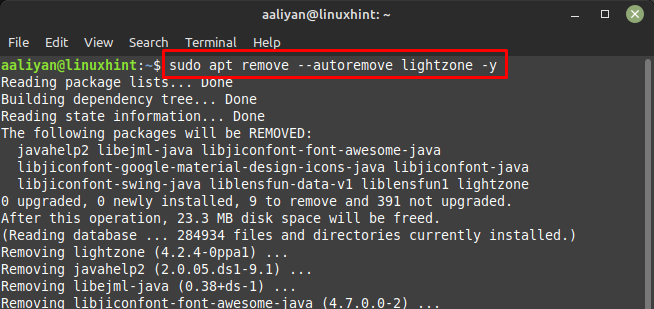
Step 1: First remove the LightZone from Linux Mint using the remove command like this:
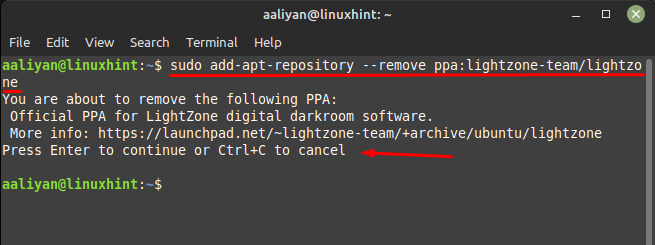
Step 2: Now remove the repository we added in the first step by executing:
Conclusion
LightZone is available for Windows, macOS, and Linux operating systems, and it offers a wide range of features and tools for editing and enhancing images. These include tools for adjusting exposure, color balance, contrast, and other image properties, as well as features for retouching, cropping, and resizing images, to get it on Linux Mint 21 just add its repository and then install it through apt package manager.

