Arduino Nano is a small compact microcontroller-based board. It is designed to be an affordable, easy-to-use option for anyone interested in learning about electronics or programming.
Despite its small size, the Arduino Nano is powerful and versatile. It has a number of different GPIO pins that can connect Arduino Nano with different sensors. It also has a built-in USB interface for programming and power, which makes it easy to use with a computer.
Sometimes working with Arduino doesn’t go as well as we think. If we are using Arduino Nano for the first time, we may encounter a failed uploading error. This article will cover possible causes and solutions to this error.
What Is Uploading Error: Exit Status 1
Failed uploading error: Exit status 1 is a generic message that occurs when Arduino IDE fails to upload code to Arduino board. Multiple reasons can lead to Uploading Error Exit Status 1.

Some causes of Exit Status 1 uploading error:
- Arduino board is not connected properly
- COM port is not selected
- Right Arduino board is not selected
- USB port of computer is not working
- Using a USB mini charging cable instead of data cable
- Serial COM port drivers missing. Click here to install the required Arduino Nano drivers.
- Arduino Tx and Rx pins are under use by any other sensors
- Outdated version of Arduino IDE
- Wrong selection of COM port
- In case of Arduino Nano using a new processor bootloader
Solutions to Fix Failed Uploading Error: Exit Status 1
We have covered some main reasons for the Failed Uploading: uploading error: exit status 1. Now we will move towards the possible solutions:
- Select the Right Bootloader Processor
- Check Arduino Nano Connection
- Check Board and Port Selection
- Make Sure COM Port Is Not Used by Any Other Device
1: Select the Right Bootloader Processor
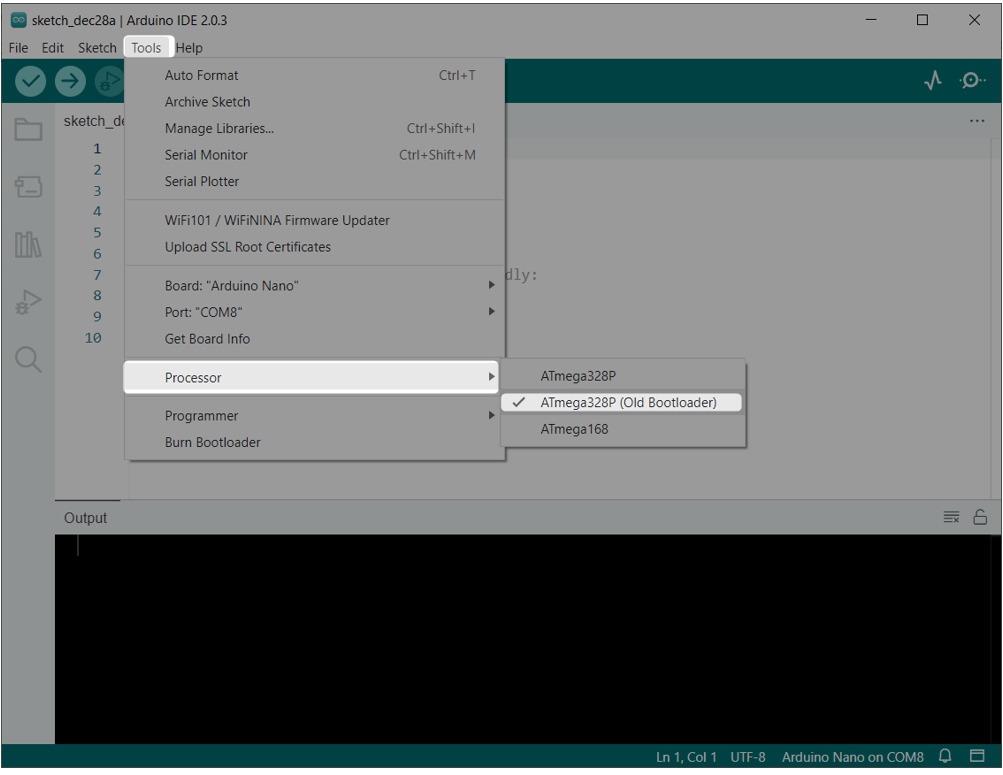
This error usually occurs when setting up Arduino Nano for the first time. Many of the Arduino Nano works over the old bootloader for ATmega328P. So before uploading code to Arduino Nano select the Old Bootloader for Atmega328P first.
Go to: Tools>Processor>ATmega328P (Old Bootloader):
2: Check Arduino Nano Connection
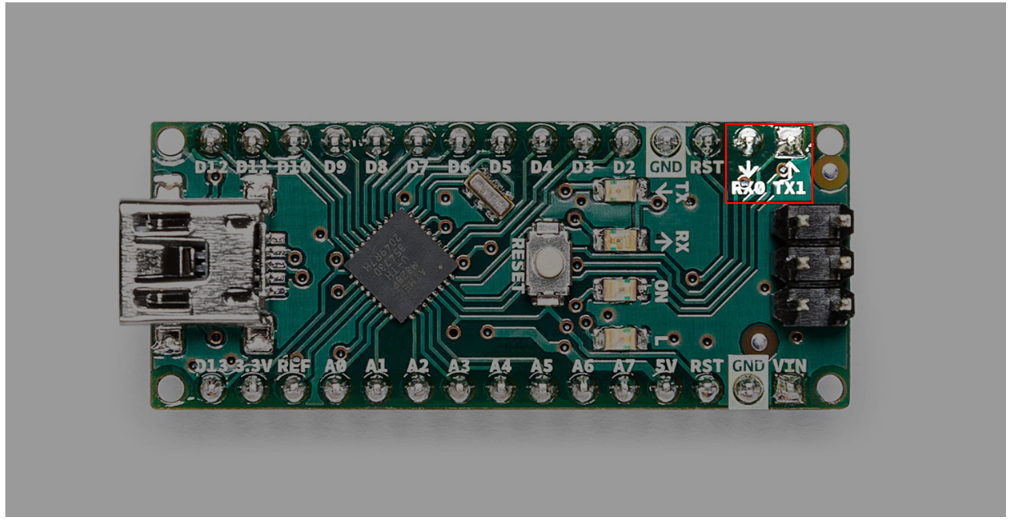
Before uploading code to the Arduino board make sure the two serial communication pins onboard that are Tx and Rx are not used by any of the other hardware or sensors. In case these two pins are in use Arduino IDE will fail to upload code to Arduino board.
This is because these two pins are connected to onboard serial communication UART interface. Using these two pins will block the computer to exchange data using the USB mini cable.
3: Check Board and Port Selection
Another solution to this error is to select the right board and COM port before uploading code to the Arduino board.
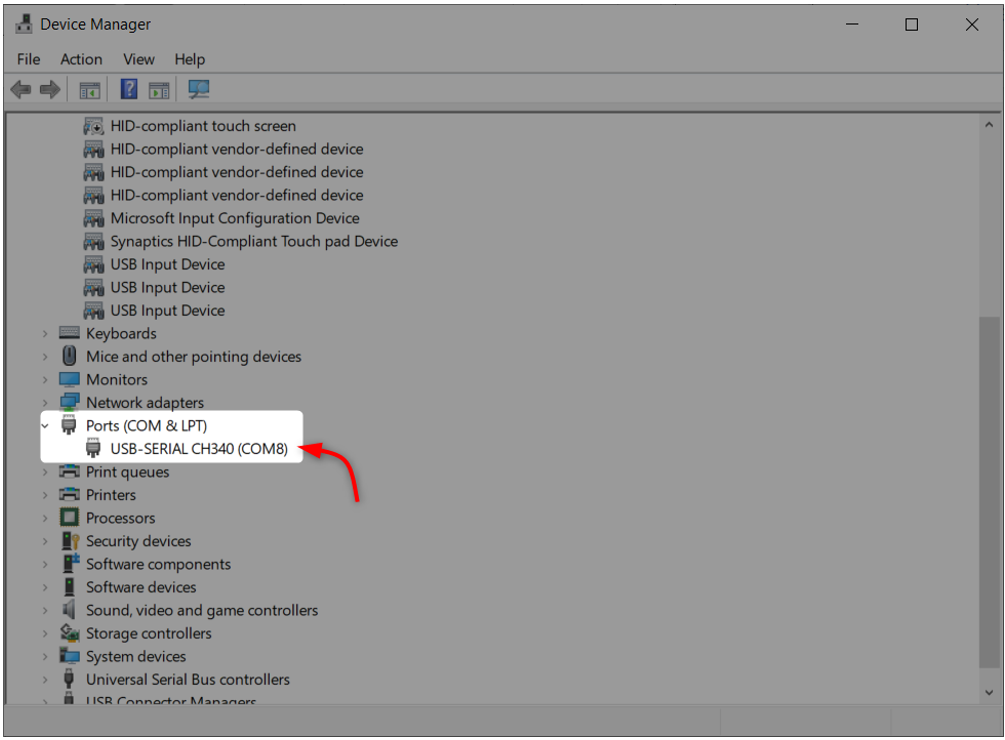
To check the COM port for Arduino board open device manager and search for COM port under COM & LPT section:
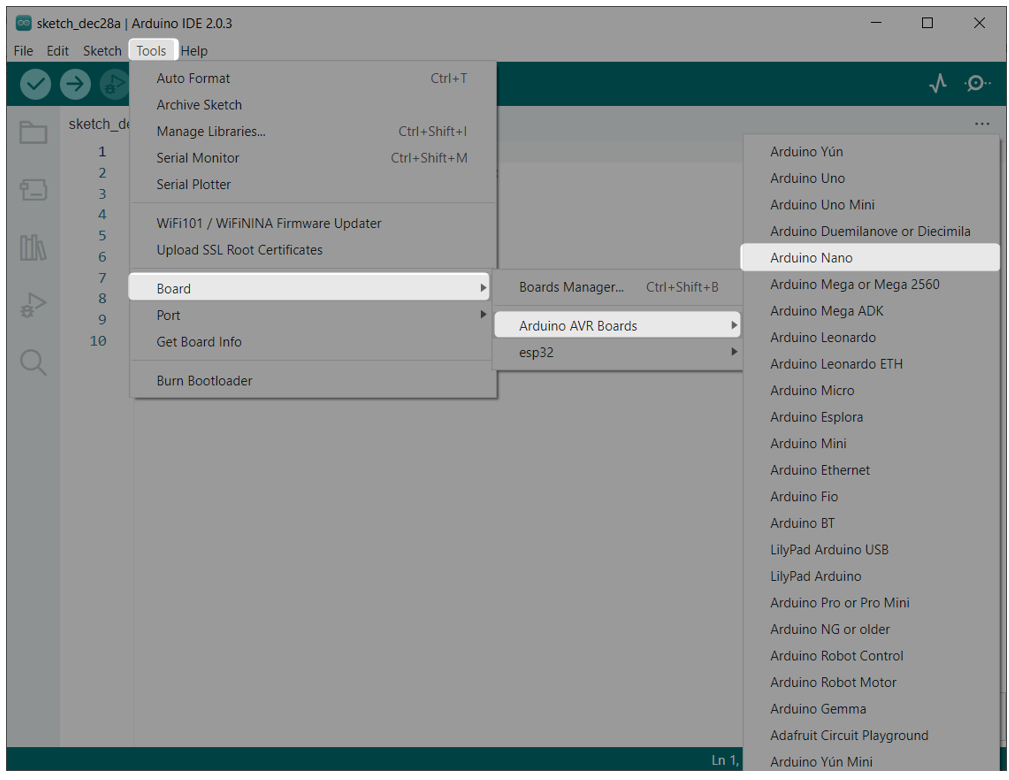
To select the right board, Go to: Tools>Boards>Arduino AVR Boards>Arduino Nano:
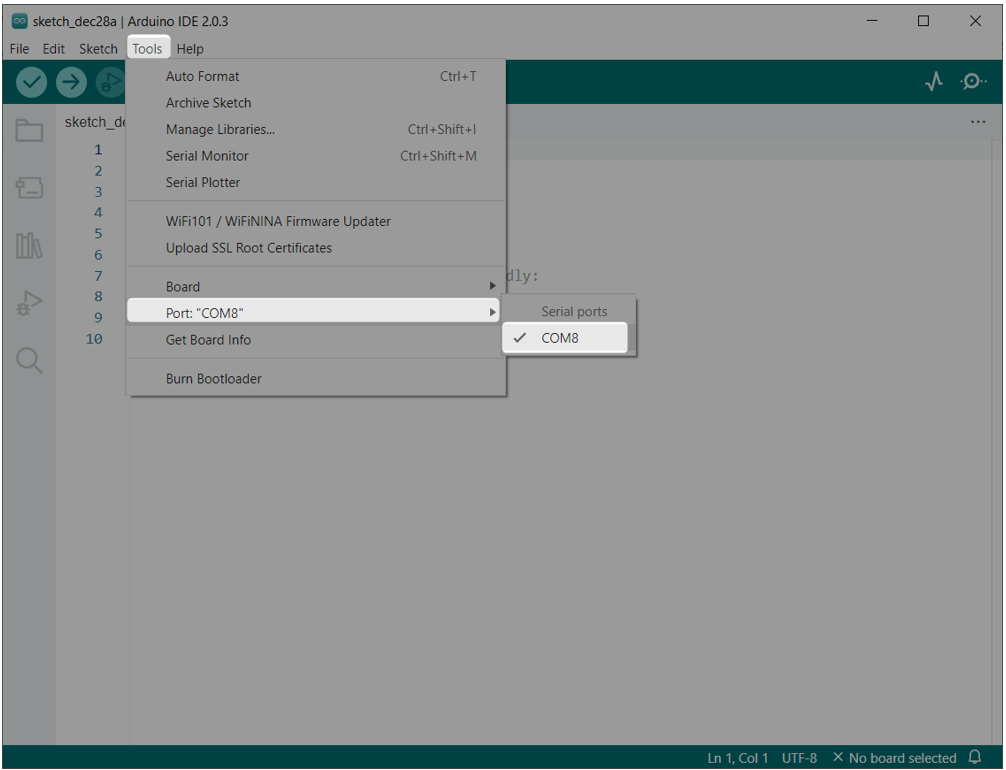
To select the right COM port, Go to: Tools>Ports>COM8:
4: Make Sure COM Port Is Not Used by Any Other Device
Make sure to always use the available COM ports. In case if the same COM port is used by any other device Arduino IDE will fail to upload code to Arduino board.
Here is an article which guides us on How to stop any process which is blocking COM ports.
Conclusion
Arduino uploading error: exit status 1 usually occurs when Arduino IDE failed to upload code on Arduino board. To solve this error, we have to select the right Arduino board and serial COM port. This article covers all basic steps needed to resolve the error and covers all possible reasons that lead to this uploading error. Read the article for complete guidelines on how to resolve this error.