Error: exit status 1
According to Arduino official documentation this error doesn’t tell us anything, it only shows that there is something wrong in our code or might have issues with the Arduino board. It only indicates that a certain process has failed.
To get more information related to this error look for the line above this error in the output terminal once the program is compiled. Line above exit status is more useful for determining the reason for the error. Usually exit status error occurs during compiling or uploading of code so we can categorize it into two different groups.
Types of exit status 1 Error
Usually while programming Arduino exit status 1 error can occur either while compiling our sketch or at the time of uploading code in Arduino board. So, we can divide exit status 1 error into two categories:
1. Error: exit status 1 While Compiling Code
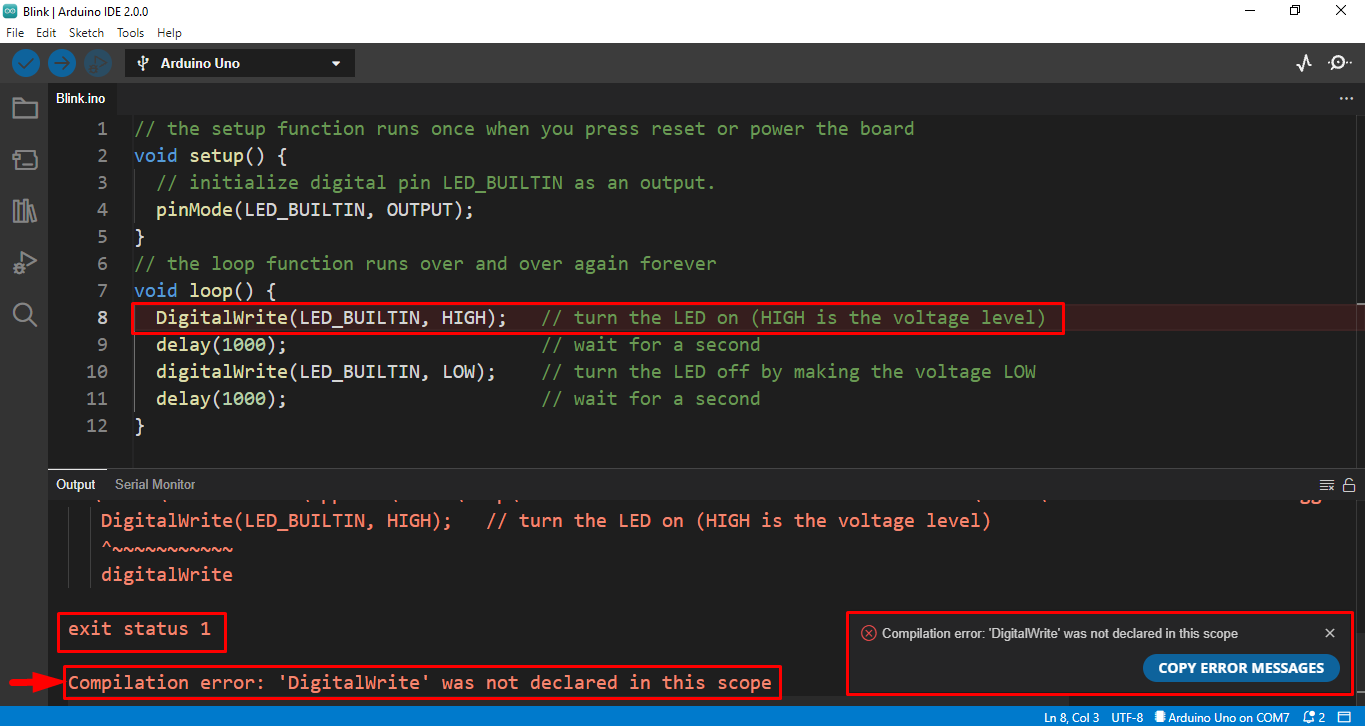
After writing Arduino code in IDE, when we try to compile our code the exit status 1 error may appear in the output window. This error while compiling indicates that something is wrong with our code. It may be an error in code syntax or some other reason such as not including proper library file or wrong declaration of input output pins. the error of exit status 1 while compilation may look like this:
Quick Checks
To fix exit status 1 error perform a quick check in Arduino IDE code. Follow the list below:
- Verify and Upload Code
- Successful Compilation
- Always Upload Bare Minimum Sketch
- Include Libraries Properly
Verify and Upload
To remove this error first perform a quick check whether you have selected the right Arduino board or not because some IDE functions are specified for some boards so always select the board before writing a code.
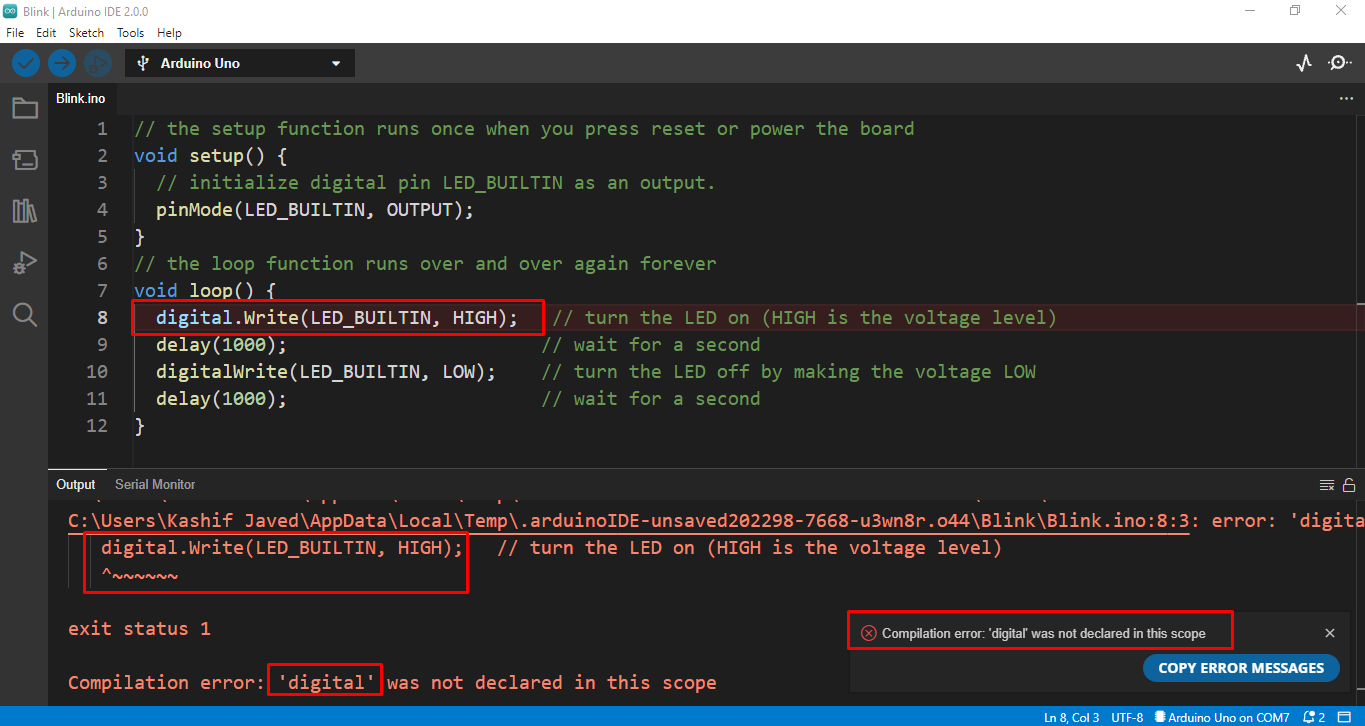
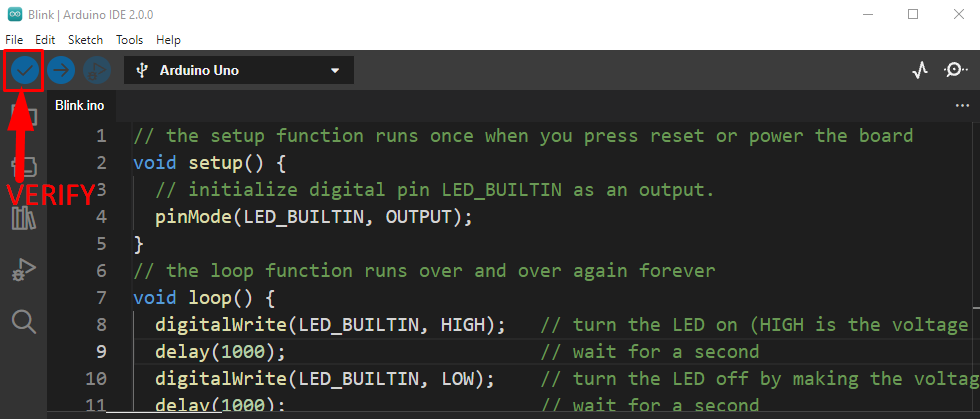
Next try to compile the code and check for the possible errors in the output window. After compiling code, you may face the following type of error in the output window:
Next step is interpreting the error by following the instructions given in the output window. In the latest version of IDE, the line which contains an error may be highlighted in red color.
Here in the above example, we can see line 8 contains an error of not declaring digital write function properly. A possible suggestion is also given in the IDE output window. Removing errors like these may fix the exit status 1 error while compiling.
Successful Compilation
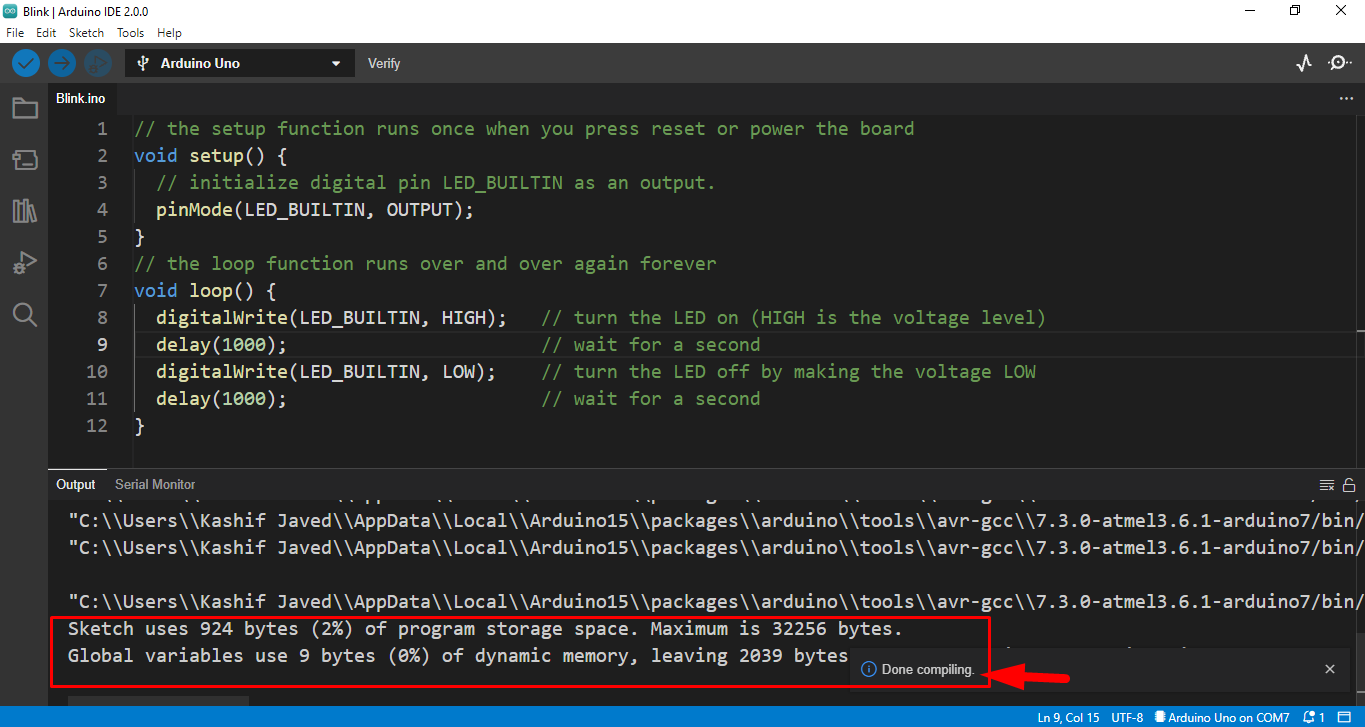
If code is successfully compiled, you will see a detailed message of memory allocation at the end of the output window. Compilation messages are displayed differently in the Arduino IDE based on the IDE version.
The image below indicates that code is successfully compiled so there might be some other problem. To solve this, see the second section of this Article.
Always Upload Bare Minimum
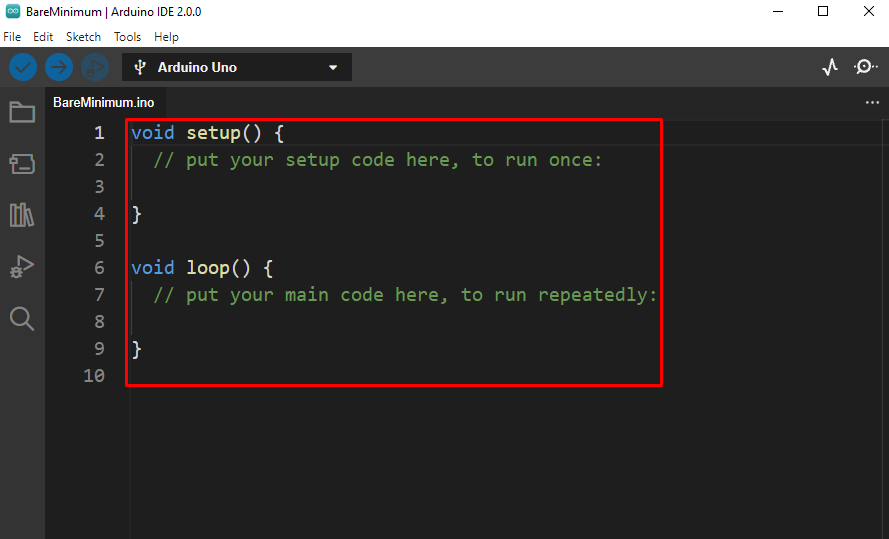
While writing code in Arduino a sketch having two main functions setup() and loop() is always needed inside the code even if they are not being used. Code written in setup will be compiled once while loop code will keep on running until Arduino is stopped or reset. To get a bare minimum sketch in Arduino Go to: File>Examples>1.Basics>Bare Minimum:
Include Libraries Properly
Libraries are a great source of optimizing code in Arduino which not only saves time but also allows to interface Arduino with a great range of hardware and sensors. The error of exit status 1 while compiling may also occur because we have not added the library properly. Most common type of error linked with libraries is either we have not included libraries in our code, or the required library is not installed properly.
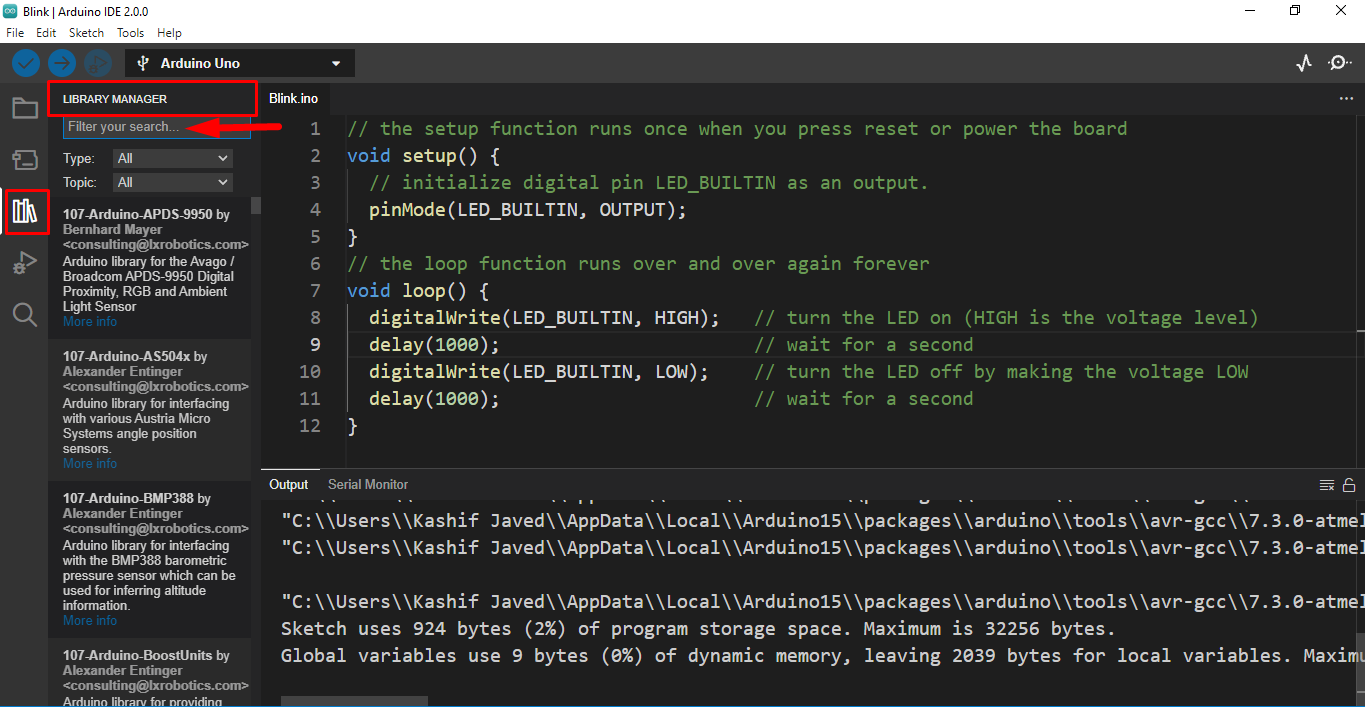
Go to the library manager and check whether the required one is installed or not:
Other Possible Reason of Compilation Error
Some other main reasons that lead to compilation exit status 1 error are:
- Compilation error: Missing FQBN (Fully Qualified Board Name)
- Compilation error: Error: 2 UNKNOWN: platform not installed
- Compilation error: variable was not declared in this scope
- Fatal error: <library>: No such file or directory
2. Error: exit status 1 While Uploading Code
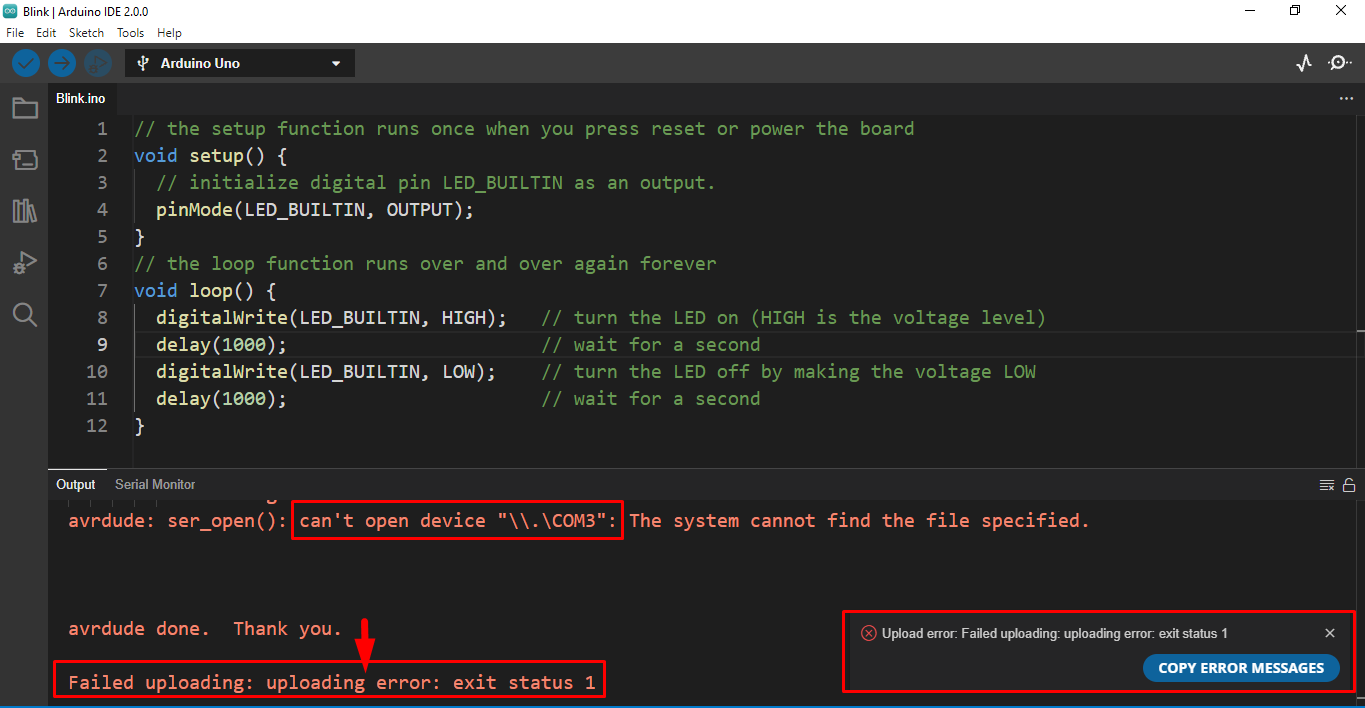
After compiling Arduino code when we hit the upload button compilation exit status 1 error may occur. This compilation error can occur due to multiple reasons. Here we have taken LED blink code as an example to demonstrate the error. The exit status1 error while uploading may look like this:
Quick Checks
To remove this error, we need to find the cause of it. Various reasons can cause this error. Follow the below checklist to find possible cause:
- Check Your Board and Port Selections.
- Check Arduino Code for Errors
- Check Tx/Rx Pins
Check Your Board and Port Selections.
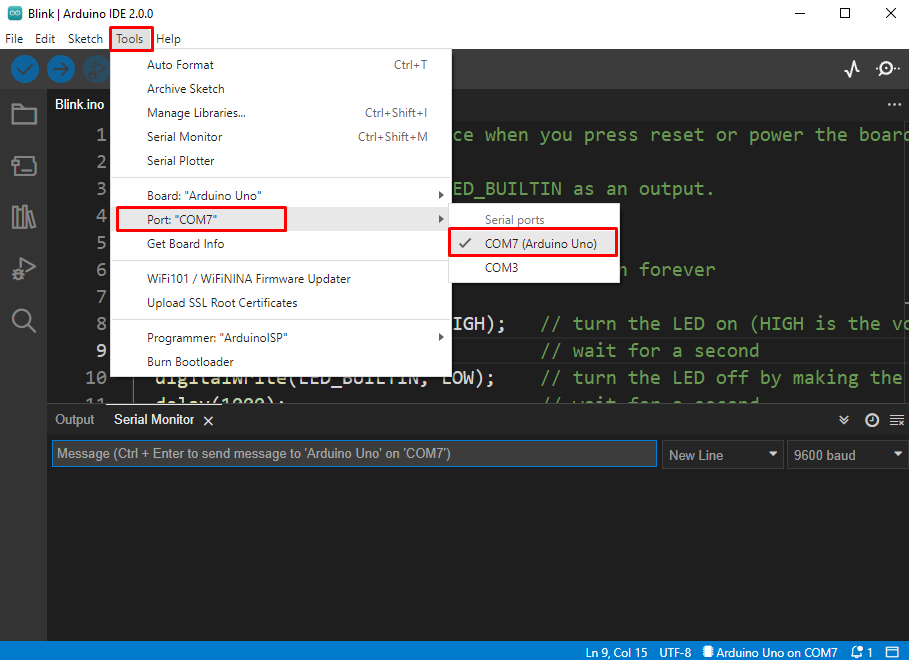
Before uploading code to Arduino make sure you have selected the right Arduino board and the COM port. The exit status 1 error while uploading may also occur when Arduino is not properly connected to PC or the USB B cable is damaged from somewhere.
To select COM port, Go to: Tools>Port>COMX:
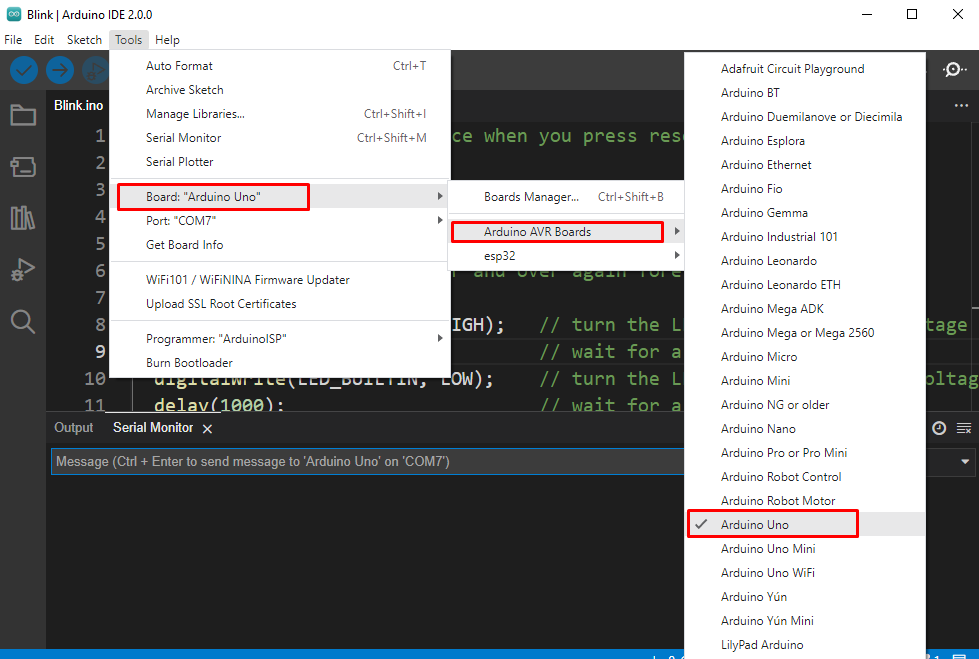
To select the right Arduino board. Go to: Tools>Board>Arduino AVR Boards>Arduino Uno:
Check Arduino Code for Errors
Check Arduino code for programming errors. There might be a possibility that some problem exists within the code. Click the compile button and if any type of error appears then remove the programming error and try to upload code again in the Arduino board.
Check Tx/Rx Pins
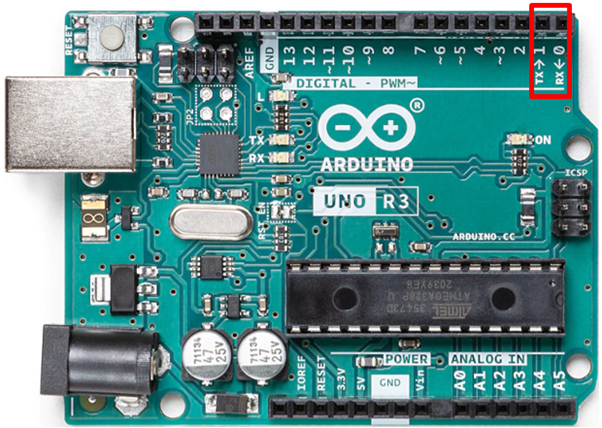
In most cases, exit status 1 errors while uploading are caused by a lack of serial communication between the PC and Arduino board. There can be a problem with the USB cable, or the on-board Tx and Rx serial communication pins might be in use. Connecting any device to these pins results in failing to upload Arduino code. It is possible to send serial data from one source at a time either through a USB port or by using the Tx and Rx pins.
Other Possible Reasons of Uploading Error
- No Device Found on <Port>
- Couldn’t Find a Board on the Selected Port
Conclusion
Sometimes while writing code for an Arduino board doesn’t go as, we think as there might be plenty of errors on your way. One of them is exit status 1 which indicates that there is something wrong with either our code or with the hardware side. So, we categorize it into two types. These errors can be rectified by following all the steps explained in this article.

