A system that runs multiple operating systems with the help of VirtualBox is known as the host. You can install and run several systems on a single host by keeping the memory limit in mind. Like you can work with Windows and Linux on a mac system.
Install VirtualBox on Linux Mint 21
The Installation process of VirtualBox on the Linux Mint 21 system is not difficult to perform but requires some attention. Problems might occur while executing commands if you missed something. So, follow this guide step-by-step carefully from start to end, and don’t miss anything.
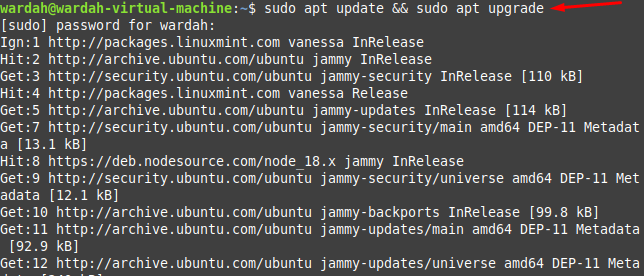
Step 1: Update the repository to ensure all system packages are updated, this would help to avoid any struggle in VirtualBox installation.
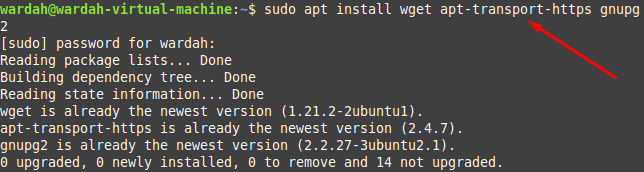
Step 2: Get all the dependencies that we need before installing VirtualBox in the system by executing the mentioned command. Some of the dependencies already exist on the Linux Mint system. But running the command will ensure you the presence of all dependencies:
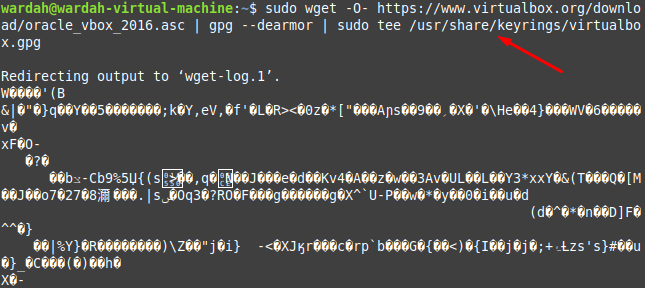
Step 3: Import the key to the system before installing VirtualBox by copying the mentioned command:
Step 4: In this step, you are required to import the VirtualBox repository from its official site. This would be done by executing the given command in terminal:

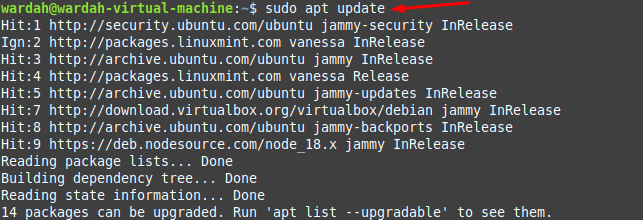
Step 5: Now update the system repository as we have added other repositories in it:
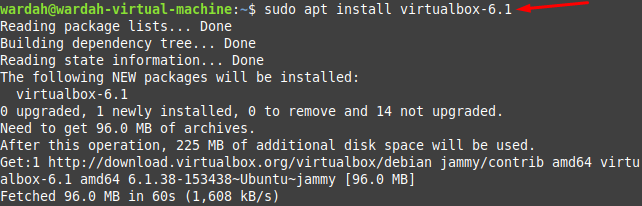
Step 6: As we have completed the required setup for VirtualBox installation. Now, we can get it through the given-below command:
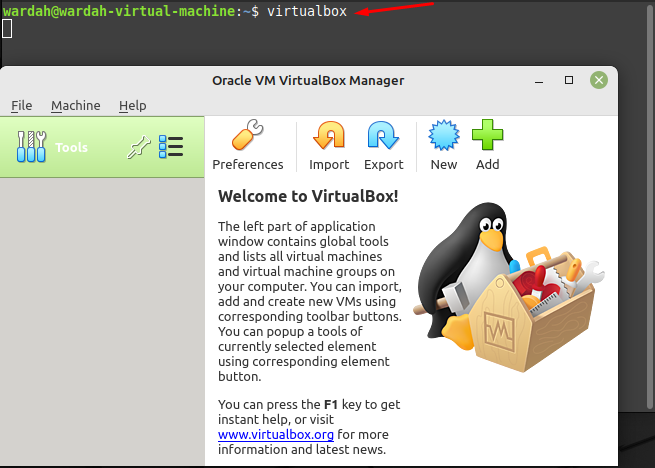
So, the VirtualBox updated version has been installed successfully on Linux Mint 21 system, to launch it, type in terminal:
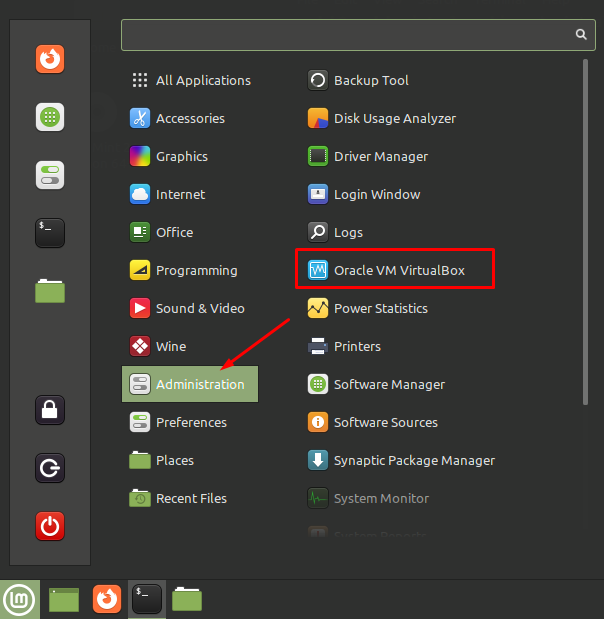
Or you can also get it by clicking on Administration from applications menu:
How to Remove VirtualBox from Linux Mint 21
To uninstall VirtualBox when there is no need of it, you can run the following command:

This command will delete the VirtualBox application from the system. But if you want to remove all the dependencies and repositories we have downloaded at the time of installation, run the following commands:
For the VirtualBox source repository, type:
![]()
For removing the GPG key (this is optional), type:
![]()
Conclusion
VirtualBox is a powerful virtualization tool for those people who wish to run several operating systems on a single host. It provides a simple interface to create virtual machines. This article has demonstrated an introduction to VirtualBox and its installation process on Linux Mint 21 system. Also, the deleting process of VirtualBox with its required source repository has been mentioned in this article.