What is memcpy() in Arduino
The memcpy() is a function used in Arduino programming that can copy a block of memory from source location to the memory block of destination. It can copy “n” characters from source to destination memory.
Here we will discuss how memcpy() is used in Arduino programming. The memcpy() function can be represented in following syntax:
memcpy() Parameters
memcpy() function has three parameters:
1: Destination
Destinations indicate the memory block where the source memory will be copied. This shows a pointer towards the destination array where the source array will be copied.
2: Source
This is the source point from which the array memory block will be copied. This array memory block will be pasted to the destination location.
3: Size/Length
This indicates the size of the memory block which we are going to copy from source to destination. It is strlen() type.
How to Use memcpy() in Arduino
In Arduino we use memcpy() to copy data from source to destination with a specified number of bytes. It is used to copy memory blocks from one location to another.
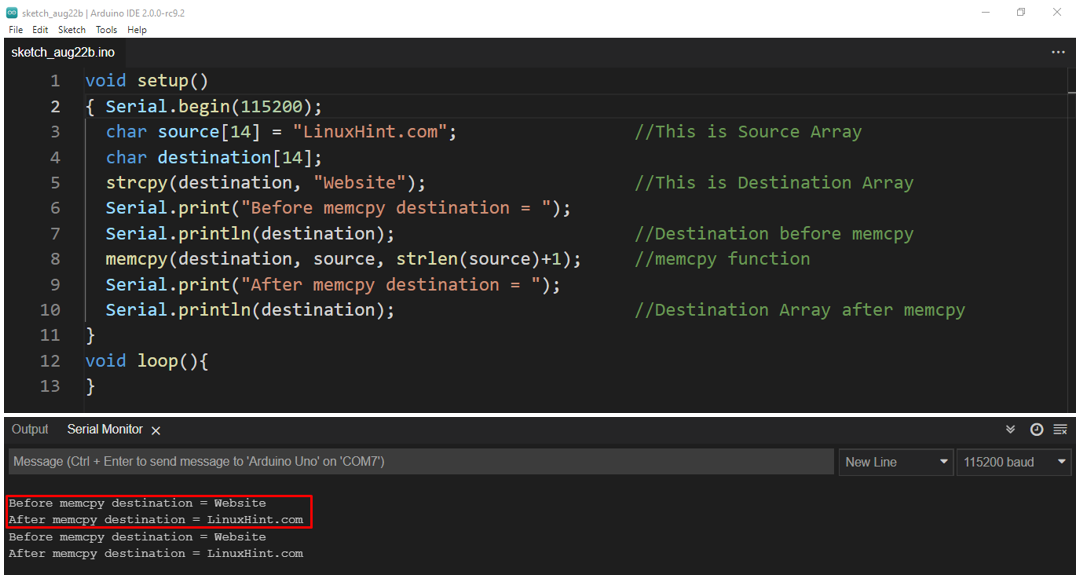
To get more understanding about memcpy() function, we will take an Arduino sketch and try to copy an array from one to another destination.
{
Serial.begin(115200);
char source[14] = "LinuxHint.com"; //This is Source Array
char destination[14];
strcpy(destination, "Website"); //This is Destination Array
Serial.print("Before memcpy() destination = ");
Serial.println(destination); //Destination before memcpy()
memcpy(destination, source, strlen(source)+1); //memcpy() function
Serial.print("After memcpy() destination = ");
Serial.println(destination); //Destination Array after memcpy()
}
void loop()
{
}
In the above example we have declared a two-character array source and destination. Size of the source char array is 14 and the size of the destination char array is 8.
In line 7 we have printed the output of the destination array on the serial monitor as “Before memcpy() destination”.
After that we have executed memcpy() function which will copy and replace source array char “LinuxHint.com” to our destination array that is “Website”.
In line 10 we have printed the output of the destination array after applying memcpy() function on the serial monitor. Pictorial representation of memcpy() function can be given as below:
Output on serial monitor is shown in figure below:
Conclusion
In this article, we have learned how memcpy() function works in Arduino programming. The memcpy() function in Arduino can copy any array from source to destination memory block. Using this function, you can optimize overall code performance.


