Let’s get started with the basics first. We need to install the apache server within our Ubuntu 20.04 Linux system using the “apt-get” installation instruction. It may require your user account password to continue this installation. Add your password and continue.

During the installation process, you will get an affirmation question from the system about the space it is going to take. You need to tap the “Y” key to continue it, as shown below.
To use the PHP files in the terminal shell, you need to install the PHP command line utility as well. It’s quite easy to install it on the terminal of the Ubuntu 20.04 Linux system using the install “php-cli” instruction as shown. It will be mounted in a few seconds without any delay.
The very next thing to be installed in Ubuntu 20.04 is the php-yaml package that is necessary to parse the yaml file to a PHP file. For this, we have been again using the apt-get installation instruction followed by the password of the user account. It will be installed quickly.
After all the installations, we restarted the apache service using the systemctl instruction and enabled it as well. The status of the apache service has been showing that it is actively running.
Let’s get ongoing with some illustrations to elaborate on the use of YAML in PHP. So, we have created a new PHP file within the current working directory using the “touch” query displayed in the image below, i.e., test.php.
Example 01
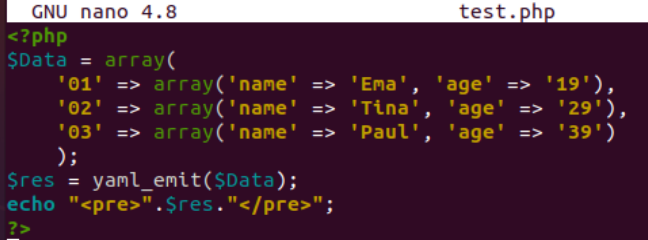
Within our first example, we will be using the yaml_emit() function to convert a different type of element to a yaml format. For this, we have been starting our PHP code in the “nano” editor with the “<?php” PHP tag. Within this tag, we have initialized a variable “Data” with the “$” sign and added an array type data within it. This array holds 3 other arrays within it, i.e., nested arrays.
After this, we have been calling the “yaml_emit()” function here to use the Data variable in it, i.e., to parse this array type data into a yaml file format and save the result within another variable “res”. Then we have been using the “echo” statement of PHP to display the variable “res” data on the shell along with “pre” tags. The “php” code for conversion to YAML has been completed here and is ready for our use. Let’s save it with Ctrl+S and exit it with Ctrl+X.
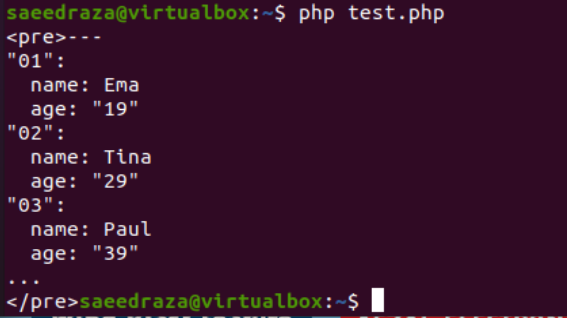
Now, we have been executing the “test.php” file with the “php” instruction and got the array data displayed in the YAML file format at our Ubuntu terminal screen displayed below.
Example 02
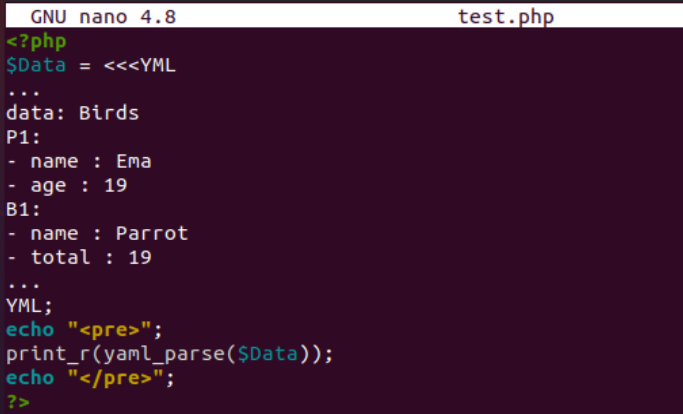
Within our first example, we have taken a look at the use of the yaml_emit() function to convert some other form of variable data to YAML format. Within this article, we will look at the “yaml-parse” function to parse a string as a yaml stream within the php variable and display it in a YAML format. So, we have started this PHP code with the use of the “<?php” opening tag that has been following the variable “Data” started with the “$” sign. We have been assigning it a YAML stream using the “<<<YML” format followed by three dots at the very next line and the end of the stream. It includes a total of 3 key-pair values, while the 2nd and third keys contain 2 pairs of key-pair values each.
The YAML stream has been closed with the “YML;”. We have been using the “echo” statement to print out the start of YAML stream data as “<pre>”. The print_r() function is here to utilize the yaml_parse() function taking the “Data” variable stream as its input argument. The php code is ready for execution now.
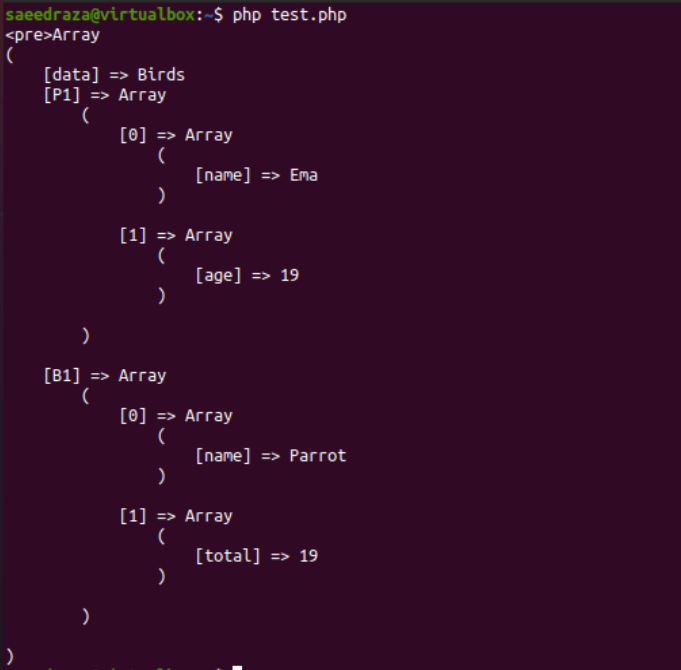
After the execution of this code file, we got the YAML format of parsed YAML stream to the variable “Data” at the shell screen using the yaml_parse() function here.
Example 03
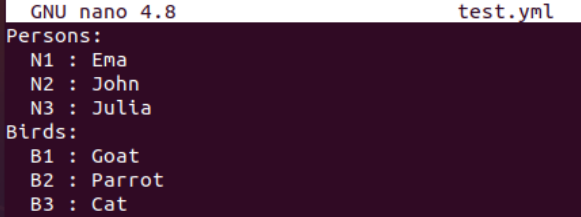
Let’s take a look at our final example of parsing the YAML file to the php code and displaying the YAML format data on the shell. For this, you need to create a YAML file in your current working directory of the Ubuntu 20.04 Linux system. So, we have tried the touch instruction to create a “test.yml” file in the current folder, opened it with the nano editor, and added the YAML format data within it. You can see it holds two main keys holding 3 key-pair values each.
After saving the YAML file, we opened the php file and added the shown-below php code in it. The yaml_parse_file() function has been utilized here with the path to the YAML file, i.e., “test.yml” that has just been created. The parsed data would be saved to the variable “var”. The print_r() function has been utilized here to display the variable’s parse YAML file data. This code has been completed here, and we have saved it for execution.
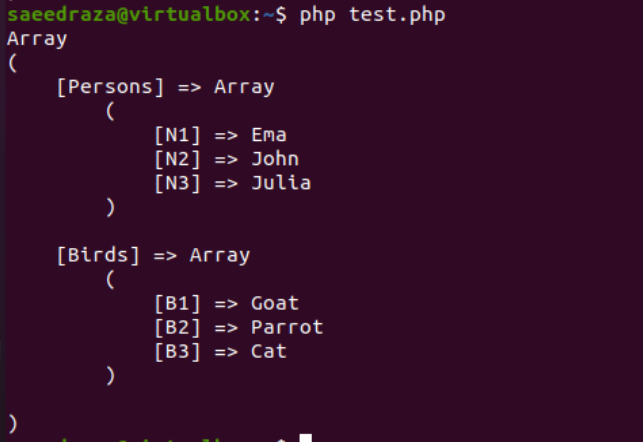
After running the “php” code file with the php instruction, we got the YAML file data displayed on our screen. This is how a yaml_parse_file() function can be utilized to parse the YAML file into the php code and display it on the shell.
Conclusion
This article’s introduction was all about the concept of parsing in php with the use of the YAML library. After that, we discussed the installation of some prerequisites necessary to perform the parsing of YAML files. Three different examples have been discussed, along with the codes to parse YAML format data and file into a PHP file and displayed on the console as per the use of yaml_emit(), yaml_parse(), and yaml_parse_file() functions.


