Example # 01:
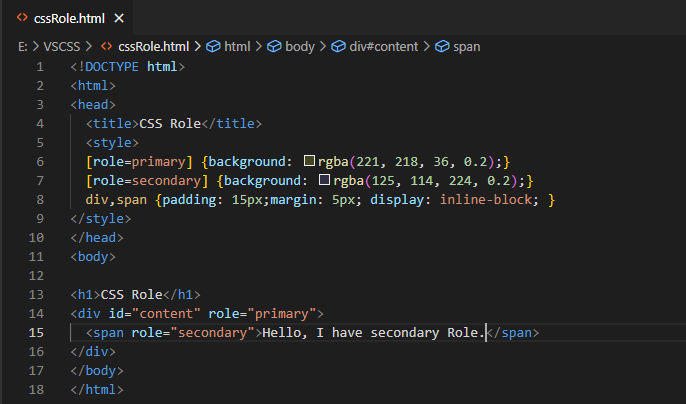
We have to start this example with the HTML basic tags followed by the head tag that has been using the title tag to give a name to our webpage as “CSS Role”. We will be skipping the explanation of the Style tag for a while as we need to look at the body tag first. Within the body tag of this HTML code, we have specified a heading of size 1 stating that this would be explaining the CSS role property.
After this, we have been using a div tag to create a new section within our HTML web page in dividing the page into sections. We have specified the ID for this section as “content” and we have specified its role as primary. After that, the span tag has been used within this section that has been containing some text in it. Along with that, this span tag’s role has been specified as secondary. The span and div tags are completed and closed here. We are done with the body of an HTML page.
Now, we need to take a look at the styling of the HTML body. Within the style tag, we have been specifying the roles to style the particular elements accordingly. For instance, for the primary role, we have been using the background as something like the green color and near blue color for the secondary role. After specifying the background colors for both the roles, we have been using div and span element titles to style them combined. We have been using 15-pixel padding, 5 pixels margins, and inline-block display property for both elements. Our style, head, and body elements are now completed and the code is ready for execution in the Chrome browser.
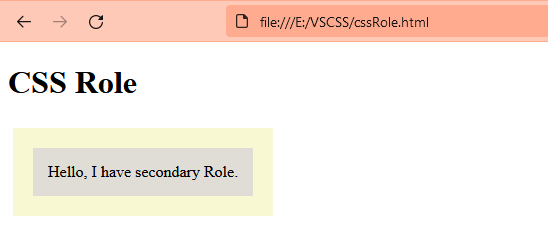
After running this code on the Chrome browser, we have the shown below output that has been showing a single div with a span in it. This span has been titled “secondary” while the outer layer of this span has been showing the primary role. You can see that the primary area of the div section has been colored with light green and the inner span of the secondary role has been colored with light purple or blue. On the other hand, paddings, margins, and display styles have been the same for both roles.
Example # 02:
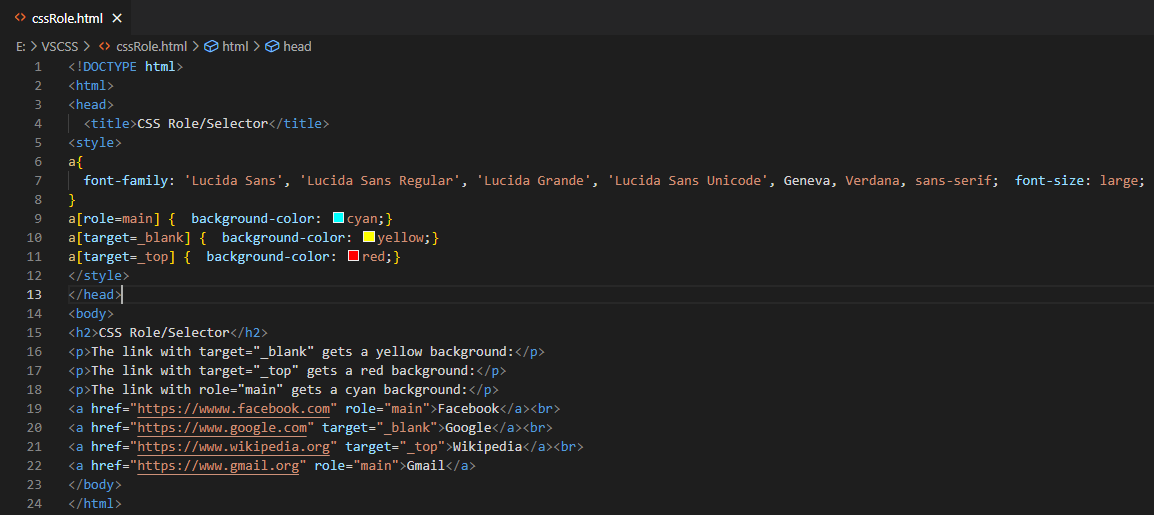
Let’s take a look at another example of using the role attribute of HTML CSS Scripting to style our HTML elements. Within these examples, we will be using the role and the target attributes to compare their uses. Just like the above example, we have started this example with the HTML main tag followed by the head tag that has been containing the title of this page in its title tag.
Within the body tag of the HTML script, we have specified the heading of size 2. Three paragraphs have been used to demonstrate the use of target and role attributes accordingly. After using the paragraphs, we have been utilizing the anchor tags to add the links to some social media websites that are very famous nowadays and specify them with the role and target attributes. Within our first anchor tag, we have been adding a link to Facebook and specified its role as “main”. The next two anchor tags contain the link to the Google and Wikipedia search engines followed by the target attribute to demonstrate the target of both the links. The last anchor tag contains the URL of the Gmail that is not valid though, and specified its role as “main”. Within the style tag, we have given many values for font family for all four anchor tags.
This means any of the font families can be utilized for these anchor tags. Font size has been set to large. The Anchor tag or URLs with the role “main” would be given a background color of cyan. Anchor, where the target is blank, would be colored yellow and where the target is top the color would be red. This script has been completed for anchor tags and it’s ready for use.
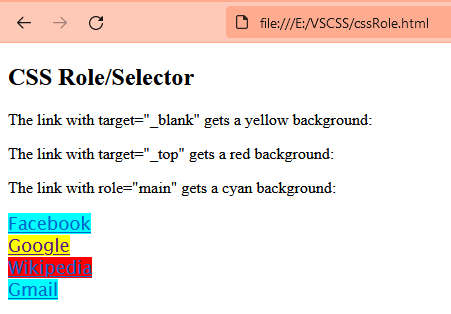
The output for this HTML code has been given below. You can see the heading and the first three paragraphs shown as simple texts on the screen. Anchor link on Facebook and Gmail has been colored cyan due to the use of the main role. While Google Anchor got the yellow color because it was targeted as Black and the Wikipedia anchor got the red color because it was targeted as a top. This is how selectors work in HTML.
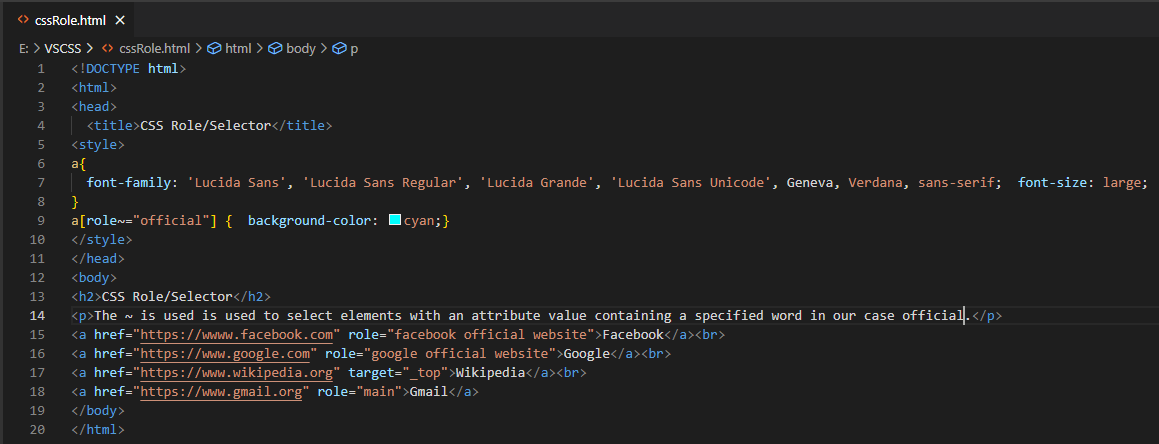
Let’s update the same code a little to get a little different output on our web page. Within the body of the HTML code, we have been using a single heading and a single paragraph with the long text. Four different anchor tags have been used to link different websites with four keywords. The first two anchor tags and the last anchor tag have been specified with the role of the main. While the third anchor tag has been specified with the target top.
The broken line tags have been used after each anchor tag to give a line jump. Within the style tag, we are using the same font family and font size for all the anchor tags. The background color “cyan” has been chosen for the anchors where the role is nearly equal to the keyword “official”.
After running this code, we have the first two links colored “cyan” on our webpage while the rest two have not been styled. This is because the keyword “official” has only been used for the first two anchor tags within the “role” attribute.
Conclusion
This article has been a good guide for all new users of HTML if they don’t have any prior knowledge of the selector “role” in CSS. We have used three different examples to clarify the concept of “role” and “target” selectors. Within our examples, we have also tried the keyword approach to display the use of “role” and target selectors. This was about it, and we have tried to cover these examples in the simplest way possible.

