A dropdown menu allows the user of a website to choose a specific option/action from the given list of options/actions. Such a menu is toggleable and consists of links arranged as list items. These links wrap a huge amount of content inside them, thereby, making the layout of a web page cleaner. Making a dropdown menu using Bootstrap 5 is done through the usage of various classes associated with it. Here we present how you can create a dropdown menu using Bootstrap 5 and various ways to style it.
How to create a dropdown menu using Bootstrap 5
For the purpose of making a dropdown menu through Bootstrap 5 use the .dropdown class. Here we have shown how a simple dropdown menu is created.
HTML
<button type="button" class="btn btn-info text-white dropdown-toggle" data-bs-toggle="dropdown">Choose an option</button>
<ul class="dropdown-menu">
<li><a class="dropdown-item" href="#">Option 1</a></li>
<li><a class="dropdown-item" href="#">Option 2</a></li>
<li><a class="dropdown-item" href="#">Option 3</a></li>
</ul>
</div>
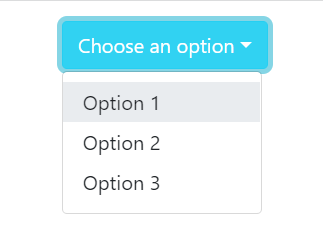
The div container was assigned the .dropdown class which represents a dropdown menu. In order to let the user be able to open the dropdown menu use either a button or a link and assign it the .dropdown-toggle class and set data-bs-toggle=“dropdown” to make the menu toggleable. Afterward, create an unordered list and assign it the .dropdown-menu class, whereas, assign the .dropdown-item class to each list item to provide options to the user in the menu.
Output
A dropdown menu was created successfully.
How to create a dropdown divider
If you wish to separate the links or options present in the menu with a horizontal line then use the .dropdown-divider class. This can be helpful in scenarios where links present inside the menu belong to various categories.
HTML
<button type="button" class="btn btn-info text-white dropdown-toggle" data-bs-toggle="dropdown">Choose an option</button>
<ul class="dropdown-menu">
<li><a class="dropdown-item" href="#">Option 1</a></li>
<li><a class="dropdown-item" href="#">Option 2</a></li>
<li><a class="dropdown-item" href="#">Option 3</a></li>
<li><hr class="dropdown-divider"></li>
<li><a class="dropdown-item" href="#">Others</a></li>
</ul>
</div>
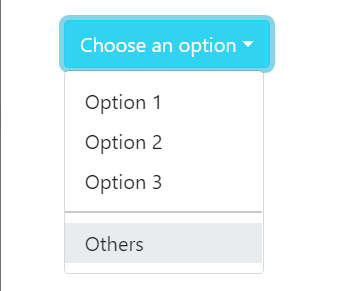
The rest of the code is the same as above with the only difference that in order to separate the last link from the rest of the links we are using the <hr> element to create a horizontal rule and assigning it the .dropdown-divider class. Note that this divider is being nested inside a list item.
Output
This is how to create a horizontal divider.
How to create a dropdown header
If you wish to add a heading to multiple categories of links inside the menu then use the .dropdown-header class.
HTML
<button type="button" class="btn btn-info text-white dropdown-toggle" data-bs-toggle="dropdown">Choose an option</button>
<ul class="dropdown-menu">
<li><h4 class="dropdown-header">First Header</h4></li>
<li><a class="dropdown-item" href="#">Option 1</a></li>
<li><a class="dropdown-item" href="#">Option 2</a></li>
<li><a class="dropdown-item" href="#">Option 3</a></li>
<h4 class="dropdown-header">Second Header</h4></li>
<li><a class="dropdown-item" href="#">Others</a></li>
</ul>
</div>
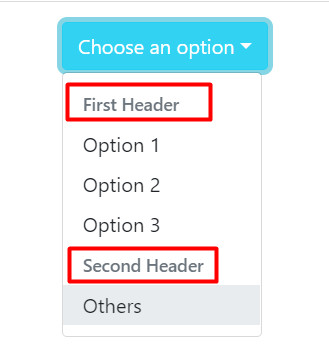
In the above code, before each category of links we are nesting an <h4> element inside an <li> element and assigning it the .dropdown-header class. In this way a heading will be inserted before each category of options.
Output
The output displays a dropdown menu with two headers.
How to assign active and disabled states to items in a dropdown menu
To add active and disabled states to specific links inside the menu simply use the .active, and .disabled classes.
HTML
<button type="button" class="btn btn-info text-white dropdown-toggle" data-bs-toggle="dropdown">Choose an option</button>
<ul class="dropdown-menu">
<li><a class="dropdown-item active" href="#">Option 1</a></li>
<li><a class="dropdown-item disabled" href="#">Option 2</a></li>
<li><a class="dropdown-item" href="#">Option 3</a></li>
</ul>
</div>
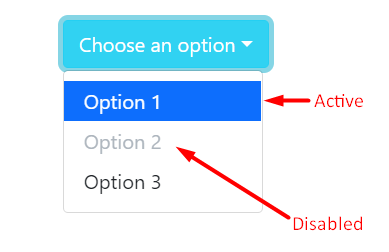
In the above code, the first link is being assigned an active state, whereas the second link is being given the disabled state. A link with an active state has blue color meanwhile, a link with a disabled state has light gray color.
Output
The .active and .disabled classes are working properly.
How to assign various positions to dropdown menus
In order to style your dropdown menu you can assign it various positions such as end, start, right, or up. Here each of these positions have been demonstrated.
How to assign upward position to dropdown menu
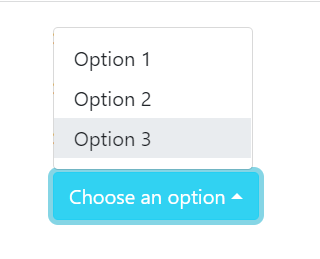
For the purpose of assigning an upward direction to the menu use the .dropup class.
HTML
<p>Some text.</p>
<p>Some text.</p>
<div class="dropup">
<button type="button" class="btn btn-info text-white dropdown-toggle" data-bs-toggle="dropdown">Choose an option</button>
<ul class="dropdown-menu">
<li><a class="dropdown-item" href="#">Option 1</a></li>
<li><a class="dropdown-item" href="#">Option 2</a></li>
<li><a class="dropdown-item" href="#">Option 3</a></li>
</ul>
</div>
The div that represents the dropdown menu has been assigned the .dropup class which will make the menu to open in an upward direction when the button is clicked. Note that we have added some <p> elements before the dropdown menu, this is because the menu needs some space to open upwards.
Output
The output shows a menu that opens upwards.
How to assign the end position to dropdown menu
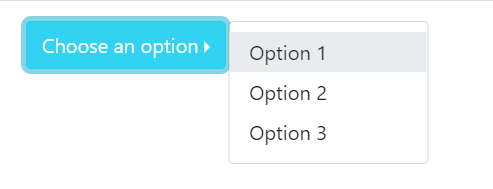
In order to open the menu at the end of the dropdown button use the .dropend class along with the .dropdown class.
HTML
<button type="button" class="btn btn-info text-white dropdown-toggle" data-bs-toggle="dropdown">Choose an option</button>
<ul class="dropdown-menu">
<li><a class="dropdown-item" href="#">Option 1</a></li>
<li><a class="dropdown-item" href="#">Option 2</a></li>
<li><a class="dropdown-item" href="#">Option 3</a></li>
</ul>
</div>
The above code will generate a dropdown menu that will open at the end of the dropdown button once the button is clicked.
Output
Here we have successfully made the dropdown menu to open at the end of the button.
How to assign the start position to dropdown menu
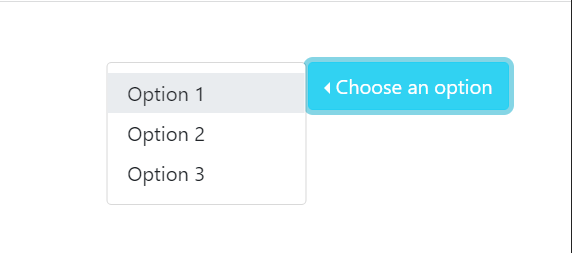
This position will work in an opposite manner to the position discussed in the previous example and this position can be attained using the .dropstart class.
HTML
<button type="button" class="btn btn-info text-white dropdown-toggle" data-bs-toggle="dropdown">Choose an option</button>
<ul class="dropdown-menu">
<li><a class="dropdown-item" href="#">Option 1</a></li>
<li><a class="dropdown-item" href="#">Option 2</a></li>
<li><a class="dropdown-item" href="#">Option 3</a></li>
</ul>
</div>
For a dropdown menu with a start position it needs to be placed at the end of a web page. Therefore, we are using the .text-end class along with the .dropstart and .dropdown classes. Moreover, the arrow will be inserted before the text inside the button automatically.
Output
The .dropstart class is working properly.
How to assign the right position to dropdown menu
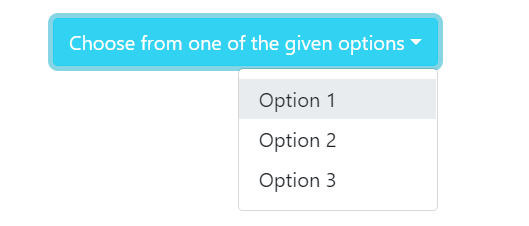
For the purpose of aligning the dropdown menu to the right side use the .dropdown-menu-end class.
HTML
<button type="button" class="btn btn-info text-white dropdown-toggle" data-bs-toggle="dropdown">Choose from one of the given options</button>
<ul class="dropdown-menu">
<li><a class="dropdown-item" href="#">Option 1</a></li>
<li><a class="dropdown-item" href="#">Option 2</a></li>
<li><a class="dropdown-item" href="#">Option 3</a></li>
</ul>
</div>
If you wish to open your dropdown menu at the right side instead of covering the whole space below the button, assign the .dropdown-menu-end class along with the .dropdown class. Note that to properly demonstrate the working of this class we have added an elongated text inside the button.
Output
The dropdown menu was aligned to the right with success.
How to add plain text to a dropdown menu
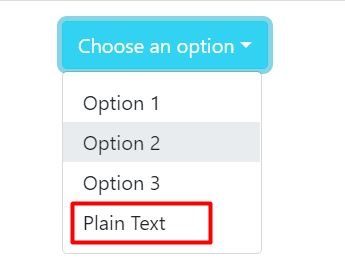
In some scenarios you would want to add plain text inside the dropdown menu, therefore use the .dropdown-item-text class.
HTML
<button type="button" class="btn btn-info text-white dropdown-toggle" data-bs-toggle="dropdown">Choose an option</button>
<ul class="dropdown-menu">
<li><a class="dropdown-item" href="#">Option 1</a></li>
<li><a class="dropdown-item" href="#">Option 2</a></li>
<li><a class="dropdown-item" href="#">Option 3</a></li>
<li><span class="dropdown-item-text">Plain Text</span></li>
</ul>
</div>
In the above code, a simple dropdown menu was created, whereas at the end of the links another list item was created; however, to add plain text instead of using the anchor tag the <span> tag was used and was assigned the .dropdown-item-text class. The text was placed inside the <span> tag.
Output
Here is how you add plain text inside the dropdown menu.
How to create a dropdown with Grouped Buttons
Another interesting thing that can be done using dropdown menus is to add these menus inside grouped buttons. Below we have demonstrated how this can be done.
HTML
<button type="button" class="btn btn-info text-white dropdown-toggle" data-bs-toggle="dropdown">TV</button>
<ul class="dropdown-menu">
<li><a class="dropdown-item" href="#">Samsung</a></li>
<li><a class="dropdown-item" href="#">LG</a></li>
</ul>
<div class="btn-group">
<button type="button" class="btn btn-info text-white dropdown-toggle" data-bs-toggle="dropdown">Mobile Phones</button>
<ul class="dropdown-menu">
<li><a class="dropdown-item" href="#">Android</a></li>
<li><a class="dropdown-item" href="#">Iphone</a></li>
</ul>
</div>
</div>
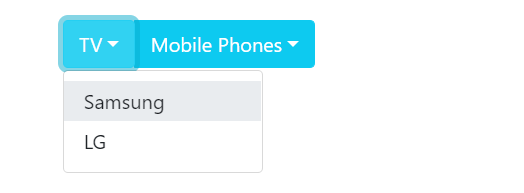
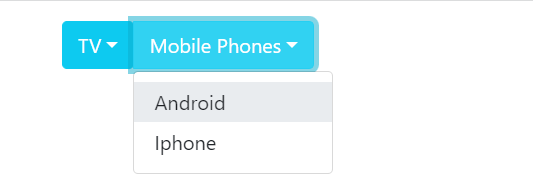
The above code generates two button groups each consists of a single button and each button has a dropdown menu associated with it. Each of the dropdown menus was created in a similar way as demonstrated in the previous examples.
Output
The dropdown menu linked with the first button group.
The dropdown menu linked with the second button group.
Conclusion
For the purpose of creating a dropdown menu, assign the .dropdown menu to a div container that will have the dropdown menu inside it. Afterward, use a button or a link to let the user be able to open the dropdown menu and assign it the .dropdown-toggle class and set data-bs-toggle=“dropdown” to make the menu toggleable. Afterward, create an unordered list and assign it the .dropdown-menu class, whereas, assign the .dropdown-item class to each list item to provide options to the user in the menu. This post discusses how to create and style a dropdown menu in great detail.

